In this article we will look at planting root, petiole and leaf celery for seedlings in 2022. How to plant the crop correctly, when to plant celery in seedlings and in the ground, depending on the variety and region. Moon calendar.
Celery (lat. Apium graveolens) is a cultivated biennial vegetable plant from the Umbellaceae family, up to 1 meter high. Just like carrots and parsley bloom and produce seeds in the second year of life. In the first year, the plant forms a rosette of leaves, fleshy petioles and stores nutrients in a juicy root crop.
Types and varieties of celery
Three types of celery are cultivated in gardening. They are classified according to which parts of plants they eat:
- root;
- sheet;
- petiole.
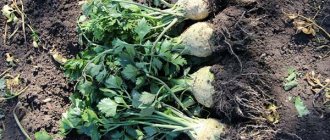
Celery root is comparable to ginseng in its effects on the body. When ripe, its root vegetables weigh 500-900 grams.
The most common varieties:
- Anita;
- Prague Giant;
- Maksim;
- Gribovsky;
- Albin;
- Strongman.
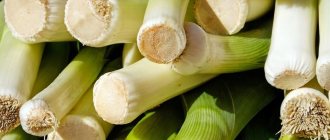
The leaves and roots of petiole celery are of no value.
The following varieties are popular among gardeners:
- Malachite;
- Tango;
- Gold;
- Triumph.
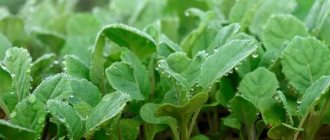
The advantage of the leafy type is the ability to eat fresh greens throughout the season. A healthy and tasty crop can bear fruit in a personal plot all summer long.
The following varieties are distinguished:
- Gentle;
- Spartan;
- Cheerfulness;
- Samurai;
- Sail;
- Zakhar.
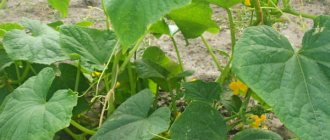
By planting seeds in open ground, you can grow petiole and leaf varieties. And only their early varieties. For mid-season and late-season crops of these species, as well as root celery, this method is not acceptable. Their cultivation is carried out exclusively with preliminary planting of seedlings.
How to properly plant leaf celery
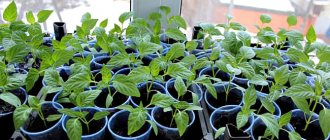
As a rule, when growing leaf celery, the seedling method is used. This will require some labor and time, but will make caring for the plant in the beds much easier.
How to grow leaf celery seedlings
The seedling method involves the initial cultivation of leaf celery at home, where all the necessary conditions can be created for it, including temperature conditions and humidity levels.
When to plant leaf celery for seedlings
Sowing work begins at the end of February or beginning of March. In this case, by May, vegetable growers will have a formed, strong bush that will tolerate replanting well, quickly take root in a new place and begin to grow.
How to plant leaf celery seeds for seedlings
To plant leaf celery for seedlings, you need to have containers, soil and the seeds themselves. Plastic containers or mini-greenhouses with lids are suitable as containers. Use purchased soil or prepare it yourself. The second option is preferable for a capricious culture. Universal soil usually contains a large amount of peat and may be too acidic.
It is ideal to mix turf soil, humus and sand in equal parts. Instead of sand, many people use commercially available vermiculite or coconut fiber, which loosens the soil well. The soil must be disinfected by spilling a boiling solution of potassium manganese.
Attention! Leaf celery seeds are selected strictly observing expiration dates. Seeds from last season and the season before last have the best germination rate. Over time, they grow worse and worse. It is better not to use planting material that has been stored for three or more years.
Usually, before sowing, leaf celery seeds are kept for some time in a solution of any growth stimulant. Dry on a napkin, mix with sand and sow on the surface of well-moistened and compacted soil. Lightly sprinkle dry peat or a mixture of soil and sand on top. Leaf celery seeds germinate best in the light, but if a greenhouse effect is created for them. To do this, the containers are covered with glass or covered with film.
When to plant celery seedlings
Note! Root celery is sown earlier: in the last days of February.
Leaf and petiole species - in the first half of March.
This is average data. The main criterion for determining planting time is the manufacturer’s recommendations indicated on the seed packaging. It is also worth considering the climate of the area where the plot is located. Often, when determining the sowing date, the phases of the moon are taken into account. The combination of all these factors will allow you to determine the exact date when to plant celery seedlings.
According to the lunar calendar
Most gardeners tend to adjust planting times by checking the lunar calendar. It is believed that the moon has a great influence on plant growth. Her cycle does not coincide with the calendar month. Therefore, every year has its own favorable and unfavorable dates.
The Lunar Sowing Calendar for... will help you choose favorable planting dates.
According to manufacturers' recommendations, depending on the variety
Seed producers provide their recommendations regarding planting. Not only the variety is taken into account, but also the characteristics of this particular seed.
Typically there are three date ranges:
- optimal sowing time;
- recommended dates for planting seedlings;
- planned ripening period.
Depending on region and climate
In regions with milder climates, sowing begins earlier. Since in April the plants can be planted in the garden.
In the northern regions, cold weather will not allow this to be done before May-June. Accordingly, the sowing dates will shift to a later time.
Selection and preparation of planting material
When planning sowing of a valuable vegetable, the following factors must be taken into account:
- the timing of ripening or the onset of economic ripeness, based on the biological characteristics of the selected variety;
- the duration of the frost-free period in a specific climatic zone;
- approximate date of end of spring frosts;
- the optimal age of seedlings at the time of their planting in open ground;
- seed quality.
Varieties and hybrids
Depending on the timing of ripening, varieties of petiole celery intended for garden growing conditions are divided into early, mid-early and mid-ripening. Their growing season ranges from 83-135 days to 160-180. When choosing a suitable variety or hybrid, it is important to take into account the climatic conditions of the region; for example, mid-season varieties are successfully grown in the Central Black Earth Region, while in the Urals and Siberia it is better to give preference to early varieties.
The plant is cold-resistant, but at temperatures below +10 ℃ it tends to bloom in the first year of vegetation
As of 2022, more than two dozen varieties and hybrids recommended for cultivation throughout the country are officially registered in the State Register of the Russian Federation. The main characteristics of some of them, including the time frame for achieving economic suitability after the appearance of full shoots, are considered in the table:
| Name of variety/hybrid | Socket height, cm | Weight of one plant, g | Maturation period, days |
| "Atlant" | 40-45 | 300-340 | 165-170 |
| "Cheerful day" | 90 | 250 | 135 |
| "Vyacheslav" | 45 | 150 | 120 |
| "Groom" | 45-48 | 320-390 | 150-160 |
| "Royal" | 60-70 | 150-180 | 85-95 |
| "Mambo F1" | 30 | 220-250 | 83 |
| "Monterey F1" | 50 | 480-500 | 80-100 |
| "Tango F1" | 50 | Up to 1000 | 160-180 |
| "Crunch" | 40-45 | 350-400 | 140-160 |
Manufacturers usually indicate information about the duration of the growing season on seed packages.
Determination of sowing dates
The optimal time for preparing petiole celery seedlings is selected as follows: from the start date of the frost-free period (after the end of return frosts), the recommended age of seedlings in days is counted in reverse order according to the calendar. For example, if in the middle zone the risk of frost remains until the end of May - beginning of June, and seedlings of most varieties are grown at home for up to 70-90 days, then the seeds should be sown in the second half of February - the first ten days of March.
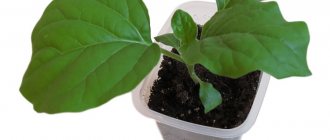
Seedlings are considered ready for planting in open ground if they have 5-6 leaves and a well-developed root system
Germination inhibitors
Celery seeds, like other umbelliferous seeds, have a feature that affects germination and, consequently, the duration of the seedling period. It consists in the presence of a large amount of essential oils, which inhibit the process of swelling and emergence of seedlings for up to two weeks. Before sowing, care must be taken to remove natural inhibitors from the seeds. To do this, planting material is soaked in clean water at room temperature for 2-3 days. It is recommended to change the water every 5-6 hours. If measures are not taken to remove essential oils, then it is necessary to take into account the delay in seed germination and shift the sowing date to an earlier date.
Considering the slow germination of seeds and the long growing season, pre-sowing preparation begins, as a rule, in February
How to plant correctly
Obtaining strong seedlings primarily depends on adherence to technology. The final result is influenced by the preparation of the seeds, the composition of the soil and the choice of container for planting.
In what soil
Substrates for planting vegetables are sold in gardening stores. The composition of such mixtures takes into account the characteristics of the plants for which it is intended. You can prepare the soil for seedlings yourself.
To do this you will need:
- lowland peat – 3 parts;
- turf land – 1 part;
- humus – 1 part;
- sand: river or quarry.
Additionally, urea and ash are added as mineral fertilizers. The first is for feeding plants with nitrogen, the second is for minerals. It is advisable to mix the components a few days before planting. After preparation, the substrate is disinfected by pouring a solution of a fungicide against fungal diseases and potassium permanganate.
Recommendation! If containers without holes in the bottom are used for seedlings, drainage is first placed at the bottom. Gravel, pebbles or expanded clay are suitable for this. Only after this the container is filled with soil.
Capacities
Containers of various sizes and configurations are used as containers for germination in gardening.
Examples of the most commonly used containers include:
- peat pots;
- plastic containers;
- disposable tableware;
- food cups;
- plastic cassettes for seedlings.
The determining factors of choice are practicality and accessibility. For plants, the nutritional and structural qualities of the soil are important. As a rule, they take small containers. Consider the convenience of watering and placement on the windowsill.
Preparing seeds before sowing
Before planting, seed material is prepared. The measures taken are aimed at increasing the percentage of germination and germination rate, and preventing plant diseases. There are several mandatory rules for pre-sowing treatment.
Recommendation! At all stages of growing celery from seeds, use prepared water: settled, boiled, melt or rain.
- Disinfection. Disinfection of planting material to destroy pathogenic microorganisms that can harm crops. Use ordinary potassium permanganate, add one gram of potassium permanganate per glass of water and process for half an hour.
- Stratification. The seeds must "overwinter" before they are ready to germinate. The procedure can be carried out both before the disinfection stage and after its completion. Seeds are evenly sprinkled onto a damp cloth. This is convenient to do on a wide plate. Cover the top with another layer of cloth, put it in a bag and put it in the bottom of the refrigerator for two weeks, the cloth needs to be moistened all this time.
- Soak. The seeds are poured into a bowl or container. Then pour in a small amount of warm water. The liquid layer should not be more than 3–5 mm. The soaking stage lasts on average two days. During this time, the water is changed several times (every 4 hours). To determine the exact period, they are guided by the appearance of the seeds. When they swell, they move on to the next stage.
- Germination. For sprouts to appear, the seeds are kept between layers of damp cloth. The procedure is carried out in a warm place for three to four days. As soon as small sprouts appear, begin planting. Germination allows you to determine the germination of seeds and carry out screening before sowing in the ground.
Healthy! Carefully read the information from the manufacturer on the seed packet. In some cases, seed material undergoes stratification and/or disinfection before sale. In this case, the stages are excluded from the pre-sowing treatment algorithm.
Sowing seeds in the ground
- Prepare a container for sowing and fill it with prepared or purchased soil.
- Keep the soil well moistened by watering it deeply and allowing the moisture to soak up.
- Carefully, so as not to damage the sprouts, distribute the seeds over the surface, in rows at a distance of 3–4 cm. If small individual cups are used, then place 3 seeds in them. Sprinkle a few millimeters of peat or sifted wet sand on top.
- Cover containers with plantings with film or glass.
- Place the plantings in a warm, bright place.
Important! When planting, do not press the seeds. Because tender sprouts can be easily damaged.
As a rule, shoots appear after 14 days. The containers are ventilated daily. The soil is moistened as necessary. After emergence of seedlings, the polyethylene is removed.
Picking
When the seedlings grow up, pick them. This happens two to three weeks after planting. For petiole and leaf celery, thinning is practiced. Simply remove less developed and weak plants so that empty space is formed between the remaining plants. The recommended distance is 4–5 cm.
Root celery is planted in individual peat cups. Plants weakened by transplantation are kept in the shade for the first few days. Until planting in the ground, it is recommended to maintain a temperature of about fifteen degrees.
How to prepare seeds for sowing
The seeds are usually very small. They need to be prepared so that they begin to germinate faster.
Gardeners first soak the seeds in warm water for three days. It is important to periodically change the water to fresh water. Next, the seeds are placed on gauze and hidden in a bag - a kind of greenhouse is obtained.
In this form they are left in a warm place where there is no sunlight.
Seedling care
By the time of planting in the beds, the seedlings should be strong and healthy. To do this, she requires competent care. It consists in organizing the optimal temperature regime of lighting. As well as timely watering and fertilizing to provide crops with nutrients.
Lighting
Daylight hours during the growing period of seedlings are short. The weather, as a rule, is not often pleasant with sunny days. As a result, due to lack of lighting, the seedlings become very elongated. Plants grow weak and thin. Celery requires additional lighting for normal development. To organize it, fluorescent lamps are used.
In the first week, artificial lighting is provided around the clock. Subsequently, the lamps are turned on in the morning and evening, artificially increasing daylight hours. And also in cloudy weather to compensate for the lack of sunlight.
Temperature
The optimal temperature for seed germination is about 26 ºC. After germination, the temperature is lowered by ten degrees. Under colder conditions, the development of plantings slows down greatly.
If the seedlings are hot, they will begin to suffer from dehydration. A still weak root system will not have time to compensate for moisture loss, and the plants will wither.
Watering and humidity
A humid microclimate is required for seed germination. It is supported by covering containers with plantings with plastic film. When the soil dries, it is moistened with a spray bottle. After germination, high air humidity is not needed and the film is removed. Throughout the entire period of growing seedlings, make sure that the soil is moist, but without standing water.
Advice! Until the seedlings become stronger and firmly established in the soil, water with extreme caution: with a pipette or syringe.
Use only prepared water at room temperature. After watering, carefully loosen the top layer of soil so that a crust does not form.
Top dressing
Before picking and 14 days after, celery is not fed. It only needs the nutrients that are already in the substrate.
In most cases, two feedings are carried out.
The first - two weeks after picking (0.5 teaspoon diluted with 1 liter of water). This fertilizer will help pale green or yellowish seedlings gain strength.
The second - after the appearance of 3 true leaves, no earlier than 10 days after the first. You can use complex fertilizers, for example, “Solution”, liquid concentrates of humic substances “Ideal”, “Gumi”.
A solution (1 tablespoon of sodium or potassium nitrate per 5 liters of water) is well suited for feeding root celery.
Good to know. If the leaves are pale with a yellowish tint, then the plants do not have enough nitrogen compounds in their diet. This can be corrected by adding urea or saltpeter.
Growing and care
Growing root celery is a troublesome task. It needs to be constantly and carefully looked after. If you follow all the rules and fulfill all the requirements for caring for the plant, the result will be pleasantly surprising. It is necessary to water, feed, loosen.
Watering
Celery loves water, but too much water will kill it. Try to water regularly, but do not overwater the plant.
Mulching the soil is suitable to retain moisture for a longer period. This will also help keep weeds from growing around the plants. Watering is done directly at the root.
For greater effect, water the vegetable with nettle tincture several times during the summer. Place the chopped herbs in a bucket and fill with water. Nettle ferments for 14 days. When watering, add 1 tbsp. infusion in 12 liters of water.
Weather conditions change and you need to constantly monitor soil moisture. Do not overdry or flood the soil - this is a prerequisite.
Top dressing
Nutrients added to the soil, found in fertilizers, give the plant strength and strength. They feed it from the inside.
To achieve a good and rich harvest, the soil with the plant must be fed throughout the entire growing season - approximately 3-4 times at equal intervals. Thanks to the first two feedings, the seedlings take root and begin to grow. The last two allow the root crop to grow larger.
Feeding:
- Herbal infusion. 7 days after planting the seedlings in the ground.
- Mullein or chicken droppings (infusions). 2 weeks after the first feeding.
- Superphosphate. End of July. The roots are fed.
- Boric acid (solution). Beginning of the ovary of the head.
Some summer residents fertilize 2-3 times throughout the entire period. This is possible, but no more than 4. Otherwise, it will not benefit the vegetable, but harm it.
Weeding and loosening
Weeds grow in all garden beds and celery is no exception. It needs a lot of space to grow and excess grass will only harm the plant. Weed on time, do not neglect the site.
Weeding and loosening of the soil take place simultaneously. Root celery prefers to be in loose soil. At first, you need to loosen more often, then once every 2 weeks will be enough.
Immerse the tool 5-7 cm into the soil depth. The main part of weeding is between rows. There is no specific period; each gardener has his own weeds and their growth rate.
When loosening and weeding the soil, do not hill up the plants. When the root crop becomes thicker, rake the soil away from it, freeing the root part.
When removing excess soil from the root, you can see roots growing on the sides. Don't leave them, cut them with a knife. It is better not to touch the leaves until September until the fruit increases in size.
Diseases and pests
The plant must be protected from diseases and pests. If you do nothing, there will be no quality harvest.
Celery can be at risk from the following diseases:
- viral mosaic;
- heart rot;
- black leg;
- stem rot.
You need to be wary of pests:
- slugs and snails;
- scoop;
- carrot flies and larvae.
You can protect celery from pests of small insects in the following ways:
- Avoid dense thickets in the garden bed.
- Water regularly, but make sure the soil is not too wet. Excess moisture is a blessing for pests.
- Remove weeds in a timely manner.
- Spray the plants with special solutions against pests.
- Do not allow the vegetable to become weak and wilt; feed it regularly.
Use mixed planting. Place the vegetables next to the celery. This may help prevent infection.
Harvest and storage
Celery harvest time is in October. It stays in the beds until frost begins. The weather should be dry.
If the leaves begin to turn yellow, this indicates the need to harvest. There is no need to rush; in the fall the root gains mass. Before digging up the roots, water the soil. After 30 minutes it will be easier to pull it out.
Celery has thin skin, so care will be required. Carefully cut off the leaves, but leave 2 cm at the rhizome. Do not disturb the root, this will keep it better.
Try to choose fruits without blemishes. This way you will provide them with a long wintering period. Until spring, celery can be stored in the basement or refrigerator. A cellar is better suited for this purpose. Prepare a box, pour sand into it and place root vegetables. The petioles should be on top. The basement should be periodically ventilated, and the temperature should be between 2 and 10 °C.
There is a freezing option:
- Clean the fruits.
- Cut into slices.
- Place into bags.
- Place in the freezer.
- Before use, simply defrost the contents of the package.
- Can be stored in the refrigerator in a vegetable container.
You can also preserve the root vegetable in dried form. Choose fruits that are firm, white and undamaged. With rotten areas, set aside. Remove soil and rinse thoroughly. Use a sharp knife or vegetable peeler to remove the skin. Grind in any of the ways convenient for you:
- a large regular grater;
- cut into thin strips with a knife;
- use a Korean carrot grater;
- Use a vegetable peeler to make thin slices;
- Use a knife to cut the vegetable into rings.
Suitable for drying root vegetables:
- Oven preheated to 60°C and a baking sheet with parchment. Keep the door slightly open.
- Fresh air, baking sheets, racks. Stir the chopped fruits periodically. Drying time 2-3 weeks. Keep away from sunlight.
- Electric dryer at 50 °C. Dry for 10 hours, swapping the rack with chopped vegetables at intervals of 1.5 hours.
When to plant seedlings in open ground
The site for planting is prepared in the fall. Choose a place that is as illuminated as possible, not shaded by bushes and buildings.
The soil is dug up and rotted manure (7 kg per 1 sq. m) and superphosphate (10 g per 1 sq. m) are added. They can be replaced with wood ash.
In the spring, before planting, organic fertilizers are added to the soil. If the soil is depleted, additional humus is added to it.
In early May, if the celery is 11–12 cm high and has at least 5 true leaves, plant it. Naturally, the earth must warm up and thaw.
If the seedlings are planted, but there is a risk of frost at night, arcs are placed over the bed and covered with polyethylene. The film is removed for the day. The distance between seedlings when planting depends on the type of celery. For leaf and petiole - 15–20 cm, and between rows - 30 cm for root - 40 cm - the distance between seedlings and 50 cm between rows.
Remember! Do not overly bury the celery root. Because this will cause active growth of adventitious roots and deformation of the root crop.
Pre-winter sowing
Leaf celery can be sown before winter. In this case, seedlings appear in the spring much earlier if you plant the seeds immediately in the garden bed. Over the winter, the seeds will undergo stratification, so the plants will be strong and resistant to disease. How to properly sow celery seeds in the fall before winter, read the example of parsley. The timing and rules for planting these plants are the same. Seeds should be planted in frozen ground; sowing can be done even in the snow.
Favorable days in 2022 for sowing leaf celery in the fall before winter:
- in October: 2, 3, 6, 7, 8, 26, 30, 31, less favorable dates - 11, 12, 16, 17, 23, 24;
- in November: 3, 4, 7, 26, 27, 30, neutral dates - 12, 13, 20, 21, 22, 23;
- in December the best days are: 1, 5, 6, 24, 27, 28, neutral - 9, 10, 11, 17, 18, 19, 20 December.
You will be interested to know: When and how to plant celery root seedlings - step-by-step instructions with photos and videos
Caring for celery seedlings after planting in a garden bed
To get a good harvest, fertilize celery with organic matter once a week. Good results are obtained when using weed tincture as a fertilizer (1 liter of weed infusion per 5 liters of water) with the addition of superphosphate (1 teaspoon per 10 liters of solution). You can use other organic fertilizers with the exception of fresh manure.
With the beginning of the formation of the root crop, to prevent the formation of voids in it, boron is added to the soil as a top dressing (2 g per 10 liters of water).
Naturally, regular watering is required. The soil should be constantly moist, but without standing water. As the plant grows, make sure that there are no more than 5 leaves. If necessary, remove the outer leaves. From root celery, the lateral roots are periodically cut off and hilled up. Otherwise, the root crop will branch.
Proper care will ensure an autumn harvest of large, dense, beautiful and tasty root vegetables without a “beard”.
Description of culture
Celery belongs to vegetable crops and to the umbelliferous family. The plant is considered perennial and has a thickened root. The leaves are pinnately dissected.
Growth limit - 1 m. Preferences for cultivation - moist soils, swamps, salt marshes. Cold-resistant and moisture-loving variety, not afraid of frost. It has a strong aroma and is therefore widely used in the culinary field. All parts of the root vegetable are used for cooking: root, stem and leaves.
Ideal for many dishes as a flavorful seasoning. It has also proven itself well in medicine, thanks to its numerous beneficial and medicinal properties.
Celery appeared many centuries ago. It was considered an ornamental plant that prolongs beauty and youth.
When to harvest and how to store the crop
The harvest season for petiole and leaf celery begins at the end of September. Kornevoy - from mid-October. Finish harvesting before the first frost. To determine the maturity of root crops, they are pulled out of the ground and knocked on. Celery is ripe and suitable for storage if it makes a ringing sound when struck. Three weeks before harvesting, petiole celery is hilled. This measure will reduce the bitter taste and characteristic odor.
Harvesting petiole and root species involves digging them out of the ground. With leaf species, they do things differently. Either the leaves are cut off or, to increase shelf life, they are transplanted into flowerpots. A pot of celery on the windowsill will please the eye and, most importantly, provide delicious dishes with vitamins.
On a note! Root vegetables are stored in boxes with damp sand or in plastic bags. Recommended storage temperature is about 2 °C. Shelf life is from three months to six months.
Reviews from gardeners about root celery
★★★★★
Lyudmila, 35 years old, summer resident, Moscow. I have been growing the “Russian Size” variety for many years.
It was difficult at first, but now growing celery is easy for me. I recommend to everyone. ★★★★★
Irina, 42 years old, summer resident, Donetsk. I used to buy root vegetables at the market.
Then I decided to raise it myself. The fruits turned out to be small, but tastier than store-bought ones. ★★★★★
Sergey, 47 years old, private entrepreneur, Kharkov. Over the past 5 years I have tried many varieties of root celery.
I settled on Diamond and President. A very popular product on the market. Hide
Add your review
Celery root has proven itself well. It has some minor disadvantages, but mostly only positives. The beneficial properties are enough to start growing root vegetables yourself.
0
0
Copy link
Advantages of the seedling method
For growing most varieties of vegetables, the seedling method is preferred. Root crops take a long time to ripen (about 200 days).
For this reason, sowing seeds of petiole and horse celery directly into open ground is unacceptable. The technique is applicable only to the leafy variety of vegetables.
Among the advantages of the seedling method you can see:
- earlier harvest;
- reduction of seed consumption;
- the ability to reject weak seedlings;
- increasing plant resistance to adverse weather conditions, diseases and pests.
Thanks to the seedling technique, it is possible to obtain a celery harvest in the same year in which the planting was carried out.
What to do if the seedlings have stretched out?
Violation of the rules of agricultural technology leads to the stretching of seedlings. To correct the situation you should:
- Balance the air temperature. For celery seedlings, the required air temperature on a clear day is +16-20°C, on a cloudy day +14-16°C, at night +10-12°C.
- Provide additional lighting.
- Stop overwatering. Celery needs a moderate amount of moisture. Seedlings should be watered when the soil dries out.
- Pick up seedlings.
- Resort to growth regulators that inhibit plant development if 3-4 leaves have formed on the sprouts.
Basic preparation recommendations
Successful planting and cultivation of celery depends on many factors, the main ones of which are the choice of variety and seeds, timing, as well as the preparation of high-quality seedlings and soil.
Related article:
The best varieties of lettuce for planting in the garden
Deadlines
When choosing a sowing date, it is worth taking into account the climatic features of the area, the selected variety and the planting method - in the ground or in containers. The manufacturer's packaging always indicates the necessary information regarding the timing of planting seeds. Typically this period differs for different species and varieties:
- for seedlings (root) - mid-February - early March (depending on the region);
- into the ground (early ripening leaf and petiole celery) - mid-April, reference point - the 20th.
Each gardener decides for himself when to plant this garden crop, based on his own experience of previous years, the type of planting and growing conditions.
Agronomists recommend not to delay sowing, since the plant has a long growing season; it can vary from 120-150 to 180 days.
Capacity
In order to plant celery seedlings and grow them, various containers are used in the form of boxes, glasses, cassettes, pallets and pots. Typically containers made of materials such as wood and plastic are used.
Today, many summer residents use various food packaging, disposable plastic forms, and even chicken egg shells as containers for growing. The container must have a hole and drainage at the bottom.
Planting material
The choice of seeds for sowing celery is a key point in preparation, on which the quality, volume and type of the future harvest directly depends.
- Buying seeds in specialized stores.
- It is recommended to purchase products only from trusted manufacturers.
- It is always necessary to pay attention to the expiration dates of planting material. It is better to opt for seeds with an expiration date next year.
- It is worth giving preference to early-ripening and large-fruited varieties - before the onset of the first frost, the crop will have time to ripen, which will ensure its good preservation throughout the winter.
Related article:
How to grow lettuce correctly
An important role in obtaining a rich harvest is given to seed preparation. Sew a bag from a piece of gauze and pour the seeds into it. Rinse with hot running water, soak in a container of water for 3 days. Unfold several sheets of paper and dry the seeds on them.
Experienced gardeners with experience carry out seed stratification before sowing. This is a manipulation associated with the influence of cold conditions on planting material in order to increase germination. To do this, the seeds are wrapped in gauze and moistened for 7 days. Next, the bundle is moved to the bottom shelf of the refrigerator for 2 weeks. It is believed that this procedure will help the seeds germinate faster and strengthen.
Priming
In order to sow celery, it is necessary to prepare the soil for boxes and containers in advance. To do this you need to take the following components:
- peat – 3 parts;
- river sand, turf and humus - 1 part of each ingredient.
It will be useful to read: Preparing soil for seedlings
Before mixing all the ingredients, they must be reseeded and loosened by hand (peat, humus), and debris and weeds removed. This will make the soil fluffy, loose and light. Agronomists also recommend adding urea (20 g) and wood ash (1 tbsp), based on 10 kg of such soil.
You also need to spill the prepared mixture with a solution of the drug “Fitosporin”, which is used against bacterial diseases.
The crop is grown in an open area with good sunlight. The plant requires sandy loam soil, neutral in acidity, on which any vegetables or herbs were previously cultivated. The preparation of the bed is carried out in the fall - humus is added, the earth is dug up and spilled with a solution of potassium permanganate.
Related article:
The best varieties of lettuce for planting in the garden
Landing rules
Farmers recommend planting celery seeds as seedlings. This is not difficult to do, but it is important to follow all the rules and recommendations in order to get the desired result. Therefore, before planting, you need to prepare the seed material and soil.
Seed preparation
The quality of planting material affects the health of celery, fruit size, taste and smell. Therefore, in order for the harvest to be good, the choice of seeds should be approached responsibly. They must have a good shelf life. If you want the celery to ripen, it is better to take an early variety.
Before you start growing celery from seeds, they need to be processed. To do this, you will need a solution of potassium permanganate at a concentration of 2%. Keep the seed in it for a quarter of an hour. Thanks to this approach, it is possible to protect the seed from diseases.