Like watermelon, melon is mainly grown in the southern regions. But thanks to the efforts of breeders, it is now possible to grow this crop in more northern cold regions. In order for the crop to ripen, it is recommended to first plant melon seeds as seedlings at home, and then plant them in open ground.
How to decide on the landing date
Melon is a fairly heat-loving plant; for growth and ripening it needs temperatures exceeding +25ºС. Therefore, when choosing a planting time, you need to pay attention to some growing features.
What factors need to be taken into account:
- Plant variety. Some varieties require certain conditions, and some can withstand more difficult climates. This all affects the landing time.
- Climatic features of the region. This is the most important factor that makes big adjustments to deadlines.
- Planting location: greenhouse or open ground.
- Melons are grown through direct planting in the ground and seedlings. Here, too, the dates will differ, as the time for transplanting and sowing will be added.
In order to calculate the time of planting seeds for seedlings, determine the date of its transplantation into the ground. This is done based on the above factors. The time for seedling growth is subtracted from this date.
The melon needs about a week for the seeds to germinate and needs another month before transplanting. This method will help you quickly and easily decide on planting any plants.
Possible problems when growing melon seedlings
The seedlings are stretched
If the seedlings are reaching towards the window, it means there is not enough light for them. Other reasons: the room is too warm, the melons shade each other, the weather outside is cloudy for too long.
With dense plantings and lack of light, seedlings stretch out.
Ways to solve the problem:
- supplementary lighting with phytolamps (12–17 hours a day);
- add soil to the pots;
- reduce the temperature to +18 ⁰C;
- expose the plants to the sun every day on the other side.
Blackleg
The disease develops if the plantings are dense, poorly ventilated, and experience sudden changes in temperature and humidity.
A constriction appears on the root collar, the seedling falls and dies.
What to do?
- remove dead plants;
- pour the remaining potassium permanganate solution (3 g per 10 liters of water);
- if the melons do not grow in separate pots, but all in one box, urgently plant them in another soil, add to the water for irrigation: “Baktofit” 0.5–1%, “Maxim”, “Fitosporin” or another fungicide according to the instructions;
- Ventilate the plant regularly, observe temperature and watering regimes.
White mold
White mold spores can be found in any living space. They settle in any, even sterile, soil. Mature, hardened seedlings, ready for planting in the ground, cope perfectly with white mold. But young seedlings that are deficient in ultraviolet radiation need to be protected.
White mold develops in damp soil in the absence of ultraviolet light.
Ways to protect against white mold:
- mulch the seedlings with a mixture of crushed charcoal and ash (1:2), after 3 weeks add another layer;
- mulch with Ermak sorbent mixture, repeat after 3 weeks;
- sprinkle the soil with crushed activated carbon and spray with a solution of brilliant green (pale green);
- Ventilate the sprouts regularly.
When to plant melon in 2022 for seedlings and in the ground
Let's consider how the timing of planting melons differs depending on various factors.
Depending on the variety
Early varieties are well suited for cold climates with short summers. They can be planted under cover from mid-May directly into the ground.
Mid-season varieties take about three months to ripen, and they are able to withstand minor weather vagaries. Therefore, you can start sowing them from the end of May.
Late varieties are grown mainly for long-term storage and need a warm climate. They are planted in June, the first two weeks.
Depending on the region
Weather conditions in Belarus, central Russia, as well as in the Volga region and Moscow region do not always make it possible to grow a full harvest of melons. But it is still possible, and the most favorable time here will be the end of May and the first days of June.
In Siberia, the Urals and neighboring Bashkiria, it is better to choose early varieties that can be grown in time under these conditions. The most ideal option would be a greenhouse. Planting dates here are in June.
In the Leningrad region it is also recommended to use early ripening varieties and a greenhouse. To get an earlier and better harvest, melon is grown here through seedlings, which are sown in mid-April.
In the southern regions, the choice of growing methods and varieties is richer. Here melon is planted from the beginning of May, depending on weather conditions.
Depending on the location and method of planting
To sow melon in the ground, it is enough that the air temperature is within +15-20ºС. But if spring is early, then it’s better not to rush anyway and wait until the last week of May. At this time, the main threat has passed. Sowing should be completed no later than the first ten days of June, or it simply may not have time to ripen.
They are planted in the greenhouse on the 2nd and 3rd weeks of May, if the temperature meets the above standards. Seedlings for this method are sown from the beginning of April.
Seeds for seedlings for open ground are planted from mid-April. It is replanted in early June, when 5-6 leaves have formed.
When to plant melon in 2022 according to the Lunar calendar
The Lunar calendar for sowing plants is extremely popular among gardeners. This is not surprising, since the influence of the Moon has long been known, and the recommendations from these tables are very useful.
Below are the basic recommendations for the time of planting melons according to the lunar calendar 2022.
| Favorable days | |
| February | 12-14, 21-23, 25-27 |
| March | 3, 6-8, 11-13 |
| April | 3-5, 7-10, 25-27 |
| May | 2, 5-7, 14, 15, 18-24, 27-29 |
| June | 1-3, 6-8, 10-13 |
In 2022, unfavorable days fall on the following dates:
- January – 2, 3, 17, 18
- February – 1, 2, 16, 28
- March – 1, 2, 18, 27, 28
- April – 1, 2, 16, 23
- May – 1, 16, 30
- June -14, 18, 29
- July – 13, 14, 28, 29
- August – 11, 12, 27-28
- September: 9-10, 26, 27
- October: 9, 10, 25, 26
- November: 1, 2, 7-9, 24, 25, 28, 29
- December: 7-9, 23-25
Caring for melon seedlings at home
To grow melon seedlings at home, you need to properly care for the plants at all stages - after germination and until planting in open ground. Basic rules, care tips and agricultural techniques for growing seedlings:
- After planting and before germination, you need to maintain the temperature in the region of 23-26 degrees Celsius. After germination of the seedlings (after about 5-7 days), you need to reduce it to 18-20 degrees. And after a week you need to increase the temperature back to 22-25 degrees Celsius during the day, and 18-20 at night.
- Immediately after emergence, you need to move the plants to the brightest, sunny window sill (preferably southern). The duration of daylight hours should be 12 hours or more, so if necessary, if there is insufficient light, you need to supplement the seedlings with phytolamps (otherwise the seedlings will stretch out).
Advice! If you do not have a phytolamp, then on cloudy, dark days it is recommended to move the seedlings to a cooler place or simply open the window a little to lower t. Lowering the temperature when there is a lack of light will help prevent the seedlings from stretching.
- Watering is the most important element of proper care of melon seedlings. Before emergence, the soil should always be moderately moist. After they appear, you need to water them as the top layer of soil dries, maintaining moderate soil moisture.
- Plants need to be placed freely so that their leaves do not touch each other or compete for light.
- If you initially planted the seeds in poor soil, then you must feed the melon seedlings, but this can also be done for preventive purposes. When a couple of true leaves appear, you can fertilize with a mineral complex fertilizer for seedlings. A week before planting in open ground, you should feed the plants with potassium fertilizer, for example, wood ash (20 grams per liter of water, leave for 24 hours before watering), or potassium sulfate (three grams per liter of water).
By the way! If the lower cotyledon leaves turn yellow, it is recommended to lightly feed the seedlings with nitrogen fertilizer, for example, urea, ammonium nitrate, or mullein.
And if the leaves turn yellow and die off at the edges, then this indicates a lack of potassium.
- An important point of care is pinching the melon seedlings. It is necessary to stimulate the growth of lateral shoots on which fruiting occurs. You need to pinch the top (growth point) at the moment when the third true leaf grows.
- If the seedlings stretch out while growing, you need to take action. What can be done in this situation? The first step is to create optimal conditions - lower the temperature to normal, provide full lighting - 12 or more hours. You can water the plants with Atlet, which helps with stretching. You also need to add soil to the container.
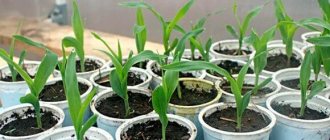
By the way! The photo below shows what good, healthy melon seedlings look like:
How to grow melon through seedlings
Melon is a heat-loving crop, so the seedling growing method is an excellent solution for regions with cold climates and for those who want to get the harvest earlier.
But for this you need to know the technology and correctly go through all stages of cultivation.
Preparing seeds and soil
The first step is to select the best seeds. First, empty and small ones are removed, and the remaining ones are immersed in a saline solution. Those that float are also not suitable for landing.
In stores, seeds are often sold already prepared, but if they are your own, then they need to be disinfected. To do this, they are placed in a manganese solution for 20 minutes, after which the seed is soaked for another 10 minutes in a soda solution.
Before planting, it is better to germinate the seeds on a damp cloth.
Melons do not tolerate diving, so they are initially sown in separate containers with a diameter of at least 10 cm.
Soil preparation
It is better to buy soil for pumpkin plants with neutral acidity. If you cook it yourself at home, then mix:
- 9 parts peat
- 1 part river sand,
- 200 g of ash.
You can use a different soil composition:
- 3 parts humus,
- one part each of garden soil and peat.
The container for seedlings is not completely filled with the soil mixture, so that it can be added later when the seedlings grow.
Planting melon seedlings
Seeds are sown in moist soil, buried 2 cm, 1-2 seeds are placed in each container. Before emergence, the seedlings are covered with film or glass. They appear in 1-1.5 weeks, and if you plant sprouted melon seeds, they can sprout on the fourth day.
For seedlings at home, you need to choose a warm, lit place where they will develop well. The optimal temperature is about +26ºС during the day, and at night +18ºС..20ºС.
How to care for seedlings
For the first two weeks, watering is carried out every other day; it should be moderate to prevent waterlogging. In this case, water should not get on the stems and leaves. The length of daylight should be 10-12 hours; if it is shorter, then additional lighting must be provided.
When the first two true leaves appear on the seedlings, the first feeding is carried out. Repeat after 14 days. For this purpose mineral fertilizers are used:
- Superphosphate;
- Potassium chloride;
- Ammonium nitrate.
A week before planting, the seedlings are hardened by lowering the temperature during the day to +15ºС and at night to 12ºС. It is also periodically taken out into the fresh air or the room is ventilated more often and longer.
Video from Yulia Minyaeva: How to grow melon through seedlings
Preparing containers and soil for seedlings
Since melon has delicate roots, it is recommended to plant it in disposable cups, special containers or peat pots.
Soil for sowing seeds can be prepared independently from the following components:
- peat – 9 parts;
- sand – 1 part;
- wood ash - 1 cup per 10 liters of soil mixture.
Another soil option for growing melon seedlings:
- humus or compost;
- turf land;
- peat.
All components are taken in equal parts, sand and wood ash are added.
Before use, it is recommended to disinfect the soil mixture with boiling water or a solution of potassium permanganate. But it is best to use a solution of special preparations Baikal-EM 1 or Fitosporin. It is very good if the substrate is prepared in the fall. Then containers with soil can be kept outside until spring, where all fungi and pest larvae will die under the influence of frost.
How and when to plant melon seedlings
After the first 6 leaves appear on the seedlings, they can be transplanted to a permanent place. But when transplanting, recommendations differ slightly depending on the planting location.
Melon is quite demanding on soil characteristics. It should be easily permeable to water and air, loose, neutral acidity and well fertilized. Loamy, sandy loam, forest and chernozem soils are best suited for it.
They are heat-loving plants and require a temperature of +25-30ºС for cultivation.
The site should have maximum sunlight.
Planting melon in a greenhouse
First, the landing site is prepared. Make wide holes at a distance of 60 cm from each other, into which add:
- 1.5-2 liters of compost,
- 200 g ash,
- 1 teaspoon superphosphate,
And water it with manganese solution.
The seedlings should not be buried, no more than 2 cm is allowed. Nearby you can immediately install a support made of wire or a branch, onto which the seedlings are carefully tied.
In the future, you will need to repeat this periodically, since the melon itself does not climb over it.
After planting, the seedlings are watered and pinched after the 5th leaf so that lateral shoots appear. It is better to install arcs on top, on which, in case of cold weather, you can easily throw covering material.
Planting melon in open ground
The beds are prepared in advance by carefully removing weeds and digging up the soil. When digging, the same fertilizers are applied and with the same dosage per plant as when planting in a greenhouse. In this case, the roots of the plant will grow more actively and they will have nutrients over their entire surface.
Planting sites are marked with a distance of 60 cm in a row and 1 m between rows. Install arcs over the beds, water the soil, cover with material and leave until transplanting.
Planting is carried out using the same technology as in a greenhouse. But there is no need to apply fertilizers, just water the holes with potassium permanganate after planting the seedlings. If after transplantation the air temperature is still low, then the melons are additionally covered with film.
How to care for seedlings
Depending on where the melon will be planted, the timing of picking, planting in open ground and pinching the tendrils also depends. There are indoor, greenhouse and open cultivation of cantaloupes.
On the windowsill
Small melons, up to 1 kg, can be grown year-round in a trimmed 5-liter bottle. Then the seeds are planted one by one in the ground, picking is carried out 21 days after the sprout emerges. The mustache is pinched as short as possible so that the melon crop does not spread throughout the apartment.
Usually, fruits grown in such conditions are difficult to preserve for the winter. But they have increased sweetness and airiness of the pulp. The skin color will be yellow to bright orange.
Greenhouse method
In central Russia, it is best to plant melon seedlings in 2022 according to the lunar calendar in early spring. Keep the seedlings in pots until harvesting for 30-40 days. The root is compressed when transplanting. The mustache is plucked 20 days after transplantation if it has grown back. If the shoots are still short, then wait 50 days.
In the greenhouse, you need to establish an optimal microclimate - humidity, temperature and lighting. If the air is too dry, the seedlings may wither or burn.
In the open ground
Melons are planted in open ground at the beginning of summer, otherwise young shoots may freeze due to ground frost. The soil under the holes is mulched in the fall.
Rotted grass from the mulch is not dug up, but raked from the future hole. After planting the bush in the ground, the mulch is again raked into place.
You don't have to pick melons that grow without covering material. Due to the cold air of the environment, they will not stretch upward, but will send out side stems. It is not worth planting melon seedlings too early in 2022 according to the moon. As the plants grow, they will feel cramped in the pots; It’s hard to transplant “accelerators” into cold soil from apartment conditions.
Planting melon directly with seeds in open ground
For melon in the garden, choose a sunny, not windy place, the soil should be permeable to air and moisture, the best option is sandy loam soil. The beds are dug deeply and fertilizers are applied.
The holes are made at a distance of at least 50 cm from each other and watered. The seeds are planted in a mixture of peat, humus, ash and mineral fertilizers. The soil mixture is poured into the bottom of the hole and watered. Place 3-4 seeds on top, which are sprinkled with soil. They should be at a depth of about 2 cm.
Watering for the first two weeks should be quite frequent, but moderate. Subsequently, it gradually decreases and, when the fruits ripen, practically stops.
Useful video about growing melon in open ground:
How to prepare a bed and soil for planting melons
Preparing the site for planting melon seeds or seedlings is very important for successful cultivation of the crop in open ground or a greenhouse. The better the soil is, the better the harvest will be. It is necessary to prepare the bed in the fall or spring several weeks in advance. The procedure consists of digging up the soil with fertilizers and improving the structure (if necessary):
- Dig up the area where you plan to plant seeds using the bayonet of a shovel.
- When digging, add organic fertilizers - compost or humus (4-5 kilograms per square meter). It is advisable to introduce them in the fall, or in advance in the spring.
- In addition to organic matter, mineral fertilizers should also be added. If you are preparing the site in the fall, then you should add potassium sulfate (20 g per sq.m.), and superphosphate (30 g per sq.m.), and ammonium nitrate (15 g per sq.m.) in early spring. Complex mineral fertilizer Nitroammofoska (40 g per sq.m.) is suitable for spring application.
- If the soil on your site is heavy and clayey, then you need to add sand (1 bucket per sq.m., if the soil is very heavy, then 1.5 buckets).
- It is useful to add wood ash (200 grams per sq.m.).
- A week before the procedure, you should loosen the soil with a rake and, if necessary, level the surface.
Advice! 10-14 days before sowing the crop in open ground, it is recommended to cover the bed with plastic film or spandex. This is necessary so that the soil warms up additionally (seeds germinate better in warmer soil).
If you want to plant and grow melons in cold regions (for example, the Middle Zone (Moscow region), Siberia, the Urals, Leningrad region, etc.), it is recommended to plant the crop in a greenhouse, a film greenhouse on arcs or in warm beds in open ground.
The principle of growing in warm beds is that there are organic components in the ground, the fermentation of which releases heat. It is this warmth that will warm the roots of the melon crop. You can make a warm, wide, warm bed, but it is much more convenient to choose a place for the holes and prepare separate warm holes:
- First you need to dig holes 0.5-0.6 m deep, about 0.3 m wide. The gap between the holes is 0.7 m.
- Then put chopped weeds and half-rotted manure or at least humus at the bottom of the hole (a layer slightly less than half the depth of the hole).
- Then fill the hole with fertile soil and water with plain water.
- A few days before sowing (or planting seedlings), it is advisable to shed the fermented infusion of herbs or the Baikal M-1 preparation.
After what crops can melon be planted?
To protect the melon from the winds, you can plant corn, sorghum or sunflowers next to it. Also good neighbors will be: beets, tomatoes and legumes.
Good predecessors are:
- Vegetables – cabbage, eggplant, pepper, tomato.
- Onion and garlic.
- Melon can be planted after potatoes and other Solanaceous crops.
- Grasses – winter crops, barley, clover and other perennial grasses.
Planting watermelons and melons next to each other is allowed, as long as the seeds are not collected later, as they are cross-pollinated. Therefore, you can plant them side by side, but it is better to do this with a distance of 2-3 m between them.
Crop rotation
Experienced gardeners already know that to successfully grow vegetables and fruits it is necessary to observe crop rotation. It is not recommended to plant the same crop for several years in a row in one place, as well as after related plants. Firstly, with such planting the soil will be severely depleted, and secondly, the soil will accumulate pathogenic microorganisms, the crop will begin to get sick and will not produce a good harvest.
The best predecessors for growing melon
The most suitable predecessors for melon are grains and legumes, corn, cabbage, radishes, turnips, onions and garlic. The land before planting the melon can also be used to grow aromatic herbs and herbs: basil, oregano, hyssop, mustard.
It is not recommended to plant melons after cucumbers, tomatoes, and carrots. Potatoes are considered the most unsuccessful predecessor of melons.
What crops can melons be combined with in the garden beds?
It is contraindicated to plant melon next to related crops. Cucumbers, zucchini, and pumpkin should not be planted nearby.
- As neighbors you can choose corn, legumes, spinach, lettuce, dill.
- Black radish planted nearby will protect the melon from spider mites, and tomatoes will be able to repel aphids, sawflies, and moths.
- Nasturtium is also suitable as a protector.
The related watermelon has the same requirements for growing conditions, so it can be planted in close proximity to the melon.
The best melon varieties for different regions
For Siberia:
- Sympathy;
- A sybarite's dream;
- Cinderella;
- Altai;
- Siberian honey;
- Golden;
- Honey Tale;
- Cappuccino.
For the Urals:
- Melon Kolkhoznitsa;
- A sybarite's dream;
- Cinderella;
- A pineapple;
- Iroquois;
- Gold of the Scythians F1;
- Tamanskaya.
For the Moscow region and Chernozem region:
- Scythian gold;
- Nectar;
- Collective farmer;
- Tamanskaya;
- Alina;
- Iroquois;
- A pineapple.
For Bashkiria and central Russia:
- Jumbo;
- Gourmand;
- Oksana F1;
- El Dorado;
- Augen;
- Iroquois;
- Dubovka.
- Northern cantaloupe.
For Ukraine and Belarus:
- Bereginya;
- Amal;
- Danae;
- Dubovka;
- Frost;
- Collective farmer;
- Krinichanka;
- Gull;
- Lipnevka.
The following varieties can be planted in Kuban and Crimea:
- Alushta;
- Serpyanka;
- Livadia;
- Cossack woman 244;
- Golden;
- Vietnamese melon;
- Nectar.
Where can I buy
When to harvest melons and how to store them
The ripeness of a melon, and therefore the moment when it is time to harvest, can be easily determined by the color of the peel and the aroma of the fruit. You can also press on the fruit from the side where there is no stalk - for a ripe melon it will be slightly soft (if it is very soft, then the fruit is overripe; if it is hard, it is not ripe).
Video: when to pick a melon
As for their further storage, you should take into account the fact that, as a rule, it will not be possible to preserve early melons for a long time. Even if they are picked not ripe, they do not ripen indoors. As for melons with an average ripening period, they may well ripen after being picked from the bush, since they can be stored for some time (a little more than a month).
Melon is perhaps the most refined melon crop in taste. This means it doesn’t matter, if there is still a lot of trouble ahead on your summer cottage, you will receive a more than worthy reward. The destiny of a beginning summer resident is to destroy the illusions about the impossibility of growing melon on his 6 acres. Our recommendations and advice will help him with this in the best possible way. After all, the main secret of success is the rational choice of variety and the use of correct agricultural technology.
Recommendations from gardeners
Experienced gardeners, in order to get an earlier harvest, advise planting melon in greenhouses from the beginning of April. Or under the covering material directly into the holes. The latter method will help avoid transplanting seedlings, which is an important advantage, since they do not tolerate it well.
To avoid buying cassettes and peat cups for seedlings, gardeners recommend making them yourself. To do this, fold 1 A4 sheet in half along the long side and cut it. The resulting two long strips are rolled into cups. They are placed in a container and covered with earth. This is very convenient in the future when transplanting.
To make the seedlings easier to survive planting in the ground, they are planted immediately in peat cups. This option will allow you to preserve the root system, not damage it and reduce the harvest time.
How to properly plant melons for seedlings
In order for the seedlings to turn out healthy and strong, it is necessary to pay attention to the process of growing them at all stages. Small plants are very fragile and every little thing affects them. By doing everything according to the rules, you will save yourself from having to re-sow the seeds.
Seed preparation
When purchasing seed material, keep in mind that the best germination rates are obtained from seeds collected 2-3 years ago. It is recommended to soak the seeds before planting. This can be done in plain water, but it is better to use stimulants.
After this treatment, the seeds will germinate faster and the seedlings will be healthier. After soaking, the seeds are dried, spread out in one layer so that they do not stick together.
For residents of the middle zone and northern regions, hardening of seed material is recommended. First, the seeds are placed in warm water for 2-3 hours, and then wrapped in a damp cloth and the temperature begins to gradually decrease. Within 2 days the indicator should drop from 20°C to 2-4°C. For example, the seeds are first placed near a slightly open window and then placed in the refrigerator. After 15-20 hours, the temperature is also gradually increased to its previous values.
Soil, container
Melon crops require soil with a loose structure that allows water and air to pass through well.
To prepare the mixture yourself, you can take:
- 2 parts of garden land;
- 2 parts compost;
- 2 parts peat;
- 1 part sand.
If you need to reduce the acidity of the soil, you can add a couple of handfuls of ash or dolomite flour.
After mixing all the components well, the mixture is disinfected by calcining it in the oven or microwave. Another method of soil disinfection involves spilling a hot solution of potassium permanganate. All these procedures are done in advance - several days before the intended sowing. During the remaining time, beneficial microorganisms will multiply in the soil.
For containers, you can use peat cups, jars of yogurt or sour cream, and cut-off milk cartons.
All containers should be washed clean and have several drainage holes in the bottom.
You will also need expanded clay to use as drainage.
Sowing
When starting sowing, the container is filled with a small layer of expanded clay, and then soil is poured. Seeds are placed in cups one at a time. In larger pots you can plant 2 or 3 plants at once. After sowing, the soil is carefully moistened with a sprayer and covered with film until shoots appear. In the first days, containers with seedlings should be in a warm, bright place. The sprouts will hatch in 5-7 days.
How to choose the right variety
To successfully grow melon in rather cool places in Russia, you need to choose the right melon variety and decide how to grow it: seedlings or sowing directly into the ground, in a greenhouse or in the open air.
As soon as the growing program is determined, the most important moment of correct selection of seeds immediately begins.
There are a number of criteria that determine this choice:
- adaptation of seeds to the region (what is commonly called zoning) and planting conditions (greenhouse cultivation or open ground);
- brand (simply reputation) of the seed manufacturer;
- time of seed collection and shelf life (it is better to discard melon seeds collected less than 3 years ago);
- If it is possible to visually inspect the seeds, it is necessary to give preference to the largest and heaviest grains.
And lastly, keep in mind that not even the most excellent and conscientious company in the world is able to ensure 100% seed germination, and therefore, purchase the number of seeds based on the natural yield of at least 10%.
It is necessary to clarify with the seller how well the purchased seeds correspond to the characteristics of the intended growing region.
It makes no sense to name the names of seed varieties, there are many of them today, and when purchasing one or another variety, you need to carefully read their characteristics and fruit ripening dates on the packaging.
How to calculate the sowing date
A vegetable grower can independently calculate the optimal time for planting melon seedlings. First of all, you need to carefully read the manufacturer’s information indicated on the packaging of the seed material. There you can see the timing of crop ripening, as well as suitable dates for planting in open ground.
It should be taken into account that at least 25 days must pass from the moment the seedlings emerge until the seedlings are planted in the beds or in the greenhouse. Additionally, you need to add 7-10 days for seed germination and the appearance of the first shoots.
By the time of planting, the threat of return frosts should completely disappear, and the soil should warm up to at least +13°C. In most regions this is the middle or second half of April.
When growing melon in a greenhouse, the timing is slightly shifted - seeds can be sown for seedlings 2-3 weeks earlier.
Gardener's recommendations
Gardeners who have been growing melons for many years recommend that the seed planting procedure be carried out solely on the basis of the growing Moon. Also, you do not need to use the days of the new moon and full moon, so as not to lose the harvest. It has been noticed that the stem will not stretch to its full length if the plants are planted during the approaching new moon. It is also important that young seedlings successfully take root in open soil if you briefly use transparent plastic film to create a greenhouse effect in the garden bed.
Seeds must develop resistance to unexpected weather changes. To do this you need:
- Harden the seeds. The seeds are laid out for about ten hours in ice or snow. For this purpose, you can use a home refrigerator.
- Develop tolerance to extreme temperatures. The seeds are placed in water at a temperature of thirty to thirty-five degrees, and left for a day in a dampened rag. After this, the process alternates with cold about three times.
- Prepare the ground well. It is recommended to plant in a mixture of turf, peat and humus. To these are added one teaspoon of potassium and urea and the same amount of ash.
The plant must be protected from pests, so taking preventive measures is inevitable. The greenhouse or area with open soil should be kept clean. Bleach, formaldehyde and table salt are the best reagents to moisten the sawdust mat when entering the greenhouse. The film taken to form the greenhouse effect is treated with a solution of potassium permanganate (five percent). It is necessary to eliminate the affected shoots and leaves, as they will lead to infection of the entire plant. We need to collect and burn them.
Melon can be grown almost anywhere in the world, including in the North, the Urals and other cold regions. It will be enough to have a greenhouse that does not require special conditions for maintenance. You need to try and try, guided by all the above tips.
Preparatory work
Seeds, no matter how they are grown, must be etched in a solution of potassium permanganate of a fairly intense color for 30 minutes, then placed under clean running water and washed. Next, it is advisable to germinate the seeds in the usual way - in damp gauze or in sawdust steamed in boiling water.
Melon is critical to replanting (most often does not tolerate it), does not like greasy soil, so when using the seedling method, it is best to plant the seeds in peat-humus pots in neutral soil with good drainage and a pH of 6.7-7.0.
Some exotic lovers prefer the seedless method of growing, believing that melon seedlings are very sensitive to lack of light, much more than to lack of heat.
Where to plant
The choice of place to grow the plant is very important. The abundance of sun (maximum for a particular area) and reliable protection from cold winds are the main conditions for the location of melon plants. The ridge should be sufficiently fertilized with rotted horse or sheep manure.
Melon seedlings are planted in a garden bed in the Moscow region in early June, and seeds, with the seedless growing method, depending on spring temperatures, on May 10 - 15, taking into account that seedlings will appear in one to a week and a half.
A good gardener must remember that the melon is capricious towards its neighbors. Her best friend, to whom she is completely neutral, can only be radishes. Potatoes depress it, and cucumber makes the melon fruit unsweetened.
Melon likes to grow freely and therefore at least one square meter of area must be allocated for each plant on the ridge.
Planting scheme
Most gardeners form traditional Russian ridges on their estate with a width of 0.8 m to 1.0 m. From here it is clear that only one melon plant can be planted per 1 linear meter of ridge. If the seedling method of cultivation is used, then seedlings are planted on the ridge at least three weeks old, and even better, one month old. The planting time depends on your region and the prevailing weather conditions in the coming spring, because these seedlings love heated soil, at least to 20-25°C.
To ensure confident planting of seedlings at the right time (which is June 10-15), it is best to prepare the soil of the ridges in the planting areas in advance. This preparation should begin in mid-May, between the 10th and 15th.
In the planting areas on the ridge, holes are dug to a depth of about 30 cm (at the height of a shovel), filled with a 20 cm layer of humus, and sprinkled on top with soil removed from the hole, flavored with a couple of glasses of sifted wood ash. About 5 days before planting the seedlings, you need to cover these prepared areas with mini greenhouses (a film stretched over a slatted wooden frame) measuring 80x80 cm and up to 20 cm high, in order to allow the soil to warm up to the temperature necessary for planting the seedlings. Warm roots are the main guarantee of a good melon harvest.
Seed preparation
For sowing seeds in a ridge without seedlings, the soil is prepared in the same way as for seedlings. However, to grow melon in the risky zone of central Russia, it is advisable to harden the seeds. This is done like this:
- the water is heated to 35°C and the seeds are immersed in it for 2 hours (seeds that have not sunk can be thrown away);
- Having taken them out, at the end of the allotted period, they are left in damp gauze at 20°C for a day;
- After standing for a day, place them in gauze in the refrigerator at a temperature of +2°C for 18 hours;
- then kept again at 20°C for 6 hours.
This procedure is repeated before planting the seeds at least 3 times. When planting, the seeds are placed flat at a depth of 2-3 cm and sprinkled with soil, compacting it very slightly.
The seedlings are planted in a hole, forming a mound above the surface of the ridge, raising it by 2-3 cm. This way, the seedlings will be protected from damage by bacterial rot. Watering after planting is carried out extremely carefully, without getting water on the leaves of the seedlings.
Growing melon in the middle zone
Dear amateur gardeners, I will share my personal experience of growing melons in open ground in Siberia, where I live. Before my story, a small digression - I am not one of those gardeners who scrupulously follow all the dogmas, guidelines and instructions for growing any crop, be it vegetables, berries or flowers.
My principle is that the simpler the better, the more suitable this method is for me. Why did I want to grow melon on my summer cottage, and even in Siberia in open ground? Yes, because I didn’t like the store-bought ones that we sell in our store or at the market at all - they have no taste, no smell, and they crunch like cucumbers.
Apparently they brought in not yet ripe ones. I once saw melon seedlings being sold at the market. Having no idea how to grow them and, in general, whether it can be done in open ground far from the southern latitudes, I still bought a few melon sprouts to try, it was too much for the grandfather who sold them to praise and say - it’s like a collective farmer’s variety, but he or not, I don’t know for sure.
Oh, I think, come what may, so I bought it. I brought it to the garden, there was room in the garden bed, so I planted a couple of sprouts. This was at the end of May, the seedling period was approximately 30 days. I made the holes as usual: I threw half a teaspoon of superphosphate onto the bottom, mixed it with the soil, added a tablespoon of ash to each hole and mixed a little again.
I added a little humus (compost) on top, watered the whole mixture well, planted the melon (seedlings), sprinkled the top with well-dry soil up to the cotyledon leaves, since the seedlings were small. After the cotyledon leaves there were 3-4 true leaves. I planted it, then watered it with water and placed four small pegs around each melon, covering it on top, but not tightly, with a thin covering material.
That's it, let it grow. I watered it again after 3 days. My seedlings took off well and began to grow amicably, and when they got stronger, and in June the threat of frost had passed, they opened up completely. There is practically no care for the melons; when growing, I watered them abundantly and regularly every 3-4 days.
Very quickly the plant blossomed and fruits began to appear. Water should be at the root of the plant so as not to wet the pollinated flowers.
Some publications recommend that gardeners growing melons remove the top growth point of seedlings after the 5th leaf so that the sprout sprouts growth, but I didn’t do this. The only thing is if you were away from the country for a long time, and when you arrived, you discovered that the melon needs watering , do not pour a lot of water at once - a melon, like a tomato, can burst from excess moisture, as can be seen in the photo below. This is the kind of incident that happened to me once. But, what a miracle it is, over time, the vine branches spread all over the garden bed and intertwined with each other, and you will admire the fruits, these little balls of “fluff” (small and beautiful).
They grew up quite quickly, and by mid-August they turned yellow and took on the fully ripe appearance of a real melon. That is, from planting the seedlings to the ripening of real ripe fruits, about 2.5 months passed. I fought the weeds simply, I only pulled out the grass, where it was higher and accessible, so as not to damage the vines themselves.
And I didn’t use fertilizers like that anymore. A couple of times during the entire period of growing the melon in the open ground, I added some ash and loosened it slightly, and when all the vines were intertwined like vines, I didn’t fertilize it at all, I only watered it, it was no longer possible to get under it.
You should, of course, make sure that the soil is constantly moist. When we harvested and 12 melons grew, that was something. I have never eaten such fragrant and tasty fruits. A real dessert!
Their melons are sweet as honey, despite the fact that they were grown in open ground and in Siberian conditions. They grew small, I think it’s probably just a matter of the variety - they weigh about 1.5-2 kg, not more. And they didn’t ripen all at once, but gradually one by one, so we enjoyed these wonderful melons for more than a month. Dear gardeners, if you live in the middle zone and the heat doesn’t spoil you even in the summer, still try growing melons in your summer cottage , without greenhouses directly in the open ground, minimum physical costs, and maximum pleasure from such a tasty treat. So for 10 years now we have been cultivating and eating melons from our summer cottage, and I wish the same for you.