The dream of a gardener has always been and will be the earliest harvest.
Other crops are planted in warm beds or greenhouses, but potatoes often remain “outside” and, exposed to nightly drops in temperature, die overnight. To protect it, they came up with a method of planting it in a bag. In this way, they manage to grow culture not only in the country, but also on the balcony of a city apartment.
Advantages and disadvantages of the method
This method of growing potatoes is different in that the potato tubers are planted not in beds, but in bags, where the bushes develop until the fruits are fully ripened.
To do this, you can use specially made bags with valves for collecting potatoes, or ordinary bags made for sugar or flour, or generally used for garbage.
To successfully grow potatoes in bags you will need:
- Nutritious and loose soil.
- Sufficient amount of moisture.
- Good lighting.
Therefore, the first thing you need to do is choose a suitable place where you can install bags for further growing potatoes in them. They can be dug a little into the ground or installed near a support.
Bags must be:
- Installed in such a place that the plants are easy to care for.
- They should not be exposed to moisture from the roof.
- Well lit.
Advice! If there is no space for bags on the site, they can be installed under the wall of the building, along the paths or near the terrace.
Advantages of this method:
- The bags take up little space and can be installed almost anywhere.
- The cost of caring for plants is reduced, since there is no need to dig up beds, hill up bushes and fight weeds.
- With proper soil preparation, potatoes in bags do not get sick during development and are not affected by pests.
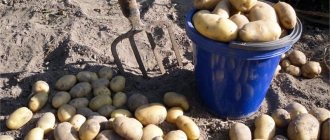
- Harvesting is quite easy and quick.
The disadvantages of this method include the following:
- During the development of bushes, it is necessary to control soil moisture.
- The bags must be installed securely so that they do not tip over.
- The soil must be nutritious.
- After harvesting, the land will need to be disposed of.
The necessary conditions
Planting material
The following potato varieties are recommended for growing potatoes in this way:
- Belarus.
- Shante.
- Reliable.
- Youth.
- Slav.
- Nevsky.
- Sineglazka.
- Lugovskoy.
- Lukyanovsky.
- American.
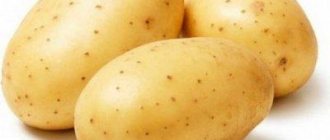
The optimal size of tubers for planting is medium, about 50-80 g.
Small planting material will give a small harvest. Large planting material promotes the development of the above-ground part, which will eventually take over all the nutrition, and the harvest will be average.
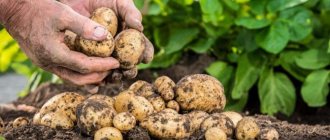
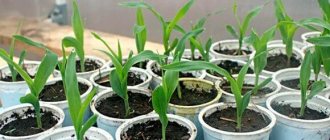
It is better to germinate the tubers before planting. You need to let them sit in the light until they turn green and sprout small seedlings.
Inventory
The principle of installing boxes: you need to drive stakes into the ground and attach the walls of boards to them with wire, or simply stack boxes without a bottom of the same size on top of each other.
The potato box is built from pine blocks and boards. If you have pallets, you can use material from them. The stakes need to be driven in on a flat, slightly elevated surface in a lighted area of the site.
In the boards at the places where they are attached to the bars, you need to drill holes for screws so that they do not split. The method can be used for more than one year.
Soil and fertilizers
Regular garden soil is not suitable for growing potatoes in boxes. In boxes, the soil is in a confined space; there is no possibility of soil aeration.
The basis for the soil is peat. It has a porous structure. Absorbs moisture well and is able to retain it during dry periods. Peat warms up well in the sun
Also, in peat, plants are less susceptible to diseases, which is important when setting tubers
To enrich the mixture, sand is added to the peat for better heating of the layer; it makes up about 1/4 of the total volume of soil obtained. Then chalk or lime flour is added: if the peat is wet, then 70 grams will be enough for every 10 kg; if dry, the dose is increased to 75-80 g. What to do if it is not possible to extract peat? You can form a mixture of compost and soil from the site, enriching it with ash.
It is recommended to cover potatoes with ash during any planting method in order to protect them from diseases and pests. Adding manure to the soil is not recommended. It may contain larvae of various insects.
Soil from under potatoes cannot be reused, as it may contain pathogens of potato diseases. This soil is poured onto the beds, and new soil is prepared for planting.
A place in the sun or partial shade is best for placing the boxes. Shaded areas are not suitable. Potatoes are most affected by late blight there.
Technology for growing potatoes in bags: rules, recommendations and instructions with photos and videos
Preparing bags
Potatoes can be planted in different bags.
Advice! Some even use thick garbage bags for this.
It is not necessary to buy new bags; you can use old ones. The main thing is that there are no large holes in them from which soil will spill out.
White bags are best used in the southern regions of the country. In them the earth will heat up less.
Important! Old bags must be thoroughly cleaned before use.
It is very convenient to plant potatoes in special bags designed specifically for this method. However, they are difficult to find for sale in small towns and villages. Besides, they are expensive.
But black plastic bags can be bought at any hardware store, and they are inexpensive.
You can also use luggage bags, which almost everyone has. They are also sometimes called “shuttle”. In such a bag you can create a small potato bed.
Important! The bags should have holes to ventilate the roots and remove excess water.
Soil preparation
It is necessary to use nutritious and light soil. In heavy clay soil it will be difficult for tubers to develop.
Important! To plant potatoes in bags in February-March in the northern regions of the country, the soil must be prepared in the fall, since in early spring the ground is still frozen.
Composition of soil mixture for filling bags:
- 1 bucket of fertile soil from the garden.
- 1 bucket of humus;
- 2-3 liters cans of coarse sand.
- 1-2 liters cans of wood ash.
Mix all ingredients well and remove any stones and branches.
Important! You cannot take soil from an area where nightshades previously grew.
What varieties are suitable
For planting in bags, it is better to use large-fruited and easy-to-care potato varieties. Suitable for this:
- Bellarosa (Bella rose) (Germany);
- Sante (Netherlands);
- Svitanok Kyiv, Slavyanka, (domestic).
Attention! It is necessary to choose early varieties that give a rich harvest.
How to grow potatoes correctly
How to choose the optimal soil
For potatoes, the type of soil in which they grow is not as important as the looseness of the soil and the possibility of air penetration. Potatoes are a vegetable that likes to breathe and can suffocate
That's why plowing the beds with potato tubers is so important
Potatoes love not only air, but also light
It is important that the rows are evenly illuminated by the sun. Therefore, it is best to plant potatoes with the rows oriented north to south.
Almost any soil is suitable for growing potatoes. This vegetable can be grown even in acidic soil. The acidity of soil suitable for growing potatoes is 5.0-6.0 Ph, which is quite good.
All these indicators are extremely important if you are going to grow potatoes in the ground in the classical way. If the classic option is not your case, since you cannot afford to comply with these standards, then it is better to try growing potatoes under straw or in bags.
How to water potatoes correctly
Immediately after planting potatoes, you should avoid large amounts of liquid. Excess moisture can destroy the entire crop, as the vegetables begin to rot and collapse from the inside. Potatoes are good because they do not require a lot of water, so they can be grown even in the southernmost regions.
Potatoes go through several stages. First, budding occurs, and then the flowering itself. As soon as the first shoots appear, and this happens a few days after planting, you can start watering the potatoes. You need 2-3 liters for each bush, but no more. It is necessary to water once a week or ten days. 15-20 days before harvesting, it is necessary to stop watering. The potatoes will ripen on their own.
Watering potatoes does not depend on the type of planting. Potatoes in bags and potatoes under straw also require a watering schedule.
Preparing the soil for planting potatoes
Autumn digging of the soil is carried out at a depth of up to 30 centimeters. After this, it is necessary to fertilize the soil. For one hundred square meters of land, 300 kilograms of manure and one kilogram of ash must be added for autumn digging. As for spring digging, it should be deeper than autumn digging. Approximately 35-40 centimeters. For planting, it is necessary to select good quality tubers if you are going to harvest a normal harvest. Otherwise, the results of your labor will simply have to be thrown away.
Before planting, it is necessary to warm the tubers and germinate them in the sun. For the best result, you can make a transverse cut around the tuber itself. This way the potatoes are stimulated and it is easier for the buds to germinate.
What and how best to fertilize potatoes
Potatoes prefer organic and natural fertilizers, and also do not like chemistry at all. Applying manure to the crop allows you to increase the amount of harvest, or even triple it. Instead of manure, green manure is perfect. They are also often called “green fertilizers”.
Urea and ammonium nitrate perfectly fertilize the soil before planting potatoes. And during spring digging, you can fertilize the soil with potassium and magnesium. Nitrogen fertilizers are perfect when potatoes sprout ten centimeters.
When applying fertilizers, be careful with the green parts of the plant; solutions should not get on them. Fertilizers can be added both to the soil and under the straw, and even in a bag of manure. It all depends on the method you choose to grow potatoes
It all depends on the method you choose to grow potatoes
Fertilizers can be added both to the soil and under the straw, and even in a bag of manure. It all depends on the method you choose to grow potatoes.
Potato planting dates
They begin to plant potato crops at the end of April. If the first leaves appear on the birch tree, then it is time to plant potatoes. But before that, you need to prepare the tubers 30-45 days in advance. That is, from the beginning or mid-March it is necessary to warm the tubers in the sun so that they sprout the first shoots. After this, the potatoes can be planted. The most optimal temperature for growing potatoes is considered to be + 15-18 degrees.
Potatoes do not like heat, but at the same time, they also grow in it, but then the harvest is not so rich. Harvesting depends on the potato variety. On average, potatoes need to be harvested from the beginning of August to the end of September.
Step-by-step instruction
If you plan to carry bags with plants, you need to prepare a hard one so that during this procedure you do not injure the root system of the plants.
- A drainage layer of 15 cm is poured into the bags. For this, you can use small cobblestones, coarse crushed stone or gravel, crushed stone.
- Next, pour the soil mixture in a layer of 20-30 cm and lightly compact it.
- Place 2-3 tubers or parts of a tuber with eyes on top (each part should have at least 2-3 sprouts).
Advice! Before planting, it is better to treat the tubers with insecticides.
- 15-20 cm of soil mixture is poured on top of the potatoes.
- The soil is watered moderately, since the potatoes do not need high humidity at first.
- If planting was done outside, the bags are initially covered with dense material so that the moisture evaporates less.
- When the sprouts appear, after about 8-14 days, and grow 10-15 cm, they gradually begin to be covered with soil up to the leaves until the thickness of the soil in the bag reaches 50-60 cm.
- In this way, new roots appear on the stem, on which additional tubers are then formed.
- After this, the bags are moved to the light. Now the potatoes will need good consecration for proper development.
Advice! Do not add too much soil, otherwise the tubers will not have enough strength to form a large number of roots.
Watch the video! Growing potatoes in bags - an experiment
Rural approach
– And here are the Rostovites who shared an interesting way of growing potatoes “waddled”. Elongated tubers are laid out at a shallow depth, 8–10 cm, across the direction of the row, and the row spacing is mulched with straw. When the bush reaches a height of 15–20 cm, “break it” in half, placing a bunch of hay or straw between the stems of the plants. What is the point of such agricultural technology?
– “Collapse” of the bush in half helps to increase the reproduction rate, that is, in simple words, a double number of tubers is formed in the underground part of the plant. This is done in order to harvest more crops while reducing the planting area and ultimately spend less labor on care, since you do not have to hill up the potatoes multiple times.
– They collected 750 kg from one hundred square meters! This exceeds the yield of many known individual growing methods by 2–2.5 times. Is this technique suitable for the Central Federal District?
– It should be taken into account that the Southern Federal District has completely different soil and climatic conditions. There, it is comfortable for potato tubers to germinate at shallow depths provided they are covered with straw instead of hilling - it will retain moisture in the soil, protect it from overheating and protect it from weeds. In the Central Federal District, conditions are completely different - there may be an excess of moisture in the soil, hypothermia of tubers after planting, return frosts, which means that the sum of active temperatures often does not allow large yields to be obtained. However, the disadvantages of such an innovation are also obvious. Firstly, you will also have to solve the problem with straw - buy it somewhere, and secondly, in a strong wind it can fly all over the area. For many summer residents, this method is unlikely to be suitable, but for rural southern territories it is quite suitable.
From late blight to scab. How to deal with dangerous potato diseases Read more
Care
Potatoes in bags must be watered in a timely manner, the soil must be loosened and fertilized, and harmful insects must be controlled.
Watering is carried out once every 7 days depending on soil moisture. It should be well moisturized. At the same time, moisture should not stagnate, so the state of drainage must be monitored.
Loosening is carried out once every 7 days after watering.
Advice! If you don’t want to loosen the soil, you can mulch it.
Potatoes in bags need to be watered more often than in regular beds, since they have a larger area for moisture evaporation. Water helps plants form inflorescences and grow tubers in time.
Advice! In bags that are too tight, it is recommended to additionally make small cuts in the bottom before planting the potatoes.
A special valve located at the bottom will allow you to conveniently harvest and ventilate the root system.
Feeding
Potash fertilizers will help improve the quality and quantity of the crop.
But you need to be more careful with nitrogen, since its excess can harm the plant and the tubers will not ripen well, they will have a thin skin and cannot be stored for a long time.
Advice! To increase productivity, it is recommended to fertilize plants with potassium sulfate.
Fertilizing is applied only after watering the plants. For one bag, use half a bucket of any of the solutions described below, which is poured from above onto the leaves from a watering can with a strainer.
"Green manure
Fresh chopped grass and greens are poured into a large tank - dandelions, burdock leaves, nettles, weeds with roots and soil for bacteria to appear in the mixture. You can also add a small amount of last year's fallen leaves, hay or onion peels.
Next, pour water into the container and leave for 1-2 weeks, stirring the composition periodically.
When a brown mass with an unpleasant odor appears in the container, and the grass becomes mucus and only thick pieces remain, the fertilizer is ready for use.
Add 1 tbsp to half a bucket of water. spoon of the mixture and water the plants in bags.
Bird droppings
- Bird droppings are poured into a bucket ¼ full.
- Next, fill it to the top with water.
- Keep for a week.
- Add 0.5 liters of infusion to 10 liters of water and use for irrigation.
Mullein
- Mullein is poured into a bucket ¼ full.
- Next, fill it to the top with water.
- Keep for a week.
- Add 1 liter of infusion to 10 liters of water and use for irrigation.
Ash infusion
Half a glass of ash is poured into a bag with plants and the soil is loosened. This fertilizing allows you to improve the quality of organic fertilizers. It is applied to the ground 5-7 days after fertilizing with organic matter.
The alkali from the ash and nitrogen from organic fertilizers enter into a chemical reaction, due to which ammonia evaporates from the fertilizer.
When to plant potatoes in open ground: optimal timing
When choosing the optimal timing for planting potatoes, it is very important to maintain a balance. If the activity is carried out too early, return spring frosts may return and destroy the potatoes, and cold soil can provoke rhizoctonia (a fungal disease in which black growths form on the tubers)
And if planted too late, you can get a smaller harvest, because due to the end of the warm season, it will not have time to ripen in full.
When is it better to plant crops in open ground in 2022, in what month? First of all, when choosing a time for the procedure, you need to focus on weather and temperature conditions. The threat of returning spring frosts must pass, the soil must warm up to 8-10 degrees Celsius, and the air temperature during the day must remain stable at 15-20 (or more) degrees Celsius.
In different regions of our vast country, weather and climate conditions are very different. This means that you need to plant potatoes at different times, taking into account climatic conditions:
- In the middle zone (Moscow region) - it is optimal to plant in the second half of May.
- In the South (Krasnodar Territory (Kuban), North Caucasus) - in early mid-April.
- In Siberia, the Urals, Leningrad region - it is better to plant at the end of May or even at the beginning of June.
A very good assistant in gardening is the cycles of the moon, with their help you can determine the most accurate time when you can and cannot plant something in the garden. Thus, the dates for planting potatoes in open ground according to the Lunar calendar 2022:
- Favorable days: in April - 6, 7, 8, 9, 15, 16, 17, 20, 21, 24, 25, 26, 29, 30;
- in May -1, 2, 3, 4, 8, 9, 10.
- in April - 5th, 19th;
Diseases and pests
Potato bushes can be favored by Colorado potato beetles, as well as various types of mites and aphids. However, when growing potatoes in bags, pests and diseases practically do not affect the bushes. But they are bothered by ants.
Ants love warmth and very often build anthills in greenhouses, wooden boxes and other places. Ants really like bags located in a sunny area.
It is very difficult to get rid of ants’ homes, so it is advisable to carry out preventive measures:
- It is necessary to sprinkle ant poison near the bags.
- The soil in the bags is sprinkled with dry mustard or ground pepper.
- The bags must be moved regularly, the soil must be watered, and the first ants that appear must be constantly disturbed.
Traditional technology
The best regionalized varieties are selected for planting. If large tubers are used, they need to be cut into pieces so that at least two sprouts remain in each. Grow in a bright room at a temperature of +15 degrees for a month, avoiding exposure to direct sun.
Soil preparation
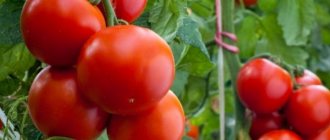
For planting potatoes, allocate an area where green manure, cabbage, cucumbers, cereals, legumes, pumpkins, and root plants grew. Sorghum, sunflower, tomatoes and other members of the nightshade family are considered undesirable precursors. They are returned to the area where potatoes were grown after 3–4 years.
In the fall, the bed is dug up and at the same time added to 1 square meter. meter 5–7 buckets of humus or fresh manure, 15 g of potassium sulfate and 30 g of superphosphate. If the soil is infected with pests or pathogenic microflora, then organic matter, which is a favorable environment for them, is not added. Only agrochemicals are used.
In the spring, when planting potatoes, spot feeding is used, that is, fertilizers are applied separately in the holes. For example, when feeding with organic matter, dry humus (a 700-gram jar) and a handful of ash are poured into the hole. If you choose fertilizer from agrochemists, then pour half a glass of bone meal and one spoonful of nitrophoska into the holes.
Boarding order
Potatoes are a heat-loving crop; they can be planted in the ground when it warms up to 7–10 degrees. If, due to a delay in planting, the soil warms up more, the starchiness of the potatoes will decrease and its yield will decrease. According to folk signs, the signals to begin planting are the opening of birch leaves, as well as the beginning of flowering of bird cherry and dandelions.
The most common methods of planting potatoes:
- Ridge - used when growing potatoes on heavy soils and with a high level of groundwater. Tubers are planted in ridges 15 cm high with row spacing of 70 cm.
- In trenches - practiced in arid climates, as well as on sandy soil that does not retain moisture well. Tubers are planted in prepared grooves.
- Smooth implies a method of planting “under a shovel”. in which tubers are planted in prepared holes.
The rows of plantings are arranged from north to south to ensure good illumination of the bushes. Maintain distances:
- For early varieties: 60 cm between rows, 25-30 cm between tubers.
- For medium or late varieties: row spacing is 70 cm, tubers are 30–35 cm apart.
Planting depth depends on the nature of the soil:
- clayey - 4–5 cm;
- heavy and loamy - 8–10 cm;
- light - 10–12 cm.
Depending on the size of the planted tubers, these indicators may vary. For example, large tubers are planted deeper than small ones, but the deviation from the optimal parameters should not exceed 3 cm.
Agricultural technology
Traditional care for potato plantings includes:
- carrying out loosening to a depth of 5–8 cm weekly until germination, while weeding;
- hilling - carried out twice in moist soil during the growth period;
- Watering - abundant but infrequent is necessary. The soil is moistened to a depth of 15 cm. Excessive flooding of beds is unacceptable;
- fertilizing is carried out three times: the first is given during the germination period (1 tablespoon of urea per bucket of water), the second is given during budding (2 tablespoons of wood ash and 1 tablespoon of potassium sulfate per bucket of water) and the third - when the bushes bloom ( 1 glass of chicken manure or mullein and 2 tablespoons of superphosphate per bucket of water).
Harvest
The signal to dig potatoes is when the tops dry out. You should not delay harvesting: tubers that have been in the ground for a long time lose weight and are worse stored.
Dig potatoes in dry and sunny weather. At the same time, the tubers are sorted, selecting damaged and diseased ones separately from healthy ones. Before storing the potatoes, they must be dried, spread out in one layer, at temperatures up to 20 degrees for 10–15 days.