Chili varieties suitable for growing on a windowsill
There are many varieties of chili, but not all of them are suitable for home planting on a windowsill. Among all the variety, it is worth choosing one of the following peppers:
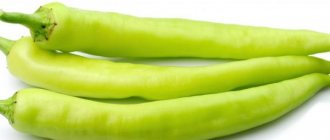
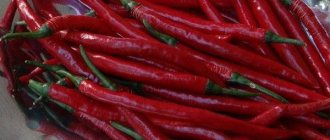
- Ogonyok is a well-known hot pepper;
- Aladdin - has excellent decorative qualities;
- Bellflower - attractive with interestingly shaped fruits;
- Indian summer is one of the oldest varieties of chili;
- Chilean heat - suitable for those who love very hot fruits;
- Coral is a new variety.
Additional Information! It is recommended to grow varieties with small leaves and a not very branched root system at home.
Formation and pollination of the bush
Final rooting and the beginning of growth of the bushes will begin in 15-20 days . At this time, the pepper will begin to actively form new shoots. Peppers grown on a windowsill do not require pinching.
Its fruits are small and the bush has enough strength to grow them. There is also no need to put up any supports; the stem of the pepper is powerful enough to support a lot of fruit.
As soon as flowers begin to form on the bushes, the branches must be slightly shaken to pollinate the buds. Turn the bushes daily for uniform development.
If this is not done, the shoots will reach towards the light and the bush will begin to lean to one side.
Pepper planting rules
Preparing suitable seeds and choosing the right location for the plant will greatly increase the likelihood that the pepper will grow and produce a harvest.
Timing for sowing seeds for seedlings
Even though most chili varieties are shade tolerant, they still need adequate sunlight. You can plant seed for future peppers at any time of the year, but since there is a need to ensure light and thermal conditions, it is best to plant in the spring, at the end of March or the first half of April.
Appropriate place
The pot with the plant should be placed in a well-lit place, and the south side is best suited for this. Because chili is a pepper originally from Mexico, it needs light and warmth.
In addition to fruits, peppers have decorative properties and will look good in the interior.
Preparing the container and soil
It is recommended to plant seedlings in separate containers. If you place several bushes in one container, the stronger and faster growing ones will begin to suppress their stunted counterparts.
Seedlings can be planted in small pots up to 200 ml. In the future, as the bush develops, the chili will have to be transplanted into a larger pot, with a volume of 3 to 6 liters.
Attention! It is not recommended to use ceramic containers, as the soil in them will dry out very quickly.
Pepper is unpretentious to the ground. Seed material can be planted in soil purchased at the store.
Suitable soil
If possible, it is recommended to prepare the nutrient soil yourself. The following ingredients are mixed:
- leaf soil - 2 parts;
- river sand - 1 part;
- peat - 1 part;
- coconut fiber - 1 part;
- perlite - 1 part, vermiculite can be used instead.
Attention! Before chili peppers are grown from grains, the soil must be disinfected.
The nutrient substrate is treated with a fungicide, for example Previkur, or calcined in the oven
Seed processing, germination
To grow chili, you must first properly prepare the seeds:
- The seed is filled with water. You can use the seeds that remain at the bottom. Those that have surfaced have a minimal likelihood of germination.
- The grains are soaked in water at a temperature of about 40 ° C for several hours.
- Disinfection of grains - soaking for half an hour in a solution of potassium permanganate.
- To speed up the germination process, it is recommended to treat the seed with a growth stimulant.
How to Plant Chili Peppers from Seeds at Home
- Seedlings are planted in wide, shallow containers at a distance of 5 cm in a row.
- The seeds are laid out on the surface, then sprinkled with a small layer of soil (0.5-1 cm).
- The crops are moistened from above using a spray bottle.
- Boxes with crops are covered with film or glass to create greenhouse conditions. For germination, seeds need a temperature of 22-25 degrees .
IMPORTANT. During the germination process, make sure that direct rays do not hit the surface, otherwise a greenhouse effect will be created inside the box and the seeds will cook.
The first shoots will appear in 10-15 days . The film must be removed immediately and the air temperature reduced to 18 degrees for several days.
Pepper maintenance and care
Knowing how red pepper grows, it is obvious that this plant is unpretentious in care.
Temperature and lighting
Lighting should be plentiful, but diffuse. The temperature in the cold season is from +16 to +18 °C, with the onset of the first heat and until the end of autumn from +20 to +24 °C.
Humidity and watering
Watering is carried out as the top layer of soil dries.
During cold weather, when heating dries out the air, pepper leaves need to be additionally moistened by spraying them several times a week.
Attention! Overwatering of soil should be avoided. Excessive moisture increases the risk of fungal diseases and root rot.
Feeding
In order for chili to become a strong, flexible bush and produce a bountiful harvest, it needs regular feeding:
- Liquid mineral compositions are added once a week - 3 g of the drug per 1 liter of water, phosphate and potassium fertilizers are suitable;
- Organic matter is used once a month - manure is mixed with water in a ratio of 1 to 4, you can use chicken manure - 1 part of manure per 10 liters of water.
In autumn, universal nutritional compounds or fertilizers for decorative varieties of pepper must be applied.
Bush formation and pinching
In the fall, when the fruits are harvested, the bush is pruned to 1/3 of its height. Pinching is carried out when the plant grows to 30-35 cm.
Attention! Flowers need to be trimmed if there are too many of them on the bush. Their size and quality depend on how many fruits there are. Many video lessons are devoted to the issue of pruning a chili bush.
The optimal number of peppers on a bush is up to 25 pieces
Flowering and pollination
When the bush blooms, it is recommended to shake it daily so that it is more actively pollinated. During this period, it is recommended to place the container with the plant near an open window, preferably on the balcony, to attract insects that will continue pollination. Then the ovaries will form faster.
Agricultural technology
It is not difficult to grow different varieties of pepper at home. When choosing a species, it is important to clarify the type of pollination in order to obtain not only an ornamental plant, but also the harvest itself. The grown bush needs timely feeding and proper watering. In this case, the hot pepper on the balcony or windowsill will be large, juicy and rich in taste.
Landing technology
You need to start growing hot peppers on the balcony by choosing the optimal location. In all months except summer, plants will feel better on south and south-east windows. During the hottest period with maximum illumination - in the western and eastern areas. In this case, it is desirable to provide the possibility of temporary harassment in the morning hours in April and May, when the sun is especially active. Check the frames in advance: there should be no “cold bridges” or holes through which air from the street blows. It is advisable to place the pots away from the windows so that they are not exposed to a draft during ventilation.
The required length of daylight is from 14 to 16 hours, so a phytolamp will be required when growing and properly caring for the crop. Do not place containers tightly, this will create additional shading. The optimal frequency can be determined visually: the crowns should be positioned freely, without interlacing or deformation. The temperature regime is important: from +18 at night to +24 during the day. Therefore, plantings should not be placed directly above the battery. It is difficult to do this in an ordinary apartment, so you need to take care of a “thermal” barrier, for example, in the form of thick fabric or a foil screen.
For planting, prepare two types of containers: cups up to 5 centimeters high and pots with a volume of no more than 5 liters with an expansion at the top. In a small volume, the root system forms faster, then picking is necessary. When replanting, use a pot with a volume of at least 3 liters, since the main root of the bush will be buried. Branched shoots will lie close to the surface, so they need a large area. The container must have a hole to drain excess water.
A universal type of seedling substrate is suitable as the main soil mixture. But you can prepare it yourself by mixing two parts peat and one part sand or vermiculite. Be sure to disinfect before planting with Fitospirin or potassium permanganate.
Also prepare the seeds in advance: soak in lukewarm water. If the seedling method is used, place them in the ground until the seedlings appear. Soak dry planting material in water with an antibacterial additive, then wrap it in cloth and leave in a warm place overnight. Then plant it immediately. If you do not intend to use seedlings, you can wait for the seedlings to appear; this will happen in 2-3 days.
On a note!
You can even sow dry material, but only in abundantly moist soil. In this case, the first shoots may appear only after a week.
The seedling method is necessary when planting a large volume of plants. After the appearance of the first shoots, 10 days later, the peppers need to be fed with a root formation stimulator. Carry out the first picking when two full sheets appear. Transplant into a large container after 20 days. Otherwise, seedlings require exactly the same care as when growing any other vegetable crop.
Aftercare
It is possible to grow really hot peppers on a balcony or windowsill only if the temperature conditions are observed and watering is timely. If the plant does not have enough moisture, it stops producing the burning essential elements, as a result of which the fruits lose their basic properties. One of the main rules is to water exclusively with warm water. You can leave the container in the room overnight so that it warms up and the sediment falls to the bottom. You can determine the need for watering by the type of pot: if the top layer has dried out and there is little liquid left in the pan, it’s time to add water. In this case, be sure to drain all the old fluid. If watered incorrectly or too frequently, the top layer of soil may turn white. It is important to spray twice a day with a spray bottle if the humidity in the room is below 70 units.
You may be interested in:
How to properly pick peppers for seedlings at home? As you know, the key to abundant fruiting is high-quality planting material. Today the majority…Read more…
The first fertilizing should be done immediately after transplanting the sprouts. Use organic mixtures, as they stimulate root growth and at the same time do not cause burns. Then fertilizers are applied during the period of active growth of greenery, so that the bush has time to gain total mass. It is advisable to choose compositions with nitrogen impurities, which stimulates metabolic processes in the foliage and activates growth. When buds begin to form, add potassium along with organic mixtures. This will help reduce the number of barren flowers. The optimal frequency of fertilizing is once every 14 days, unless there are other alarming symptoms.
No pinning required. It is only permissible to form the bush itself by branching. You need to carefully pinch the top. It is better to do this with sharp tweezers so as not to injure the plant tissue. If signs of fungus or mold infection appear in the area where the top leaves were removed, sprinkle the point with a special preparation. Collect the first large fruits immediately after color changes. This stimulates the growth of the remaining ovaries.
On a note!
The crop must be harvested regularly, otherwise growth will stop completely. All pods will gradually dry out.
It is not difficult to grow peppers from new seeds at home, but this is a perennial plant, so it makes sense to save it after fruiting until the next growing season. After the crop is harvested, the leaves will begin to dry. During this period, you need to reduce watering, refuse fertilizing, and then trim the stem, leaving 5-8 centimeters in height. There is no need to remove it from the windowsill. After resting, the plant will begin to grow green mass and bloom again, forming ovaries.
During the period of active formation of side shoots, cuttings can be carried out. The shoots should be fruitless, elastic and thick, healthy in appearance, and rich green in color. It is advisable to have a couple of sheets. Cut with a sharp tool at an angle. Soak the cuttings in a weak zircon solution: 3 drops per 100 milliliters. After a day, sprinkle the cut with root and plant it in pre-moistened soil. In the next week, reduce watering to prevent the development of fungal diseases.
We must not forget about pollination. Any variety is characterized by the type of this process and can be bee-dependent or self-pollinating. The former are not suitable for home use, since they form ovaries only in open ground. It is difficult to manually pollinate peppers, and there is no guarantee of a harvest. Independent species are more suitable for home conditions, but they can pollinate each other if placed too closely; the characteristics of each variety will be blurry and inconsistent with the manufacturer’s description. However, there will be ovaries.
Collection and storage of pepper at home
Peppers are harvested regularly as they ripen. From one bush you can collect about 100 fruits per season.
For long-term storage, it is recommended to dry the fruits in the oven. They are stored in a warm place with minimal humidity. Dried fruits can be ground and later used as a seasoning in dishes, instead of peas.
Fresh pepper can be stored by freezing it. Before freezing, the fruits are poured with boiling water for several minutes.
Chili peppers can be frozen
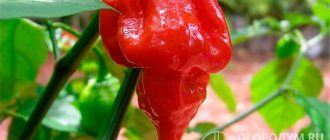
Balcony landscaping
Indoor chili pepper
How to grow balcony peppers?
Preparation of material
Materials needed: seeds, pond dirt, peat soil, garden soil, sand, growing container, garden shovel, pruning knife, water.
Containers: Generally, the height should be 10-15 cm. The size can be chosen according to your own planting needs. The density of one plant is 10-15 cm.
Sowing seedlings
You can sow directly or soak purchased chilli seeds in warm water at 50-55 C for 20 minutes.
Before sowing, place the prepared nutrient soil in a basin at a distance of 3-4 cm from the edge of the basin and water it. Once the soil is slightly dry, sow 1-2 seeds at 10-12 cm intervals and cover with 1 cm of fine soil after sowing.
Planting in a pot:
- When the seedlings grow to 2 true leaves, they can be planted in pots.
- Prepare a drainage layer at the bottom of the pot.
- Use a trowel to dig up the seedlings about 5cm around the root system of the original potted plants.
- Plant small seedlings with soil in the prepared flower pot.
- Water until water leaks in the pelvic floor area.
- After planting the pot, place it in a cool place indoors to control evaporation, and wait until the seedling's growth has slowed before moving it out onto the balcony.
Daily care
- Peppers love warmth, but are afraid of frost and avoid high temperatures.
- After potting, add 5-10g of mixed fertilizer per plant every 15 days.
- Lighting requirements are not strict, but insufficient lighting will delay the fruiting period and reduce the fruiting rate.
- In principle, there is no need for pruning during the growing season.
- The suitable temperature for fruit development is 25-28 C. In case of high temperature and drought, direct sunlight and strong lighting, it is easy to cause sunburn or fruit drop. During the fruiting period, much watering should not be used and dry air is required, otherwise pollination will be poor.
Errors allowed
The most common mistakes are systematically overwatering the plant and placing hot and sweet peppers next to each other, for example the Hercules variety. In the first case, the bush will most likely die. In the second case, the two types of peppers will pollinate each other, which will lead to a change in their taste.
Chili has beautiful, delicate blooms
Keeping chili indoors is not a difficult task. Choosing a suitable variety, regular care of seedlings, and then an adult plant can be done even by those who have no experience. The reward for your labor is getting a tasty and very healthy harvest.
Disease prevention and control
When a plant becomes diseased, the top leaves of the diseased plant wilt within a day. After 2-3 days the leaves remain green, but the entire plant wilts. Cut off the diseased stem, the catheter is brown, dip the cut in water, and a white cloudy bacterial fluid flows out of the cut.
Late blight is a bacterial disease that occurs when soil temperatures reach 20 C -25 C when the soil water content reaches more than 25%. When there is heavy rain and sunshine, the temperature rises quickly, the humidity is high and the amount of evaporation is large, microbes are active and the affected plants increase in size, which can cause serious harm.
Methods of prevention and control:
- Selection of disease-resistant varieties;
- Adjust soil pH and apply 50-100 kg of lime per acre;
- Timely inspection, ensure that diseased plants are immediately removed and burned.
- If chili blight is a soil infection, it is necessary to use pesticides to irrigate the roots during prevention and treatment.
- The key time for prevention and treatment is mid-to-late July. Chili peppers flower and bear fruit, and root watering is usually carried out within 1-2 days after pouring the first water.
Powdery mildew
Chili powdery mildew is caused by an ascomycete of the subgenus Endospermum, and old leaves and young leaves can be infected. It is mainly spread by air flow in fields. The disease easily becomes popular in somewhat drier conditions. Initially, small faded green and yellow spots appear on the front of the affected leaves, which then grow into fuzzy faded green and yellow spots around the edges. A white powdery substance forms on the back of the affected area. In severe cases, the disease spots become densely covered, causing entire leaves to turn yellow and a large number of light-colored stems to be produced, which seriously affects yield and quality.
Methods of prevention and control:
- When planting, select varieties with good disease resistance and mix seeds with new membranes with high lipid content (which can repel underground pests and diseases, isolate viral infections and do not affect germination and swelling function, enhance respiratory power and improve seed germination rate).
- Before planting, turn the soil deeply and spray with new high-fat membrane liquid to sterilize and retain heat and moisture.
- Peppers should be sprayed promptly at all stages of pepper growth to improve the supply of nutrients to the body and increase the pepper's resistance to external microbes.
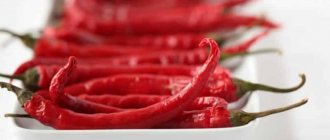
Origin of hot peppers
Chili peppers came to our gardens from South and Central America. Capturing the whole world with its popularity, it became a mass-growing crop and achieved the highest yields in most warm climate zones. It is distinguished from its usual sweet relative by increased bushiness, high yield potential, small size and elongated shape of the fruit, and decorativeness. It is thanks to these qualities that chili is often grown as an indoor crop. Today, it has in its list hundreds of diverse varieties that differ not only in the degree of pungency, but also in color, size, and shape. In general, chili belongs to the group of cayenne peppers and is included in the variety of hot peppers.
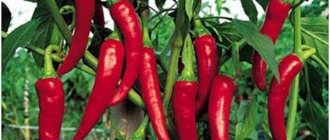
A bed of hot chili peppers. © Christoph Zurnieden
Chilean culture - what you need to know
The southern continent of America is considered the birthplace of the culture; hot chili peppers were grown by the Indians. Nowadays it is cultivated mainly in Thailand and India. In fact, the name "Chili" covers most varieties of hot peppers, which can have fruits of different colors.
Chili peppers contain a unique substance – capsaicin, which gives it its spicy taste. Its content is measured in scoville units (SHU). For example, in bell pepper this indicator is 0, regular hot chili contains 100-500 scoville, and the one included in the book of records for spiciness is 1 million scoville.
Advice! Fresh milk is very good at relieving the burning sensation in the mouth from hot chili.