Gardeners know that it is necessary to shape a pumpkin in open ground, but not everyone understands how to do it correctly. Meanwhile, such an agrotechnical technique as pinching is very important for the crop. Only in this case will the pumpkins be able to fully ripen and delight with their taste. There are several schemes for forming a pumpkin bush. When choosing the appropriate method, you should take into account the climatic conditions of the growing region, the characteristics of the variety, and your own preferences.
Why is pumpkin shaping important?
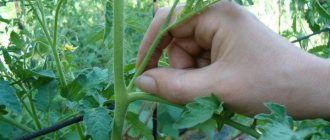
The pumpkin is formed by pinching the shoots. The procedure is carried out differently depending on the purpose. If you need to get more small-sized fruits, leave long vines and many ovaries. You can keep just one fruit on a plant, then there is a chance that it will grow to a gigantic size. In any case, shortening the vines and normalizing the ovary has a positive effect on the quality of pumpkins.
The procedure has additional advantages:
- space is saved, which is important for compact areas;
- the bush is better blown with air and receives more light;
- the consumption of fertilizers is reduced, they are not wasted;
- productivity increases, ripened fruits will weigh more;
- pumpkins will be able to ripen faster;
- The pumpkin will taste sweeter.
They begin to pinch the pumpkin at the moment when the lash reaches a length of 1.5-2 m. The procedure cannot be carried out earlier. It is necessary to place sheets of plywood or cardboard under the left ovaries - this will protect the fruits from contact with the ground and reduce the risk of rotting.
After formation, they continue to monitor the appearance of stepsons (lateral shoots) and immediately remove them so that the bush does not become thickened and food is not wasted.
How to properly pinch a pumpkin in open ground to get a good harvest
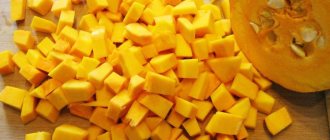
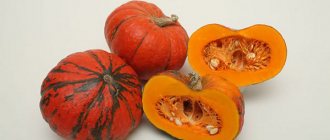
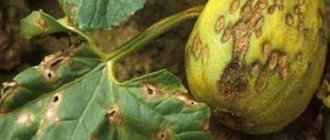
Pumpkin is notable for containing five times more carotene than carrots. For its rich content of minerals and vitamins, it is rightly called the queen of autumn. Many tasty and nutritious dishes are prepared from this “sunny” vegetable: cream soups, porridges, pies, casseroles. It is not surprising that pumpkin is a frequent visitor to garden plots.
In order to reap a good pumpkin harvest in the fall, gardeners, in addition to traditional care (watering, fertilizing, removing weeds), add special agricultural techniques that allow them to regulate the number and weight of fruits on the bush. Such techniques include pinching, pinching and shaping a pumpkin bush.
Schemes for the formation of climbing varieties
Climbing pumpkin is characterized by accelerated shoot growth. Under favorable conditions in open ground, the bush can form a large number of lashes. If the size of the fruit is not critical, you can leave all the shoots, evenly distributing them so that they do not interfere with each other’s growth, and from time to time thin out the shoots by removing individual leaves.
In the case when you want to get large pumpkins or the weather is not conducive to fruit ripening, it is better to pinch. It is allowed to form a pumpkin into one, two or three lashes.
In one lash
With this method of formation, they wait until the main lash grows 1.5-2 m in length and 2-3 ovaries form on it. 4-5 leaves are left above the last pumpkin, and then the top of the shoot is pinched. At the same time, lateral branches are not allowed to develop, removing them at the very beginning of growth. This method is usually used in regions with short, cool summers or if the pumpkin grows in poor soil.
In two lashes
When forming a pumpkin into two shoots, in addition to the main shoot, one side shoot is left. You need to choose the most powerful branch. The remaining shoots are cut off. With this method of formation, 1-2 ovaries are allowed to develop on the main shoot, 1 fruit and 4-5 leaves above it are left on the side shoot. Then the tops of both lashes are pinched.
Three lashes
This method differs from the previous one in that not one, but two side shoots are left, on each of which 1-2 ovaries can be left. The growing point of each vine is pinched after 5 leaves appear above the top pumpkin so that the process of photosynthesis occurs at the required intensity.
Watering and fertilizing
We continue the conversation about how to properly pinch a pumpkin. Let's deviate a little more from this topic, because, in addition to the formation of the bush, an important issue is providing it with the necessary conditions for growth and development.
The pumpkin root goes 2 meters deep into the soil, so close groundwater is detrimental for it. But the plant loves watering; its powerful leaves need it regularly.
In extreme heat, leaves may hang during the day as if scorched, but this does not mean that you need to immediately grab a hose or watering can. It is enough to thoroughly water the holes in the evening and the plants will recover overnight.
The better the bed is fertilized, the more the pumpkin branches. Therefore, the questions of how to feed and how to properly pinch a pumpkin are very interconnected.
An excess of fertilizers will lead to the appearance of a large number of green vines that will not bloom or bear fruit. Therefore, if you have been fertilizing the garden bed since the fall, you will not add organic matter during the summer season. A well-manured bed already provides nutrition to the plant, so the stepsons need to be constantly monitored. Otherwise, you risk getting a huge plant that will shade everything around, but at the same time produce a dozen small fruits.
To save space and make pinching easier, trellises are placed on the pumpkin. The plant does not need to be tied up; it will easily climb on its own. At the very beginning of the development of the bush, direct young shoots to the trellis, and then simply periodically thin out the stepsons, remove excess flowers and fruits.
Features of the formation of bush pumpkin
Bush pumpkin varieties are characterized by more compact sizes. Beginners believe that by planting this variety, they will be able to avoid pinching and removing shoots, but this is not entirely correct. As they grow, the bushes become too dense.
A large number of leaves requires a lot of nutrition and moisture. At the same time, the bush is less ventilated. Pumpkins may be shaded by foliage, which will impair their development. The main stem is pinched after the first ovary has formed. In the future, excess shoots and leaves are not removed. The correct load on 1 bush is no more than 4 fruits.
If you leave more ovaries, the pumpkins will grow small. In mid-August, all growth points on the bushes are pinched, then the plants will redirect nutrients to the fruits, which will speed up the ripening of pumpkins.
Why pinching is done
Another important question. Indeed, it is not enough to know how to pinch a pumpkin; you also need to understand why it is done. We will try to answer these questions.
An experienced gardener can regulate early ripening and yield, as well as the quality of the fruit, based on knowledge of the patterns of growth and development of pumpkin plants. That is, you will have to become a kind of surgeon who, with the help of pinching and pruning, pinching, rationing flowers and fruits and removing excess leaves, achieves excellent results.
Formation Tips
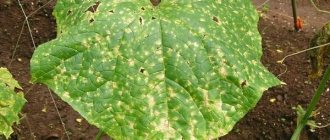
If several pumpkin bushes are planted, it is better to form them in different ways - into one, two and three stems, in order to later compare the result and choose the most suitable method for yourself. Pruning of shoots is carried out using a sharp knife or pruning shears. Before starting work on the next plant, the tool is disinfected so as not to accidentally spread a hidden infection, because the symptoms of many diseases do not appear immediately.
The number of ovaries is regulated taking into account the characteristics of the variety:
- for large-fruited plants - no more than 3-4 fruits per plant:
- for medium-fruited ones - no more than 4-8 pumpkins per bush;
- for small-fruited ones - no more than 10-12 pumpkins.
Laying lashes of the same length is not very convenient. You can simplify the process by pinching out the side shoots a little later, when more pumpkins have formed on them. Then the fruits will be arranged alternately and will not interfere with each other in the garden.
It is better to carry out pruning and pinching early in the morning, so that before nightfall the wounds have time to dry out and become covered with a film. After the formation of climbing pumpkins, their shoots are buried in the internodes, after which the areas sprinkled with earth are abundantly watered. As a result, the pumpkins will grow additional roots, which will provide them with increased nutrition.
Don't rush to remove leaves. Over time, they themselves fall apart, giving the pumpkins access to the sun. If one of the leaf blades extends directly above the growing ovary, it can be torn off, but there is no need to be excessively zealous in this matter. After all, it is the leaves that nourish the pumpkin fruits.
Reviews
I usually leave 3-5 leaves after the fruit and pinch it off. I cut out the extra side shoots. One more nuance. I leave 2-3 fruits on the vine (as a reserve), since they may fall off or rot. The excess can be removed later.
lucienna
https://forum.prihoz.ru/viewtopic.php?t=7313&start=105
Let your pumpkin be surrounded by care
Proper pinching will help us get more pumpkins, tasty and different. It worked once - it will turn out even better the next time!
Pumpkin planting options for easy formation
The pumpkin bed is prepared in advance by digging and fertilizing the soil in the fall. In the spring, all that remains is to add mineral fertilizer to the soil and loosen the surface with a rake. The vegetables are grouped in one bed so that it is convenient to distribute the lashes. To care for plants, make a wide row spacing in the middle.
You can plant pumpkin seeds around the perimeter of a large compost pile. In this case, the lashes of neighboring plants can be easily distributed so that they do not interfere with each other. An interval of at least 70 cm is maintained between neighboring specimens. On the contrary, you can plant pumpkins at the top so that their shoots “scatter” downwards.
The vertical method of growing crops has proven itself well. Pumpkins are planted in barrels. During the growth process, the shoots hang down and do not take up much space on the site, allowing you to save space for planting other crops. If the barrels are decorated, pumpkins will become an element of landscape design. Or, conversely, a trellis is built for the bushes, on which the lashes are directed upward and secured during the growth process.
An excellent option is to grow pumpkins on the south side of the fence. This method will be especially successful if the fence is not “solid”, but freely allows air and light to pass through. In this case, it is convenient to pinch the shoots and carry out other measures to care for the plant. In open spaces the fruits grow to a considerable size. It is advisable that the pumpkin not be in a strong draft; nevertheless, the culture is heat-loving.
A pumpkin trellis can look like a “hut” of stakes. When installing the structure, it is important to take care of its reliability, because as the pumpkins grow, the load on the support increases significantly. In this case, the space is spent very rationally. You can plant shade-tolerant crops inside the hut:
- aromatic herbs;
- bush beans;
- leaf salad;
- horseradish;
- spinach;
- peas;
- arugula.
A casual touch of the sun will be enough for these plants to grow. At the same time, the pumpkins will be illuminated from all sides, which will contribute to their full ripening.
A pumpkin on a pergola is quite a design decision. Typically, clematis and climbing roses entwin the arches. But a spectacular vegetable with bright fruits and large leaves is in no way inferior in beauty to flowers. At the same time, pumpkin agricultural technology does not suffer at all, the plant receives everything it needs and develops fully.
Useful tips
At the end of the story about pumpkin formation, here are some more tips for beginning gardeners:
- If for fodder vegetables limiting the number of vines and their proper pinching is not mandatory, then it is almost impossible to grow a tasty nutmeg, hard-barked or large-fruited pumpkin without these measures.
- Residents of northern regions, where summers are short and not very hot, are not recommended to plant muscat varieties of pumpkins in their beds : these plants take longer to ripen than other varieties of melons.
- Pumpkin grows best on loose and light soil . This plant needs a lot of light and moisture, but does not tolerate stagnation of water in the root system.
- Potatoes, tomatoes, peppers, eggplants, legumes, cabbage, carrots, beets and other root vegetables should be considered as ideal predecessors for pumpkin . But after cucumbers, zucchini and other representatives of the Cucurbitaceae (pumpkin) family, this plant cannot be planted.
- Before planting a bush, it is necessary to very carefully enrich the soil with organic matter and add basic mineral fertilizers to it - potassium, phosphorus, nitrogen, calcium, magnesium, iodine, etc.
- The bed for planting pumpkins should be well dug.
Did you know? In 2010, a pumpkin pie weighing almost 1.7 tons was baked in Ohio. Four years later, the Chinese made their own culinary creation, using the nutmeg variety of the berry. The dessert did not reach a ton of weight, but the fact that the dough for the pie was kneaded using... two excavators gave a special piquancy to the event! - Regular watering, which the plant loves, should be stopped a few days before harvesting : this way the amount of sugar in the fruit increases, which not only increases their taste, but also improves keeping quality, because sugar is known to be one of the best natural preservatives.
- The maturity of a pumpkin can be determined in different ways : the fact that the fruit can be removed is indicated by the drying of the stalk, as well as the hardening of the crust to such a stage when it is no longer possible to damage it with a fingernail.
- Large pumpkins are more suitable for preparations, small ones - for fresh consumption..
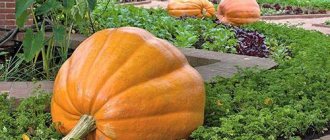
- Too large berries, weighing more than ten kilograms, are usually used for livestock feed ; the culinary value of such giants is lower than that of their smaller relatives.
- A cut pumpkin can be stored in the refrigerator for no longer than ten days , so when forming a bush you should try to get a harvest that can be quickly processed as a whole.
Pumpkin is a strong and unpretentious plant. However, in the struggle for a “place in the sun,” this crop can not only seriously compete with other inhabitants of the garden, but also deprive itself of development, directing all its forces to growth and not allowing numerous fruits to grow and ripen. You can get a good harvest of sweet and nutritious melons, while maintaining soil fertility, if you plan the formation of a pumpkin bush in time and correctly implement this plan.
Caring for a pumpkin after formation
After the bush is formed, it needs to be fed. During this period, the plant can be offered organic fertilizer, for example, a solution of manure or bird droppings. Mullein is diluted with water in a ratio of 1:10. For bird droppings, the proportions are different - 1:20. The composition should infuse for 5-7 days. Under each bush, add 1 liter of nutrient solution.
Green fertilizer made from nettle will have a good effect on pumpkin. The cut weed is placed in a barrel, filling half the volume. The remaining space is filled with water. Cover the container with a lid. The composition must be stirred daily. After about a week, the fertilizer is ready. Before use, a liter of fertilizer is diluted with 10 liters of water. Add 0.5 liters of infusion to each pumpkin.
The next feeding is carried out after 2-3 weeks (depending on the fertility of the soil and the condition of the plants). This time you can add complex fertilizer for pumpkin crops or wood ash. Varieties with long vines need fertilizing more often than bush pumpkins.
The period of ovary formation is the most difficult for the plant. The vegetable requires abundant watering. An average of 10 liters of warm, settled water is consumed per bush. The frequency of irrigation depends on the weather. Stop watering and feeding pumpkins a month before harvesting. By the time of full ripening, the fruits are painted in a color characteristic of the variety, and the stalk hardens.
All activities are important in caring for pumpkin, because it is a powerful vegetable that requires a lot of nutrition, moisture, heat and sunlight to develop. Timely pinching and proper formation will allow the plant to obtain everything it needs for growth. After removing excess greenery, the pumpkin will use nutrients rationally, and the illumination of the fruit will improve. Pumpkins will be able to ripen earlier and gain the necessary mass.
How to care
After pinching the lashes, the pumpkin needs care so that it regains its strength and directs it to the process of formation and further ripening of the fruit.
- at the initial stage, the formed lashes are sprinkled with earth, establishing the direction of growth;
- at the budding stage, artificial pollination of flowers is recommended, which makes it possible to increase the efficiency of ovary formation;
- water the bush with warm water, abundantly moistening the soil in the evening;
- after moistening, the soil is loosened to avoid the appearance of an earthen crust on its surface, which interferes with air permeability;
- They add organic matter, which is often manure mixed with wood ash.
Conditions
The plant is considered heat-loving, but does not have any special requirements, although it loves moist soil during flowering. This is due to the fact that during this period the root system begins to develop, which needs to become stronger. If there is not enough moisture, the ovaries will fall off.
Being a “sunny” crop, pumpkin requires enough light. It does not tolerate strong winds and cold, so there should be a fence/building on the northern part of the garden.
Lighting
It is advisable to plant the crop in areas open to sunlight. This is almost the only plant that easily tolerates exposure to direct sunlight, and for 6-8 hours. Despite this, slight shading is also acceptable, which is why many gardeners compact crops with corn.
Temperature
Pumpkin loves warmth, so the optimal temperature can be considered +25 degrees. Peculiarities:
- if the temperature drops below +8-10 degrees, the seeds do not germinate;
- at a temperature of +15-20, germination occurs slowly;
- at a temperature of +25-30 degrees, the seeds hatch in a couple of days.
Soil requirements
The soil for pumpkin crops should be saturated with humus, which will allow you to get tasty and aromatic fruits of high yield. It is advisable to drain the soil and fertilize it with compost. pH acidity should be 6-6.5. The upper soil layers should not be wetted, but groundwater can pass through the lower ones.
If we talk about crop rotation, the best predecessors are beans, cabbage (necessarily early) cabbage, onions, and garlic. It is not advisable to plant pumpkin after late varieties of tomatoes, carrots and cabbage. Beets, greens, and cucumbers are considered neutral. Pumpkin can coexist with beans, radishes, beets, and corn. It is forbidden to plant next to potatoes and tomatoes.