Quote from Lyubasha_Bodya's message
Read in full In your quotation book or community!
It can be a shame when expensive petunia seeds, which you have been looking for on sale for a long time (and finally found!), refuse to sprout. Or they sprout, but after a while they begin to get sick and die. The feelings that a failed gardener experiences in this situation are difficult to convey in words. Of course, everything has a reason, and the sudden onset of the pestilence also did not arise just like that. You have made a mistake in some way.
Situation No. 1. Petunia does not grow well
You have planted the seeds and are beginning to wait for the first harbingers of spring. You look into the landing container with hope: what if? But the 5 days stated on the package pass, and then the same amount, and nothing happens.
Possible reasons:
“Dead” seeds (old or dead due to improper storage)
Deep plantings (petunia needs to be sown superficially; seeds germinate only in the light)
Using pelleted seeds (sometimes the granules are too hard and you need to break them or soak them manually)
Wilting leaves
One fine day we notice that the leaves of the sprouts have withered and even begun to wither. Most likely, this is due to the soil, namely, its dryness or, conversely, it is so wet that it has begun to sour.
How can we remove this?
If there is dry soil, pour warm water over it, then after a quarter of an hour carefully loosen it.
If you have been diligently and systematically watering the seedlings all the time, then we check the root system. To do this, carefully remove the plants with a lump of earth from the container and carefully examine its roots. We must have a densely growing system of white roots. If it has a creamy or yellowish tint, then we will definitely review the watering regime.
- We use less water, but treat them to water treatments (spraying). If the plants are large enough, then it makes sense to transplant them into larger containers with the addition of fresh soil.
Also, the reason why planting material withers is the difference in soil temperature in containers, which is lower than the room air temperature. This often happens when the containers are on the windowsill, and cold air blows from the window along the windowsill, cooling the roots of the sprouts.
How can this be avoided?
We build a stand 15-20 cm high on the windowsill using various means (boards, large boxes, containers, etc.). We are already placing containers with seedlings on it. Cold air will now circulate under the constructed structure and will not “cool” our pots.
Situation No. 2. The seeds sprouted, but did not shed their seed coat
This is bad and indicates that the sprout does not have the strength to drop the seed on its own.
The sprout does not have enough strength to shed the seed coat and straighten the cotyledons
There may be two reasons for this problem:
1. air, making the seed shell “impenetrable”
2. Old or improperly stored seeds, the sprouts of which are frail and difficult to adapt to independent life
In the second case, perhaps the sprouts are not worth saving. Even if you get rid of their “cap”, there is a high probability that they will soon die out from something else - the immunity of such plants is too weak and the survival rate is scanty.
But in the first case, it is very possible to fight for the life of the seedlings. First, try increasing the humidity. For example, cover the container with seedlings with film (if you have not done this before). Try to soak the shell - drop water from a pipette or syringe onto it, wait until it softens, and then carefully pry it with a needle and remove it. This must be done, otherwise, if the cotyledons do not unfold, the sprout will die.
Transplanting seedlings into unsuitable soil
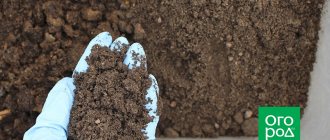
An important role in the development of plants, including at the seedling stage, is played by the composition of the soil and its acidity level. There are soils that are initially difficult to grow most plants in. This is, for example, heavy loam, clay or sandy soil.
If you do not correct this feature of the soil, you may not get a harvest. Also, seedlings are very susceptible to soil acidity levels. For example, most vegetable crops prefer slightly acidic, neutral and slightly alkaline soils, but alkaline soil will not suit them.
What to do: in order to globally improve the composition of the soil, special techniques are used. So, clay soil and loam are limed, sand and peat are added, sandy soil is enriched with organic substances and mineral fertilizers. Ash, dolomite flour, lime, gypsum or chalk are added to acidic soil. Alkaline soil is acidified with high-moor peat, fresh manure, rotted pine needles and some mineral fertilizers. Of course, once the seedlings are planted, it’s too late to dig up the garden, much less add fresh organic matter to the soil. But you can try to adjust the composition of the soil in the desired way directly under the seedling bush.
Situation No. 3. The stem of the sprout becomes thinner at the base and breaks. Seedlings fall
Many novice gardeners have a question about why petunia seedlings are falling. Most likely, the seedlings suffered from a serious disease with an interesting name - “black leg”. It manifests itself like this: a dark area forms at the base of the stem, which softens and begins to rot. Very soon the sprout ceases to support its own weight, falls, and the stem breaks.
The stem of the sprout turns black and breaks - this is how the “black leg” manifests itself.
Blackleg is a fungal disease, that is, its causative agents are soil fungi. They live in any substrate, but behave entirely peacefully. However, in some situations they begin to become harmful and destroy green spaces. This usually happens at high air and soil humidity. Some gardeners like to create “greenhouses” for their seedlings, arranging extreme humidity there at 100% and at the same time forgetting to ventilate them. In such a climate, “black leg” is practically guaranteed! Greenhouses need to be ventilated every day, the covering material (film, glass) should be wiped clean from drops of condensed water. High humidity is the main reason why petunia seedlings fall. Thickened plantings and excessive use of nitrogen fertilizers also contribute to this disease.
If you notice signs of “black leg” on your seedlings, immediately get rid of the affected sprouts - there is nothing you can do to help them. Let's try to save what's left. To do this, it is very desirable to completely change the soil, but this is not always possible, and particles of soil and fungal microorganisms will still remain on the roots of the sprouts. Therefore, it is more realistic to simply disinfect the soil. A 40% formaldehyde solution is very effective in this regard. You can also use a strong solution of potassium permanganate or any fungicide, for example, Maxim.
How and when to apply fertilizer
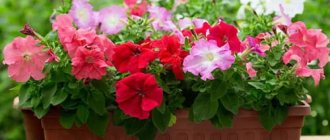
Fertilizers should contain a minimum amount of nitrogen. At the beginning of summer, prepared seedlings can be planted in the ground, in hanging flowerpots or in balcony boxes. Seedlings must have a well-developed root system. Petunia grows and develops well on nutritious, well-drained loamy, sandy loam or chernozem soils with a neutral reaction.
Plant plants in well-lit, sunny areas of your garden. Large-flowered varieties are more demanding of warmth and good lighting than small-flowered varieties. It is worth noting that petunias are very demanding of nutrients, so in order to achieve lush and continuous flowering, young bushes must be fertilized regularly.
As fertilizers, you can use universal complex fertilizers or fertilizers for flowering species, which are balanced in the content of potassium, phosphorus and iron. The first fertilizing can be done two weeks after planting the seedlings in open ground or balcony boxes. Fertilizers are applied simultaneously with watering.
The following feedings are carried out every two to three weeks. You can also apply organic fertilizers - humus or compost, but fresh manure is strictly forbidden, as this can provoke the appearance of gray rot or other dangerous fungal diseases.
Petunias need to be provided with regular, moderate watering, avoiding prolonged drying out of the soil. But remember that overwatering or stagnation of moisture in the soil can lead to rotting of the root system.
The frequency of watering depends on the climatic conditions of the region. Water the plants under the bush using settled or rain water. Too much rain is quite dangerous, as it can lead to the cessation of flowering or the shredding of flowers.
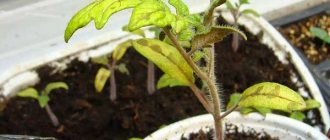
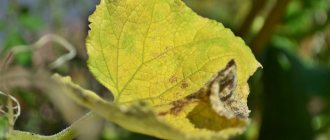
Situation No. 4. Petunia seedlings turn yellow
Yellowness on petunia seedlings not only looks unsightly, but is also a sign that not everything is in order with the plants. If the upper, young leaves turn yellow, and not evenly, but between the veins (the veins remain green), then this is chlorosis - a lack of iron. The seedlings stopped absorbing this microelement and began to turn yellow and weaken. Chlorosis occurs when the soil becomes alkalized, due to its poor quality or excessive watering.
Usually, external application of iron in a form accessible to the plant – chelate – helps correct the situation. Iron chelate is included in all drugs against chlorosis, for example, such as “Ferovit”, “Iron Chelate”, etc.
Chlorosis sometimes occurs due to pest damage, for example, during a spider mite infestation
If the lower leaves are affected by yellowness, then the problem is an overflow or lack of nitrogen. Start feeding the seedlings well with nitrogen-containing complex fertilizers or adjust the watering.
What to do to make seedlings grow well
In order for seedlings to grow strong and healthy, they must be watered regularly and correctly - the soil should always be moist, but not waterlogged. But it’s also not good to overdry.
Good lighting must be provided. If there is little natural sunlight, you need to illuminate it with artificial lighting.
Petunia loves fertilizers very much. We must not forget to feed her with useful micro- and macroelements, as well as vitamins.
Good soil is important for seedling growth.
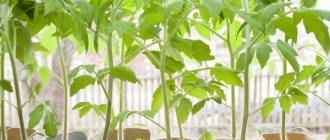
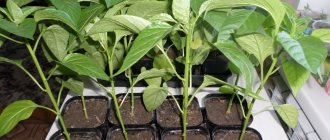
Situation No. 5. Petunia seedlings stretching out
Petunia seedlings are stretched due to lack of light and heat (relative, of course, for seedlings and 25°C is already very warm). Therefore, it is not advisable to sow petunia in February if you do not have good lighting. Natural light is still very scarce, and the batteries are burning with might and main. The seedlings will stretch.
If this happens to your seedlings, do not despair. First, trim (pinch) the tops of the sprouts and bury the stems at the cotyledons, and then either provide enough light for the seedlings or reduce the temperature at which they are kept. Then the appearance of your little petunias will return to normal.
An elongated petunia needs to be pinched and the lighting improved, then it will begin to develop correctly and will soon fluff up
How to protect seedlings from pests
If none of the above points is suitable as a probable cause for the growth of seedlings to stop, then perhaps this is due to the influence of pests that gnaw at the roots of the seedlings. This happens if the soil is not sufficiently disinfected before planting seedlings, or, again, the conditions for caring for young plants were violated.
What to do: in this case, the seedlings are also taken out of the ground and their roots are studied, as well as leaves, plant stems and holes where they were planted. If larvae are found in the ground, they are collected manually or the soil is spilled with insecticides or potassium permanganate, and the damaged plant roots are treated (as described above). Depending on what pest attacked the seedlings, a specific control agent is used.
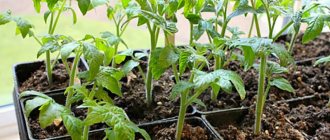
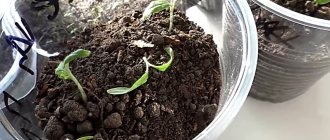
Situation No. 6. Petunia seedlings have stopped growing
Seedlings stop developing with a small volume of soil, when all the food that was initially there has already been “eaten.” Distill the sprouts into larger containers, and after 2 weeks begin to “feed” them intensively. If there is enough soil, but the seedlings still stop growing, then, in any case, they lack microelements. Often - boron. Many complex fertilizers contain this microelement, but you can use a simpler and more effective method - spraying the seedlings with a solution of boric acid (0.7 g per 1 liter of water). After targeted feeding, growth is usually restored within 7-10 days.
It’s wonderful when planted petunia seeds sprout with vigorous sprouts after three days, then, after a month, they grow to a quite decent 5-6 cm, and after another month they bloom. Everything is fast and clear - everything is according to a plan pre-designated by the manufacturer. But in life there are often disappointments. Well-hatched seedlings suddenly slow down their growth or stop developing altogether. A week passes, then two, and the young petunia sprouts seem to have fallen asleep. What to do? How to speed up the growth of seedlings?
How to water correctly
You need to water with settled water at room temperature. After some time, they are picked and transplanted into separate small seedling or peat pots. Picking is carried out after the appearance of three or four true leaves.
To prevent strong stretching of seedlings, the pots are moved to a darker, well-ventilated place.
A month after transplanting, the pots with young seedlings can be taken out onto the balcony or veranda. For hybrid forms, as well as plants that grow quickly, for better formation of bushes and abundant flowering, it is necessary to pinch the shoots at the level of 4-5 pairs of leaves.
The sooner you pinch, the more new shoots will appear on the bushes. The second pinching is carried out when the length is about 20 cm. Further pinching is carried out as it grows. After the seedlings have grown a little, you can fertilize them with complex nutrient mixtures.
Proper nutrition - “developing” fertilizers
At two weeks of age, petunia seedlings already need feeding. If your seedlings are already mature and have been growing for a long time in the same soil, in which there are no more nutrients left, it is not surprising if the sprouts begin to “slow down”. Petunia does not grow well without regular feeding.
Buy liquid or dry fertilizer with a high nitrogen (N) content - this is what is needed most at seedling stage for the formation of the above-ground part of the plant. Don't forget about the roots! To develop them, fertilizer manufacturers add phosphorus (P) to their products. Potassium (K) is responsible for budding, flowering and fruiting, so this microelement can be present in small quantities in fertilizers for feeding seedlings.
Petunia seedlings are watered with fertilizer, the concentration of which is 2 times less than indicated on the label (the instructions indicate the ratio of fertilizer and water for adult plants)
It is very desirable that the fertilizer for your petunia seedlings, in addition to the NPK formula, also include other important microelements: iron, boron, magnesium, zinc, etc. But only in chelated form (sometimes in salt form - not very successful)! Chelates are 2-10 times better absorbed than microelements in inorganic salts. Therefore, when using fertilizers with chelates, you can be sure that the microelements have reached their destination. Microelements begin to act very quickly and you will see the result!
Preparing the soil for growing petunia
A soil mixture is prepared for the seeds, which should be nutritious and breathable. When using ready-made soil, it is recommended to add a small amount of sand. In mid-February or early March, the seeds are sown in an even layer in flower boxes, sprinkled with soil on top and watered well.
The containers are moved to a well-lit place, since for faster growth, the seeds need a good level of lighting.
You can provide artificial lighting with a table lamp or fluorescent lamps. Flower boxes are covered with glass or plastic film on top. From time to time, the cover is removed, the soil is sprayed and the condensation that has formed is removed.
The first shoots appear a week after sowing the seeds. At first, seedlings grow rather slowly, since all their energy goes into forming the root mass. During this period, it is very important to ensure regular watering of young bushes, preventing the soil from drying out.
Stopping seedling growth
Many crops go through a picking process. Sometimes after this you may notice that the seedlings stop growing. This may be the result of damage to the roots of young plants when transplanting into containers.
What are we doing?
We spill the seedlings under the root with any stimulating drug (for example, “Kornevin”, “Epin” or others), based on the instructions in the attached instructions. After 2-3 weeks we repeat.