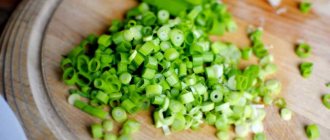
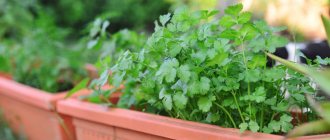
The body needs vitamins at any time of the year. But in winter, when the immune system weakens, they are especially necessary. Green onions, which are easy to grow at home, will help make up for the deficiency.
For this matter, it is better to use multi-nest varieties.
You can determine which ones are suitable in the following way: cut off the top of the turnip by 1/3. If several green primordia are visible in the section, then it is multi-nested and suitable for obtaining a feather.
A good growth stimulator will be soaking the bulbs in water with the addition of Kornevin or Epin.
Immediately before planting, a disinfection procedure is carried out, each one is immersed in a weak solution of potassium permanganate for 1 hour, then slightly dried (don’t forget!).
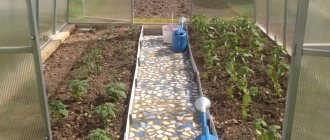
Into the ground
The easiest way is in the ground with any container. To do this, use containers of the available size, which are filled with soil. The container must have a drainage hole for water to drain; the vegetable does not tolerate stagnation of moisture.
Planting material needs to be prepared. To do this, cut off the top part of the turnip by 1 cm, then plant it at a distance of 1-2 cm from each other, pressing the bottom to the ground. It is important to water so that water does not fall from above, otherwise the process of rotting will begin.
Another interesting way is pavement. The heads are planted tightly together in a container with soil, leaving no distance between them. After planting, the container will look like a piece of pavement, and the onion will look like small pebbles on a cobbled street.
With this method, the tops are not cut off, since watering is carried out from a watering can from above, using the “sprinkling” method.
Afterwards the container is placed in a dark place. As soon as the sprouts appear, the container is moved to a bright window; after 2-3 weeks the greens are ready for cutting and use in the kitchen.
Using egg cells in the garden
Ordinary cells from store-bought eggs can be useful to you at the dacha. Today we will talk about interesting options for using them. If you have your own secrets for using egg cells, and you are ready to share them, be sure to tell us about your experience in the comments to this post.
Read on dacha6.ru:
Onion cactus
The neck of a five-liter container is cut off by 5-10 cm, the bottom is pierced in several places, ensuring excess moisture is drained. Holes with a diameter of 4-5 cm are cut out on the sides of the canister in a checkerboard pattern. A drainage layer of 2-3 cm should be placed on the bottom.
It can be sand, small pebbles, vermiculite or expanded clay.
For planting on feathers, use medium-sized onions or sets. The holes for sowing should be much smaller - 1.5-2 cm. The canister is filled with soil, placed on a tray, and watered. Water for irrigation should be settled and at room temperature.
We plant it in the resulting holes so that the “tail” is outside the edge of the canister. The bottom of the onion is pressed tightly to the ground, the seed is buried 2/3 into the soil. With this method, watering is needed once a week.
The bottle should be unwrapped daily so that all sprouts are evenly illuminated.
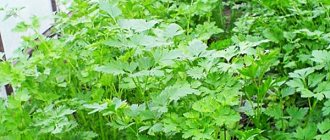
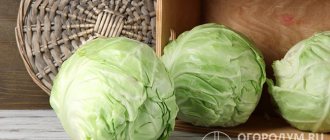
Always clean strawberries
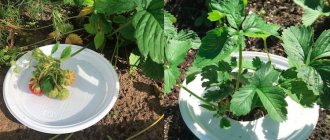
There are varieties of garden strawberries that have short flower stalks and large berries. When the harvest is formed, there is inevitable contact between the fruit and the ground. The quality of the crop suffers from this. The berries are dirty. They are attacked by insects.
A gray coating appears on the surface of the fruit. They are rotting. Convenient stands for strawberries of different shapes and sizes are made from cardboard egg cells. In square trays, cut a round hole in the center. Small trays with lids are cut into 2 parts. Place them directly under flower stalks with ripening berries.
In water
An ancient method of obtaining greens that our grandmothers used. An onion is placed in a glass of water so that the turnip only touches the water with its bottom. For such a landing, large heads are chosen that exceed the diameter of the vessel.
If it is smaller than a glass and falls inside, use simple devices. To do this, you need thick cardboard or plastic lids. Cut a strip of cardboard so that it exceeds the width of the glass.
I recommend watching the video (be sure to watch it to the end), you will learn a lot of new things:
A circle is cut out on a strip of cardboard, 2-3 cm smaller than the diameter of the container.
Place a strip of cardboard on top of a glass filled with water, or put on a lid with a hole. Then place the bulb so that the bottom is slightly immersed in water. With this method, you will have to constantly ensure that the water does not evaporate by regularly adding liquid to the glass.
The glass container should be washed periodically with running water.
Green Onions in Egg Trays: Advantages and Disadvantages
Advantages
home hydroponics are as follows:
- low price;
- ease of implementation;
- does not require soil;
- reuse of long-degradable material;
- there is no rotting or smell from it if the rules for planting are followed;
- good and stable harvest;
- The bulbs can be eaten after forcing the feather.
Disadvantages
this method has little. Here they are:
- fragility of cardboard containers - the lower tier will get wet and fail;
- plastic trays require replacement over time;
- the need to monitor the water level in the pans.
Egg container
Holes are made in the egg tray to drain the water, and the container is placed on a tray. For this purpose, you can use the lid of an egg tray, or a second tray that has no holes.
10-20 bulbs are planted in the recesses of the container. For this method, you can also use sets; they are planted in 2-3 pieces in one recess of the tray. In this case, the container should be filled halfway with earth.
The tray is filled with 1 cm of water, and egg trays with plantings are placed on top. You need to water through the tray. With this method there will be less rot, because the upper leaf plates remain dry.
Preparing egg containers for planting
Hydroponics trays can be made from any egg tray - plastic or foam, as well as cardboard.
Preparing plastic or foam containers
is as follows:
- Separate the bottom of the container from the top.
- The bottom of each recess in the lower part is cut out.
- Remove unnecessary holders and latches.
- Two skewers (sticks) made of wood or bamboo are attached to the top part with tape or glue in the form of crossbars.
- The lower part of the tray is placed on the tray cover.
Preparing Cardboard Trays
happens a little differently:
- Cardboard boxes are treated with hydrogen peroxide for disinfection.
- The bottom of each recess is cut off.
- Several containers prepared in this way are inserted into each other so that their recesses coincide.
- Stacks of 4-5 trays are placed in a tray or similar container that is the right size.
Onion. The illustration for the article is used under the standard license ©ofazende.com
cellophane plantation
For growing in a plastic bag, choose a high-density bag. The bag is filled with 10-15 cm of soil, then the bulbs are planted on the surface of the ground.
Instead of soil, you can use wet sawdust or moistened toilet paper folded in several layers. Make sure that the germination medium is not too wet, but just moist.
The bag with the planted material is tied at the top, creating the necessary microclimate inside and placed in the dark. As soon as the first sprouts appear, place the bag on the windowsill, but so that there is no draft.
As soon as the feathers rise 10 cm, the bag is untied and not tied again. Care consists of regularly moistening the soil, sawdust, paper, etc.
Egg Tray
In such a convenient device you can sow seedlings of vegetables and flowers. Or you can start forcing green onions. Take a plastic container and cut off the bottom from one of the halves. Now we place the bulbs with their root system in the recesses of the second half of the device. Add clean water. In a warm and bright place, for example, on a kitchen window, such greenery will always come in handy.
Continuing the topic of seedlings, let’s remember packaging for juices and dairy products. Containers well washed and cut into square containers are a great idea for planting seedlings. On the window they stand closely, which significantly saves space.
Cut-off halves of transparent plastic bottles make good greenhouses for seedlings planted in a permanent location.
Found a violation? Report content
A 5-liter plastic bottle with onions planted in it will not only provide a harvest of greenery, but will also become an original decoration for the windowsill. This method of growing will require time for preparation, but will please you with the end result.
Into the sawdust
Wood chips are a good growing medium. To prevent the development of a pathogenic environment, the sawdust is first poured with boiling water for 10-15 minutes. Then the water is drained, the sawdust is cooled and slightly dried.
The selected container is filled with sawdust, slightly moistened with water. The bulbs are placed tightly, leaving no distance between them. The container is placed on the windowsill in a warm place. Further care consists of regularly moistening the sawdust.
Planting onion sets
The principles of planting onions
on greens
are the same for any type of trays used for making pallets.
- Select small bulbs with a diameter of two to three centimeters. You can take larger ones, but not larger than the cell size.
- Only healthy bulbs are selected - without rot and softness.
- Remove the top layer of scales.
- The top of the bulb is cut off by one or two cm. If it has sprouted, it is left unchanged.
- The root growth site is pierced two or three times with something sharp.
- Prepared onions are soaked in warm water for one or two days. The water is changed every 12 hours.
- After this, the onions are dried. It can be planted as soon as the scales become dry.
- The bulbs are placed in the cells of the pallet with the roots down.
- Water is poured so that it only reaches the roots.
Plastic greenhouse
You can buy a ready-made greenhouse in a specialized store, or you can make it yourself. A five-liter plastic canister is cut lengthwise into two uneven parts: the larger part is a container for planting, the smaller part will play the role of a closing lid.
The bottom of the canister is pierced in several places to ensure the drainage of excess moisture. The container is filled with soil and watered with warm water. The heads are planted close to each other, covered with a lid, then the container is put in a warm place.
When the feather grows 5-10 cm, the lid on the canister is opened for ventilation and air circulation.
To ensure that the green feather grows strong and healthy, add wood ash to your watering (1 tablespoon per liter of water). Fertilizing with ash is carried out no more than once every 10-15 days. It is cut when it grows to a height of 30 cm. As soon as the bulb becomes soft, it is thrown away and replaced with a fresh one.
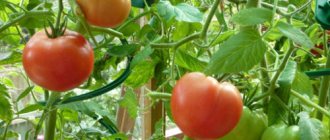
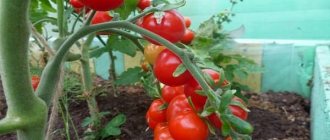
Fruit protection
A number of varieties of tomato or cucumber bushes produce their fruits close to the ground. When tomatoes come into contact with the soil, they rot, are susceptible to being eaten by insects, become dirty, and are vulnerable to diseases. Using egg trays, create devices that prevent vegetables from coming into contact with the ground.
Choose one of the ways to organize the protection of ripening vegetables:
- mulching between rows. Cut cardboard into strips or place containers between planting rows. The fruits will fall to the surface of the packages. Weeds will not grow through the mulch layer; moisture will remain inside the soil;
- Place the container under individual hanging fruits. The pouring vegetable will not come into contact with the earthen surface and will remain clean.
The use of egg trays to protect plant fruits not only prevents contact of ripening vegetables with the soil substrate, but also maintains soil moisture and prevents the growth of bushes and the germination of weeds.