Vitamin deficiency and winter are practically synonymous. But this is easy to fix if you often eat fresh vegetables, fruits and herbs. Only the latter becomes much more expensive in the cold season, and deteriorates even more in quality. The ideal option is to plant and grow onions on your windowsill at home: we will tell you how easy it is to do this.
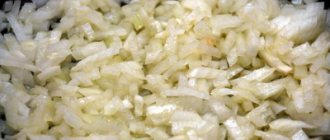
Green onions contain a large amount of vitamin C, so they are excellent for preventing flu and colds. Fiber will help the digestion process, and vitamins K and E will take care of your skin and hair.
The best part: anyone can grow green onions on a windowsill—even a child. Choose the method you like and just follow the simple rules.
Which variety is suitable for growing at home?
Due to its prevalence, onions remain the most popular option for growing at home. But other varieties are also capable of producing a good harvest even in winter; we will list a few.
| Batun | It is also called Tatar or winter. It has excellent productivity. There are no bulbs, so it is planted in the ground. |
| Schnitt | It is distinguished by delicate and long feathers with a pleasant aroma. |
| Multi-tiered | Very unpretentious, requires virtually no maintenance. It withstands cool temperatures well, so it is in demand when grown on a windowsill. |
| Leek | There are no bulbs, the visual difference is the garlic-shaped feathers. |
| shallot | An easy-to-maintain onion that is distinguished by its high yield and ease of care. |
| Slime | Another variety that does well in cool atmospheres. It grows quickly, and the taste and smell are slightly garlicky. |
| Parade | Very tasty and even slightly fleshy leaves. |
| Rostovsky | It is not too afraid of overwatering, as it has increased resistance to fungal diseases. Gives a wonderful harvest. |
| Black Prince | Multibud - one bulb can produce many feathers. |
| Amber | It is distinguished by its dense greenery, and the bulbs themselves are not at all afraid of diseases. |
| Bessonovsky | Not the best variety for home growing - the feathers are dense and short, and the yield is average. |
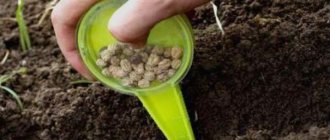
From a bulb or seeds (nigella)?
The good thing about growing feathers from a bulb is that you can get a harvest in less than a month. But some gardeners stick to traditional options and plant seeds.
In addition to the fact that growing from seeds takes longer, this method itself is also more energy-intensive, since it requires careful preparation of nigella.
If you want to grow onion sets from seeds, it is better to follow the following instructions:
- Seeds must be divided into groups by size and disinfected.
- Soak the bandage in a solution of sulfonamide with water and place the seeds on it for half an hour.
- Rinse and soak in a biostimulator solution for a day. “Epin” or “Cycron” are best suited - they contribute to the good development of the plant’s root system.
- Rinse again with water, place in a cool, dark place on damp gauze, water periodically, avoiding drying out.
- Keep in this state until white roots appear.
- Fill the growing container with soil and place the seeds at regular intervals.
- Cover with film to create a greenhouse effect before germination. Then take it off.
- Moisten by spraying 2-3 times a week.
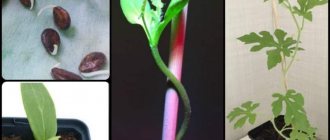
You need to understand that the result in the first years may be like in the next photo.
How long does onion seed remain able to germinate?
Important. For sowing, quality seeds should be used.
It is advisable that they be collected no earlier than a year before planting. Planting material loses its viability very quickly. Technically, it is 3 – 4 years, but after two years the seeds may not sprout.
In one season, almost half of the seeds may not germinate. When purchasing, many unscrupulous sellers hide their expiration dates, therefore. If possible, it is better to prepare planting material yourself.
Choosing the right onion
To keep your greens happy all winter, you need to choose a good and correct bulb:
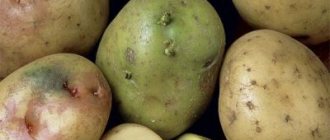
- size - up to 5 centimeters in diameter. If the bulb is larger, then it should already have a sprouted shoot. Or germinate it yourself. There is the following rule - too small bulbs will not please you with a bountiful harvest, and too large ones will make you wait a long time;
- there should be no rot or damage;
- the husk should shine;
- The better developed the root system, the better.
If the bulb has not sprouted, then it can be stimulated:
- Cut off the top or make a cross cut.
- Soak the onion for half an hour in a solution of potassium permanganate or ash suspension.
- Immerse in clean growing water.
If you plan to grow onions in the ground, then you should remove the top scales from the bulb.
Preparing for landing
How quickly and in what quantity the onions on the window will produce greens will depend on how correctly the material is prepared. There are several steps in proper preparation:
- Immerse the bulbs in a solution of potassium permanganate for an hour - this will disinfect them.
- Rinse.
- Soak in warm water and leave for 1-2 days - depends on the size of the onion.
- Remove the top husk, trim the crown by 1–1.5 cm.
- Soak in the Epin solution according to the instructions.
Properly storing onion sets before planting
Onion sets are varieties that germinate in the first year after sowing the seeds. They are not suitable for salads and other cooking, which is why they are popular among gardeners for growing herbs on the windowsill.
For good results, it is important to plant the bulbs next to each other, very tightly.
You need to store them in a dark, cool place and don’t worry if the bulbs begin to sprout - this is even good: it means you can get the harvest faster.
Selecting and preparing the right container and soil
Both the container and the soil depend on how exactly you will grow the onions - in water or soil. The recommendations are simple.
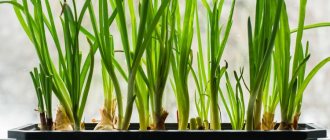
In water
To grow onions in water, you can use almost any vessel: a pot, a jar, or even a glass of water. The most important thing is to carefully evaluate the width of the neck so that the onion does not fall completely into the water - only the lower part should be immersed.
You can also be creative in creating the ideal environment. For example, some housewives use plastic containers to store food.
The container is filled with water, and the top is covered with thick cardboard with holes cut out for onions.
In the ground
When growing onions in the ground, it is better to select pots, boxes and containers no higher than 10 centimeters. In addition to the soil itself, you will also need drainage to the bottom.
Soil acidity should be at pH 6–7. In summer you can use ordinary soil from your dacha, and in winter you can buy it in a store.
Features of a hydroponic installation
For those who like to enjoy delicious green onions in the cold winter, there are various devices. Their actions are based on the hydroponic principle: the container is filled with water, the bulbs are placed in the holes at the top, and the lower part should not come into contact with water. Thanks to a special compressor, a wet suspension is formed inside the growing tray. This eliminates the risk of root rotting. According to experts, with this method of growing green onions at home on the windowsill, feathers grow much faster than using other methods.
Home conditions
Growing onions at home is very easy. Even a child can cope with this: it’s not for nothing that such an experiment was previously carried out in biology lessons, and all observations were written down in a notebook. Onions are very unpretentious, so they will take root on any windowsill.
Boarding time
The good thing about onions is that you can harvest them quite quickly - the feathers for the salad will be ready within 3-4 weeks after planting. The length of the leaves should reach approximately 25–35 centimeters. This is an important mark, since the feather can continue to grow, but in this case the bulb will deteriorate and the entire harvest will be lost.
If a pre-sprouted onion was used, then the harvest can be harvested earlier.
There are no strict recommendations for planting onions, but most begin to act closer to mid-winter. The fact is that the onion begins to sprout precisely at this time, ending its dormant period.
If desired, onions can be grown on the windowsill all year round if you control the temperature and lighting. But the main thing is to germinate the bulbs yourself.
Place
The most popular place for a container with sprouted onions is the windowsill. This ensures sufficient lighting for the plant.
If the onion variety is cold-resistant, then it can be placed on a glazed balcony/loggia or on a north window.
But the best thing is a southern, sunny window, regardless of the cultivation method.
Lighting
In winter, with short daylight hours, additional lighting will not hurt. Both special lamps and ordinary fluorescent light bulbs are suitable for this. It is advisable to give the plant access to light 12–14 hours a day.
Watering
In this regard, onions are a rather whimsical plant. It should be watered 1-2 times a week and carefully monitor the condition of the soil:
- too high humidity will lead to rotting of the root system and the bulb itself;
- Too dry soil will cause the turnip to dry out and stop the growth of feathers.
It is best to use settled water at room temperature because:
- too hot water can provoke the appearance of harmful insects or the development of diseases;
- too cold and growth will be inhibited.
Before harvesting, reduce the amount of watering.
Temperature
Onions do not like heat - a temperature of 15–20 degrees is much preferable for them. If the windows are located on the sunny side, then you need to make sure that the vegetable does not overheat.
To make sprouts appear faster, you can raise the temperature slightly - up to 25 degrees.
But we must remember that at 30 degrees and above, the leaves stop growing: this is the main reason why onions do not grow or germinate on the windowsill.
Drop off frequency
The disadvantage of onions is that they only produce once. And if you plant a lot of vegetables at one time, there is a risk of simply not eating all the onions.
As soon as the feathers reach 20-25 centimeters, they must be cut off immediately, otherwise it will fade. Storing a fresh product will also not work - it simply won’t survive.
The correct solution is to plant the bulbs in batches. The average option is about 10–15 bulbs per week. This amount is enough for a large family, and then you should focus only on your needs.
The benefits of onions
It is better to eat onions immediately after cutting. Fresh feathers have the richest aroma. Finely chopped green onions are an excellent addition to sandwiches, salads, eggs and cottage cheese. It not only improves the appearance and taste of dishes, but also increases appetite and provides vitamins.
Onions, in addition to essential oils, contain many minerals:
In addition, it is rich in bactericidal substances, vitamin C. This is an excellent, although underrated, vegetable that improves immunity and even cures hangovers! It effectively fights hypertension and eliminates bad cholesterol. Also recommended for diabetics as it reduces blood sugar.
Conclusion
Even in the middle of winter, we can grow fresh onions ourselves on the windowsill of our own apartment or on the balcony. This is an excellent addition to a winter diet poor in vitamins. Onions are useful from late autumn to winter, when we lack fresh vegetables.
Growing methods
Onions are a fairly unpretentious plant, so they can be grown in a huge number of ways. They differ from each other in the technology and material for cultivation.
Method 1. In water
This is one of the easiest and most popular ways to get green onions even in winter - it is often used to instill in children a love for the healthy onions. The advantage is that the window sill will always be clean - without soil.
Step-by-step instruction
The operating principle is extremely simple:
- Remove the old husk and make a cross-shaped cut.
- Place in water so that only the roots are in the water.
- Keep for 10 days in a cool, dark place away from sunlight.
- After 10 days, place it on a lighted windowsill.
- Add water if necessary.
Useful tips
To make onions healthy, juicy and tasty, it is better to follow the advice of experienced housewives:
- pre-treat the growing container with a solution of potassium permanganate;
- wash the roots with running water once a week;
- use only small dry heads;
- keep away from radiators and change the water twice a day until the root system becomes large enough;
- after the first shoots appear, change the water daily;
- periodically remove the onion from the water and dry for 2 hours - this will protect the onion from rotting;
- to stimulate feather growth, cut off greens frequently;
- Wash the growing container once every 1–2 weeks.
Method 2. In the ground
This is a more traditional option for gardeners, so it is also often used. The main idea here is not the soil, but where it is buried along with the onion.
In a plastic bottle (onion cactus)
This method is useful for housewives who need to save some space. To grow green onions, you will only need a 5-6 liter plastic bottle - this is the optimal size. For the first experiment, you can use a two-liter container.
- It is necessary to make holes over the entire surface with a diameter slightly smaller than the bulbs themselves. The easiest way to do this is with a knife or scissors. Leave the bottom of the bottle without holes so that water does not leak out when watering.
- Place drainage on the bottom, then soil. Place the bulbs with their heads facing the holes.
- Cover with soil.
- Make several layers of earth-onion-earth-onion. It is important to press the bulbs tightly into the holes so that the soil does not spill out.
- Water. During feather growth, it is advisable to turn the bottle on different sides towards the sun so that the entire onion receives the same amount of light. Then water once a week.
In a pot or box
This option is more traditional and not much different from the previous one, but, compared to a bottle, it will require much more space.
The most important thing in this case is to prepare the bulbs well. It is advisable to let them sit for 1-2 months so that they sprout.
For landing we will need:
- the bulbs themselves;
- priming;
- capacity;
- settled water.
The operating principle is again quite simple:
- Fill the container with soil to about 5–7 centimeters.
- Place the bulbs on the ground at a distance of 2 centimeters from each other. There is no need to deepen them - it is enough that the roots only touch the ground, otherwise the onions may rot. But there are exceptions to this rule - sets and leeks, they need to be deepened a little.
- Moisten the soil with warm water without touching the bulbs.
- Place the container in a dark and cool place for 5-6 days until the first shoots appear. Then place it on a lighted windowsill. If you planted sprouted onions, you can skip this step.
Yes, it is easier to grow green onions in water, but it is in the soil that you can get a richer harvest. This happens due to the content of vitamins and nutrients in the soil.
Method 3. In sawdust
Growing green onions in sawdust is very similar to a similar option with soil, only it is much cleaner. They stimulate the growth of the root system, due to which you can grow a good harvest.
Any sawdust is suitable - both coniferous and deciduous plants. Even the size of the chips doesn't matter.
But the only thing that is important is to treat the sawdust so that bacteria do not breed in it:
- Soak sawdust in boiling water for 10 minutes.
- Drain the water after cooling.
- Can be placed in growing containers, filling them 2/3 full.
For growing, it is best to use a low box - up to 5 cm in height. Even a kitchen baking sheet will do. In this case, the bulbs are placed closer to each other, slightly deeper.
Water once a week and make sure that the sawdust is not wet - only light moisture is permissible, otherwise fungus may develop and the process of rotting may begin.
After 20–25 days you can harvest.
Useful tips
For the first few days, you can place the box/container in a bag, inflate it, close it and place it in a dark place for shoots to appear - this will greatly speed up germination. After small green feathers appear, remove the bag and place the container with the bulbs in the sun.
There are a few more secrets that will help you enjoy a wonderful harvest:
- If you add coal or wood ash to sawdust when soaking, the material will be better protected from bacteria and disease.
- When the roots grow, the container is washed with a solution of hydrogen peroxide: 5 ml per 0.5 liters of water - this will increase the immunity of the bulbs.
- When watering, avoid getting water on the bulbs themselves, otherwise they may rot.
Method 4. In a hydroponic setup
A hydroponic bed is a special device that will help you enjoy healthy green onions even in winter.
The installation looks like a regular box with a lid that has special holes for the heads and a compressor.
The box is filled with water, and the bulbs are planted so that the roots hang in the air, without coming into contact with water at all - this avoids rotting. Growth occurs due to maintaining high air humidity.
Do it yourself - option 1
You can buy such a hydroponic installation in specialized stores or online. But you can do it yourself:
- Any container will be useful;
- instead of a lid, a piece of foam plastic with holes made is perfect;
- You can use a compressor from an aquarium to humidify the air.
This hydroponic setup ensures the fastest growth of feathers, so you can harvest earlier.
Do it yourself - option 2
There is an even easier way to assemble something like a hydroponic setup with your own hands - you just need to divide a plastic egg container into two parts. In one of them, the tops of the cells are cut off so that the bulbs have access to water and moist air. Then everything is simple:
- Water is collected in the lower, intact container.
- Two skewers are placed across - they will support the upper container so that it does not end up too low and the onions do not touch the water.
- The second container, the cut one, is placed on top of the skewers.
- An onion is placed in each cell.
The constructor turns out to be elementary, but very effective in growing feathers.
Method 5. In a greenhouse from a bottle
Not the most popular, but a very neat growing method that can replace a bag. We will need:
- bulbs;
- sawdust;
- plastic five-liter (or more) bottle;
- activated carbon or ash.
The operating principle is very simple and clear:
- Soak the bulbs in water for several hours or in a weak solution of potassium permanganate for an hour. Then dry, remove the top skin, and cut on top.
- Pour boiling water over the sawdust with the addition of activated carbon - it can then be added to the “soil” itself.
- Cut out one of the sides of the bottle, making it into a boat with a lid.
- Place the sawdust in a bottle, arrange the bulbs tightly, do not deepen them too much.
- Close the lid and place the bottle in a dark place.
- After the feathers appear, move the greenhouse to the windowsill.
- After the feathers reach the lid, remove it and start watering so that the sawdust does not dry out.
- After 15–20 days you can harvest.
You can watch the entire preparation process in the video.
A SUPER YIELD WAY OF GROWING ONIONS IN BOTTLES WITHOUT GROUND!
Method 6. In the package
The bag is a great place to grow onions. It can be used in two ways:
- using toilet paper;
- using sawdust.
The point is that the “soil” must be wetted, squeezed out and placed at the bottom of the bag. Place the onion in the prepared material and compact it a little.
Next comes the most interesting part. Inflate the bag and tie it well. You can open it only after the first shoots appear.
This is indeed a simple and original way that will save space on the windowsill.
Method 7. In toilet paper
If you don’t want to mess with the soil, but don’t have sawdust on hand, then you can use regular toilet paper (cheaper) or even newspaper as soil!
The landing principle is approximately the same as in other options:
- We prepare the bulbs - fill them with warm water for several hours, dry them, remove the top skin and cut them on top.
- Place a layer of paper about 1 centimeter into the bag and moisten it with settled water. It is important not to overdo it - you should not allow the paper to sink, as this will cause fungus and mold to develop.
- We place the onion on the paper - as close to each other as possible.
- We inflate the bag and tie it.
- For the first week it is better to keep the bag in a dark and cool place, then move it to the windowsill.
- The bag should be untied only after the feathers have already reached the very top of the improvised greenhouse.
Typically, the crop can be harvested in 17–22 days.
Forcing an onion feather
This is the name of the idea of germinating onions in a window in water. After reading the question, I immediately remembered the batteries of mayonnaise jars on the school windowsill with soggy cardboard rings holding the bulbs with pitiful green feathers and powerful roots. It was in elementary school that all children were given such a task and, as planned, they were supposed to monitor the cultivation of onions. I also remember that all this agronomic bacchanalia, as the classics wrote, “did not ozonize the air.”
With all the sarcasm about children's experiments, the onion idea is worth the candle. If you periodically plant the bulbs in water, you can provide yourself with green onions from your window garden all winter without entering into a “dirty” relationship with the soil.
There are several approaches to planting onions in water:
- Separate containers (cups, jars, bottles, cups, etc.). There is even a kind of life hack - with this type of planting, use an ordinary sock, which will act as a conductor of moisture to the roots of the bulb.
- Any flat containers in which it is recommended to place the bulbs side by side so that they hold each other in an upright position.
- Special containers of industrial origin for germinating onions, even equipped with an electric diffuser for spraying water to prevent putrefactive processes in the bulbs.
Water for planting should be used for a day, and the bulbs should be immersed in it no more than 1/4 of their height. The first sign of the bulb's revival and its readiness to produce feathers is the growth of roots. If there is more water, the head will simply begin to rot, which, in fact, was the reason for that unpleasant putrefactive smell that I mentioned at the beginning of the answer.
It is better to choose medium-sized bulbs, and they are suitable both with sprouted feathers and without them, first remove the top layer of husk. Experts advise trimming the onion from the top. The fact is that the germination rate of onion feathers depends on this. In trimmed bulbs, germination begins on days 5-6, and in those not trimmed before planting - on 8-10. In 2 weeks the feathers grow up to 15 cm.
Again, from the advice of knowledgeable people, fertilized bulbs give thick and juicy feathers in a shorter time. As a top dressing, ready-made complex mineral fertilizers, ammonium nitrate, superphosphate or wood ash are used. A new batch of onions should be planted based on the timing of forcing the leaves: it turns out that after two weeks you need to plant a shift so that the process of obtaining your own green onions is not interrupted.
Care
Caring for onions in a pot and soil is not difficult at all - they are not at all demanding. All you need:
- watering once a week or less;
- periodic loosening of the soil.
Loosening is a very important process, as it increases air permeability, which means it allows the roots to grow and feed better.
Periodically, it is worth loosening the top 2–3 centimeters of soil, being careful not to damage the roots. It is best to do this right before watering.
There is no need to replant the bulbs - the perfect plant!
Fertilizer
Housewives also appreciate onions because they do not require any fertilizers. It itself contains all the necessary nutrients. This applies to both bulbs and seeds. The only thing that needs to be monitored is the condition of the soil: it should be soft, loose and slightly moist.
The only option when fertilizer may still be required is if the variety involves multiple harvests.
For feeding, it is best to use a solution of nitroammophos or urea: 1 gram of substance per 1 liter of water.
You can also enrich the soil with wood ash: you need to use only 5 grams per 1 liter of water.
Important! All fertilizers are intended for the soil, that is, you only need to water the soil. Avoid getting fertilizer on the bulb or its feathers.
Collection of greens
It is difficult to say how many days it will take for your particular onion to germinate. It depends on the bulb itself and on the conditions that you create - whether there is high humidity and a greenhouse effect or not.
- If the onion was initially soaked and trimmed, then you can expect a harvest in about 17 days.
- If the bulb was initially sprouted, then the time is literally reduced to 10–14 days.
- If the conditions are not the most comfortable or the bulb has not been pruned, then the full maturation of the feather can reach 20–23 days.
In any case, it is better to focus on the length of the feather itself - as soon as it has reached 20-25 centimeters, you can safely use it in a salad.
The feathers must be cut off and not pulled out, since in this case the head can be moved out of place. It is best to use scissors or a knife.
Feathers are removed from the edges as new shoots appear in the center.
You must understand that after cutting the feather, the bulb can no longer be used to re-produce greens. You can't eat it either, so the only way out is to throw it away.
Deciding on planting material
All varieties of onions can be planted on the feather - the choice depends on taste preferences. The only thing you need to pay attention to is that there is no point in planting late-ripening varieties if early-ripening varieties will produce the first harvest in 10-14 days.
- Traditionally, ordinary onions are sprouted on kitchen windowsills - their large heads sprout quickly and produce a lot of greenery. Multi-bud varieties “Bessonovsky”, “Arzamassky”, “Soyuz”, “Timiryazevsky” and others bring many times more green mass compared to single-bud varieties that produce only one green arrow.
- For mild vegetable salads and for decorating main courses, sweet red onion varieties such as “Yalta”, “Carmen”, etc. are often grown.
- For rooting and forcing greens in a city apartment, other varieties of onions are used - batun, leek, shallot and chives.
In the absence of varietal planting material for forcing, sprouted onions of an unknown variety from the store or large seed sets, 3 cm in size, are quite suitable.