Obvious danger
The question of how to deal with late blight is asked by every serious gardener, because simply planting bushes is not enough, you need to provide watering, weed control and protection from diseases.
The danger is very great; if you do not act or leave the possibility of a problem without proper attention, the fungus will definitely spoil the harvest. The following crops are often susceptible to harmful effects:
- Tomatoes.
- Pepper.
- Eggplant.
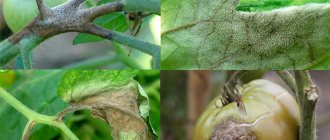
In plants that are affected by the disease, a white coating appears, gradually from the underside of the leaf it moves to the stem and covers the fruit.
Experts consider the main difference to be the appearance of dark brown wet spots. The crop rots quite quickly if proper care is not provided, and neighboring plantings will also be in danger.
Phytophthora - what is it?
The reason for the appearance of late blight lies in the fungus Phytophthora infestans, which can be translated as “vegetation destroyer.” Active reproduction begins with high humidity and cool temperatures (+10 - +20°C). If weather conditions are favorable for the fungus, then the first symptoms can be noticed 3–4 days after infection, and the development of the disease occurs very quickly.
It is important to notice the problem in a timely manner and begin to solve it, otherwise late blight will affect all the plants in the greenhouse, and there will be no talk of any harvest.
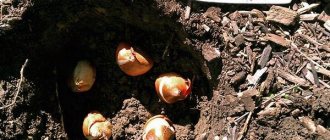
The fungal spores will survive the winter safely, which means infection will occur next season. Spores survive the cold period in the soil, potato tubers, and plant tops.
The disease also has another name, “brown tomato rot,” and it appeared because of the dark brown spots covering the stems and leaves of plants. At the next stage, a whitish coating appears - fungal spores.
The crop, which is initially hard, also becomes covered with brown spots, followed by softening of the fruit. Even if the tomatoes were picked while they were green and had no visible damage, then during ripening, spots may begin to form (if infected). The case ends with the death of the plant.
Processing of main parts
Before moving on to choosing products and deciding how to treat the greenhouse against late blight, it is necessary to carry out a number of preparatory work. This includes clearing out all excess debris in the fall. Of the undesirable plant components, it is worth highlighting:
- Tops.
- Root system.
- Spoiled fruits.
- Weed.
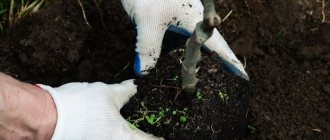
As soon as this stage is completed, you need to move on to disassembling all removable parts; it is better to take them outside. To treat the walls, a special solution is used; it is prepared using finely chopped laundry soap and water; about 40-50 grams of shavings are required for 10 liters of liquid.
The room must dry; for this, windows and doors are left open for a certain period of time, after which it is worth using one of the methods for complete disinfection.
Late blight in the greenhouse: effective means of control
Bordeaux mixture is considered the best. For example, vegetables such as tomatoes need to be replanted and treated with a 0.5% solution, then repeat with a 1% solution after two weeks. If it didn’t help the first time, then do it again after another two weeks. It is worth continuing until the plant becomes healthy.
Drugs such as Zaslon, Hom and their analogues help well. Garlic infusion is also highly effective. If plants with fruits have been treated with any solutions against pests, then they can be eaten no earlier than a month after the event.
The use of drugs will be more effective if it is done immediately, as soon as it is noticed that late blight has affected the plant.
To prevent plants from being exposed to late blight, it is best to disinfect greenhouses, so you need to prepare for the planting season in advance. And in the spring, treat the greenhouses and fertilize the soil.
Lime base
This type of chemical action on the fungus is effective enough to get rid of late blight; the greenhouse is treated after thorough washing and drying with a rag.
The mixture can be prepared according to a specially developed and tested recipe for 10 liters. liquid, you need to add 1 kg of product. Infusion plays a special role, after which the concentrated water should be filtered.
Important! You should be careful when performing manipulations; chlorine vapors can harm human health; it is better to use a respirator and gloves.
The room must be left to settle; three days will be enough for the fungus to be completely destroyed and not affect the plantings.
After which the building is ventilated, to consolidate the result, the wooden components are washed with a solution made from copper sulfate with a concentration of 5-10%.
Disinfection of greenhouse soil from late blight
In a confined space, greenhouse soil quickly loses its agronomic structure, reduces fertility, increases acidity, and accumulates pathogenic flora and fauna. To increase the duration of use of the greenhouse, the greenhouse soil must be systematically regenerated. Soil improvement is carried out in several ways.
The most harmless method for the environment, humans and animals is complete or partial replacement of the soil in the greenhouse. The method is very simple, but labor-intensive and is more suitable for small greenhouses. Usually, once every 2-3 years (possibly annually), the top 10-25 cm layer of soil is carefully removed and taken to a prepared place, where a “layer cake” is formed from waste soil, dry healthy tops, autumn leaves, and compost.
Each layer 5-15 cm high is spilled during the warm period with water or a solution of the preparations “Baikal EM-1”, “Ekomik”, “Trichoplant”, “Azotofit”, etc. Composting using solutions of these biological products helps to destroy negative microflora and faster processing plant material.
Constant shoveling speeds up the process and after 2 years the renewed soil can be used for garden crops. As a rule, the top layer is replenished with forest or field soil or soil that has never been used for vegetable and other garden plants or treated with chemicals. The renewed top layer of soil is divided into beds and sown with winter green manure, which will enrich the soil with organic matter and at the same time destroy some of the diseased microflora (see the article “What green manure to sow in the fall”).
There is another way to improve the health of the top layer of soil in a greenhouse. Old soil in a layer of 15-20 cm can literally be sorted out or sifted through sieves with wide holes (0.3-0.5 cm). The soil will be cleared of excess roots, rotting residues, and some pests. The cleaned soil is sown with green manure.
In case of severe soil contamination with late blight, a high cleaning effect is ensured by sowing white mustard for one season. First, the soil is treated with lime, and then white mustard is sown. The combination of these two techniques almost completely clears the soil of the late blight pathogen (see the article “What green manure to sow in spring”).
At dachas and personal garden plots, it is better to use a biological method of soil disinfection . It is especially effective in combination with preliminary temperature treatment of the soil.
After treating the greenhouse with bleach, slaked lime, and copper sulfate, part of the solution falls on the soil. Mix the top layer by loosening. We expose the dried soil to the sun. High temperatures in dried and sun-warmed soil (+30...+35°C) will destroy a significant part of the pathogenic microflora and improve the health of the soil.
If you haven’t had time to carry out work to disinfect the soil from late blight since the fall, then they should be done 2-4 weeks before the start of seasonal work in the spring. The soil is watered with hot water and covered with film for deeper steaming.
Both methods of hot soil disinfection destroy not only part of the pathogenic, but also beneficial microflora. After such disinfection, the soil needs to be reanimated. To restore beneficial microflora, the soil is moistened, if necessary, brought to a temperature of +12...+14°C and treated with a solution of “Baikal EM-1”, “Ekomik”, “Siyanie” or scattered “Emochka-Bokashi”, covered with a rake and covered with a covering material .
In a warm, humid environment, effective microorganisms (EM) begin to multiply intensively, using pathogenic microflora as food. To maintain a healthy soil level during seasonal work, approximately once every 2-4 weeks with watering, the same biofungicides are added to the soil as for treating plants - “Gamair”, “Alirin-B”, “Trichoplant”, “Gaupsin”, “Fitosporin-M”, etc. How to prepare solutions of biofungicides for soil treatment is indicated in the accompanying recommendations or on the packaging of the drug.
At home, even those in a hurry who like to do everything quickly are not recommended to disinfect greenhouse soil with chemicals.
Among the chemical methods of treating soil against late blight in private greenhouses, it is permissible to treat the soil with a hot solution of potassium permanganate (dark pink color) or a solution of copper sulfate prepared at the rate of 25-30 g of the drug per 10 liters of water. 2-3 days after processing the soil, digging is carried out using an incomplete shovel and green manure is sown. It is not recommended to use these methods of soil disinfection frequently and in large concentrations. Manganese and copper contained in salts accumulate in the soil and inhibit plants.
A greenhouse in which plants suffered from late blight requires special treatment after harvest, both inside and outside. © Country Folks Grower
Fungicide help
A similar no less effective method is perfect for treating a polycarbonate greenhouse against late blight, but you need to choose a chemical product, then this liquid will also saturate the substrate.
The presence of dangerous components in the composition requires compliance with safety rules, which can be found by carefully reading the instructions for use. It is worth highlighting several of the most common names of fungicides:
- Virocide.
- Oksikhom.
- Abiga-pik.
Spraying is carried out in the morning or evening, but you need to create a suitable temperature in the room; experts believe that the optimal indicators will be 10-25 degrees.
Agrotechnical methods
These techniques will help reduce the likelihood of illness or avoid it altogether:
- Autumn and pre-sowing plowing . The vegetable garden is divided into ridges of 1.5-2 meters and plowed with a spade with the top layer of soil turned downwards. This is especially true in gardens with dense plantings, where it is humid and warm. In such conditions, the mycelium of the fungus develops faster. When digging the soil, all infected tops, tubers, and roots are destroyed.
- Crop rotation . Plants of the same family have the same diseases. By alternating crops, you can get rid of many diseases, including late blight. Tomatoes are planted in the garden after any Solanaceae at least 3-5 years later. During this period, the pathogen dies in the soil.
- Tilling the soil with boiling water in the fall . After harvesting, the soil is watered with boiling water. Oomycete spores die when exposed to high temperatures. This option is effective, but labor-intensive over large areas.
Grandfather's way
A sulfur block is used to treat the greenhouse against late blight in the spring; to carry out the manipulations, lump sulfur should be purchased. The detailed algorithm of actions looks like this:
- Place the pieces on a metal plate, having previously distributed them into 100 grams.
- Water with kerosene.
- The substance is set on fire.
- The premises are closed for 4-5 days.
Before starting work, you should prepare and put on a protective suit, gloves and a respirator. Combustion products are toxic, so professionals advise purchasing glasses; after smoke gets into your eyes, they will begin to water.
For every 2 meters of area you will need to install one tray, constructed from a plate or sheet of metal at your personal discretion.
Sequencing
Processing stages
Spring preparation of a polycarbonate greenhouse for the new planting season includes 6 main stages:
- General cleaning of the area where the greenhouse is located.
- Installation of the structure.
- Cleaning the frame and polycarbonate (acting as glass).
- Disinfection inside the building.
- If necessary, minor repairs to the structure (strengthening, strengthening of load-bearing foundations).
- Soil cultivation. It involves the introduction of chemicals, insecticides, fertilizing, digging or replacing the fertile layer.
If no treatment was carried out in the fall, spring cleaning should begin with the removal of old plants. These include not only tops and fallen fruits, but also weeds, their large seeds and roots.
Next, you should get rid of all pegs, trellises, ropes, pieces of twine and other garter material. Pathogenic bacteria can multiply in it and immediately attack new seedlings. They should be taken out of the greenhouse and burned. By leaving them on the site, gardeners risk the occurrence of diseases in other parts of the site.
After this, the polycarbonate structure itself is cleaned. The most thorough treatment will be if the structure is disassembled into its components and all surfaces are disinfected. If an epidemic of diseases has been noted inside the greenhouse, the structure must be treated with a disinfectant. It is recommended to treat metal structures with warm water and vinegar.
Polycarbonate is a transparent material that loses its appearance and transparency when exposed to moisture and dirt. To return it to its original appearance, it is necessary to wash the coating with soapy water or detergents without abrasive components. You can also use a light solution of potassium permanganate. At the end of the procedure, you should thoroughly rinse off the detergents with clean running water.
To clean the polycarbonate coating, do not use hard sponges, metal brushes or mechanical abrasives. The coating is vulnerable to scratches.
Inside the greenhouse, all racks, equipment and containers should be cleaned. To do this, you can use boiling water, as well as some chemicals (formalin, vitriol, bleach).
Fumigation as a method of cleaning a greenhouse
Fumigation is an effective method of pest control in a closed greenhouse structure. To do this, entrances and windows are tightly closed, small cracks are sealed and a smoky fire is lit. If this is not enough, you will need several sulfur bombs. They are laid out on metal sheets. You can replace them with lumpy sulfur, which should be combined with a small amount of kerosene.
Disinfection using fumigation is carried out for 4-5 days, after which the room is ventilated.
It is dangerous for a person to be in a greenhouse during such treatment, since the gas released during fumigation can cause serious respiratory diseases. If it becomes necessary to enter the greenhouse, personal protective equipment should be used.
Basic methods of soil disinfection
The next step is soil disinfection. Three types of processing can be used for this:
- temperature;
- chemical;
- biological.
The effectiveness of the fight against bacteria, fungi and insects depends on the chosen processing method. The choice of purification method is influenced by the type of crops grown in the greenhouse. This procedure is quite labor-intensive.
Changing the temperature
If the end of winter and the beginning of March are frosty, you can take advantage of this natural blessing and freeze the ground. To do this, you need to open the greenhouse and leave it open for several days. Low temperatures can lead to the death of harmful bacteria and fungi that abundantly infect plants. Frost can also neutralize insect larvae deposited in the ground in the fall.
If we are talking about a small area for seedlings, then you don’t have to start working with chemicals, but treat the soil with boiling water. This is enough to destroy most types of pathogens and pest larvae. Find more information about tilling the soil before planting seedlings here.
Biological control method
Biological treatment is usually carried out using the following drugs:
- "Fitosporin";
- "Phytocide";
- "Biodestructor of stubble."
The following drugs are also used:
- "Baikal M", effective against rot, fungi and lichens;
- "Fitolavin" against rot and pathogens;
- “Carbation”, which helps cope with clubroot and blackleg, as well as verticillium and fusarium wilt;
- "Acrobat MC" to combat powdery mildew and late blight;
- "Bayleton" for gray rot.
To clean the soil, it is enough to shed only the top layer. For treatment, you need to prepare the solution according to the instructions, then carry out disinfection. After the solution is absorbed, use a rake to dig up the treated area a little. Then the disinfected soil must be covered with a covering material (film or spunbond).
After using biological preparations, it is necessary to take care of the soil structure and replenish it with beneficial bacteria artificially.
Chemical method of disinfection
The use of chemicals is usually due to the desire of site owners to get rid of pests for a long time. However, it must be understood that any exposure to such substances has significant consequences for the crops grown.
Chemical treatment is best carried out during the coolest part of the day, ideally at night.
There are a number of chemicals widely used for soil disinfection:
- Bleached lime is considered the most accessible. It is affordable and has earned the trust of gardeners for its effectiveness. To prepare it, just dilute 400 grams of quicklime in a 10-liter bucket of water. The solution is infused for 8 hours: 4 - with occasional stirring, 4 - without stirring. After this, the upper liquid layer is selected for soil treatment. The remainder of the solution can be used to whitewash any wooden frames in the garden.
- A chlorine solution prepared in a proportion of 1 kilogram per 10 liters of water is effective in combating spider mites.
- Formalin is applied 2 weeks before planting. After applying it, the soil must be covered with polyethylene for 3 days. The cleaned soil is dug up and the greenhouse is ventilated.
- “Bordeaux mixture” is a powder for dilution in water. The main condition is its proper application on the soil according to the instructions.
- “Iprodione” is a powder for soil disinfection in the spring to prevent diseases such as gray and white rot, Phomopsis, and oidium.
- Hexachloran is effective against caterpillars and butterflies.
- Treatment with copper sulfate can be used as radical methods. It is quite aggressive against all bacteria (not only those harmful to plants). After its application, the soil is considered infertile, so it will need artificial fertilizing for several years. Copper sulfate solution is most often used to treat the internal surfaces of the greenhouse and cracks in the base of the structure. With its help you can fight late blight, powdery mildew, and scab.
You can purchase ready-made medications in specialized stores:
- “Lightning” against spider mites;
- “Thunderstorm” from snails and other types of slugs;
- "Marshall" against aphids and thrips.
Before using chemicals, it is important to carefully study the instructions and strictly follow the proportions when diluting poisons. To spray them, special equipment and protective equipment or improvised equipment can be used.
Thermal type impact
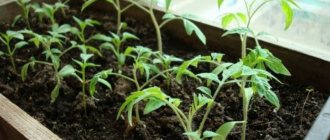
There are tomatoes for greenhouses that are resistant to late blight, but experienced gardeners do not take risks and carry out preventive measures without relying on such information.
To implement this method, you need to create a certain temperature regime, frying or freezing. Manipulations are often carried out in the fall; it is better to choose a dry day.
To destroy the pathogenic fungus, you should tightly seal the room, close all the cracks and raise the temperature to 30 degrees; the spores will become inactive, and when raised to 35 degrees they will completely die.
To carry out freezing, you should choose a cold day; not all regions of the country can boast of such indicators, so the method is used by a limited number of gardeners.
Tillage in spring before planting and in autumn
- Spring tillage of soil against late blight is pre-planting, the main task of which is to destroy the dormant mycelium of the fungus - the causative agent of the disease. Processing times depend on the chosen method.
- Autumn tillage is carried out in case of infection of crops and to prepare the soil for winter. The soil on the site is cleared of plant debris and dug up to a depth of 30 cm with a layer turnover. In this case, the upper part of the soil turns down and is “embedded” into the ground. This way, most of the spores will end up on the soil surface.
Today, there are several methods to combat late blight in the soil. The choice of method depends on:
- intended purpose (for prevention or control);
- the extent of development and spread of the disease;
- personal preferences (some gardeners are categorically against chemistry, although in some cases its use is justified).
Methods of folk origin
Often, experienced owners of private houses prefer ordinary medical iodine; 15 drops for a 10-liter container will be enough; an additional liter of milk is poured into the substrate. Spraying continues for a long time, often every 2 weeks.
One of the proven recipes is garlic tincture; to implement the plan, cloves, arrows and leaves of the crop are used, after which the mass is diluted in 10 liters of water, 1 g of potassium permanganate is added, and the plants and soil are sprayed.
Prevention
Most oomycete spores are found in the ground. In autumn and spring, the main preventive measures are digging up the soil, removing plant debris and disinfecting it. Let's consider what can be used for preventive soil disinfection. This is most often:
- a strong solution of potassium permanganate (it is a powerful antiseptic and, in combination with hot water, kills overwintering fungal spores);
- copper-containing preparations (only for early spring application during the first plowing of the land);
- biological product Fitosporin-M (the solution is prepared in water at a temperature of no more than 35 °C, so that diseased bacteria do not die. The drug is allowed to infuse for 1-2 hours).
Fungal spores reach plants with rising air currents from the heated soil. To prevent this, it is recommended to mulch the top layer of soil immediately after digging it in the spring.
Photo of proper greenhouse treatment
Advice from experienced gardeners
- Vladimir, Lipetsk region. “I use proven resistant tomato hybrids. I don’t resort to chemicals; I always sow mustard next to the tomatoes.”
- Oksana, Moscow region . “I grow tomatoes in a greenhouse and am not too lazy to change the soil. I replace the soil for planting every 2-3 years and compose it myself, always adding ash and Fitosporin-M.”
Only comprehensive measures will protect the garden from possible outbreaks of late blight. At the first symptoms of the disease, it is not advisable to completely abandon chemotherapy. Proper use of agrotechnical measures, biological protection agents, cultivation of green manure and crop rotation guarantee the health of tomatoes and other vegetable crops.
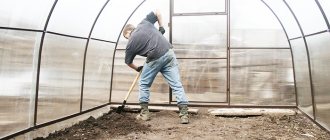
Stages of preparing a greenhouse for the season
In order to properly treat the greenhouse for spring sowing, a lot needs to be done. In addition to preparing the soil, you need to wash and disinfect the structure itself, which can become a breeding ground for bacteria and pests.
Freeing up space
Before starting work on processing the greenhouse, you will have to remove everything from it that could interfere with this process. Even the supports that support the roof in the event of a large amount of snow must be dismantled.
Everything that is taken out of the greenhouse must be carefully inspected and processed:
- Whitewash wooden structures with lime and paint glue. If the elements are rotten, they require replacement;
- treat metal products from rust if pockets of rust have been identified. This can be done using both folk remedies and purchased ones. After this manipulation, paint the metal supports.
Attention! If heating equipment is installed in the greenhouse, it needs to be painted. However, it is not recommended to use oil paint - it reduces heat transfer.
If everything that was taken out is not damaged, then you can refuse processing
Garbage collection and recycling
Be sure to get rid of last year's weeds, ropes and pegs that were used by gardeners to tie up vegetable crops. Roots, leaves, and stems of plants also need to be removed.
Collected garbage must be burned. At the same time, the ash that will be obtained during the recycling process will be an excellent fertilizer. It will help saturate the earth with useful microelements (zinc, phosphorus, iron, etc.). If you use dry ash for fertilizer, then it must be scattered before digging the soil at the rate of 3-5 cups per 1 square meter. m. If for feeding, then you need to dissolve 1 glass of the substance in a bucket of water.
Fighting dust and dirt
It is necessary to provide clean conditions for growing seedlings and vegetable crops by washing the greenhouse. You need to remove dirt and layers of dust with:
- frame. It is treated with a soap solution, then it is collected back with a rag. If there was an invasion of parasites in the previous season, then a remedy for the detected pests should be added to the solution;
- polycarbonate plates, while they are processed on both sides. For washing, use a soft rag or sponge with soapy water. From the outside it can be washed off with high pressure of water, but inside you need to do this carefully - it is undesirable for soap to get into the ground.
If you follow these rules, you can clean the greenhouse without harming the soil.
Greenhouse disinfection
After the greenhouse has been washed, you need to start disinfecting it. Bordeaux mixture is used to combat diseases. Some gardeners who prefer folk remedies to combat diseases and pests resort to a decoction of pine needles.
You need to prepare it as follows: fill the bucket halfway with pine branches, add liquid. When this remedy is infused, it can be used. To quickly prepare this product, you can cook it for 20 minutes. Summer residents can also replace pine needles with nettles - the preparation of the decoction is similar. If the greenhouse is severely damaged by fungal infections, then you can resort to fumigation.
Attention! Before this procedure, all the cracks in the greenhouse must be sealed so that the vapors of the product used do not evaporate into the air.
Fumigation is often done by gardeners, since this way they can treat the soil and the structure itself.
Preparing the soil for planting
Disinfection methods acting on the frame make it possible to reduce labor costs for soil cultivation. According to the rules, you need to change its top layer (the first 12-15 cm) with a new one every year. But there are alternative replacement methods:
- tilling the land with boiling water - per 1 sq. m. requires 3 buckets of liquid;
- pour boiling water and cover the soil. The resulting steam penetrates deeply, destroying pests;
- soil disinfection with a 1% solution of potassium permanganate or a 3% solution of nitrafen. This will help exterminate insects hibernating in the soil;
- disinfection with carbation at a concentration of 2%.
Other chemicals are best used in the fall.
Why treat a greenhouse in the spring
After several years of operation of the greenhouse, pathogenic microbes and other microorganisms can live and multiply on its walls and in the soil. To protect the plants and not harm the crops, spring treatment of the structure is necessary.
During their growth, seedlings receive nutrients from the soil. Therefore, it is necessary to prepare the greenhouse correctly for the new season in the spring. Necessary:
- Inspect the greenhouse for damage. If they have been identified, eliminate them;
- carry out complete disinfection;
- fight pests whose habitat is in the ground;
- restore soil fertility.
You can protect the future harvest and the structure if you choose the right drugs to combat parasites and carry out the necessary procedures on time.
Signs of late blight (late blight) on tomatoes
Unfortunately, often due to the inattention, sometimes even carelessness of the owners, precious time is lost and emergency measures have to be taken, often not entirely useful and safe.
Novice gardeners often don’t know what late blight looks like on tomatoes, so they don’t sound the alarm. At the first stage of infection, yellowing and drying of the foliage is observed, mainly in the lower part of the plant. Later, the leaves die off. The fungus will not stop there and quickly attacks the fruits, causing them to turn black.
| Note. Advanced gardeners with many years of experience have learned to detect the approach of the “enemy” in advance, since it happens at approximately the same time. In the Far Eastern Federal District, the most severe outbreaks of infection in open ground occur quite late - in August–September. In a greenhouse, favorable conditions can develop much earlier. Especially if there are potato plantings nearby, even outside the greenhouse, which are the primary source of infection. |
After the first manifestations on potatoes, wait 10–12 days for a “guest” on your tomatoes. This gives you an understanding of when to treat tomatoes against late blight (late blight) in a greenhouse: as soon as the first ovaries appear, it’s time to be wary and start preventative spraying and watering. 2–3 such treatments can be carried out at intervals of 2–3 weeks. Now you need to regularly carefully examine your plants so as not to miss the first signs, when you can still help with less toxic or folk remedies.
| Recommendation. Change the treatment agents periodically, otherwise the fungus adapts to one drug and stops responding to it. In this case, all your efforts will be in vain. |
Photo pixabay/Dustytoes: The disease requires prompt help from the gardener to the plants.
Reasons for the development of late blight
The first signs of late blight are the appearance of small brown spots on the leaves and stems, and a white moldy coating on the underside of the leaf. Under favorable conditions, fungal spores multiply quickly and infect leaves, stems and fruits.
The danger lies in the special vitality and rapid reproduction of fungal spores. They can withstand winter cold and summer heat, remaining in the soil, on the frame and other elements of the greenhouse.
The impetus for the awakening of spores and the development of the disease are the following factors:
- increased air humidity in the greenhouse, which is caused by too frequent and abundant watering or rainy, cloudy weather;
- a sharp difference in day and night temperatures, characteristic of the second half of summer;
- non-compliance with crop rotation: planting tomatoes after other crops of the nightshade family, for example, eggplant; as well as growing tomatoes in a greenhouse for several seasons in a row;
- placing a greenhouse with tomatoes next to potato plantings (first of all, late blight affects it);
- dense plantings, poor or no ventilation;
- Excessive fertilizing with nitrogen fertilizers promotes the growth of green mass and thickens the plantings;
- late blight most often affects plants with reduced immunity, which occurs due to a lack of microelements (for example, potassium, manganese, iodine);
- Excessive application of lime to the soil.