547
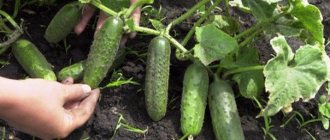
Cucumbers are one of the most popular crops grown by gardeners in our area. Today there are a lot of different methods for cultivating this vegetable: trellises, barrels, bags or bags. However, most often gardeners use the hydroponics method. Using hydroponics, you can achieve very good results, even without soil. How to do DIY hydroponics for cucumbers? Let's look at the step-by-step actions.
Methods for growing cucumbers hydroponically
The method is loved by gardeners due to its compactness, efficiency, and high yield. There are several methods for growing cucumbers hydroponically:
- Periodic flooding. The idea is that vegetables are planted on a porous substrate, into which a solution enriched with beneficial microelements is poured.
- Drip irrigation. Used in closed premises and without adding manure. The method consists of constructing a system of two connected containers, one of which is intended for the root system. Water with nutrient liquid is poured into this dish. The method allows you not to use phytolamps.
- Floating platform. For planting cucumbers, special blocks of mineral wool are used, which are placed in containers with a nutrient composition. Using this method you can protect the roots from rotting.
- Aeroponics. In this case, no soil mixture is required. The meaning of the technology is to aerosol moisten the root system with nutritional compounds. This method is only suitable for growing in specialized greenhouses.
To grow cucumbers hydroponically in greenhouse conditions, it is worth using periodic flooding. This method is more effective, easy to install, allows you to harvest a large harvest and does not depend on the influence of external weather conditions.
Suitable varieties
To grow cucumbers hydroponically, you should carefully choose the variety. Suitable options are:
- Variety Lilliput F1 is early ripening. Harvesting begins 1.5 months after the appearance of the first shoots.
- Hybrid MediaRZ F1.
- Variety Zozulya.
- Marfinsky.
- Long English.
- Alma-Ata 1.
Preference should be given to early-ripening shade-tolerant varieties capable of self-pollination.
Nutrients and containers
The main components that make up a hydroponic system for growing cucumbers may include, but are not limited to, the following items. This:
- pots or plastic cups;
- filler for them;
- pump;
- nutrient solution
Fillers can be:
- mineral wool;
- expanded clay
A vegetable grower who decides to build such a system on his balcony or in his room will need a specially prepared container for storing a mixture of nutrient components and water. This can be a plastic container or any other container, but must have opaque walls. Otherwise, the nutrient solution will quickly bloom and become unusable.
Advice!
If the walls of the selected container turn out to be transparent, then you can get out of the situation by painting them with dark paint or pasting them with foil on the outside.
The reservoir will also need a lid. It should be dense and not contain any bulges. The volume of the tank depends on how many plants you plan to grow. When calculating the volume of the tank, you need to take into account that for high-quality cultivation of one cucumber bush you will need about 3 liters of nutrient liquid. The optimal tank volume is considered to be 50 liters. When you plan to grow a lot of cucumber bushes, it is permissible to use several medium-sized containers.
For growing cucumbers hydroponically at home, mesh structures are well suited, which gardeners like to use when cultivating seedlings of various flowers and vegetables. You can also take small flower pots. Only in them you need to first make a lot of holes in their lower part.
Hydroponics pots should be placed under reservoirs for nutrient solution with water. To fill the nutrient mixture with oxygen, a two-channel pump design should be installed. You can use models that are used to equip aquariums at home, but we recommend replacing the standard pump pipes with silicone hoses.
Conditions for growing crops
Growing cucumbers hydroponically at home is not difficult. Moreover, this method prevents the development of various diseases and rotting in plants. It is worth considering that the crop loves free space, so no more than two seedlings can be placed in one 1m*1m container.
The second important point is light. To increase the impact of lighting, you can take advantage of an increase in the concentration of carbon dioxide in the air. If you follow the rules for preparing the solution, the growing process will be much faster and easier.
Solution components:
- 0.25 g copper;
- 0.25 g magnesium sulfate;
- 1 g calcium;
- 0.25 g sodium;
- 0.75 g zinc;
- 0.25 g potassium sulfate.
The optimal acidity level should be between 5.5-6.
If there is a lack of useful elements, the crop will be dominated by leaves rather than fruits.
Nutrient liquid
It may be interesting How to test cucumber seeds for germination Favorable days for planting potatoes in 2022 for Ukraine How to plant and grow bananas at home?
The key to quickly obtaining a good harvest of cucumbers at home is the correct preparation of the watering solution and the installation of the correct hydroponic system.
Below is one of the recipes that gardeners often use. It consists of the following parts:
- 10 g of sodium or calcium nitrate;
- 2.5 g of potassium phosphate;
- 1.25 g potassium chloride;
- 2.5 g magnesium sulfate;
- 0.125 g ferric chloride.
Each of these substances is diluted in half a liter of water. Then pour 7 liters of clean water into a large container, for example, a bucket, and add the resulting solutions there. The mixture must be stirred constantly. Then, 0.2 g of manganese and borax sulfate, 0.1 g of zinc and copper sulfate are added to the resulting 10 liters of solution.
When using the solution, alternate. In the first week, the mixture is diluted with a quarter of water. The next week, take half the solution and half the water. In the third week, use a concentrated solution.
A few words must be said about the water that will be used in preparing the solution. Since this is most likely water from the tap, we advise you to first keep it for a couple of days in a bucket or open glass jars. This is done so that the fluorine evaporates and the salt settles to the bottom.
Step-by-step technology
Vegetables grown in apartment conditions will have similar taste qualities to cucumbers collected from the garden if the technology is followed. It consists of several stages.
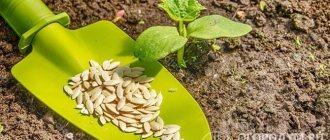
Sowing seeds
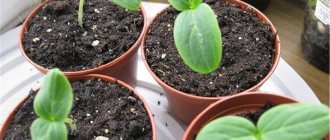
Prepare a solution for hydroponics for cucumbers and saturate the cassette plugs with it. Place the seed in the center of the plugs. Thanks to the nutrients, germination will occur in a short time. To create optimal humidity, it is enough to sprinkle a small amount of vermiculite on top and keep the air temperature within +25° C. The seeds need to create a greenhouse effect by covering them with polyethylene for three days.
Transplanting seedlings
Before transplanting the seedlings, the cubes are treated with the same solution as the cassettes. Weekly seedlings must be transferred together with the cork, lowering the temperature by a degree. The greater the distance between the cubes, the better the culture will develop. Cucumber seedlings should remain in cubes for 45 days.
Planting seedlings
Before transplanting, hydroponic mats should be soaked in nutrient liquid and small holes made in them. Which will play the role of drainage. The room temperature should be between 22-25°C.
After waiting for the seedlings to bloom and the stalk to form, it is necessary to remove the flowers up to the fifth leaf. In order for the root system to develop safely, it is necessary to observe temperature conditions of +22° C.
Cucumber solution formula
| Element (ppm) | Source of substance |
| Macronutrients | |
| Calcium (Ca-200 ppm) | Calcium Nitrate |
| Nitrogen (N-140 ppm) | Calcium Nitrate |
| Phosphorus (P-50 ppm) | Monopotassium Phosphate |
| Potassium (K-350 ppm) | Monopotassium Phosphate |
| Sulfur (S-150-250 ppm) | Potassium Sulfate Magnesium Sulfate |
| Magnesium (Mg-50 ppm) | |
| Iron (Fe-3 ppm) | Iron Chelate (FeDTPA) |
| Microelements | |
| Manganese (Mn-0.8 ppm) | Manganese Sulfate or: Manganese Chelate |
| Copper (Cu-0.07 ppm) | Copper Sulfate |
| Zinc (Zn-0.1 ppm) | Zinc Sulfate or: Zinc Chelate |
| Boron (B-0.3 ppm) | Boric Acid or: Solubor |
| Molybdenum (Mo-0.03 ppm) | Sodium Molybdate or: Ammonium Molybdate |
Like tomatoes, you must prepare a ready-made solution in reserve in large quantities, since in a small amount of liquid you will not be able to add trace elements, their weights will be very small for small volumes, you simply will not be able to weigh them accurately.
Rules for caring for cucumbers
To obtain a high-quality result, the crop must be cared for throughout the entire period from sowing to harvesting. There's nothing complicated about it. Until the first fruit is formed, the stalks must be regularly disposed of. The more cucumbers appear on the bush, the more careful control over the growing season and generation process should be.
Watering includes drip irrigation throughout the daylight hours. Otherwise, the cucumbers will have a deformed shape. Optimal temperature indicators: on cloudy days from +19° to +22°, sunny days up to +24°. To avoid powdery mildew and botrytis, the room needs regular ventilation and maintaining humidity at 75%.
If there is insufficient sunlight, LED lamps will come to the rescue and ensure full growth of vegetables.
Modern way of growing
Those who want to collect the fruits as soon as possible should pay attention to this method. Since this vegetable crop climbs, in small hydroponics it is recommended to place them near the walls of the containers. When the sprouts are visible, you should make a support for them with an angle and tie them up.
Such a system will be useful to farmers looking for options for quickly growing plants. In addition, hydroponic cucumbers placed in this way will not create obstacles for other plants nearby and will bring a better harvest, unlike their soil counterparts.
For normal development and growth, cucumbers need good lighting. Therefore, they should be placed in bright places, and illuminated with lamps in bad weather.
Advantages and disadvantages of the method
When planning to make hydroponics for cucumbers with your own hands and reap a good harvest, you should carefully study all the pros and cons of the technological process.
The advantages include:
- Controlling nutrient intake. The composition for hydroponic cucumbers is prepared independently and added to the water in the required quantities.
- The culture absorbs the required amount of liquid to ensure full growth.
- The root system is not hidden by the soil, which allows you to monitor its condition and maintain the required level of oxygen.
- Minimal risk of plant disease. As a result, there is no pesticide treatment, which has a positive effect on the taste and size of the fruit.
- Due to the high nitrogen content in the material, a lot of biological mass is produced.
The disadvantages of the method are also important to consider:
- The yield and health of the plant directly depend on its care. If the substrate for cucumbers is prepared without complying with the established parameters, the death of the plant may occur. It is necessary to maintain the level of nutrients and acidity.
- The temperature in the root zone should be +22-24 degrees. Exceeding these indicators will lead to the death of the root system.
- Hydroponics speeds up the process of growing vegetables, but is quite expensive.
- The use of plastic pipes and mineral salts is not acceptable for everyone.
If the listed disadvantages are not a problem, you can confidently grow cucumbers using this technology at home. With a little time and effort, you can enjoy delicious and nutritious vegetables at any time of the year. This is especially important in winter, when it is almost impossible to find pesticide-free cucumbers on store shelves.
How hydroponics works when growing cucumbers - video
How to make hydroponics with your own hands
To cultivate vegetables hydroponically at home, you need to build the system itself, install it correctly, and then plant the plants. This is not as difficult as it might seem at first glance; even improvised items are enough.
Necessary materials
To make the simplest model we will need:
- Capacious container made of plastic material, preferably black;
- Foam sheet;
- Cups or pots with many holes;
- Pump (you can use a specialized one or an aquarium pump).
The plant itself must be kept in containers with a special substrate. It must be characterized by increased moisture capacity, to ensure continuous wetting of the root system, and looseness, which allows oxygen access to the roots. Some of the best fillers are:
- moss;
- peat;
- expanded clay;
- small crushed stone;
- special gels for hydroponics;
- mineral wool, etc.
It is better to use ready-made fertilizers for hydroponic installations as a liquid that will supply cucumbers with micro and macroelements. They strictly adhere to the dosage of the nutrient complex. It is advisable to purchase solutions in specialized stores.
System assembly
When all the design details are at hand, you can begin installing the equipment. The installation itself is a plastic container filled with nutrient liquid, on top of which a foam sheet is attached that holds cups of substrate and plants.
If there is no black container, then you can use any one, provided that it is painted dark. If this is not done, light will penetrate into it, promoting the appearance of algae.
When the water base is ready, a sheet of foam plastic with pre-made holes is placed on top. The number of the latter should be equal to the number of hydroponic pots. The size of the holes must be calculated in such a way that the pots are firmly fixed in them and do not fall into the water.
The root system of cucumbers is very demanding of oxygen. If it is deficient, the roots of seedlings may begin to rot and soon die. To eliminate this risk, you should use an air compressor in your installation.
Growing plants hydroponically is very exciting and accessible to almost everyone. With a little effort, you can provide yourself and your family with organic vegetables at any time of the year.
Hydroponic setup at home
Purchasing an industrial hydroponics system is quite expensive, so it’s better to make it yourself. The technology of hydroponics at home is not inferior in its efficiency to its factory counterparts, but is much cheaper both during assembly and during operation. If necessary, parts are easy to replace.
Preparing containers for growing
Instead of expensive industrial pots for hydroponics, you can make cheap analogues from scrap materials. They can serve, for example, plastic bottles. 5 liter bottles will be enough.
They are cut so that the depth of the pots is at least 15 cm, and holes are punched in the bottom for drainage. Through them, excess moisture will be removed from the roots. You need to make a stand for the finished pots. Its height should be at least 50 cm, as this will allow you to conveniently work with and care for plants. Round holes should be cut in the stand slightly smaller than the diameter of the bottom of the pot.
Before use, planting pots are disinfected with chlorine. The pots are filled with any substrate suitable for drainage. The most successful options are moss, expanded clay and pebbles.
Irrigation in the system
Irrigating roots in a greenhouse is quite simple. This is necessary so that the plants do not die.
The tomato root system should be constantly irrigated with the solution, and the excess returned back. To do this, install a reservoir with a solution under the pot stand and supplement it with a pump that will pump the solution into the pots. You can use a regular aquarium pump instead of a pump. After installing the system, you can plant the grown seedlings in pots without removing the sponge pieces.
What plants are grown hydroponically?
DIY flower beds
Many plants can be grown hydroponically.
Vegetables:
- Tomatoes;
- Peppers;
- Cucumbers;
- Radish;
- Cabbage.
Greenery:
- Salads;
- Bow feather;
- Dill;
- Parsley.
Flowers:
- Tulips;
- Daffodils;
- Gerberas and many others.
Berries:
- Strawberry;
- Strawberries.
Let's take a step-by-step look at what do-it-yourself hydroponics is for cucumbers and tomatoes.
Investment stage of the project
To start activities, you need to draw up a business plan for a hydroponic greenhouse with calculations, draw up documents for legalization of the farm, and arrange the selected territory. Any greenhouse business depends on the climatic conditions of the region in which it is located. The same parameter determines the amount of investment and profitability. Our project is focused on the middle zone, where the warm season is replaced by prolonged cold and lack of sun. To ensure productivity, insulation, heating, lighting, and ventilation will be required to prevent condensation. All costs are reflected in the table:
| Expense item | Amount, rub. |
| Collection of documents, LLC registration | 30 thousand |
| Rent of land for a year | presumably 20 thousand (more precisely, according to the results of the auction) |
| Purchase of industrial greenhouses | 150 thousand |
| Installation of the foundation and assembly of the structure | 70 thousand |
| Industrial hydroponic system (sown area 60 sq. m.) | 1 million 200 thousand |
| Fertilizers, mineral complexes, substrate | 50 thousand |
| Pots, seeds | 10 thousand |
| Installation of communications (plumbing, electricity, ventilation) | 50 thousand |
| Packaging, labels, containers for transporting products. | 10 thousand |
| Arrangement of the warehouse with racks for storing products before shipment. | 100 thousand |
| Total | 1 million 700 thousand |
The final investment amount may differ from that stated in the table depending on the area of greenhouses, their number and the choice of hydroponic system. Hydroponics is the most expensive expense. Its cost varies from 50 thousand to several million rubles, depending on the modification. If greenhouse farming is focused on mass production, then there is no need to save on equipment, which determines the speed of ripening and the amount of harvest.
Method using plastic pipes
To properly organize hydroponics, you need to do certain things. The first is making holes in plastic pipes; they will later be needed to place glasses in them.
Crushed stone and expanded clay are added to the glasses, which will replace the soil. The next step is to prepare fertilizer for the planted plants. One of the best fertilizers is a liquid mixture and compost in equal proportions. This mixture is poured with mineral fertilizers and left for one day. The finished mixture is poured into a separate container.
Next, use a pump and pump water into the tubes towards the glasses. The summer resident can only monitor the level and condition of the solution.
It is important to remember that the cups containing the plants should not fall below two centimeters of the solution.
Personnel appointments
Hydroponics works automatically, but requires human control:
- Mineral solutions must be loaded into the system in a certain proportion, taking into account the characteristics of the crop.
- Seeds also cannot get into the cells on their own.
- The climate in the greenhouse must be controlled.
- Product collection cannot be carried out without the participation of employees.
The farm requires specialists:
| Job title | Quantity | Salary, rub | Total, rub. |
| Director | 1 | 25 thousand | 25 thousand |
| Technologist (specialist in the technology of growing crops using hydroponics) | 1 | 15 thousand | 15 thousand |
| Plant grower (monitors the growth and condition of plants) | 3 | 10 thousand | 30 thousand |
| Equipment Master | 1 | 15 thousand | 15 thousand |
| Handyman | 2 | 10 thousand | 20 thousand |
| Total | 10 | – | 105 thousand |
| Deductions | – | – | 30 thousand |
| Expenses per month | – | – | 135 thousand |
Administrative work and product sales will be handled by business owners. As the economy develops, it is possible to supplement the staff with a sales manager and a supplier. You can invite people to the harvest season, paying for their services at an hourly rate.
When recruiting employees, special attention should be paid to specialists with specialized education in agriculture or biology, so that a person understands the principle of growing a particular crop.
Pros and cons of technology
Hydroponics, as a method of progressive crop production, has advantages and disadvantages. Growing strawberries hydroponically is a simple process. However, before you start breeding plants, you need to make an accurate calculation, calculate income and expenses, and assess possible risks. The advantages of the technology are worth noting:
- saving space;
- no need for daily watering;
- no dependence on weather conditions;
- resistance to fungi and pests;
- high productivity;
- rapid ripening of strawberries;
- environmental friendliness of the product.
In addition to the advantages, this technology has some disadvantages. In particular, it is worth noting such disadvantages as constant monitoring. Plants grown hydroponically require daily care. It is necessary to maintain the level of nutrition and its composition, the level of water consumption, substrate humidity and light conditions. Constant monitoring may seem tedious to a novice gardener. But the result justifies the effort, especially since all this can be done under the control of simple automation.
Types of equipment and characteristics of systems
There are many technologies for growing cucumbers without soil. Only the installations, their complexity, operating principles and, accordingly, price differ. Here the gardener chooses himself - depending on what goals he pursues and how much he is willing to spend. Types of technologies are divided into the following: aeroponics – nutrient layer technology using drip irrigation; periodic flooding method and floating platform method.
What is hydroponics and why is it needed?
Hydroponics is a system where crops are grown without the use of soil. The root system is nourished in an artificially created environment (humid air, intensively aerated water or solid). This technique requires regular or continuous drip irrigation using a special working fluid.
Advantages
- This method of cultivating tomatoes has many advantages:
- economical waste of nutritional mixtures, water and space;
- rapid growth, almost one hundred percent uptake of fertilizers by crops;
- simplified care and time saving;
- high fertility;
- guarantee of quality characteristics of fruits.
Did you know? The term hydroponics was coined by Dr. William F. Gerick. He is also the founder of modern hydroponics, who transferred this technology for cultivating vegetable crops from laboratory conditions to industry.
Flaws
- Unfortunately, hydroponics technology also has disadvantages:
- financial costs for the purchase and installation of the system;
- possible damage to plants by diseases;
- risk of harmful insects;
- deformation of tomatoes, damage to roots, falling flowers - if the solution is not prepared correctly.
Advantages
- Increased productivity . Nature has decreed that all living things must work to obtain food for themselves. With this method, all nutrients are supplied to the plant in ready-made form. It can be compared to a person who would not need to chew his food, since it has already been crushed for him. The plants are accustomed to working and put all their freed energy into producing crops.
- Watering . No need to water every day. Given the size of the vessel, you can water the plants once or twice a month.
- Fertilizers . Thanks to the balanced composition of the solution, the plant constantly receives all the substances it needs.
- Immunity . Plants grown hydroponically are not afraid of fungal diseases, and they also cannot develop soil pests and root rot. Therefore, there is no need to use pesticides.
- Ease of transplantation . The roots of such plants are not damaged during transplantation. It is enough to move them from one vessel to another, changing the solution.
- Saving . There is no need to use soil that needs to be changed every year.
- Purity . Hands will always be clean when working, since soil is not involved in the process.
Do it yourself
Flaws:
- The need to control the composition of the solution;
- Control of water level and temperature;
- Control of the safety of the root system;
- Difficulty in growing large species.
Performance planning
To assess the profitability of a business in the field of hydroponic greenhouses, it is necessary to make calculations of the profitability of the farm in the first year of operation. Various crops will be grown that coexist well in the same area. Greens and salads ripen quickly.
The first batch of the harvest can be sold a month after planting. Industrial hydroponics with 6 tiers can serve up to 4 thousand pots at the same time. Let's assume that in a greenhouse of 100 square meters. m. (usable shelving area) at the same time onions, dill, several types of lettuce, parsley, cucumbers and flower seedlings will be sown for the season of outdoor planting in flower beds.
The first income will be received from greens and salads, the share of which is 2 thousand pots. The cost of each type is different and can be set per piece or kilogram. To calculate, let’s take the average price of 70 rubles per item. The proceeds will be 140 thousand rubles.
By the gardening season, flower seedlings (petunias, marigolds, asters and others) grow, which are sold out very quickly. Prices for each type are different - from 30 to 150 rubles per root. Let's assume that the income will be about 250 thousand rubles.
Next, the cucumber harvest will ripen, which can provide an income of up to 700 thousand rubles a year or more. You can read more about productivity and profit in the field of cucumber cultivation on our portal in the thematic business plan.
Over the course of a year, a hydroponic greenhouse allows you to grow some crops in several stages:
- Greens up to 10 batches - revenue about 1 million 400 thousand rubles.
- Cucumbers in 3 stages – revenue from 700 thousand rubles.
- Flowers for seedlings 1 season - from 250 thousand rubles.
- Cut flowers in bouquets - up to 500 thousand rubles.
Total – 3 million 50 thousand rubles.
During the year, the company will have expenses for employee salaries, payment of utility bills, purchase of seeds, fertilizers, preventive maintenance, taxes and much more. To determine the net profit and profitability of a hydroponic greenhouse, let’s enter all the parameters into the table:
| Procedure | Amount, rub |
| Annual revenue | 3,050 thousand |
| Purchase of seeds, mineral complexes, substrates | 100 thousand |
| Consumables for hydroponics, technical maintenance | 50 thousand |
| Utility bills | 120 thousand |
| Loan payments | 600 thousand |
| Salary and annual contributions | 1,600 thousand |
| Income before tax | 580 thousand |
| simplified tax system | 80 thousand |
| Remainder | 500 thousand |
At the stage of opening the greenhouse, funds in the amount of 1 million 700 thousand rubles were invested. If the greenhouse generates a profit of 50 thousand rubles per month, then the farm will reach self-sufficiency in 3 years. To speed up the process, you need to consider the product range. In the first years, you can focus your activities on crops that do not require long cultivation periods and large investments in maintenance.
Scheduling
It is assumed that the hydroponic greenhouse will operate all year round. The demand for greens, vegetables, flowers and other plant crops is not seasonal due to the improved living conditions of modern people. The installation period of the greenhouse is determined by climatic conditions. A frame can be installed on frozen ground if the foundation is laid in advance and communications are installed. Therefore, we will plan the start of work for the warm season - spring or autumn, in order to sow the required crop in a timely manner. In our case, we start planning the dates in early spring, selecting a suitable site in advance and arranging a lease.
| Procedure/Month | 01–02 | 03 | 04 | 05 | 06 |
| Preparation of a business plan, search for territory for a greenhouse complex | + | ||||
| LLC registration | + | ||||
| Applying for a loan or subsidy | + | ||||
| Drawing up a lease agreement. Obtaining funds for the implementation of the project. | + | ||||
| Submitting an application for a greenhouse and hydroponic system. | + | ||||
| Installation of greenhouses and equipment. | + | ||||
| Summing up communications. Setting up equipment and communications. | + | ||||
| Recruitment | + | ||||
| Search for clients | + | + | + | + | + |
| Arrangement of the adjacent territory. | + | ||||
| Purchase of seeds, fertilizers, substrate. First sowing of the crop. | + | ||||
| Harvesting the first harvest (greens). Sowing the next crop. | + | ||||
| Dispatch of the first batch of goods. | + |
The advantage of a hydroponic greenhouse over the classical method is the speed of crop ripening, regardless of the type of crop. If you alternate greens, vegetables, flowers, seedlings, taking into account the ripening conditions and sequence, you can make a profit from a specific harvest every month.
How to plant seedlings correctly
Now that you are familiar with the manufacture and use of the device, all that remains is to tell you how and when to plant tomatoes and your favorite varieties of cucumbers. This should be done either in early summer or spring. In winter, growing vegetables using hydroponics will not be as effective, and you will have to spend money on additional lighting.
Carefully remove the seedlings from the cups, immerse them in warm water for an hour, get rid of any remaining soil and disinfect them for a few minutes in a warm solution of potassium permanganate. Now fill the bottom container with clean warm water
Plant the plant in the substrate and lower the top of the bottle into water. The seedlings should stand in water for a week, only after that add the nutrient solution.
Now fill the bottom container with clean warm water. Plant the plant in the substrate and lower the top of the bottle into water. The seedlings should stand in water for a week, only after that add the nutrient solution.
For the first month of growing, I would advise using a solution with a weak concentration. Take only half of the nutrient mixture for the specified amount of water, this will help avoid burning the tender roots of the seedlings. After a month, start diluting strictly according to the instructions. See for yourself how plants will react to an increase in beneficial elements.
I would like to warn you that plants grown hydroponically should not be taken out into the open air. You risk disturbing the water balance, which can result in plant death. The solution may undergo changes under the influence of fresh air and affect the harvest.
Have you already appreciated the benefits of growing your favorite tomatoes and cucumbers hydroponically, but still have some questions? I advise you to watch a fascinating and useful video for the material. I hope there will be no incomprehensible moments at all, and you can make a simple system yourself. I say goodbye, but not for long. All the best!
https://youtube.com/watch?v=xNkGUjvFWQk
home
We recommend reading
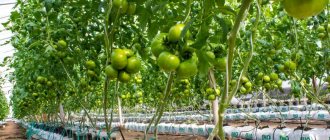
Tomatoes
To grow tomatoes hydroponically, you need to put in a lot of work (as, indeed, with the traditional method of growing on the ground). Low-growing and early-ripening varieties of tomatoes are suitable for growing in this way.
First, the seeds need to be germinated. When the root grows to about 1 centimeter, it is time to plant the plant. To plant seeds, mineral wool soaked in a nutrient solution is used. Sprouted seeds should sprout up to 7-8 centimeters within a week and a half. Be sure to monitor the temperature (20-25°) and the length of daylight hours (8-10 hours). If there is a lack of one or another, you need to come up with heating and additional lighting.
Ease of maintenance
While the seedlings are growing, it is necessary to decide on a hydroponic system. It happens:
- Drip;
- Wick watering;
- Deep-sea rocks;
- Aeroponics;
- Periodic flooding;
- Nutrient layer.
Drip irrigation is used more often. Its scheme is quite simple. The nutrient solution flows through tubes to each plant, wets the substrate and the excess goes back into the tank.
After the seedlings grow 4-6 leaves, it’s time to transplant them into hydroponics
Fill it halfway with expanded clay, place the seedlings and carefully fill it to the top with expanded clay. After this, the pots are placed in another container, slightly larger in size than the first, which does not allow sunlight to pass through.
As such a container, you can use a plastic pipe of a suitable diameter and make holes in it for cups with seedlings.
A large container is filled with the nutrient mixture. Using an air pump, the root system is irrigated with a nutrient mixture. As soon as sprouts appear through the holes in the bottom, you need to monitor the level of the solution in the outer pot. The roots should be immersed in the solution by two-thirds.
Important! When the seedlings grow about 20 cm, they need to be tied up. Otherwise, the tomato may break or fall out of the pot.
It is necessary to carry out artificial pollination in time or attract bees to this. You can grow tomatoes in this way both in a greenhouse and at home, all year round. What could be better than a fresh, just picked tomato in winter, on New Year’s Eve!