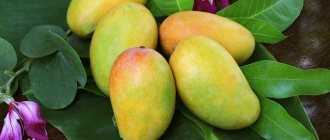
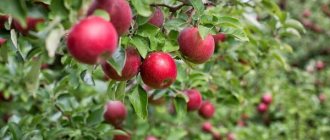
You can grow cherries from pits. But it’s much easier and faster to go into any even abandoned cherry orchard and dig up root shoots, which, although they are inferior to the grafted cherry in terms of the timing of fruiting, are much more durable than the cultivated “relative”.
The reasons for growing cherries from pits may be obtaining a rootstock for grafting and the desire to have a seedling of a favorite variety on the plot. But in most cases, felt cherries are grown from cherry pits.
Since the lifespan of this plant is short - only about 10 years. That’s why they are rushing to prepare a replacement for it on site. The features of growing cherries from pits will be discussed in this article.
Is it possible to grow cherries from seeds?
Nature has arranged it this way that cherry pits serve precisely for the emergence of new trees. Self-seeding is a method of propagation for many cherries. This circumstance is a significant plus in favor of growing a cherry tree from a kernel. Only you can decide whether it’s worth spending time on such a thing at your dacha.
But, if you decide, you should know that it will take time and patience, and there is no guarantee that the grown tree will have the same varietal characteristics and be distinguished by the same tasty fruits as the parent cherry.
Landing in a permanent place
Once the height of the seedlings reaches 25 cm, they can be planted in open soil. From this moment on, the process of caring for the plant becomes “adult”. Every year the soil is loosened, weeded, and weeded. Watering is done when necessary. Such seedlings are used to graft varietal plants. This is due to the late start of fruiting in such a tree and the poor quality of the fruit. Berries grown in this way in the country are unsuitable for consumption.
Pros and cons of the method
There are undoubted advantages in propagating cherries through pitting. This is a great way if needed:
- use the tree as a rootstock to successfully graft a variety that is otherwise impossible to root;
- get a large number of wild cherry seedlings;
- grow a tree of a variety that you like so much;
- continue breeding work.
But, unlike grafted trees, even if the tree completely freezes or dries out, its roots can give life to new shoots, which means the variety will be preserved.
Moreover, such cherries are better adapted to the climatic conditions of the area where they grow. And their root system is capable of firmly holding the tree in the ground and actively providing it with water.
There are also some downsides:
- the yield will not be the highest and not regular;
- Cherries will begin to bear fruit no earlier than they reach 5-7 years of age (even 8-10 years of age).
Subsequent care of seedlings.
During 1 year of life, the plant needs to be watered once a month, 10 liters of water. Then, in the 2nd year of the plant’s life, the amount of water is increased to 20 liters once a month. For the 3rd year of life - 30 liters of water once every 2-3 months. Then you need to water:
- When the buds swell.
- After flowering ends.
- 2 weeks after you harvest.
- With the onset of September.
It is necessary to apply fertilizers from the 2nd year of the plant’s life 2 times during the season. In spring, before the buds swell, you need to take 6 tbsp. nitrophoska and dilute in 30 liters of water. In September, when you carry out the last watering per 1 sq.m. add superphosphate (30 g) or wood ash (400 g) to the tree trunk circle.
Throughout the season, after it has rained and you have watered or applied fertilizer, it is necessary to loosen the soil, then mulch with compost. For preventive purposes against diseases and insects, treatment is carried out using a solution of wood ash. You need to dilute 1 kg of ash in 10 liters of water and boil for 20 minutes. Cool the resulting solution, strain and add another 3 liters of clean water. The prepared solution is sprayed onto the plant. in autumn it is necessary to whitewash the trunk, 1 m in height. Before the winter period, the soil is mulched, in a layer of no more than 10 cm. After planting, within 1 year of life, you need to form the crown, namely, carry out sparse-tiered formation. In 1 year, it is necessary to maintain 3-4 strong branches, which are evenly spaced along the circumference of the tree trunk. Those shoots that remain must be shortened by 30 cm. The first skeletal branches should be no lower than 45-50 cm from the ground level.
The central conductor must be shortened so that its length is 20 cm longer than the skeletal shoot. Then the obtained cutting parameters must be saved. For the 2nd year of the plant’s life, two annual growths must be left on each skeletal branch; the remaining ones must be cut off. Second-order branches must be shortened by 10 cm in the 3rd year; two strong growths must be left on second-order shoots. Then the plant needs to carry out sanitary pruning - cut off damaged branches, branches that thicken the crown and compete with the main ones. Pruning must be done in the spring, before the buds begin to swell. In the fall, it is necessary to cut off all damaged branches, as well as those that are diseased or attacked by pests. When the cherries begin to bear fruit. If all the necessary actions are carried out correctly, then the first fruits will be possible after 5-6 years. But we must remember that the newly obtained plant may in some way differ in some characteristics from the mother plant, moreover, if there was no grafting. It is, in principle, possible to grow cherries from seeds, but you must follow all the necessary rules for planting and caring for the plant. It may also take a little longer than if you planted a plant that you purchased from a special nursery.
Which varieties are suitable for germination?
In order for growing a fruit-bearing tree to become a sure thing, you will have to use certain varieties of cherries, such as Shpanka, Barbados, Red, Suriname and Pink.
According to the recommendations of experienced gardeners, these are the ones that should be propagated if you do not want the tree, grown with such difficulty, to turn out to be frail and sick and not bear fruit.
Important! You should not try to grow a tree from berries bought in a store. The likelihood of getting a fruit-bearing crop as a result is negligible. There are much better chances if the cherries are from a neighboring orchard.
Suitable varieties for growing
Before choosing material to be planted from seeds at the dacha, it is necessary to take into account the climate, soil acidity, temperature conditions, etc. Red, Pink, Barbados, Shpanka, Lyubskaya, and Suriname cherries can be propagated from seeds. I have known cases where even in harsh Siberia it was possible to obtain a tree in this way, subject to the rules of cultivation and care. As practice shows, it is best to grow felt cherries from seeds, because they require replacement every 10 years and while the main bushes bear fruit, young replacement shoots will appear nearby.
The advantage of growing felt cherries this way is that seedlings obtained from seeds fully retain the qualities of the mother plant and are better adapted to local conditions. Of course, the option of growing cherries from a twig is more preferable, because the harvest can be obtained much earlier, and its quality will be higher. But you can easily acquire a standing variety of cherry on your plot by grafting it, which fits perfectly with a large number of trees.
There are a variety of methods for doing this, including:
- on side cuts;
- improved copulation;
- for the bark;
- grafting “into the cleft”.
The main thing is to immediately select cherry varieties that are similar in quality and characteristics. You can even graft cherry onto cherry plum, bird cherry, sweet cherry and sloe. Try it and share with us the secrets of this process. Grafting is done in the warm season, when sap flow in the trees gains sufficient strength. That's all about getting a tree from a seed. If you have something to share, write it in the comments and don't forget to subscribe to my blog updates. Good luck!
Preparatory stage
To get the expected result, the cherry pit must be carefully prepared for germination; it is equally important to plant it correctly.
See also
How to permanently get rid of cherry trees on your property with your own hands
Read
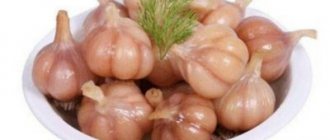
How and when to collect cherry pits
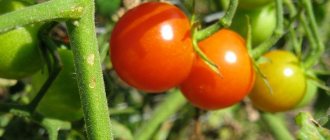
A sprout that breaks out will have to open the membrane of the cherry seed, and this is not easy. Select larger and riper berries for further germination. The first thing you have to do as soon as you collect them is separate the pulp from the seeds.
Saving cherry pits until planting
How to save cherry pits before sowing? They must not be allowed to dry out or rot. To do this you will have to take several steps:
- get rid of any remaining juice and pulp by rinsing thoroughly in cold water;
- lay in an even layer on the fabric and leave in the shade to dry;
- for storage it is better to use a paper bag, and then pack it in a plastic one;
- Before sowing, keep in a dry place, make sure that the temperature does not rise above 20 ºС.
Natural stratification: spring and autumn
In order for the seedlings to germinate, the seeds are given special training called stratification. Simply put, they are kept in the cold in a special way.
- Autumn.
If cherry pits are sown in the fall, they are first soaked for a week. Cold water is used for these purposes. A prerequisite is to change it daily. The seeds are placed in the soil a month and a half before it freezes, deepened by 3-5 centimeters and maintaining a distance of 15 centimeters between them.
In the winter cold, the cherry tree is covered with a snowdrift. In the spring, young cherries will require weeding, watering and loosening of the soil. Autumn stratification is natural.
- Spring.
Artificial stratification of cherry pits is carried out 3-4 months before the time of planting them in the ground.
The first method is similar in its effect on seeds to natural stratification. Cherry pits are soaked in the same way. A week later, a sterilized jar with a capacity of 3 liters is filled 2/3 with a mixture of substrate and soaked cherry pits. When preparing the substrate you can use:
- sawdust;
- coarse sand;
- dry grass - smaller, chopped;
- crushed peat;
- sphagnum moss;
- fine expanded clay.
You will also have to treat the substrate to avoid the formation of mold and rot. Excellent results are obtained from the use of a solution of potassium permanganate, Maxim or Benazol.
A jar with the mixture, closed with a plastic lid, is buried in the ground and removed from there no earlier than the ground thaws. And the seeds, already sprouted, can be planted in peat cups, or directly into the ground.
There is another method of spring stratification, when the seeds are filled with water, then soaked in it for 3-5 days. Then they are mixed with the substrate (described above). In plastic containers they remain refrigerated for 3 to 4 months (just not in the freezer). This is enough for the sprouts to hatch.
Transplanting germinated seedlings into the ground
The seedlings are transferred to open ground when they reach a height of 1–1.5 m and form several skeletal branches (from 3 pcs.) - at the age of two. Before transplanting, you need to prepare the site in advance. This must be done six months before disembarkation.
When and where to plant
You need to choose a site that is sunny and protected from the wind on the north side. A good option for planting near outbuildings, a fence or a house. The main thing is to place the plant on the south side, no closer than 2 m from the building. The depth of groundwater should be checked. The optimal distance to them is 2 m.
If there is no suitable place with such conditions throughout the area, the plants will have to be planted on an artificially constructed mound. It is best to transplant into the ground in the spring, before the buds bloom on the seedling. This will make it possible to observe the adaptation of the plant throughout the warm season.
Did you know? 10 cherries at night - and sound healthy sleep is guaranteed if you suffer from insomnia. And all thanks to the melatonin found in the fruit, which calms the nervous system and improves sleep quality.
Requirements for the landing pit
The soil on the site should be well fertilized, loose, with a neutral pH level (5–7). Cherries develop and bear fruit best on loam. Soil preparation is carried out in the fall. The area is cleared of weeds. Then they dig it to a depth of 30 cm and disinfect it with a 3% concentration of copper sulfate solution.
A week later, for repeated digging, the following is added to each square meter:
- 10 kg of sand;
- 20 kg of manure;
- 30 g superphosphate.
In the spring, they dig again and add 20 kg of compost per square meter. The planting hole is made a month before planting. Its size is 0.6 × 0.8 m. When planting several plants, it is optimal to leave a distance of 3-4 m between them. A similar step is taken in rows.
The top 30 cm of soil is mixed with 20 kg of compost and 30 g of superphosphate. Fill the hole 1/3 full with this mixture, install a support stake and add 20 liters of water.
Read more about how to plant cherries in spring.
Transplantation scheme
Before transplanting, the plants are not watered for a week. On the day of planting, a cone-shaped mound is formed in the hole. A pot with a seedling is placed on it (if the peat option was chosen) and leveled so that the plant is not buried too deeply in the ground.
If the seedlings were grown in plastic pots (buckets), they are replanted using the transshipment method, preserving the earthen clod. After filling the hole with soil, the tree trunk circle is compacted and 20 liters of water are poured. As soon as the liquid is absorbed, the soil around the trunk is mulched with peat and sawdust to a height of 5 cm.
Scheme of planting a fruit tree seedling
Planting and germination at home
October is the best time for planting. As a last resort - early spring. It should be recalled that cherries do not tolerate transplants, so it is better to decide on the location right away. It is important to keep the soil moist. It shouldn't dry out.
See also
Description and characteristics of the Novella cherry variety, subtleties of cultivation
Read
Required soil
If there is an opportunity for the seedling to choose the soil where the mother cherry grew, take advantage of it. This option is the best. If this is not possible, a potting soil mixture sold in stores will do.
Pot size
To germinate seeds - cherry pits, each one will need its own small pot, up to half a liter in volume.
Kernel landing algorithm
Seeds can also be planted in one fairly large container, maintaining a distance of 15-20 centimeters between the planted seeds. And the holes in the ground with cherry “seeds” are covered with soil.
We grow and care for seeds.
After the first shoots appear and you remove them to another well-lit area, the temperature must be maintained at up to +20 degrees. After this, you need to constantly moisten and loosen the soil. For fertilizers, organic fertilizers and a mineral complex are well suited. Feeding is needed when you notice the appearance of 1-2 leaves. Fertilizing is applied once a month and at the root of the plant. good use of liquid mullein. It must be diluted with water (1:10). Each plant needs to add 200 ml of fertilizer. Organic fertilizers should be alternated with a mineral complex. Nitrophosk is also good (for 3 liters of water, take 1 tablespoon of the product, for each plant - 200 ml of the prepared mixture). You can also use superphosphate (take 10 g of the substance per 10 liters of water - 300 ml of the finished mixture per plant). Nitrophosk must be used throughout the warm season, it must be alternated with mullein, and superphosphate must be added in August. You need to finish fertilizing in September. For the 2nd year after planting, you need to apply fertilizer once every 2 months. Water the plant when necessary. You need to check the dryness of the soil using a wooden stick. They lower it into the ground, then pull it out and look at it. If the stick remains dirty, then you should not water the plant yet. At first, it is better to water the plant and apply fertilizing using a spray bottle. In winter, you need to reduce watering to a minimum amount. You can add water once every 2 months, but you must ensure that the soil does not dry out. After watering the plant and fertilizing, do not forget about loosening. This will help oxygen penetrate deeper into the roots of the plant. when 4 leaves appear, it is necessary to dive the plant. if you grow the plant in peat containers, then this process will be very simple. You need to take the pot and put it in a slightly larger container and fill the voids between the two containers with soil.
It is necessary to transplant into an even larger container if the roots grow through the drainage hole. In summer, the plant is best grown outdoors. If this is not possible, then an unglazed balcony will work well. Diving the plant into open ground is necessary for it to reach 2 years of age. After this you can keep it on a glassed-in balcony. When the plant sheds its leaves, it is in a state of hibernation. But you need to insulate the pot in advance. This should be done using agrofibre, wrapping the container. To avoid freezing, you need to mulch the soil with humus. This will be like a hardening procedure before transplanting the plant into open soil.
Further care
It consists of the most common actions:
- loosen and water the soil in time;
- remove weeds;
- apply fertilizers and humus;
Important! If the soil in which the cherry is planted has been fertilized since the fall, fertilizing is not required. But cherries planted in pots will need to be fed after a couple of months.
- as you grow (from the 2nd year of life), form a crown - perform spring pruning;
- fight diseases and pests.
It is important to properly prepare young cherry trees for their first winter:
- covering the roots, mulching the tree trunk;
- generous watering (up to eight liters per plant);
- in regions where winters are especially harsh, in the last ten days of October the trunk and crown also require insulation; newsprint or burlap is suitable for wrapping them.
Disease and pest control
Among the diseases developing on cherries are moniliosis and pocket disease. Preventive measures to protect against them are annual spring treatments of shrubs with Bordeaux mixture, carried out in two stages. If it is not possible to prevent the disease, then all affected shoots are cut off and burned. Then the plant is sprayed with a copper-containing preparation. Among the pests on the crop, attacks by aphids, scale insects, cherry weevils and gall mites have been recorded. Insecticides “Aktara”, “Karbofos” and other pesticides of similar action act as an effective means of protection.
Will the tree bear fruit?
It has long been known that cherries grown from stones lose the quality of the parent tree. If you want to get abundant harvests from it, follow certain rules of agricultural technology, but, above all, select the right material for planting. Otherwise, you risk raising wild animals with low yields and mediocre taste.
Not every seed can produce a full-fledged cherry from which you can expect good harvests. Forget about large fruits from the store. Better look at your neighbor's garden.
You can, if desired, graft a cultivated variety onto a seedling grown from a seed to be completely sure of the result.
Beneficial and harmful properties of cherries
Dear readers, cherries have many beneficial properties for the body. I will briefly describe its main positive and negative characteristics.
- Pectins and salicylic acid contained in the pulp help get rid of streptococcus, staphylococcus and the harmful environment of the gastrointestinal tract.
- Calcium strengthens bones.
- Anthocyanins prevent the formation of cancer cells.
- Antioxidants and B vitamins strengthen the nervous system.
- Bioflavonoids and vitamin C improve immunity and rejuvenate the body as a whole.
- Magnesium - for the prevention of varicose veins and atherosclerosis.
- Antiseptics cleanse toxins and waste.
- Iron - normalizes blood clotting.
- Not recommended if you are allergic to cherries.
- With acute diseases of the liver and gastrointestinal tract.
- The acids contained in the pulp destroy tooth enamel, so you need to rinse your mouth after eating cherries.
- Use caution if you have diabetes.
- The seeds contain the glycoside amygdalin. It decomposes in the stomach and releases hydrocyanic acid, which can cause poisoning.
Watch a video about the benefits and harm of cherries
Propagation by seeds (seeds)
Some varieties of cherries can be grown from seeds. They will bear fruit just like the mother varieties. Some grown seedlings can serve as a rootstock for grafting other varieties. How to grow cherries from pits?
Ripe berries are chosen for sowing. The seeds are cleared of pulp and washed in water. Afterwards the seeds are dried. The seeds are planted in the ground at the end of September. Therefore, to preserve until planting time, place the seeds in damp sand and place in a cool place.
To plant seeds, prepare the bed in advance. Dig up the soil. Remove weeds. Apply fertilizer. Now start sowing. The seeds are placed in the ground to a depth of 3-4 cm. Place a 5 cm layer of peat on top.
Cherry pit stratification can be done at home. To do this, pour the prepared seeds into a container. Mix with sand or peat and refrigerate until spring.
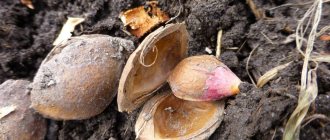
If cherry pits are sown in the spring, they must undergo stratification. This period is 200 days. To stratify, place the seeds in sand. Moisten and place in the cellar at a temperature of +5-6 degrees. If there is no cellar, dig a trench 60-80 cm deep. Place seeds at the bottom and cover with peat. Finished bones are determined by cracking or breaking along the seam.
Such seeds are sown in early spring to a depth of 5-6 cm. The seeds are planted with a distance of 3-5 cm and row spacing of 30 cm.
Cover the plantings with a layer of humus or peat. Further care consists of watering, loosening and weeding.
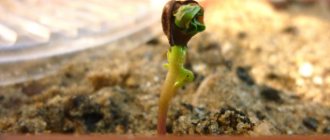
Sprouted cherry pits
During the growth of the bush, remove the side branches that grow on the lower shoots. These branches are removed so that they do not interfere with budding in the future.
With the onset of autumn, the seedlings are carefully dug up. If possible, trying not to damage the root system. A few days before digging, wipe off the leaves from the seedlings.
Sort seedlings into categories:
- The first category is the root collar with a diameter of 7-9 mm.
- The second category is the thickness of the root collar 5-7 mm.
- The third category or rejects includes seedlings with a root collar thickness of less than 5 mm.
Cherry seedling from pit.
Trim the roots of the seedlings. Leave 10-12 cm. To preserve them until spring, you need to dig them in a trench. It should be placed in an inclined position. With the onset of spring, plant the seedlings in a permanent place.
Seed preparation and stratification
Be sure to remove the remaining pulp from the seeds and rinse them with warm running water. Pour water over the drupes and leave for three days, changing the liquid regularly. After drying for a short time, send the seeds into a container filled with damp sand, it will help preserve the seeds and cause sprouts to appear.
The stratification process is required; to do this, place the container in the refrigerator. Can be kept for several months in a cool, well-ventilated area. If autumn planting is carried out, there is no need for hardening; winter frosts will do an excellent job of stratification.
Carissa
The indoor plum is an exotic plant with fragrant flowers and edible fruits. To plant it, you will need fresh seeds, which must be placed in universal soil at a depth of 2 cm, and then covered with polyethylene and provided with moderate lighting and moisture.
Five-centimeter sprouts are transplanted into separate containers and pinched to stimulate branching.
In summer, an adult plant must be provided with a temperature of + 18-25 degrees, during the dormant period - + 17.
Carissa needs regular but moderate watering with warm water and fertilization with phosphorus-containing compounds throughout the entire waking period. A young bush needs to be replanted annually in the spring, an adult plant - every 2-3 years in non-acidic soil made from leaf and turf soil, peat, humus and sand.
Advice from experienced gardeners
Experienced gardeners know several secrets that increase the chances of successful propagation of cherries by cuttings:
- If propagation is carried out by green shoots, then 2 weeks before harvesting the material you need to select a specific branch and mark the cut point on it. In this place, the shoot should be wrapped in an opaque material, for example, with black electrical tape - 4 cm wide. Since the closed area of the bark will no longer receive sunlight, the cells in this place will degenerate, and after burying in the ground, the cutting will give roots faster. According to gardeners, this method increases the likelihood of rooting by 30%.
- Shortly before cutting the planting material, it is recommended to water the cherries generously with water. The more the tree shoots are saturated with moisture and nutrients, the faster the cuttings will begin to grow.
- Despite the fact that even mature cherry trees produce strong root shoots and green shoots, it is better to use young plants for propagation - the planting material taken from them takes root better.
Gardeners recommend remembering that for successful propagation, cuttings must be cut accurately, neatly and evenly with a well-sharpened blade. The garden knife should first be sterilized in a solution of potassium permanganate.
It is better to take planting material from young plants
How can cherries be propagated by pitting? How can cherries be propagated by pitting?
Victoria
In nurseries, steppe and sand cherries are propagated mainly by sowing seeds taken from the most productive bushes with large and tasty berries. Sowing can be done both in autumn (in September) and in spring. Before sowing, seeds are stored in damp sand, otherwise they will reduce germination. During spring planting, cherry pits are stratified. When propagated by seeds, despite the fact that they were taken from the best bushes, the offspring will still be heterogeneous. Along with valuable seedlings, there will also be low-yielding ones with small berries, but this will become apparent when the seedlings begin to bear fruit. When propagated vegetatively - by cuttings, root shoots or layering - the seedlings fully retain all the qualities of the mother bush. In this way, a particularly valuable form can be propagated. The easiest way to propagate steppe cherries is by root shoots. It appears especially a lot in May - June. The shoots grown in May can be used for planting in the garden in the fall of this year or next spring. But it is better to take two-year-old shoots with a more developed root system. When harvesting shoots, you should keep in mind that low-yielding bushes always produce a large amount of shoots, and high-yielding bushes usually produce little. Saplings from green cuttings begin to grow in the first half of June. Green shoots are cut from the chosen bushes and cut into cuttings. Each cutting should have three internodes and two leaves. The cuttings are planted in a box with humus soil. The box with the planted cuttings is covered with glass, watered regularly and kept at a temperature not lower than 20-25°C. After a month, the cuttings take root and the glass is removed from the box. In winter, the cuttings are stored in the basement, and in the spring they are planted in a school for growing or directly into the garden. Layers of sand cherries are laid in the same way as currants. Layers of felt cherries are placed in grooves 10 cm deep. When laying layering, the shoots are broken so that they take root better
ORIK
plant, water and fertilize))
Baldman
put the bones in the ground and plant them. whatever, it will grow
Anna Pankova
bury the bones in the ground!
Valentina Ermakova
Ordinary!!!! It is better to plant cherry seeds in the ground in the summer or autumn, and in the spring the shoots will appear. It’s better to put it in some hole or bed that will be used, which means fertilized soil and constant watering.
Zhanna S
Of course. can be done by sowing in the ground in the fall. But such seedlings, the seeds of which were taken from good cherries, will most likely not retain their maternal properties. And the process will be long. It is better and more reliable to buy a grafted seedling. As a last resort, dig out the root shoots. But... along with its taste properties, such a seedling will also inherit the ability to produce root shoots. And this is a problem in the garden...
Tatyana Batukhtina
Cherries have a strong root system. It is better to plant a rooted seedling, but then dig a fence (a sheet of iron) into the ground to a depth of 50 cm and about a meter in diameter. Otherwise, the young growth will clog the entire area, and it’s not easy to get rid of it!
How to grow a coffee tree at home
If growing a lemon or orange from a seed seems like a very banal thing to someone, you can try growing a coffee tree. True, there is one caveat here: the coffee beans that we pour in large quantities into the coffee machine are unlikely to be suitable. It is best to ask for a couple of brown-red unripe coffee fruits from those who already have such a tree growing.
To get to the unripe beans, you need to peel the coffee fruit and remove the pulp. Both halves of the grain can be used as planting material. They need to be washed with water under the tap, and then kept in a weak solution of potassium permanganate for half an hour. Then the seeds are planted in a container with drainage holes and loose soil to a depth of 1 cm.
The coffee tree is quite picky and prefers to grow in acidic soil. Therefore, the substrate for it is prepared from acidic peat, which is mixed in equal parts with humus, wood ash and sand. In order to increase humidity and at the same time add acidity to the soil, sphagnum moss is sometimes used, which is pre-crushed.
The container is placed in a place that is well illuminated by the sun, providing the future plant with a temperature of at least 20°C. Typically, pots with coffee tree sprouts are placed on windowsills on the sunny side and covered with a jar on top to create a greenhouse effect. But during prolonged heat, it is better to move them to a cooler place so that the plant is not exposed to direct sunlight.
When growing a coffee tree, you need to choose the right pot. A coffee tree will, of course, grow in a small pot, but it is unlikely to bloom.
The coffee tree has a capricious nature and requires replacing the soil every year until it is five years old. Before you start replanting, add fertilizer to the soil - 20 g of bone meal or horn shavings per 1 kg of soil.
After five years, the tree's need for annual soil replacement decreases, and you can simply relax and enjoy its magnificent view.
Growing from seedlings
After it has been possible to grow a cherry sprout, depending on the method of growth, the seedling is planted in open ground. In this situation, you should meet the disembarkation deadlines. If it is carried out in the fall, then the best time is the beginning of October. If in spring, then April, but only until the buds open.
Planting is carried out according to the rules of agricultural technology in order for the cultivation of cherries to be successful. Directly for planting, you should dig a planting hole with the following parameters: diameter up to 60 cm, and depth up to 45 cm. The entire root system of the seedling should fit into it without any problems. The soil that was removed from the hole should be divided in half and mixed with humus and ash, potassium chloride and superphosphate should be added. For clay soils, sand is also added.
Before planting, you need to carefully examine its root system and remove damaged and dried roots. Sometimes it is recommended to keep the roots in water for a couple of hours.
At the bottom of the hole, pour a cone above the prepared soil described and lower the seedling there so that the root collar is three centimeters above ground level. Then the roots are covered and the soil is compacted by hand. A peg is driven in from the north side and a seedling is tied to it. A roller of earth is made near it so that a hole for watering is formed. The seedling needs to be watered well with water that has been heated in the sun. Then the soil around it is mulched with humus, compost and liquid bird droppings.
During the year, the young seedling should be fertilized several times so that it has enough nutrients for full growth.