Celery is a healthy and tasty plant. The harvest depends on what variety you planted: if root celery, then you will get a juicy root vegetable; and if petiolate, then succulent petioles. The crop has a long growing season, so in regions with short and cold summers it needs to be grown through seedlings (especially late-ripening varieties!). This material has already talked about the features of growing seedlings, but now the time has come for spring planting of plants in open ground! And we should talk about it.
The best varieties of celery root
Celery is called both a vegetable and a herb, depending on which type of crop the gardener chooses. And there are three of them - leaf, petiole and root. The most popular of them is the root one, although the root crop has a long ripening period: it lasts up to six months.
This vegetable has round, fleshy roots, hollow petioles, and thin leaves. The most valuable and appetizing part is the root vegetable with white juicy pulp, shaped like an apple.
Those who have been growing root celery in open ground for a long time have decided on the choice of the best varieties for their region. You should focus primarily on the climate. In the south of Russia, spring comes early, so any variety will have time to ripen, but in the Moscow region or the Urals it is better to give preference to early ripening types of celery.
In central Russia, with snowy winters and humid summers, the best choice will be root varieties of celery: Anita, Alabaster, Kornevoy Gribovsky, Zolotoe Pero, Yablochny.
For cultivation in the areas of Siberia and the Urals, it is worth paying special attention to the varieties Egor, Russian size, Invictus, Silach, Esaul.
The Anita variety can be called universal. It grows and bears fruit with equal success in the Moscow region and in Siberia. Mid-late root crop weighing up to 400 g. not afraid of slight frosts, stores well.
In regions with long summers, the mid-season varieties Gigant and Silach are called the best, and among the late ones, the Maxim variety is especially distinguished.
Where to plant celery in the country: choosing a location
In order for petiole and root celery to produce a good and tasty harvest, it is necessary to plant it in a suitable area in the garden. The ideal bed for the crop: a sunny, open place with light, loose, fertile, sandy loam soil that is neutral in acidity.
When choosing a place for planting, it is recommended to take into account the principles of crop rotation (that is, alternation of crops). Good predecessors in the garden for celery: legumes, tomatoes, cucumbers, cabbage. Bad predecessors: parsley, dill, parsnips, carrots.
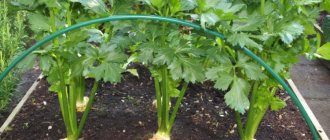
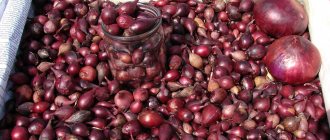
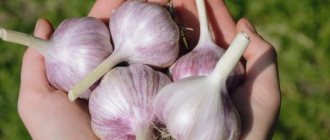
Good neighbors in the garden: onions, garlic, potatoes, onions. You can plant celery in the rows between these crops (the smell of this plant repels some pests).
Preparing the bed
It is recommended to prepare the bed for growing crops in advance (preferably ahead of the season, that is, in the fall, or at least 4-2 weeks in advance). Before digging (to the depth of a shovel), you need to add humus or compost (4-6 kg per 1 square meter), as well as mineral fertilizer, for example, Nitroammofoska or Diammofoska (according to the instructions). It is important to apply the last mineral fertilizers when digging in the spring, but in the fall it is advisable to apply potassium sulfate and superphosphate.
Advice! If the soil on the site is heavy, dense and clayey, then sand should be added for digging (1 bucket per square meter) and preferably non-acidic peat (the same amount).
Planting seeds for seedlings
On the territory of our country, in most regions, root celery is grown exclusively through seedlings. Growing times are as follows:
- in the southern regions: late January ─ early February;
- in the middle zone: in the second half of February;
- Siberia and the Urals: early March.
Soil for sowing can be bought in stores for summer residents, but if possible, it is better to prepare it yourself. The soil mixture should consist of:
- from one part of turf land;
- two parts of humus;
- one part of peat;
- one part sand.
To disinfect the finished soil, it is advisable to spill it with a warm one percent manganese solution. And just before planting, the soil should be mixed with wood ash. You will need approximately one tablespoon for every kilogram of soil. The most suitable container option is wooden or plastic containers. You can also use plastic cups or cassettes, peat tablets and pots.
If there are no drainage holes, a small layer of pebbles and sand should be poured onto the bottom of the planting container, followed by prepared soil.
Soaking procedure
First of all, seed treatment is necessary. The fact is that due to the high content of essential oil, they germinate slowly. To speed up the process, you need to soak the seeds: pour them into gauze and place them in heated water for a day. The water must be changed every four hours.
Some gardeners use soaking seeds not in water, but in vodka. This procedure lasts no more than a quarter of an hour, then the seeds are washed in clean warm water and dried. Experimenters call this option a good prevention against possible root diseases.
Only previously untreated seeds can be soaked. You should study the notes on the packaging: if it is indicated that the seeds are coated or encrusted, you should abandon the soaking procedure.
Features of the landing stage
This final stage is perhaps the most important, especially for those who are just mastering the science of how to grow root celery. It is necessary to strictly follow the sequence of actions:
- Fill the container prepared in advance with moistened soil and lightly compact it.
- Pour a two-centimeter layer of snow on top of the ground, lightly crush it and spread the seeds on top. A little later, the melted snow will immerse the seeds to the desired depth.
- Cover the crops with film or glass and leave them in a room with an air temperature of at least +25 degrees.
Seeds can be planted without adding snow, but in this case they need to be mixed with sand, scattered over the surface of the soil and sprayed with water with a growth stimulant dissolved in it.
Is it possible to grow celery at home?
If we are talking about obtaining root vegetables at home, then this is only theoretically possible. Of course, you can create artificial conditions, but does it make sense to maintain high illumination for six months and create long daylight hours in order to obtain several fruits? But it is quite possible to get vitamin-rich greens in winter by planting a commercial celery root crop in a pot, which is often done. But it would be more correct to call this process not growing, but forcing greens.
Growing conditions
You can get celery leaves at home on an insulated balcony, if the temperature there is not lower than 10 ° C, or on a lit windowsill. The root crop for this can either be bought in a store or taken from your own summer harvest. It is important that it is not too small: at least 5 cm in diameter. No special conditions are required: you need a large pot, a place for it and a little effort in watering and maintaining sufficient lighting.
Landing
You can plant root vegetables both in early spring (on the balcony, to obtain spring greenery), and immediately after digging up root vegetables in the garden (on the windowsill, for winter harvesting of vitamin products). However, it is worth understanding that the duration of the arrival of tender leaves will not be long: after two months, the leaves will be aromatic, but very rough; they can be used in cooking, but not in salads. This means that a new root crop will need to be planted.
Any flower pot or small bucket is suitable as a container. Several specimens can be planted in a large container, but not close together. It is advisable to place a small layer of drainage at the bottom, but there are no special requirements for the soil for forcing leaves: soil of any normal composition will do. True, you can bring weed seeds from the garden with it, but this is not scary: weeding is not a difficult task, it is worse if it contains unpleasant insects. The root crop must be planted so that its top is not covered with soil.
Care
Caring for plantings is elementary. Celery in a pot should be watered frequently, preferably with settled water. Watering is required abundantly, but without fanaticism: the soil should not become sour, otherwise the root crop will simply rot. It is better to keep the pot on a southern windowsill: you need a lot of light. If we are talking about winter time, you will have to equip additional lighting: a short day will not make it possible to obtain a bountiful harvest, even of green products.
At home, we can only talk about obtaining green products
The first leaves can be cut off in 2-3 weeks. To prolong the harvest, the soil in the pot must be loosened periodically. Is it worth feeding? It seems that it is better not to do this: as long as the root crop has enough of its own strength, let it expel the foliage. For your own health, it is better to get natural products, and after a couple of months replace the soil and root crops in the pot.
First shoots
After sowing, it will take at least two weeks before tender shoots appear. They require a very careful attitude when leaving. If the soil dries out, the crops should be carefully moistened with heated water using a hand sprayer. It’s even safer to use a pipette, syringe or syringe. With this watering, each plant should receive approximately three tablespoons of water at the root.
As soon as the first shoots emerge, you should immediately remove the cover from the container and place the box near the most illuminated window. At the same time, the air temperature decreases; it should not be higher than +16 degrees.
Seedlings begin their development almost in winter: the days are short at this time, which means that the gardener should organize additional lighting for the plants using phytolamps.
During the first week, supplementary lighting should be around the clock, and then phytolamps can be turned on only in the morning and evening hours. And only in cloudy weather do seedlings need additional lighting all day.
A little about petiole celery
Petiole celery is even more demanding on growing conditions. In addition to the fact that it also needs fertile soil and regular fertilizing, it also needs to be hilled high during the growing season or bleached before harvesting. Only then will it turn out juicy and tender.
Bleaching is carried out when the petioles reach 30 cm in height. Cut off all leaves growing horizontally and remove excess growth points. Then they wrap the leaves in thick paper, leaving only the tops exposed to the light. It looks like a “collar”. After three weeks, they make their own “collar” for the grown leaves.
The result will be better if you make a “collar” from black covering material. Then the whitening procedure will take only two weeks.
Petiole celery must grow in favorable conditions without interruptions in watering and in a stable temperature, otherwise it will become bitter.
Picking seedlings and caring for them
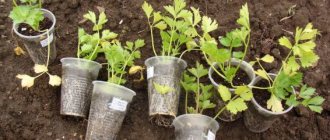
Root celery, the cultivation and care of which has its own characteristics, is not without reason called a “slow” plant. Only after a month do real leaves form. This is a signal that soon you will have to start picking plants into separate pots, cups, or directly into greenhouses and hotbeds.
When picking seedlings, a layer of soil 10 ─ 15 cm thick is required. When picking plants, you need to ensure that the growing points are not covered with soil and the root system is not exposed. Damage to the main root is especially dangerous. These mistakes are fraught with a delay in seedling development and the formation of numerous roots with a shapeless tuber.
If seedlings are moved to a greenhouse or greenhouse during picking, a distance of at least 5 cm should be maintained between them. After the operation, the seedlings are watered and covered from the sun with damp paper for several days. The thermal regime assumes + 16 degrees during the day and at least +12 at night. Next, the gardener’s task is to provide young plants with regular watering and loosening of row spacing.
When loosening, the soil should not touch the cotyledon leaves, so that in the future the root crop does not acquire unnecessary “shaggyness”.
Rules for sowing seeds
Before sowing, the soil is spilled with clean warm water and poured into boxes. Using a toothpick, make 0.5 cm indentations into which the seeds are placed. The soil is watered again. As it penetrates the soil, it will pull the seeds down. Instead of water, gardeners advise using snow to create natural conditions.
There is a relatively new and original way of growing celery seedlings in snails. This method significantly saves space in the house. To curl the snails, use a backing for laying the laminate and strong elastic bands for fixing.
The substrate is disinfected with a solution of potassium permanganate, a tape 10 cm wide is cut out, soil is poured on top with a layer of 1 cm and a length of 20 cm. The prepared seeds are laid out with tweezers at intervals of 2 cm. 2 cm are removed from the edges of the film. Then the tape begins to be carefully rolled up. A layer of soil is poured onto the remaining area and the seeds are laid out. The snail is rolled up to the end, secured with elastic bands and placed in wide trays, several at a time, so that the seeds are on top.
Two weeks after sowing, preventive spraying is carried out with Trichodermin (10 mg per 1 sq. m).
Planting root celery for seedlings
Feeding seedlings
For the first feeding, which is carried out 10 days after picking, you will need a nutrient solution. When compiling it, you only need one teaspoon of nitrophoska, which is diluted in a bucket of water. Each container with a plant is watered with two to three tablespoons of fertilizer.
If the leaves begin to lose their bright color, the seedlings must be supported by adding urea to the soil ─ once every two weeks. After feeding the plant, be sure to wash the solution off the leaves. This way it won't get burned. Hardening off of seedlings is carried out before planting in open ground. First, it is taken out into the open air during the daytime, and after a day or two it can be left overnight if there is no threat of frost.
Features of growing seedlings
Celery root seeds are characterized by a rapid loss of germination, and the long growing season forces gardeners to use the seedling method for growing the crop.
To obtain strong and healthy root celery seedlings, the seeds are first awakened and germinated, a nutritious soil mixture is prepared, and after the leaves appear, the seedlings are planted in separate containers. Care consists of maintaining optimal soil moisture, observing light and temperature conditions and applying fertilizers.
Seeds
Celery root seeds are very capricious and quickly lose their viability. Gardeners advise buying fresh seed material or collecting your own every year.
The outer shell of the seeds is impregnated with essential oils, which protect against unfavorable conditions, but make germination difficult. To wash off volatile substances, the seeds are soaked in warm water for 48 hours, then germinated in damp gauze in a dark place. The water in the saucer is changed every three days. After the seedlings appear, the seeds are sown for seedlings.
The second way to prepare seeds for growing seedlings is stratification. The material is wrapped in a damp cloth and left at room temperature for a week. Then the seeds are placed in the refrigerator for two weeks, creating natural conditions favorable for germination, when the grains overwinter in the ground and sprout together in the spring.
The soil
Light but nutritious soil is suitable for growing celery seedlings:
- turf, sand, peat, sawdust, ground eggshells in equal parts;
- 3 parts peat, 1 part vermiculite, 1 part humus;
- vermicompost and sand in equal proportions.
Gardening stores sell ready-made nutrient substrates with a full range of nutritional components.
Before sowing, the soil is disinfected in the oven, microwave, or steam. Considering that when heated, not only pathogenic, but also beneficial microflora die, gardeners advise spilling the soil with a strong solution of potassium permanganate, “Baikal-M” or “Shining”.
For every 10 kg of soil add 200 g of wood ash and 20 g of urea.
Container and place of cultivation
Root celery seedlings are grown in common boxes or plastic trays and then transplanted into individual plastic glasses with a volume of at least 300 ml. Before use, the container is washed and disinfected with a solution of potassium permanganate or copper sulfate.
The place for growing seedlings is chosen on the south side of the house. Daylight hours are 12-16 hours. If necessary, the sprouts are illuminated with a lamp.
How to sow celery. Sowing root celery seeds for seedlings.
Planting in open ground
The best time to move seedlings into open ground is considered to be mid-May , and even earlier in early spring. By this time, each seedling will have acquired a well-developed root system, produce four ─ five leaves and reach a height of 12 ─ 15 cm. It is believed that early planted root celery gives a more abundant and high-quality harvest. But when determining specific dates, it is necessary to exercise caution, since planting too early is fraught with the formation of numerous flower stalks.
Preparation of planting material
The key to successful cultivation at the initial stage is the correct choice of seeds, as well as compliance with the timing and technology of sowing.
Selecting seeds for seedlings
Depending on the variety, the growing period from germination to technical maturity is up to 200 days. This means that in regions with a temperate climate, you need to choose varieties with early or medium ripening.
As of 2022, the State Register includes early and mid-early varieties of root celery, which are allowed to be grown in garden crops:
- Kornev Gribovsky;
- Diamond;
- Apple;
- Yudinka;
- Egor.
Selection criteria when purchasing seeds:
- you should choose seeds from trusted producers who have already proven themselves in the market (“Russian Garden”, “Gavrish”, “Biotechnika”, etc.);
- it is better to buy at a specialized gardening store, where they know how to store seeds and can give recommendations on varieties;
- check the expiration date of the package, as old seeds lose their viability;
- Do not use damaged or rotten seeds.
Preparing for sowing
Seeds for seedlings are sown from February to mid-March, focusing on the ripening time of the variety and climate. You need to calculate the time correctly so that there are 70–80 days left before planting the plants in the ground. Celery root seeds can germinate without pre-treatment. In this case, seedlings appear in approximately 12–18 days.
To speed up germination, additional manipulations are carried out with the seeds before sowing.
- seeds are soaked in warm water for 18–24 hours, changing it every 5–6 hours;
- two layers of damp paper, cotton wool or fabric are placed on a saucer, between which the seeds are placed until germination;
- The seeds are poured with a small amount of vodka for 15 minutes, then washed with water and immediately sown.
Sowing is carried out both in common boxes and in individual pots or peat tablets. When choosing soil, the main thing is that it is loose and allows water and air to pass through well. For example, sand, coconut fiber, as well as vermiculite or peat are added to universal purchased soil as a leavening agent.
Sowing order:
- In nutritious, moist soil, make grooves 0.5 cm deep at a distance of approximately 5 cm or holes according to a 2x2 cm pattern.
- Sow the seeds and sprinkle with a thin layer of soil.
- Spray the soil with water from a spray bottle.
- The container is covered with a transparent film or glass and placed in a warm place until shoots appear. The optimal temperature for seed germination is 18–20 °C.
Some gardeners recommend sowing seeds superficially and covering them with soil only after the beginnings of roots appear.
Additionally, the methods of sowing root celery are described in the video from the channel “In the garden or in the vegetable garden.”
Site selection
The bed for planting celery is usually prepared in the fall. It is cleared of weed roots, dug up and fertilized with manure. If these works are postponed until spring, then when choosing a suitable site you need to remember:
- celery does not like acidic soil;
- if the land is often subject to flooding, there is a high probability of infection of the crop with bacterial and fungal diseases;
- in a bed with heavy soil a drainage layer is necessary;
- Only rotted manure should be used as fertilizer.
To plant, you must wait for cloudy weather. If there are successive sunny days, then planting work needs to be done in the evening hours. If you plant large-fruited varieties of root celery, it is necessary to provide a distance of 40 cm between plants, and for smaller, medium-sized varieties - 25 cm.
Best planting methods
Celery can be grown by sowing in boxes with further picking or by sowing in individual containers/peat tablets with further plucking out excess sprouts.
Sowing in boxes with further picking
- For sowing, we select small boxes, cake boxes, you can use cardboard milk or juice bags - the main thing is that there are drainage holes at the bottom, and the height of the walls of the container is about 6-7 cm.
Juice or milk cartons can be excellent containers for growing seedlings
Pour snow onto the surface of the soil and press it down
Cover the crops with film and place in a warm place
Sowing in peat tablets or individual cups for growing without picking
Proceed this way:
- Prepare the cups, fill them with soil and press them down. If you use peat tablets, soak them in warm water until they swell.
Soak peat tablets in warm water
Place celery seeds into the soaked tablet using tweezers or a toothpick.
Celery shoots in individual cassettes are moved to a lighted place
After planting, I always cover celery seeds with transparent cling film and keep them under phytolamps until they sprout. The temperature at home is from 25 to 27 0 C. Even dry seeds germinate on the 7th day, and after a couple of days the cotyledons appear. I keep them under the film for another week, and then I open the film and continue to grow the seedlings as usual.
Video: how to sow celery
Celery care
During the first time after planting, the gardener’s main concern is to prevent the plants from freezing. If low temperatures are predicted, the planting ground should be protected with a non-woven cover.
The types and features of caring for young plants in the summer months are as follows:
- weed removal;
- loosening the soil;
- reasonable watering;
- removing the lower leaves;
- freeing the top of the root crop from the ground;
- cutting off the outer roots.
Weeding and loosening work is especially important at the beginning of summer. And then the leaves will grow, close, and the weeds will die on their own.
Watering the garden bed
The plant requires moist soil and does not tolerate drought well. At the same time, its roots have access to moisture only in the top layer of soil.
Watering is done with care so that there are no puddles on the surface of the bed, which can deprive the roots of oxygen, expose them, or cause them to rot. In this case, you cannot use a regular garden hose. The most suitable methods are watering at the root of each plant using special sprinklers. This work is best done in the evening or morning hours.
If properly saturated with moisture, the pulp of the root vegetable will be juicy and dense, without a bitter taste.
Fertilizer application
The most correct way to apply fertilizers to the garden bed is in the autumn. If the gardener did exactly this, then celery does not need organic matter in the summer. If all fertilizing is postponed to the summer months, then the addition of ash, infusion of manure or bird droppings will be required. Supplements with herbal infusions are useful.
As soon as root crops begin to set, boric acid must be added to the soil, and at the end of summer, complex mineral fertilizer.
Attention to tops and roots
There is an interesting property of root celery: cultivation and care include the obligatory procedure of raking the soil around the root crops so that their tops are above the surface of the bed. And second: the upper lateral roots of the fruit, as well as the outer leaves, must be cut off. This operation must be repeated weekly to eventually form even large root crops.
In October, with the onset of light night frosts, the collection of root crops begins. Usually they are removed using a fork and left in the air for several hours to dry. Next, before storing, only two or three roots are preserved for each fruit, the rest are carefully trimmed. The leaves are also removed with a sharp knife, but five-centimeter petioles should remain.
Harvesting
Celery is left in the beds for as long as possible, since this crop continues to gain weight until October. One of the main signs of root maturity is the yellowing of the lower leaf of the plant.
They dig it up only before the onset of frost. To collect root vegetables, use only pitchforks, not shovels, as the fruiting body can be damaged.
When harvesting root celery, they are not in a hurry, unlike other root vegetables, to remove the leaves. The tops are cut off after 3-4 days so that the nutrients from the leaves have time to move into the underground part of the root crop. Cut off the tops with a small part of the fruiting body. The cut should be smooth and continuous, not torn.
Carefully trim the small roots on the root crop.
A bundle for memory. Small roots are washed well, chopped, dried and added to the company of other white roots - parsnips, root parsley.
