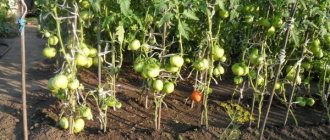
Almost every gardener considers it his duty to plant at least a few tomato bushes on his plot.
This means that throughout the entire season, tomatoes that require regular “haircuts” will supply whole armfuls of leaves and shoots. At the end of the season, a huge stack of plants pulled out from the ridges will be added to this green abundance. Is it really possible to simply throw away such a quantity of tops in a landfill? But no! Experienced tomato growers know that tomato “tops” not only delight you with delicious fruits. With a little effort, they miraculously turn into an effective insecticide, useful fertilizer or odor absorber.
Composting tomato tops
Tomato plant scraps are great for compost. Preparing this organic fertilizer is quite simple if you know the basic rules for laying the future vermicompost:
- cut branches and leaves are laid in layers in a compost pit;
- plant materials are sprinkled with earth and compacted;
- You can stimulate the fermentation process by adding a solution of urea or mullein to the mass;
- for disinfection, each layer is treated with a solution of copper sulfate in a ratio of 2 tbsp. l. for 1 liter of water;
- the collected compost is tightly covered with a dark film, having made several ventilation holes in it, or with a dense layer of straw;
- For fertilizer, vermicompost will be ready in a year.
Important! For composting, it is allowed to use tomato tops infected with late blight, but in this case the soil improver will be suitable for safe use only after 3 years.
We properly compost tomato tops affected by late blight, rotten apples and other waste
Hello, dear friends. I welcome you to our community “Country Stories” .
At the end of summer - beginning of autumn, a lot of waste accumulates in the garden. Basically, we are talking about carrion (apples, pears, plums), which is unsuitable for food, is not marketable, or there is no desire or opportunity to process it.
https://vk.com/photo-159774511_457242330
The main reasons that fruits fall off en masse are their damage by diseases or pests.
Reason one.
The most disgusting (although not the only) disease is fruit rot (scientifically moniliosis, or monilial burn). This disease affects almost all fruit trees growing in our garden. These include stone fruits, apple and pear trees.
https://vk.com/photo-159774511_457242326
Fruits affected by moniliosis begin to rot and fall off. In the middle zone, almost all cultivated trees are affected in one way or another by moniliosis. Another thing is that some are more, others are less.
https://vk.com/photo-159774511_457242327
The only real way to avoid getting acquainted with this disease is to plant resistant varieties. There are cherries, plums and apple trees that are resistant to moniliosis. Old gardens need to be periodically rejuvenated, the crown thinned, and, if possible, treated with fungicides.
When every fruit tree in Russia is infected to one degree or another with moniliosis, the question arises: should we be afraid to compost fruits infected with this disease? There are a lot of videos on the Internet, and even on YouTube, that give advice on how to properly, or rather safely, put affected fruits into compost. In principle, everything is correct there.
However, I repeat once again that this disease lives on almost all fruit trees and you will not fundamentally spoil anything in your garden by placing diseased fruits in the compost heap. And after one and a half to two years, the pathogen in the compost will die naturally.
However, if you are very suspicious and want to be completely sure that the disease will be destroyed, you need to dig a hole and bury the affected fruit so that the layer of earth above them is more than the length of a spade bayonet.
Second reason
why fruit trees lose their harvest - damage to the codling moth. But if you buried the apples to the depth of a spade bayonet, the pest will not be able to overcome such a distance.
https://vk.com/photo-159774511_457242328
Of course, it will be easier for pests to get out of the compost. But again, if there are a lot of abandoned old orchards near your dacha, or your neighbors don’t struggle with the codling moth, your pile of apples poured into compost will not affect the overall background of infection.
- Since apples can acidify the soil, it will be useful to sprinkle the carrion with slaked lime at the rate of 150 grams per 20 kilograms of apples.
Now about composting other rotten vegetables
. Everything is the same here. We roll up more than a shovel or put it in compost, which must sit for 2-3 seasons before use.
Now about the tops of tomatoes affected by late blight.
The main advice on how to dispose of it is to burn it. However, it has already been proven that part of the spores of this disease do not die when burned, but are carried by the wind along with the smoke. If you are interested, you can look for information on the Internet. Although burning is still a very effective method.
https://vk.com/photo-159774511_457242329
As an alternative, use a thermal composter. Well, naturally, for those who can afford it.
Regarding tomato tops affected by fungal diseases, there is one method that is not labor-intensive or expensive. And most importantly, time-tested. This method was recommended by professional agronomists in the 80s of the last century. I modernized it a little and I advise everyone to try it.
- Tomato tops, including those affected by fungal diseases, must be placed in a barrel (which has drainage holes on the sides that need to be temporarily plugged), and compacted very well, and can be chopped.
- Fill the tops with about a bucket or two of boiling water, cool for a couple of hours, then open the holes and drain the water.
- Sprinkle dry phytosporin or trichodermin on top. For those who are not squeamish, instead of biological preparations, you can pour 1% iron or copper sulfate (also boiling water), but as practice shows, biological preparations are more effective.
- Cover the tops with soil and plant cucumbers or zucchini.
The treated tops are almost completely disinfected over the next season and the compost from them can be used in the garden.
Thank you for your interest in my article.
0
Author of the publication
offline 1 year
dachnii-red
2
Comments: 0Publications: 720Registration: 21-10-2020
Similar posts (articles)
- Self-sowing tomatoes or sowing tomatoes directly into open ground. How real is this?
- Simple rules for growing tomatoes in a greenhouse guaranteeing a high yield
- Three quick ways to stop fattening tomatoes. Verified personally
- The simplest forming of low-growing open ground tomatoes
- How I preserved my tomato harvest. Letter from our reader
Liquid fertilizer
If you don’t have the time or patience to wait for the tomato tops to turn into high-quality humus, then they can be used as one of the ingredients for preparing an effective nitrogen fertilizer - a herbal infusion.
- The container for preparing liquid fertilizer is filled 2/3 of the volume with any mowed vegetation, of which fresh tops should make up a fourth.
- The green mass is poured with water so that the liquid reaches the very top of the bucket or barrel.
- The container is loosely closed with a lid or covered with film with holes for air exchange.
- To complete the fermentation process, the fertilizer must be infused for about 10 days. In hot weather, the herbal starter will be ready within a week.
- Before use, 1 liter of liquid fertilizer should be diluted in a bucket of water.
- With the help of herbal infusion, you can carry out both root and foliar feeding. The latter also repel pests.
Important! To prepare liquid fertilizer, you cannot use tomato tops with signs of disease.
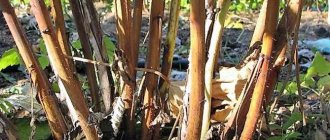
Preparing the stems
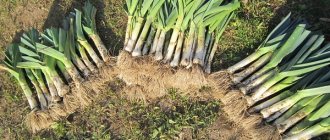
First you need to prepare the tomato stems. The composting process is much faster if you pre-grind all the ingredients. So, the smaller the stems, the faster the rotting process occurs.
The first stage is chopping the tomato tops. It is most convenient to chop it with sharp pruning shears.
The pieces should be from two to five centimeters. Of course, this is a painstaking process, but the smaller you cut the stems, the faster you will receive nutritious fertilizer.
Ash fertilizer
Every summer resident knows that one of the most valuable natural fertilizers is wood, and especially grass ash. It serves as a rich source of potassium, as well as other various micro- and macroelements, incredibly useful for feeding cultivated plants. An additional advantage of this method of producing natural fertilizer is the ability to use even diseased plants.
- To obtain a more or less noticeable volume of ash, it makes sense to burn only whole tomato bushes harvested from the beds at the end of the season.
- Before burning, the tops should be pre-dried.
- Dry tomato stems and leaves can be disposed of in any fireproof container.
- You can apply ash fertilizer in dry form when digging the soil or directly into the holes when planting vegetable plants. In addition, ash is often used in the form of infusions.
Important! The finished ash can be stored indefinitely, provided that it is carefully protected from moisture. Otherwise, ash fertilizer quickly loses its effectiveness.
Layering and moistening
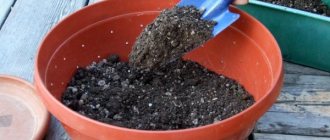
When you have crushed the tomato stems, you can move on to the next step - laying out layers in the compost bin.
Yes, not only tomatoes are used to prepare fertilizer. You definitely need to lay out other components in layers: plants with roots, weeds, remnants of zucchini and pumpkins, chicken litter with droppings, hay, sawdust, soil.
Georgia, Türkiye and other countries opened their borders for Russian tourists
How drivers from different regions assess the quality of roads: survey results
There were more Russians among those vacationing in Turkey
Each layer should be about 20 centimeters. No need to make too thick layers. This way organic matter will be processed much slower.
Each layer must be watered. If you miss this moment, compost will not work. You need to water generously so that each layer is well saturated. Only in a humid environment will composting processes begin.
Natural insecticide
Tomato tops contain the compound solanine, which is poisonous to living organisms, in large quantities. It is this feature of tomato greens that is used to combat insect pests. Insecticidal decoctions are prepared from it.
To prepare a decoction of fresh stems or leaves, chop 4 kg of greens, add a bucket of warm water, leave for 4 hours, and then boil for 30 minutes. To treat plants against pests, the decoction is diluted with water in a ratio of 1:4 and 3 tbsp is added. l. liquid soap for better adhesion.
Plant insecticide can also be made from dry raw materials . In this case, take 1 kg of dry leaves or stepsons, infuse it in 10 liters of water for about 5 hours, and then boil for 2–3 hours. The original broth is diluted with water in a ratio of 1:3 with the addition of liquid soap. You can store this decoction for up to 8 months if you pour it into a glass container with a tight lid and put it in a cool place.
- Plants affected by pests should be treated before and after flowering at intervals of a week.
- Parts of plants affected by diseases should not be used to prepare a decoction, as otherwise the infection can be spread to all plantings.
If you lack time, instead of a decoction, you can make a tomato infusion from 1 kg of chopped tops and a bucket of warm water. You can spray sick plants with this composition after 4–5 hours, adding 40 g of dry or 3 tbsp. l. liquid soap.
Important! It is dangerous to exceed the tops consumption rates specified in the recipe, since a too concentrated solution when spraying fruit-bearing plants can be harmful.
Where do you put the potato tops?
- Read all comments from the beginning:
- 1
- 2
I never bothered about whether it was potato tops, or, say, tomatoes, cabbage stalks, weeded weeds, carrion from apple trees, fallen leaves, etc. I'll tell you what I'm doing. 1. I have a compost storage - an open top chest (about 100x150 cm and about 150 cm high) made from four sheets of slate that were previously on the roof of the veranda, removed when replacing the slate with corrugated sheets. The front sheet (100 cm wide and lower than the others, about 100 cm) can be easily removed in the fall when removing the contents. Throughout the summer, my wife and I simply dump all the removed vegetation there. We do not use any recipes or tips for making compost. By autumn, almost everything has rotted away (except for the very top layer) - you can’t pick it up with a pitchfork, you can load it into a bucket with a shovel. 2. Next to this storage area are two cucumber beds. I have one made from the doors of old refrigerators (10 pieces - 4 on the sides, one at the ends - you can judge the size of the bed), for the second there were not enough doors - only one at the ends, the side walls are made of sheets of some used from metal (the sheets turned up accidentally, you can make them from slate, from boards - but they will rot). 3. In the fall, I clear one of the ridges of the soil in it. It turns out a trench about 3.5 meters long, the bottom of which is even 10-20 cm below ground level. I throw the earth nearby - on an area between the beds about 2 meters wide, I grow about 60 tomato bushes there (this operation is usually done before digging potatoes , or a few days later). As soon as this trench is freed from the ground, I begin to fill it. I throw potato and tomato tops at the bottom and then everything indiscriminately - all the compost from the storage, and all other tops, fallen leaves, etc. When all this greenery is gone (by mid-October, or even earlier), I trample it down and sprinkle it with earth (5-10 cm) on top - I take it from what was previously in the ridge. The cucumber bed is ready. 4. The next year I do the same operation with the next ridge. It turns out that everything loaded into this trench-pit the year before last takes 2 years and another plus 8 months before spring planting (if there are any substances in potato tops that can inhibit other plants, they will no longer be there, they will decompose and rot ). 5. Since only part of the soil taken out from there (about 15-20%) is used to fill the bed (on top of the compost), then quite a lot of excellent humus-supropel remains. I spread it around the site with a wheelbarrow - I add it to where I want to improve and fertilize the soil.
Mulching the soil
Dried and chopped tomato greens are an excellent mulching material that gives several positive effects at once.
- Tops laid on the surface of vegetable beds and in the trunk circles of berry bushes prevent the evaporation of moisture and the growth of weeds.
- Rotting tomato leaves and shoots enrich the soil with useful minerals.
- Greens with a bright aroma repel garden pests that overwinter under the roots of plants from trees and berry bushes.
Important! As the tomato mulch dries and rots, new portions of raw materials should be added, choosing only completely healthy tops for this purpose.
What should not be put in a compost bin: a reminder list with explanations.
Hello, summer residents and rural residents!
Today I have selected this useful material for you all. Although our very rainy and cold summer of 2019 is coming to an end, the end of August, we all really hope that September and October will at least be warm and will please us with sunshine, and we will still dig deeper into our plots and beds. I really want this.
I myself have not yet acquired this thing on my site. I’m a little afraid of her and don’t really understand why I need her. But all my acquaintances and friends have it, and everyone has been using this thing very actively and for a long time.
And so compost turns out to be one of the most valuable organic fertilizers, which is obtained from weeds, plant residues, and kitchen waste, which decompose under the influence of microorganisms. And in order to use it for its intended purpose, it turns out that not everything can be put in a compost bin.
Absorber of unpleasant odors
Knowledgeable gardeners have long used the property of tomato tops to absorb unpleasant odors to neutralize the dubious “aromas” of the country toilet. In addition to direct air deodorization, this method has several additional advantages:
- recycling of green mass;
- saving money on the purchase of special medications;
- no harm to the environment;
- reduction in the number of annoying insects.
To obtain a noticeable effect, tomato tops should be added to the toilet regularly every 7-10 days.
Product Matrix: Tomatoes