Reproduction of dahlias: why is it necessary?
Propagation by cuttings is needed for:
- increasing the number of crops;
- plant rejuvenation;
- strengthening immunity and preventing diseases;
- improving the quality of flowering.
Large rhizomes prevent beautiful and lush flowering. Over time, if you do not divide the root at all, the dahlia will die in 5–7 years.
Important! Flowers that are regularly divided have higher protective functions. Such plants tolerate unfavorable climates well and are less likely to suffer diseases and rot.
Not suitable for reproduction:
- tubers with less than 4 growing points;
- small roots;
- types of dahlias with thin root collars and stems.
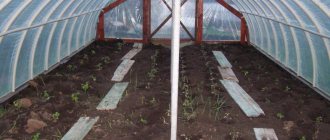
Germination technology in boxes
At the end of March and beginning of April, planting material is taken out of storage. Before sending dahlias to sprout tubers after winter, they are inspected and all dried specimens are removed. Usually by this time most of the tubers have already sprouted buds. If they are not there, then something happened to the planting material during the winter. To determine this, you need to cut one of the “potatoes” with a knife. If the cut site is brown, then the tuber is already dead, and if it is light, then it is alive.
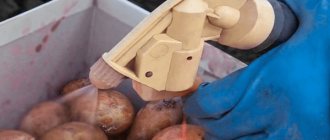
Attention! Even if the tuber is alive and healthy in appearance, but it lacks the upper part with renewal buds, you can’t expect sprouts from it. All diseased and damaged areas found during the inspection must be trimmed with a sharp knife, and the cut areas should be sprinkled with charcoal powder or treated with brilliant green.
All diseased and damaged areas found during the inspection must be trimmed with a sharp knife, and the cut areas should be sprinkled with charcoal powder or treated with brilliant green.
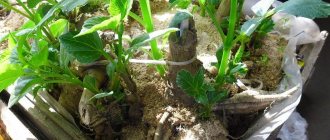
After sanitizing the planting material, you can begin to germinate dahlia tubers. Shallow and wide boxes are best suited for planting them. They are the most convenient way to germinate dahlias before planting.
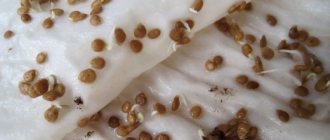
Dahlia “potatoes” are placed in boxes and sprinkled with a small amount of loose soil, peat or sawdust. After which they are well moisturized. After 5-6 days, if all conditions are met, they should germinate.
Advice! You should not sprinkle soil on the root collar of the tubers; it is on this that the dormant buds are located, from which the sprouts should hatch. It should protrude slightly above the ground surface.
During the day, the boxes can be taken out onto the veranda or greenhouse. At the same time, at first they should be shaded from the sun so that the tender shoots that have just appeared do not get burned.
How to divide dahlias into tubers in spring
First you need to divide the entire rhizome in half so that there is an equal number of buds on each side. Then each part is divided into small root-cones with one or two buds.
Correct division:
Tuber preparation
The inspection should be carried out 2 weeks before the proposed planting in open ground or cuttings. The best month to start work is April. Just at this time, the tubers have not yet awakened, but the buds are already visible. Planting material is removed from peat or sand and inspected for rotting and dryness. Before dividing, work should be done to soak the roots in fungicides.
Dividing dahlia tubers in spring
There is no consensus on when it is best to divide roots. During spring division, the buds are already clearly visible. You can do better division and get more planting material. Three weeks before planting, you need to remove the roots from storage. If the shoots are not visible, then the tubers must be sprinkled with water and left for another couple of days.
There are several ways to divide tubers. Here's one option:
- Prepare scissors or a sharp knife.
- Split the root into two parts so that there are buds on both sides of the stem; You need to act so that the stem does not break off from the root.
- Place the root on the surface and separate it until one or two buds remain on each part.
You can do the procedure manually, without tools. Especially if the tubers easily separate from each other, and the roots have only two sprouts. For the procedure, you need to loosen the root from below and break it into the required number of parts. The method will not work if the root cones are tightly fused with each other. In this case, you need a sharp knife. It is first disinfected after each cut.
Large parts can be cut and divided further. Using a knife, carefully make a cut so that there is a bud on each part. It is important to ensure that the sprout is far from the cut site.
With any method of division - breaking or cutting - processing of the sections is necessary. For this, one thing to choose from is suitable: potassium permanganate (its solution), brilliant green, coal crushed into powder, fungicide. You can purchase a special product in garden stores. Any disinfectant is applied to the entire cut surface and left for 2-3 days.
Rules for storing dahlia tubers
The general rules for storing dahlia rhizomes are as follows:
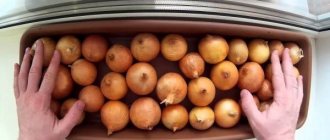
- In wooden or plastic boxes, dahlias are placed with their roots on a layer of peat. The top is filled with sand or sawdust.
- It should only be stored in well-dried sand. In this case, the top of the containers is covered with burlap. In winter, you should occasionally check the condition of the tubers for moisture.
- Tubers are stored in a dark, cool and dry place.
Before planting for the winter, all unsightly parts of the tuber are cut out or whole roots are thrown away.
There should be no sudden temperature changes when transporting tubers from winter storage. If the difference between room temperatures is more than 10 degrees, then it is necessary to keep the tubers in the intermediate zone for 3 days. For example, you can’t move it from the basement straight into a room, but first lift it to the top step, closer to the exit.
Site selection and preparation
Heat-loving dahlias are easily damaged even by minor frosts, so lowlands with stagnant moisture and poor air circulation are not suitable for them. They grow best on flat or elevated areas where there are no through winds - the fragile stems break in strong winds.
It is not recommended to plant them next to buildings, fences, or close to tall trees, since lack of light (less than 6 hours a day) causes the flowers to become smaller and the color richness is lost. In areas where the groundwater level is less than 1 m, moisture stagnation is observed, the tubers begin to hurt, the supply of nutrients is disrupted, and the bush dies. In this case, if there is no choice, high embankment ridges are built.
The place for the ridges, flower beds are prepared in the fall - they dig them up (depth 30-35 cm), add rotted manure (10-15 kg/1 m²), potassium sulfate and superphosphate (1 tbsp./1 m²). In May, when there are 2-3 weeks left before planting, they dig again, but to a depth of 20-25 cm, adding wood ash (2-3 tbsp), Agricola and urea (1 tbsp each) per square area. .
Ways to improve the structure and composition of the soil:
- if the soil is heavy and dense, then coarse sand is added when digging - it will make the soil more loose and breathable;
- sandy ones are “weighted” with peat, vermiculite, clay - they retain moisture well;
- for alkaline ones add a little peat, for acidic ones (pH 4-5) - slaked lime powder (0.3-1 kg/1 m²) or chalk, dolomite flour.
Related article:
Varieties and types of perennial asters
Since lime slows down the growth of beneficial bacteria necessary for the decomposition of organic matter, lime and organic matter cannot be added together. Organic matter is added in the fall, and lime in the spring. Nitrogen and potassium fertilizers are quickly washed out of the soil, so they are added when digging and into the planting hole.
How to take cuttings from dahlias
One planting material can produce the largest number of flowers using the cutting method. You can cut dahlias in the spring according to the following scheme:
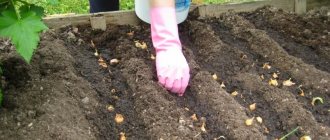
- Preparing tubers - trimming and soaking.
- Preparing the soil and searching for containers.
- Planting queen cells.
- Separation of cuttings from tubers.
- Planting plots in the ground.
- Planting care.
- Planting cuttings in open ground.
Timing for planting queen cells on cuttings
It is better to plant queen cells in the first half of February. The deadline is calculated so that work on rooting cuttings can begin in mid-March. It is from this period until July that the roots appear best.
Preparation of substrate and queen cells
The strongest and healthiest uterine tubers are selected for cuttings. The material is treated with manganese solution or fungicides. Then the tubers are placed in a bright room. Germination best occurs in peat and sawdust, taken in equal parts. Pots with filler and dahlia tubers should be placed in a bright place with a temperature of 20–22 degrees for 2–3 weeks. If necessary, illuminate with lamps.
To accelerate growth processes in queen cells, the growth stimulator Epin is used. However, experienced gardeners can do without it.
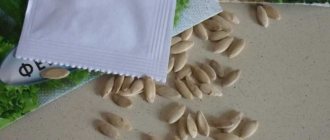
To choose good queen cells in the store, you need to choose strong roots, without rot. They should not be too light in weight.
Tubers are planted in one of two ways:
- many queen cells are planted in one large container;
- each root is placed in pots 10–22 cm high.
In the latter case, it is necessary to plant the tuber so that the neck is higher than the soil mixture. The roots are placed horizontally in containers. This method has a drawback - the planting material gets tangled with each other as it grows.
Usually, shoots appear after 21 days. At this time, it is necessary to change the temperature conditions to 18–21 degrees.
When and how to separate cuttings from tubers
After the shoots grow 8–12 cm, they are cut into cuttings. This should be done so that each stem has 2 or 3 internodes. It is better to use a sharp knife for cutting, although many simply break off the stalk. The last option is more suitable for experienced gardeners. To ensure that the formation of roots does not keep you waiting, you need to make a cut at a distance of 3–5 mm from the leaves. Closely growing shoots are cut together and then separated.
To properly prepare for planting, you need to remove the lower leaves and leave the petiole. To stimulate root formation, the cut is soaked in “Kornevin” or a similar preparation. After this, the cuttings are planted in containers. The soil is prepared from a mixture of sand, peat and perlite.
Planting is done in moist soil at an angle. The depth of embedding the cut into the soil is 2 cm. Afterwards, the soil in the pot is compacted by pressing with your fingers.
Important! If one container is used, then the cuttings should be planted so that they do not touch the leaves.
Pots for cuttings
Each pot is covered with a transparent cap or one container lid. The height of the containers should not be higher than 15 cm, and the diameter of each pot should be approximately 10 cm.
Dahlia flowers are heat-loving, so greenhouse conditions will be needed. You can use plastic transparent containers or glass jars as a cap.
To simplify the process, purchase special mini-greenhouses with a large volumetric lid for the greenhouse effect. Such designs can be used many times.
Caring for cuttings
Watering is carried out as the substrate dries. Plantings are kept at a temperature of 22–26 degrees for 2–3 weeks. If the sprouts become very elongated, a support is placed in each pot and a garter is made. To prevent mold and mildew from appearing on the cuttings, ventilation must be done. To do this, remove the lid for 30–40 minutes.
Important! After 10–15 days, the first roots appear on the tubers, then the transparent covers can be removed. The planting must undergo adaptation to environmental conditions.
Advantages and disadvantages of the cutting method
Advantages of the cutting method:
- A bush from a young cutting blooms earlier than a dahlia from an old tuber. Cuttings and root tubers are planted in the ground at the same time. The former will already be laying buds, while the latter will only be growing green mass.
- Obtaining a large amount of planting material.
- Rapid propagation of rare and expensive varieties of dahlias.
- Dahlias from cuttings are more hardy. Planting is buried in open ground when the plant already has a height of 20–40 cm.
- Cuttings do not have a tuber underground, so plant growth does not depend on the condition of the rhizome. Whereas a dahlia planted with tubers can rot in the soil due to pests or the vagaries of the weather.
- The whole plant is rejuvenated and preserved for a long time. There are varieties that constantly need to be maintained by cuttings.
Disadvantages of growing dahlias from cuttings:
- There is a risk of losing the cutting. The sprout may be damaged by wind or insects. A dahlia sprouted from a tuber will soon have new buds. A plant planted by cuttings in such cases dies.
- The need to highlight plantings.
- Pots with plants can take up a significant part of the living space in an apartment or house.
- Tubers developing in pots become distorted. Whereas the roots of dahlias immediately planted in the garden are even.
- To master the skills of cuttings, you need time, patience and special equipment.
We dig up planting material before severe frosts
Before dividing the dahlia, it must be dug up. This must be done before frost begins. If severe frosts suddenly begin and the dahlias are not dug up in a timely manner, the fleshy stem will die, and when it gets warmer, it will rot. This process can then affect the tubers. Therefore, it is necessary to dig up the flower before severe frosts occur so that the plant does not die.
Low-growing dahlias, when compared with other flowers, for example, gladioli, are less picky about weather conditions. This means that digging up tubers can be carried out in rainy weather.
Preparing for storage at home: subtleties of the process
You need to start preparing for wintering before the onset of autumn frosts, which are extremely dangerous for dahlias. Both the above-ground part and the roots of dahlias are damaged by frost, so such damaged planting material no longer survives until spring. In order for dahlias to easily survive the first frost, you need to insulate them in advance by hilling the bushes like potatoes.
In this case, you need to focus on the weather. As soon as the first frost touches the ground part of the dahlias, the foliage will turn black and dry out. For the gardener, this is a signal: it’s time to start digging up the tubers. First, you need to carefully cut the stems with a sharp tool, leaving no more than 5-10 cm to the tuber. Labels with the name of the variety can be attached to these “stumps” to make it more convenient to arrange storage in the future. After cutting the stems, if there is no precipitation and is not expected in the near future, the tubers can remain in the ground for another week.