How to grow tomatoes in a greenhouse using Galina Kizima's method
Growing tomatoes using the Galina kizima method
Tells A. A. Kazarin, a Pskov experienced gardener with 40 years of experience.
Prohibition for tomatoes
It has become a common sight when in the summer summer residents, having arrived at their garden plots on weekends, first of all rush with a watering can to the greenhouses to water the tomatoes. This occupation, especially for older people, is quite exhausting; the return in harvest for this diligence is most often negligible.
I feel sorry for people who are engaged in completely useless and even harmful work. Therefore, at every opportunity (in print, on the radio, during meetings with gardeners) you have to talk about your method of growing tomatoes without watering. This method has no analogue in the world.
At one time, due to lack of funds, I was unable to obtain a patent for the invention and limited myself to publication in the press (newspaper “Dachniki” No. 3, 1994, article “The life-lover will not be lost”). The essence of the method is as follows. With periodic watering (even rarely - once every one or two weeks, as most gardeners usually do), there is no stimulus for growth at the roots of the tomato, until the beginning of fruiting: moisture and nutrients for the development of the stem and leaf surface in the absence There are enough fruits.
The roots begin to grow only from the moment of massive fruit set, that is, with a significant delay. As a result, fruiting is delayed and the yield is reduced.
In the absence of watering, the roots begin to seek moisture long before fruiting begins, grow in all directions, and a powerful root system develops in a timely manner, capable of fully nourishing the plant not only during the growth of the stems, but also during the period of fruit filling. The yield in this case is always higher than that of plants with watering. Of course, not everything is as simple as it seems at first glance.
During normal planting, especially in greenhouses and in hot, dry weather, the plants may not survive and die. But this is a rare exception. Let's do this experiment.
Let's cut some shoot from a tomato plant, for example a shoot, and bury it in the soil half the stem, pour water on top to compact and wet the soil. This stem will not dry out, over time it will give roots and develop normally. From what?
Yes, because the stem itself (its buried part) replaced the functions of the root when planted. This means that we need to make fuller use of this biological feature of the tomato when growing it. What I am doing.
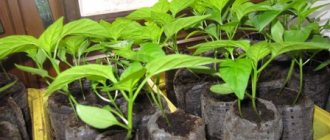
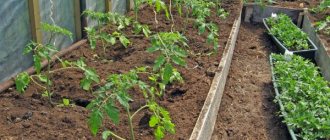
Tomatoes without watering
When planting seedlings from the lower half, I tear off all the leaves and dig an oblong hole-groove under the bush, a little more than half a stem long. I pour half a bucket of compost into the furrow (I prepare compost without adding mineral fertilizers to its layers, so I put it as needed without fear of overfeeding), a handful or two of wood ash, 1 gram of potassium permanganate.
I mix everything thoroughly. I pour half a bucket of water into the grooves. After absorbing moisture, I lay the lower part of the stem strictly horizontally, orienting the tops to the north.
If I plant seedlings without a clod of soil, then I make sure to spread a clay mash, dipping half a stem into it, then powder the coating with dry earth (for better connection with the soil). I sprinkle a 3-5 cm layer of earth.
I tie the upper part of the stem almost at a right angle to stakes driven in immediately (or subsequently tie it to a trellis). I pour another half a bucket of water under the bush from above, trying to avoid moisture getting on the leaves.
That's all - I no longer water the bushes throughout the entire season, until harvesting. It should be remembered that if you plant the plants deeper, you will not get the effect of planting, since at a depth of 10-15 cm there are practically no microorganisms, and they mainly feed the plant. The first time after planting, the plants are pleasing to the eye, they hardly even wither in the sun.
But then, when the soil dries out in the holes, you see how the tomato leaves shrink slightly. I just want to water them at this time. And a caring vegetable grower, of course, cannot stand it - he gives the plants moisture. And in vain.
After all, what happens to the appearance of the plant is quite natural. When the soil dries out, there is a struggle for survival. The plant seeks moisture, the roots grow vigorously, this consumes energy and plastic substances, which at this time are not yet fully replenished.
But a little time will pass, the tomatoes will get stronger, your pets will come to life and begin to please the eye. The value of the method I propose lies in the fact that it allows you to grow a good harvest even from the most seemingly worthless seedlings - frail or overgrown.
After 2-3 weeks, any “dead” seedlings become like a palm tree. Their owner only needs to overcome the difficult psychological barrier and refrain from watering. Tomatoes without watering can be grown on any type of soil with any level of groundwater in the area.
Sometimes in some greenhouses with muddy soil the soil dries out and turns to dust. In such places, even the weeds dry out. Here sometimes, about once a month, you still have to maintain the planted plants with moisture.
In general, if you want to get the maximum yield of tomatoes, then you can start watering them no earlier than at the moment of massive fruit set, when the plant’s root system has already largely formed. But I still don’t water them, otherwise the fruits become watery and less tasty.
And even without this, so many tomatoes grow that we process them only for juice, and the harvested food is enough for the family for the whole year until the next harvest. Since the publication of the method, I have received many grateful letters. Foreigners are also showing interest in him. “Kazarin Method”, “Ancestral Earth”, No. 3, March 2013.
Tomatoes without watering
Personal experience of Galina Donova from KrasnoyarskI have always been embarrassed by the large labor costs in the garden. In an effort to get rid of hard work, I looked for any technology that would allow me to work “playfully.”
I was very attracted to organic farming, the essence of which is to create a vegetable garden according to a natural type and make maximum use of the plant’s capabilities. Moreover, before my eyes there is a living example - there is a grove very close by, and there everything grows and flourishes without “hard labor”. I have especially big problems with watering.
Therefore, I drew attention to the experience of growing tomatoes without watering by A. A. Kazarin, an experienced Pskov gardener with 40 years of experience. “The meaning of the method is as follows. With periodic watering, even rare - once every one or two weeks - there is no stimulus for the growth of the root system, right up to the start of fruiting, for the plants.
There are enough nutrients and moisture for the development of the stem and leaf surface. In this case, the roots do not grow, because... Nothing useless happens in nature. And the roots begin to develop intensively only at the moment of fruit filling, i.e. with some delay.
As a result, fruiting is delayed and the yield is reduced. In the absence of watering, the roots begin to seek moisture as the soil dries. In this case, long before fruiting, a powerful root system develops, capable of reliably feeding not only the stem but also a rich harvest.” That is, while everyone STOP WATERING during fruiting, to protect yourself from late blight, and I just have to NOT WATER after planting the seedlings so that they grow roots. I started conducting the experiment in 2009.
I grew 37 bushes of tomato seedlings, and at the beginning of May I planted them in a greenhouse, placing the stem horizontally (I tore off the leaves from half the stem). I left control plants according to the planting method, i.e. not lying down, but as usual - vertically.
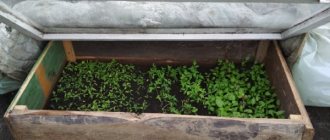
Watered it well, mulched it and left it to “survive.” The main thing in this method is to wait and not start watering when the plants first wither. It was a cold spring, I had a greenhouse without additional heating, and I did not immediately tie it to the trellis, but placed arcs with covering material over the plants.
By the beginning of June, my tomatoes were happier. (I didn’t allow faint-hearted relatives into the greenhouses). When the threat of frost had passed, I raised the pretty bushes onto the trellis and watered the soil with phytosporin, mulched it a second time and spread old film under the bushes to warm the soil.
Read also: What indoor plants are grown in hydrogel
I watered it for the third time after the first fruit harvest, in early July. After all, I have a greenhouse, not open ground. Care consisted of shaping, pinching and tearing off only diseased and yellowed leaves.
I fumigated it twice with carbon dioxide, which is released when the Greenhouse tablet is burned. At the same time, I conducted another experiment. In the newspaper “Gardens of Siberia” No. 3 for 2009, agronomist Kornilov explained that tomato seedlings need maximum illumination at the moment the cotyledon leaves open.
And it is advisable to illuminate the first days around the clock. I found a device that measured illumination, bought a lamp and did everything as recommended in the newspaper. Of course, I left the control plants. And now what happened.
I harvested red tomatoes only in July, and then I started harvesting green ones (my relatives insisted). I weighed everything. The growing season of plants in the greenhouse ended at the end of September. I collected about 30 buckets of tomatoes. I simply did not expect such a harvest.
The best plants were those that received additional light around the clock in the cotyledon phase and were planted horizontally. The control ones also produced a harvest, but not as abundant and much later.
They didn’t have time to fully develop their capabilities. That year I had different varieties: both salad and for canning. In the new year, I decided to plant only large-fruited varieties and harvest them not green, but so that they ripen on the vine. I stocked up on seeds and new knowledge.
At the lectures of our Rostock club, N.V. Berezhnova told how to properly illuminate seedlings around the clock and water them in a tray so that the soil does not become compacted and the seedlings do not get sick. She taught me not to “pull out” weak seedlings, but to leave only strong plants and cut off the lower leaves before transplanting into the ground. This way the plants will be subject to less stress during transplantation.
I found out about another trick. After planting seedlings in the ground, it is usually recommended to apply liquid fertilizing only after 2 weeks, when the plants have become stronger. Berezhnovs give a weak organic liquid fertilizer on the 2nd day after planting and no later!
I thought again about what the meaning of “not watering” is. It is necessary that tomatoes do not grow up as “dependents” who wait for their owners to provide them with water and food, but that they do everything on their own. They will still be forced to do this, but later, and time has already been lost!
This means that I am doing the right thing in that I do not pinch the main root when transplanting seedlings - let it stretch deeper. I did everything else as in the previous year, I only added spraying with the homeopathic medicine “Healthy Garden” (the summer was very cold). The first fruit ripened at the end of June, and throughout JULY we already ate red tomatoes with all our might.
It turns out that the early lighting and lack of watering did their job, and the harvest ripened earlier. The harvest was not weighed, but I have never eaten such tasty and sweet tomatoes. Don't think that I'm praising myself.
I even surprised my tomato sister, as well as numerous guests, including from the southern regions. And by the end of the season, giant fruits grew from 700 g to 1100 g. Of course, I also have problems.
In the heat and calm, fruits do not set well, which means you need to look for methods for additional ventilation of greenhouses. We need to do an even better job of heating the soil and, of course, find good seeds. You can grow a good harvest even with watering, if you water it on time, and even with “Baikal”, mulch, and ventilate well so that the air is dry.
But this is a different technology. This one is more suitable for me, which in my conditions reduces labor costs, frees up a lot of time for me and does not reduce the yield, even the tomatoes were much sweeter than usual, because... there was little water in them, and relatively a lot of sugar. Last year I decided to change the experience a little.
I planted the seedlings later so that the plants would be “younger” when planted in the ground. I read that this way they adapt better and will hurt less during transplantation. And I decided to plant it vertically so that the tomatoes would not waste time forming roots on the buried stem.
So I wanted to speed up fruiting. Result: If in 2010 I picked the first red tomato at the end of June, then last year it was already 2 weeks later. The plants had just gained their strength, and then the cold arrived.
I had to remove the bulk of them green again, but they are no longer as tasty as from the root. This was a negative experience. But I really liked the other 2 techniques. First, I cut windows into the sides of my carbonate greenhouse and lowered the temperature on hot days.
The second trick is successful with bottles. I live in the center of the Krasnoyarsk Territory and the soil needs to be heated in May. After replanting, I placed bottles of water around the plants and also filled a black plastic sleeve with water (sold at Siyanie centers).
My tomatoes endured the return frosts much easier. All tomatoes were grown in a greenhouse and were watered only 3 times over the summer: when planting, in early June, in early July. #tomatoes
Feedback on the use of the method
Kizima is engaged in farming in the Leningrad region, so southerners don’t have to listen to her... Anna Merkuryeva https://7dach.ru/MaxNokia/kak-vy-otnosites-k-rekomendaciyam-kizimy-ga-14806.html
This year, following the example of our Lungwort and having read Kizima, when planting seedlings in a greenhouse, I poured 5 liters into the hole. Mulched with cut grass. And I have NEVER watered it once all summer. The experience was a success. Mikhailovna https://forum.tvoysad.ru/viewtopic.php?t=40965&start=1290
Ganichkina and Kizima are “populizers”, moreover, “experts” of all crops, from tomato to cauliflower. The trouble is that there are no other books on sale. For example, Gavrish’s book “Tomatoes” was released in only 10,000 copies, and you won’t see it on sale for a long time. And when a person writes and gives recommendations on all types of shelters, for all regions, for all types of plants, then reading such literature is a waste of time. Although for general development you can buy it. Truck https://www.forumhouse.ru/threads/6574/page-27
If, like Kizima, he plants it on a high bed, covers it with newspaper and doesn’t water it anymore, then here in Saratov, on clay half and half with sand, tomatoes die in 2 weeks and they don’t care about Kizima and others like her. Eva Yurievna https://www.forumhouse.ru/threads/264305/page-4
Like me, many older people will be helped by the farming methods proposed by Galina Kizima to get joy from their beds, and not pain in the back and all joints from constant shelving and digging. G. Kizima is a scientist. She tries to understand the essence of the processes occurring in plants and gives a clear explanation of each step. Lyuba52 https://www.forumhouse.ru/threads/264305/page-4
Obviously, Kizima's technology is amateurish. You can plant a dozen 2-3 plants this way. 2–3 hundred is unlikely, too labor-intensive and not technologically advanced. Alai https://dacha.wcb.ru/index.php?showtopic=47433&st=240
I was also interested in Kizima’s method. But I think it’s acceptable where there is good soil at a decent depth. But we have a raised bed, and the ground under it is solid clay, compacted like stone. The roots can't get through there. Therefore, this method is not suitable for our conditions personally. So you also need to consider the quality of the land. I always mulch with a thick layer of grass cut from the lawn, then add more mulch several times. Svetlana https://otvet.mail.ru/question/88112431
Galina Kizima’s method for growing tomatoes, like her other proposals, significantly facilitates the gardener’s work, forcing the plants to obtain food and moisture on their own. To guarantee success, you need to choose the right varieties and avoid mistakes when growing seedlings and planting them in the garden.
Rate this article:
[Votes: 2 Average: 5]
Planting tomatoes using Galina Kizima's method: an example of diaper technology for smart lazy people
Growing a sufficient number of seedlings by the beginning of the dacha season is not an easy task in a city apartment. Plants need light, and narrow window sills can only accommodate so many seedling pots.
Planting tomatoes according to the method of Galina Kizima, candidate of mathematical sciences, author of numerous books on vegetable growing, allows you to obtain a large number of tomato sprouts in limited space using the avant-garde technology of cultivating seedlings in diapers.
"Diaper" technology of Galina Kizima
According to the agricultural method of amateur vegetable grower Galina Aleksandrovna Kizima, tomato sprouts are grown in “diapers”. Conventional seedling boxes are replaced with non-woven material (most often ordinary film), wrapping soil with seeds in it. The resulting bags retain moisture well and take up little space on the windowsill. In addition to the ergonomic arrangement, there is another goal.
Tomato roots should grow deep and not spread in the upper soil layers. This allows plants to obtain water and nutrients for themselves, and not depend on anyone, by analogy with wild herbs that obtain their own food. No one is helping them survive.
Principle #3: DO NOT water!
As evening approaches, buckets rattle in summer cottages and pumps start up. Water gurgles everywhere. It's like a generally accepted, undeniable ritual. But watering work is one of the most labor-intensive! Even if you use a pump.
Let's think about whether plants really need that much water? And if anyone needs it, how can they do it in such a way as to make their work easier and simpler?
Let's remember one simple point: it is better to keep water in the soil than to pour it there endlessly. Is it possible to do this? It’s easy if you don’t allow moisture to evaporate from the surface of the earth.
From here one should immediately draw a conclusion, which, by the way, is well known to everyone, the soil must be protected from moisture evaporation from its surface. To do this, the soil surface should be covered. This is called mulching.
There are many things you can use for mulching. For example, sawdust . Let them sit for a year or two and mulch. If there is a coniferous forest nearby, collect needles. But do not forget to add ash, or dolomite, or lime, or chalk to them. Because needles strongly acidify the soil.
It is good to mulch with high-moor peat . But it also acidifies the soil, so you will have to add deoxidizers. You can mulch with non-woven covering materials (spunbond, lutrasil) , but only if the material is black.
You can use cardboard and even simple newspapers , folded in several layers and glued together into a panel with ordinary tape. In a greenhouse, the soil can be mulched with crumpled newspapers .
In the first, hottest weeks of spring, fallen leaves in autumn . So don’t remove them in the spring for the sake of beauty and cleanliness. The awakened worms themselves will drag them into their holes and process them into humus with the help of overwintered microorganisms.
So how do you mulch your beds? So what, you can’t water them at all? Well, not watering at all won’t work, but there are some considerations for saving energy on watering.
The fact is that not all cultures are as helpless as we imagine. They can be divided into four groups:
- The first group includes those inhabitants of the beds who do not know how to obtain moisture and spend it uneconomically. These are cabbage, cucumber, lettuce, radishes.
- The second group includes those plants that do not obtain water well, but spend it sparingly. This group contains onions and garlic.
- The third group of plants produces water well, but spends it uneconomically. These plants include beets and rutabaga.
- And the last, largest and most adapted group knows how to get water well and spend it economically. These are peppers, tomatoes, carrots, parsley, zucchini, pumpkin, melon, watermelon.
Hence the watering norms. Plants that belong to the first and third groups need regular watering the most. And those in the last group need moisture least of all. Generally speaking, you don't have to water them at all all summer if you do a few things when planting them in place.
For example, tomatoes . Into the hole made before planting the seedlings, add a third of a teaspoon of the dust fraction of the AVA fertilizer and a dessert spoon of double granulated superphosphate. Gradually pour 4-5 liters of water into the hole. After this, plant the seedlings, water them, lightly hill them and mulch them well. That's all. No fertilizing or watering will be required all summer long. Except during prolonged cold weather.
At temperatures below twelve degrees Celsius for a week, the plant begins to experience severe starvation because the root system does not work. In this case, you should feed the plants by leaves. It is best to use a solution of one of the following drugs: “Florist”, “Aquadon-micro”, “Uniflor-rost” or “Uniflor-bud”.
Pepper. Pour a third of a teaspoon of AVA fertilizer powder into the planting hole, add a dessert spoon of any chlorine-free potassium fertilizer, then add half a glass of gel made from Aquadon or hydrogel into the planting hole. Plant the seedlings. Water, crimp and mulch. That's all for now.
It will only require watering once every three weeks in hot weather. There is no need to water in wet or cool weather. But foliar feeding, like tomatoes, will be required. Otherwise, the pepper will even shed its leaves.
Carrot. Before sowing, water the furrows well with water from a kettle. If the spring is dry and there is not enough moisture in the soil, then the evening before sowing, thoroughly water the bed and immediately cover it with film. The moisture under the film will remain and saturate the bed to its entire depth.
After sowing, compact the furrow with a board. Cover the bed with film to retain heat and moisture in the soil. After emergence of shoots, replace the film with lutrasil or spunbond, remove which only for weeding or thinning.
There will be enough food for the entire season. Water only in dry weather directly with lutrasil in the evening. And only until a bunch of 4-5 leaves appears. From this moment on, the carrots form a root crop, and they no longer need a lot of moisture. Its central root goes deep into the soil, and there moisture will be found.
So, in order to get rid of problems with watering and fertilizing in the garden, you need to show some ingenuity. The simplest thing is to prevent moisture from evaporating from the soil. To do this, the soil should be loosened, or even better, mulched.
The advice that Galina Aleksandrovna Kizima generously shares has proven itself in her personal experience, as well as in the practice of her many followers and students. And Galina Alexandrovna had accumulated so much knowledge that she decided to put it together and capture her experience using video. The result was a visual, very informative guide for gardeners, a video course “Gardening without the hassle.”
These materials have helped more than a dozen people to make their work in the garden easier and simpler, saving their time and energy. Get to know the content of this unique author's course. To do this, you need to follow the link: https://ogorod-net-hlopot.ru. After all, it’s better to see everything with your own eyes.
Advantages and disadvantages of the method
Galina Aleksandrovna Kizima’s method of planting tomatoes has its strengths and weaknesses. To understand whether this method of growing seedlings is right for you, you need to study the pros and cons of this technology.
Advantages
- A huge number of sprouts fit on one windowsill, which significantly saves space.
- Low consumption of nutrient soil. Planting 50 sprouts requires only 2 kg of soil.
- It is easy to transplant seedlings. It is enough to simply unwrap the “diaper” and plant the tomato with a lump of earth in a new place.
- Plants get sick less often, especially with black leg, which occurs due to excess moisture.
- The film can be used for several years in a row. All you have to do is unwrap it, wash it and put it in a box. It will take up very little space.
Flaws
- Large crowding of seedlings slows down the growth of tomato bushes.
- Tomatoes shade each other and do not receive enough sunlight, so they have long and thin stems.
- Due to the small earthen lump, the root is weaker than that of tomatoes grown using conventional technology.
Planting and growing
Potatoes are always planted in spring or early summer. Choosing the right time to deepen planting material into open ground is only part of the success of obtaining a good harvest.
It is important to follow the rules of planting and caring for tubers
Preparation
The first stage of land work is preparing tubers for planting. It consists of several important steps:
- Sorting. Only tubers weighing from 50 to 80 g, having a perfectly smooth surface without signs of damage, are suitable for planting. Tubers affected by scab and cracks are not suitable for this purpose. They will not sprout.
- Germination. 2-3 weeks before the expected planting date, transfer the tubers to a warm, bright room. Don't be alarmed if they turn slightly green. This indicates that solanine has accumulated in their composition, which will prevent them from getting sick in the future.
- Treatment. Be sure to treat the planting material with a solution of boric acid and copper sulfate in a ratio of 1 g of active ingredient per 10 liters of water. This is necessary to disinfect vegetables from diseases and pests. The procedure is carried out immediately before planting after germination. For 100 kg of tubers, 1.5-1.8 liters of solution is enough.
Before planting potatoes, inspect them again and sort whole tubers from damaged ones. This type of vegetable is very light and heat-loving. Therefore, choose a place on the site that is well lit by the sun; there should be no tall buildings or trees near it that create shadow.
Attention! Treatment of planting tubers is mandatory. If this is not done, then the risk of pest damage and disease increases.
This means that the entire ridge is at risk
Consequently, the harvest may grow meager
This means that the entire ridge is at risk. Consequently, the harvest may grow meager.
Soil preparation
Prepare the soil for planting in the fall or immediately before planting days. After digging up the previous crop, be sure to free it from the tops, burn it and move it to an area away from the site. If this is not done, the insect larvae and harmful bacteria that have accumulated on it will move into the soil and infect the new crop. Before planting, clear the soil of weeds, dig and loosen it. This is necessary for improved oxygen circulation and creation of the necessary humidity. It is recommended to use a pitchfork instead of a shovel for digging. Be sure to feed the soil at least once every 3 seasons. Use rotted manure or ash for this.
Landing
Planting tubers in open ground is carried out as follows:
- Loosen the soil, making its surface level.
- Dig furrows along the bed. The distance between them should be at least 60-70 cm. If you want to make them even, it is better to mark them with a rope in advance. Instead of furrows, holes can be made at the same distance from each other. The recommended depth for planting potatoes is 8-12 cm.
- Distribute the tubers with the sprouts facing up so that the distance between them should be 10-15 cm.
- Fill the furrows or holes with soil.
Gardeners believe that the best time to plant tubers in open ground is cloudy, windless weather. If frost returns after this, to protect the planting material, cover the ridge with thick plastic film.
Care
An important part in caring for potatoes is watering. If it rains regularly in the summer, there is no need to do this. In dry summers, be sure to water twice per season - after germination and during flowering. Another important part of care is hilling. It is necessary to ensure that the tuber does not move outward, and that the root system is firmly anchored in the soil. Hill up the potatoes several times a season after the stems reach a height of 15-20 cm, after which you can sprinkle the bush with soil several more times as it grows.
Attention! The most dangerous enemy for potatoes is the Colorado potato beetle. Regularly monitor the condition of the bushes; if you find traces of insects or bite marks on its leaves or stems, collect the pests and spray them
For which tomato varieties is this method suitable?
For growing in “diapers” it is recommended to take low-growing determinate and ultra-determinate varieties. Many summer residents plant hybrids because they get sick less. The author of the method did not use hybrid tomatoes, since she preferred to take seeds only from plants that she grew herself, and the varietal characteristics of hybrid tomatoes are lost in the second year.
It is better not to grow indeterminate varieties in plastic bags. Their hand formation may be impaired.
It branches into 2-3 processes. Seedlings grow longer than most determinate tomatoes, and by the time they are planted in a permanent place, the stems have time to become very elongated.
How to properly care for seedlings
As soon as the first shoots appear, measures are taken to obtain strong seedlings.
- The sprouts immediately begin to be watered with a weak solution of mineral fertilizers (1 tsp per 3 liters of water) instead of water.
- Nitrogen is excluded from fertilizing because it speeds up the growth of seedlings.
- Phosphorus and potassium are added to the fertilizer.
- Feeding with mineral complexes is alternated with diluted Ecofus, a unique fertilizer created on the basis of algae from the White Sea.
- The seedlings must be provided with 12 hours of daylight; if necessary, they are additionally illuminated with special lamps.
Organic onion farming, tips and secrets
There are plenty of secrets in growing onions, but once you master them, you can get a wonderful harvest with the help of organic farming and a small amount of mineral fertilizers. Caring for the upcoming onion wealth should begin in the fall, when it is time to season the high bed with a good layer of manure. This procedure can be successfully replaced by sowing green manure, for example, rye or phacelia, which are left in the soil for the winter and mixed with the soil in the spring using a flat cutter.
In the spring, the first thing you need to do is protect the planting material from rot. To do this, the well-known solution of potassium permanganate is used, in which the seeds are placed for 10 minutes, after which they are well dried.
For better germination in the beds, small onions are trimmed from above, then this process will go many times faster.
To prevent the onion fly from reaching your harvest, arrange a bed not far from the rows with carrots, at the same time you will scare the carrots away from it, or sprinkle a little sea salt when planting. You need to sow onions as early as possible, while the pest larvae are still sleeping. If you are late, then the crops can be protected by adding peat and naphthalene to the humus layer, which should serve as mulch. Once every two weeks, plants can be watered from a watering can with a salt solution: 300-600 grams of salt per large garden watering can.
Over the entire summer period, three feedings of onions are carried out. The first of them is done at the stage of the appearance of the second leaf. Use slurry or a solution of chicken manure and ash. For the second, in two weeks, you will need a solution of 10 grams of urea, 30 grams of superphosphate and 5 grams of potassium per bucket of water. A similar feeding is carried out after another two weeks. Too much nitrogen fertilizer is not recommended, otherwise the heads will be small and your harvest will be a heap of green tops.
Harvesting should be timely, before the September rains. In this case, it will be perfectly stored all winter, because no matter how wet the sushi is, it will still rot. If you follow all the tips and tricks, a bountiful harvest of large, healthy onions is guaranteed!
Organic farming is not just a way to get a rich harvest with little labor - it is an entire philosophy, a life position based on peaceful coexistence with nature and any of its manifestations. Love her and treat her with care, and then she will answer you not only with her generous gifts and the beauty of the garden, but also with your health and spiritual harmony.
Picking seedlings
When picking a tomato, you should never cut off the root. The method is based precisely on the fact that the root must grow deeper. The procedure is carried out when 2-3 true leaves appear on the plant.
Water the envelope with the sprout well, then unfold it and add another 1 tbsp to the existing soil. l. soil so that the stem is in the soil up to the cotyledon leaves, and the real leaves are above the film.
In the phase of 5-6 true leaves, the “diaper” is opened again, another 1 tbsp is added. l. soil down under the roots, roll it up again and put it in place.
In the video, vegetable grower Galiza Kizima shows her greenhouses with tomatoes and shares tips on growing the crop.
Organic farming beds, warm beds
Of course, beds for organic farming must have a certain appearance. and structure. They are also called warm, since the added organic matter, decomposing, releases heat, which is so necessary for plants. They are more difficult to prepare than traditional ones, but they must be permanent, so you only need to work hard once. The best time for this is late summer or early autumn.
Here, oddly enough, you will need a sharp shovel, as well as a pitchfork and a board the width of the garden bed to make it convenient to dig up the soil. Organic beds have a small width of 1-1.2 m, so that it is convenient to work with them, reaching the middle of the bed on both sides. The length can be any, depending on personal preference and the size of the area.
- First you need to mark the bed.
- Next, you should water the area under digging to make your work easier. First, the top layer is moistened, and then more abundant watering is done. As soon as the layer of water begins to sink into the soil within a couple of seconds, there is enough water. After a day, water again and let it sit for another hour or two. Now you can dig.
- It is necessary to dig a transverse trench from one edge of the bed. First you need to remove squares of turf 5-7 cm thick, from which all the rhizomes are selected, and lay them next to the bed. This way the entire trench is cleared. After removing the sod, a layer of soil is dug out.
- After this, the pitchforks go to work. They dig up another 30 cm of soil. In this case, the clods are not broken, but only turned over, the so-called deep loosening. The sod is turned over with the grass side down and laid on the bed.
- Next, 10-15 cm of humus or fresh green mass or any other organic matter is added.
- Then the next trench is dug, the soil from which is transferred to the previous one. In this way the entire bed is dug up. You can move around it only with the help of a board. The soil taken from the first is brought into the last trench.
- The prepared bed will be 20 cm above the soil level, but will settle over time. Then all that remains is to frame the bed and wait for spring planting.
Planting seedlings in a permanent place
Before planting in a permanent place, Galina Kizima advises not to water the sprouts for 2-3 days, but to do this already on site before planting. She believes this will make the stems less fragile and prevent them from breaking along the way. The method of planting plants in a permanent place differs from traditional methods.
- 1-2 days before planting the seedlings in a permanent place, the soil is generously spilled with Fitosporin, which contains organic predatory bacteria that devour pathogens.
- Feed the soil with Gummi fertilizer.
- The holes are made according to the pattern 30x30 cm, deeper than the bags with seedlings.
- Pour ½ tsp into the hole. ABA fertilizers, phosphorus and 2 tbsp. l. ash.
- You can add 2-3 cm of fluff and feathers from an old pillow. This will serve as a good insulator for the roots and will become an additional element of nutrition when the feathers rot.
- Carefully pour 5-6 liters of warm water into the hole.
- When the water is absorbed, the rolls are unrolled and the seedlings, along with a lump of earth, are planted in a permanent place.
- The bed must be mulched immediately so that the water does not evaporate. Straw or black and white newspapers are used as mulch. A slit is made in the newspaper for the stem of the plant, and it is laid out on the bed around the tomato.
Why is snail sowing popular?
This is not the first time that many gardeners have used snails to produce seedlings of not only tomatoes, but also other vegetable crops. In addition to saving window sill space, such a container can be easily transported to the dacha for planting seedlings in a permanent place.
There are clear advantages of the method:
- Lighting is distributed evenly between each plant. After all, a snail is easier to unfold than a large box.
- There is no need to prepare a large amount of soil in the fall at your summer cottage. But here a serious problem arises: there is nowhere to store it in the city. Ready-made soil composition is not that cheap.
- Cellophane substrates can be reused many times; you just need to wash them in soapy water, disinfect them, and dry them.
- The root system develops well in the snail; it is more convenient to plant seedlings, since there is practically no damage to the roots.
The only note: you should not rush into picking. You need to wait until the roots gain strength and a sufficient number of leaves appear. They continue to grow tomato seedlings using diapers. Already interested?
Growing tomatoes without watering
When planting tomatoes using Galina Kizima’s technology, caring for plants in a permanent place is greatly simplified.
- The bushes are not watered.
- The row spacing is not loosened.
- Weeds are not weeded. If there are too many of them, the stems are cut off and left in the garden as mulch.
- As soon as the plants are planted in a permanent place, they are sprayed with the following composition: 2 drops of Zircron, 4 drops of Uniflor-bud and 2 grains of Ecoberin and Healthy Garden, diluted in 10 liters of water. Spraying is carried out once a month. This universal composition simultaneously serves the bushes as a biological protection against pests, as a fertilizer and accelerates the formation of ovaries.
Opinion about diseases
Kizima considers Fitosporin to be the most effective remedy for strawberry diseases.
The most unpleasant strawberry disease that Kizima has encountered is gray rot. At the same time, she recommends making wine from rotten and then trimmed berries (probably, the drink will be for everyone, the smell alone is worth it).
According to observations, the drug “Fitosporin” turned out to be a particularly effective drug for gray rot. The author recommends processing after the snow melts, then at the time of setting the berries.
Kizima claims that this drug copes well with white and brown leaf spots. For prevention, it is recommended to treat the beds with “Fitosporin” for strawberries going into winter.
The gardener is jealous of withered bushes. If this is a random, isolated wilting, then the strawberry bush must be removed, as it may be a carrier of a viral or mycoplasma infection.
The essence of the technique from Galina Kizima
Galina Aleksandrovna Kizima invented a new method of planting tomato seedlings, which saved space for seedlings. Muscovites were the first to use this growing method en masse, which is why it is also called “Moscow style.”
The essence of the technique is that any container for growing seedlings from seeds is replaced by a plastic diaper. Unlike containers and boxes, it takes up less space. And each seed will have enough room to grow. At the same time, the film in which the seeds grow does not allow moisture to pass through, and the soil remains moist longer. Tomatoes grow healthy and viable.
It also becomes more convenient to pick seedlings, and this procedure is less painful for them.
Use of dry seeds
To plant, you need to prepare some materials:
- dense polyethylene;
- soil that has the desired composition;
- elastic bands;
- seeds.
The work is carried out in the following sequence:
- Dense polyethylene is cut into strips 10 cm wide.
- The prepared strips are laid out on the workplace. The earth is poured onto them in an even layer. It is thoroughly moistened with water, to which a growth stimulator is added.
- Tomato grains are sown along the strip at a distance of 4 cm from each other.
- Polyethylene is wrapped in a roll and secured with an elastic band.
- A plastic bag is placed on the finished roll. After this, they are placed in a box, which is placed in a warm place.
See also
Time for sowing tomatoes for seedlings in SiberiaRead
When the first shoots appear, the bags are removed from the rolls. In this case, the box is moved to a well-lit place. Artificial light sources are also used for lighting.
Advantages and disadvantages of the method
Galina Alexandrovna’s technique allows you to grow healthy tomato seedlings without hassle.
- A large number of seedlings fit on the windowsill, which allows you to significantly save space compared to other planting methods.
- It is convenient to plant tomatoes - to do this, you just need to unroll the film and plant the seedling in a new place.
- Planting seeds does not require a large amount of substrate.
- The risk of blackleg disease appearing on seedlings is almost zero.
- The method is simple and no special knowledge is required to plant the seeds.
Despite the fact that the technique has a large number of advantages, it also has disadvantages:
- The root system is not as developed as when grown in the usual way.
- The seedlings are growing a little slower than usual.
Although there are few disadvantages, they are all significant enough not to pay attention to them. The film growing method should be used in extreme cases, if there is really nowhere in the house to put boxes with seeds.
Advantages and disadvantages
The traditional method of growing tomatoes involves sowing the seeds in a container filled with soil. Glasses, pots and other containers are often used for this purpose.
However, experienced gardener Galina Kizima suggested planting seeds in non-woven material. For this purpose, dense polyethylene is used. It allows you to use the small amount of land that is required to grow viable seedlings.
The key feature of such a container lies in the ability to retain moisture, which is needed to produce powerful seedlings. This technique is also called “in diapers” or “Moscow style”.
This is due to the fact that it was Moscow residents who first used the technology. This method does not require much space to implement.
Before planting tomatoes, you should definitely familiarize yourself with the pros and cons of the technique.
The key advantages of the procedure include the following:
- It is possible to place a large number of seedlings on the windowsill. Thanks to this, it is possible to save space, which is often not enough.
- Picking seedlings is carried out very quickly. To do this, just unfold the diaper and pull out one sprout at a time. After this, they can be planted in containers.
- Growing seedlings does not require a large amount of land. To grow 100 plants you will need a maximum of 5 kg of soil.
- This technique makes it possible to protect tomatoes from diseases. First of all, this applies to the black leg. The likelihood of its occurrence is minimal.
- A transparent container allows you to easily assess which seeds have already sprouted and which have not yet.
However, the method also has certain disadvantages:
Seedlings do not have a lot of space. Due to the high density of sprouts, natural lighting is reduced. As a result, they develop rather slowly. To get seedlings in time for the beginning of the season, they need to be planted in advance. When using this technique, tomatoes have a fairly powerful stem. However, the same cannot be said about the roots
Therefore, when planting crops in open soil, attention should be paid to strengthening them.
Galina Kizima method
Galina Kizima’s methodology is based on the rules of organic gardening, which she gradually came to over 52 years of her “dacha” experience. Like many of us, she devoted all her weekends and vacations to working in the garden; hard work in the garden beds did not allow her to rest at all. Galina Kizima began to look for ways to reduce labor-intensive manipulations without harming the yield.
The principles of agricultural technology and gardening that she developed sometimes completely contradict the conservative and familiar methods of farming. According to Kizima, most manipulations are completely unnecessary and even harm the condition of the soil. By refusing to dig, organizing a moisture conservation system and thereby reducing the frequency and volume of watering, you will be able to relax more at the dacha, devote your free time to family or gardening experiments.
Read also: How to raise chickens from an incubator at home
Kizima organic farming
Organic farming according to the methods of Galina Kizima - like everything new, it is well forgotten old. Just a hundred years ago, every peasant was guided by these principles, but today they are hardly returning to our existence and for many are considered something fantastic. Technical progress, sad as it may be, has negated the centuries-old experience of natural farming and led to the depletion of soils and the destruction, if not of potential harvests, then of their benefits from the point of view of healthy nutrition, definitely.
According to Galina Kizima, the basis of organic farming is made up of three main principles:
- Don't dig! This principle consists of avoiding deep active digging of the soil, which helps preserve its internal structure, nutrient layer and beneficial soil inhabitants intact. Only surface loosening to a depth of no more than 5 cm is allowed. In this way, the quality of the soil, its water and air permeability are preserved and an excellent layer of humus is created.
- Don't weed! Endless weeding is not just tedious and troublesome, it is ineffective. Weeds do not need to be fought with radical methods; they must be suppressed by cutting off the surface part and leaving the roots in the ground. You'll have to do this several times over the summer, but it's worth it. At the same time, it is very appropriate to use the remains of weeds for the benefit of the soil and the garden as a whole, because weeds are excellent food for the inhabitants of the soil.
- Don't water! It would seem that this is a labor-intensive and necessary process, without which gardening and gardening are unthinkable. In fact, it turns out that such a valuable resource as water is often wasted, so you need to learn how to retain moisture in the beds instead of watering them hourly.
Of course, organic farming using the Kizima method is much more than giving up the usual gardening chores. It’s just that in everything that concerns plants, from fertilizing to protection from pests and diseases, you need to rely on natural self-regulation mechanisms, which cannot be found more efficiently, and then the plants will be healthy, strong and resilient.
And although adherents of traditional farming are convinced that it is unrealistic to use these methods in the conditions of a summer cottage, since large expenses will be required, nevertheless, in practice one can be convinced of the opposite. Even on traditional 6 acres, organic farming reveals itself from a completely different side. And it turns out that it is much easier to organize it on a small piece of land.
The main thing is:
- Understand the mechanisms of nature and organize your work according to them;
- stop exploiting the soil and start preserving and improving it;
- rationally use the planting area and your efforts to reap the richest harvest possible.
Method of growing seedlings in diapers
Galina Kizima also developed a technique for growing seedlings that significantly saves space on window sills. The author's technology is based on the so-called. “diapers”, popularly called “Moscow rolls”. The technique was developed for growing tomato seedlings, but in the case of preparing sprouts of peppers, cabbage, cucumbers and flowers, it also shows good results.
Galina Kizima in her work “Vegetable garden without hassle” recommends growing seedlings of tomatoes and other crops in rolls made of non-woven material with a small volume of nutritious soil. This technique does not require traditional filling of containers with soil, which means it saves you money and space on illuminated window sills.
For “swaddling”, soil, seeds and non-woven material (geotextile, thick film or disposable baby diapers) are prepared, which is cut to size. Moist soil is spread on the diaper in a thin layer, seeds are placed in the upper third of the length, after which it is rolled up and placed vertically in a container.
In addition to saving space, combined with high productivity, Kizima’s method for growing seedlings has a number of undeniable advantages: the picking process is greatly facilitated, and you can visually assess the quality of the sprouts.
But this method also has plenty of disadvantages. Sprouts develop worse in cramped conditions, the root system is much weaker than the stems. In addition, when picking, you will still have to plant the plants in separate pots, so the thesis about saving space becomes moot. It is advisable to use this technique for growing seedlings of cold-resistant crops, which can be planted directly into beds or a greenhouse.
For heat-loving crops, Galina Kizima suggests extending the “diaper period” by dipping the sprouts into individual rolls with soil, rolled up like shawarma. In a relatively spacious bag made of non-woven material, the seedlings will be comfortable, moist and warm, and the plants will be able to sufficiently develop their root system and above-ground parts by the time they are planted in the ground or greenhouse.
Bedding
The peculiarity of growing tomatoes using this technology is that it eliminates frequent watering of the plants. Before planting, dig a hole for each sprout.
Place 5 kg of compost at the bottom, a glass of ash, and at the end a teaspoon of potassium permanganate (can be replaced with a tablespoon of concentrated superphosphate fertilizer). Mix the components thoroughly and pour 1-2 buckets of water into the hole. After some time, the water will be absorbed, after which you should start planting tomatoes.
The root system of tomatoes grown in film is not strong enough, so the plants are planted vertically into the hole with extreme caution. There should be at least half of the plant in the soil (but no more than 5 centimeters). The roots are carefully covered with soil and the soil is compacted. The upper part of the plant is tied to a peg. To compact the soil, pour a bucket of water under the root of the tomato. The surface of the bed is mulched. The plant will no longer require any watering or fertilizing.
Seedlings can be planted in a greenhouse. In this case, it should be provided with drip irrigation. To do this, plastic bottles filled with water with pierced holes are placed between the plants.
Main principles of the technique
Galina Kizima based her technique on naturalness. In natural conditions - in a forest or in a field - there is no area on the earth that is not occupied by plants. They coexist well together, do not require fertilization, additional watering or digging up the soil, and at the same time they develop well and produce a harvest.
In garden plots, the opposite picture is observed: the more a person works and puts in effort, the worse the result. Galina Kizima turned to organic principles of cultivation and developed her own methodology, which is based on the desire to abandon unnecessary and harmful work in the garden.
Digging
The first postulate of the technique is not to dig. Autumn and spring digging of the garden greatly damages the soil, so Galina Kizima urges gardeners to give up shovels and pitchforks. There are several good reasons for this:
- High-quality soil has its own structure: aerobic microorganisms live in it at a depth of up to 20 cm, anaerobic microorganisms live in it from 20 to 40 cm. These bacteria, in the course of their life activity, make the earth fertile due to the active fermentation of organic matter and the breakdown of mineral elements. During standard digging, these living layers change places, and microorganisms die in unfavorable conditions for them.
- In the field and in the forest, the earth is always a little springy, it is soft and lush; in the garden, after watering and rain, we are forced to loosen the beds in order to knock off the specific crust. Under natural conditions, there are microchannels in the soil formed by a wide network of dead plant roots processed by bacteria; with their help, the soil breathes and is quickly saturated with rainwater. When digging up the garden, we destroy these passages, and the dense soil does not allow the roots of the cultivated crops to breathe and feed.
- When digging in autumn and spring, we constantly select the roots of weeds, but the weeds still grow before the cultivated crops. This happens because we ourselves bury their seeds before winter, and before planting we turn them over again closer to the surface.
Digging dries out and deadens the soil. Even black soil brought to the site loses its fertility after a few years and turns into a kind of sand, deprived of important bacteria. To save your land, you cannot dig it. To prepare the beds shallowly - up to 5 cm - loosen the soil with any tool convenient for you - a hoe, a rake or a pitchfork.
After finishing the sowing work in the garden, there is no time to relax - weed sprouts are already appearing in the beds, which must be mercilessly fought all summer so that they do not take away nutrition from the planted crops. Galina Kizima has found an effective and minimal effort way to combat them. There is no need to weed the weeds - they need to be cut off in time at the root or with a slight depth of 2-3 cm using special tools.
Weeds need to be cut when they reach a height of 5-10 cm. Constant removal of the green part will lead to suppression of the root system, which is difficult to do without the important chlorophyll. The cut weeds are left directly on the garden bed - they will serve as natural mulch and organic fertilizer.
During the season you will need to make only 3-4 cuttings, this will be enough for the weeds to die. These manipulations are less labor-intensive than traditional weeding, and the efficiency is much higher. The green part of the weeds serves as mulch, protecting the soil from drying out, and also plays the role of a constant compost fertilizer. Dead roots will serve as food for bacteria, which will increase soil fertility.
Step-by-step process for planting potatoes
The method is accessible and simple; the bed does not need to be fertilized, watered or hilled.
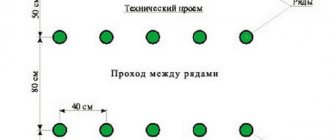
The sprouted tubers are laid out over a selected virgin plot in the garden. There is no need to dig up the soil or remove weeds. Lay out the potatoes in 2 rows with a distance of 40-50 centimeters between them. Between tubers, 20-25 centimeters is enough. We get a bed of any length with a width of 80-100 centimeters.
Small tubers need to be placed in 2-3 pieces. Large potatoes are cut in half lengthwise, the cut is allowed to dry for a couple of days, and then placed in the beds. The number of eyes on a tuber can be increased by cutting the potato crosswise a week before planting, or removing a thin layer of peel across the bottom of the potato.
Then the bed is covered with a layer of hay. Straw is not used - it is too attractive for rodents; plastic film is not suitable because it does not allow the tubers to breathe.
If there is no hay, dry leaves, grass and even paper will do. The covering material must be dry and allow air to pass through to the tubers. If there is a threat of return frosts, the bed is additionally insulated with burlap, spunbond, and lutrasil. As the weather gets warmer, the covering material is removed.
Garden bed care
Then all the weeds collected on the site during the season are laid out on the garden bed. It is necessary to ensure that when the compost layer shrinks, the growing tubers are not exposed. Kizima advises pouring slop between the rows. The moisture released during the decomposition of weeds is sufficient for potato bushes; they do not need watering or hilling.
When the plants bloom, it is necessary to tear off the inflorescences so that the plant devotes all its energy to the formation of root crops. You can leave one inflorescence per bush so that you know when to harvest the first harvest. To harvest potatoes, lift the layer of covering material, collect the tubers and return the grass to its place. The potato bush will continue to grow.
It is important not to miss the optimal planting time. Focus on the beginning of bird cherry blossoms in your region. You can plant earlier, when the top layer of soil has dried well.
You can plant earlier, when the top layer of soil has dried well.
You can plant earlier, when the top layer of soil has dried well.
New potato tubers are formed on stolons - horizontally located lower shoots that form at the very bottom of the main stem. This process requires complete darkness.
The beds should be located in the sunniest places without shade. Otherwise, the potatoes will grow tops and not root crops.
Try to plant early potato varieties in separate beds. Then you will be able to dig up new potatoes for cooking in July.
It is best to select potatoes the size of a chicken egg for planting (20 pieces per 1 kg). Smaller specimens should be placed 2-3 pieces in each hole. Large tubers need to be cut lengthwise, leaving approximately the same number of sprouts on each side. It is not advisable to cut crosswise, since the top part of the potato usually contains more eyes than the bottom.
Before planting, the cut parts of the tubers should lie down for 2-3 days so that the wounds heal (then it is advisable to sprinkle them with wood ash).
Cover the top of the potatoes laid out on the ground with hay, dry leaves, torn newspapers or pieces of wrapping paper. Do not use straw under any circumstances; it will attract rodents to the area, which will ruin all the plantings. There is no need to cover the space between the rows with mulch.
How to plant potatoes using the Kizima method is of interest to many summer residents. As you know, there is no need to dig up the soil. The sprouted tubers must be laid out in the garden bed. It is advisable to make 2 rows, the distance between them should be 50 cm. The distance between tubers should be 25 cm.
As for the size of the tubers, it is best to take potatoes the size of an egg. Small specimens will not be able to produce a good harvest, and large ones will have to be cut lengthwise.
The sun's rays should illuminate the area with potatoes throughout the day. Otherwise, the tops will grow, and the tubers will be small.