Garlic is considered a perennial herb that has valuable properties. It is not difficult to grow this natural medicine in your summer cottage. The main thing is to strictly follow all recommendations for sowing and preparing seeds. If you follow the rules, you will be able to grow garlic in the Moscow region, in Belarus and even in the Trans-Baikal Territory.
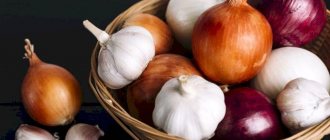
Garlic growing in the ground. The illustration for the article is used under a standard license ©ofazende.ru 500
Popular varieties of garlic
Before you start planting garlic for the winter, you should understand the issues of choosing the right variety. There are 2 types of garlic:
- winter - more frost-resistant (can withstand down to -25°C), which are planted in the fall, are distinguished by large segments of 4-12 pieces. (even number) in each head, the taste is more pungent, suitable for consumption and preparations, but is poorly stored;
- spring varieties - they are distinguished by smaller slices, the number of which is 8-20 pieces, low winter hardiness, can be stored until spring, the taste is mild.
For planting in the autumn months, it is better to choose winter varieties that will withstand wintering well in the soil and then produce an early harvest.
The most popular winter varieties:
- Alcor is a bolting, high-yielding variety, the bulbs are large, weighing up to 40 g;
- Grodekovsky - winter-hardy, good yield, medium-sized bulbs, harvested 80-90 days after germination;
- Autumn - a universal, high-yielding variety, the bulbs are large and dense, weighing up to 36 g, distinguished by a purple tint of scales;
- Podmoskovny is a mid-season variety, the heads are large, weighing up to 60 g, planting is carried out in September to a depth of 8-10 cm;
- Komsomolets - mid-season, cold-resistant, the bulbs are flat in shape, color - white with purple streaks;
- Lyubasha is a productive variety, the heads are large, with 7 lobes, the color is white-pink with purple veins, and has a long shelf life.
The difference between spring garlic and winter garlic
All varieties of garlic are usually divided into winter and spring . Spring crops are planted in early spring, and winter crops are planted in the fall. It is not difficult to distinguish one species from another.
Winter varieties are distinguished by a small number of cloves and an even number (from 4 to 6). The head can be compared to a tangerine: all the cloves are even, of the same size and shape.
The spring cloves are much larger and can be of different sizes and shapes . Another difference is that in the center of the head of the winter plant there is a trunk - the dried base of the peduncle.
Important! Only spring garlic is suitable for long-term storage. Winter crops are eaten immediately or used for preparations.
Choosing a location and preparing a bed for garlic
The quantity and quality of the future harvest directly depend on the successful choice of place for beds for planting garlic before winter.
Main stages of preparation:
- choose a place;
- properly prepare the land;
- form wide beds and allow the soil to settle.
The area for winter varieties should be located on a slight hill. Garlic does not tolerate dampness and flooding of the soil, and excess moisture provokes the development of fungal infections and rotting of the bulbs. There should be no tall trees or buildings near the garden bed that create shade, because... The plant prefers sunny and warm places. The most suitable soil is light loam.
The soil should be loose and fertile, the acidity level should be closer to neutral. If the acidity is high, the garlic will not grow well. Therefore, in such a situation, it is recommended to lim the soil by adding lime, chalk or dolomite flour.
Soil for a good garlic harvest
What kind of soil does raspberry like?
What kind of soil is needed for onions and garlic - medium loamy, chernozem, light loamy. High acidity of the soil will lead to the spread of plant diseases. The culture grows well where previously grown:
- zucchini;
- currant;
- legumes;
- cereals;
- cabbage;
- raspberries.
Poor predecessors for the plant will be tomatoes, onions, potatoes, and carrots.
It would be ideal to plant green manure on a prepared plot. So, for winter crops, green manure is planted in July, mowing before flowering begins. If you use mustard or flacelia, the oils secreted by their root system will help rid the soil of parasites. The green mass of crops, dug up with soil and then moistened, saturates the soil with microelements, enriches it with oxygen, and makes it loose.
Burying green manure
You can get a good harvest only on properly prepared soil, warmed up and moderately moistened. Considering that the crop has an underdeveloped root system, the choice of soil plays an important role. The yield depends on its looseness and humidity, the level of acidity and adherence to the planting scheme.
Planting material, when and how to plant garlic
Good predecessors for garlic beds can be: nightshades (tomato, eggplant), pumpkin plants (zucchini and pumpkins), legumes, cabbage and greens. It is not recommended to plant it after potatoes, carrots, radishes and other onions for 3-4 years, so that the plantings do not become infected with similar diseases.
The time for planting depends on the region and climate, as well as the depth of planting of the cloves. Most often, the slices are planted shallowly (3-5 cm), then the event is carried out 15-20 days before the start of frost (late September - early October). Deeper (up to 10-15 cm) planting allows the cloves to take root well and withstand frosts - for the middle zone this method is used from August to mid-October.
First, you should sort through the planting material, disassemble the bulbs into individual cloves, selecting the largest and healthiest ones, preferably from the outer tier (for non-shooting varieties).
Selected slices are disinfected by soaking for a day in a weak solution of manganese or 1% copper sulfate, then slightly dried. The standard depth of holes for sealing cloves is 5-12 cm.
It is important not to rush into planting, but to allow the soil to settle after forming the beds. Premature planting of garlic cloves has a negative impact on their growth: after the soil settles, they become buried. Because of this, shoot germination takes too long in the spring and, as a result, a decrease in yield.
How to prepare a bed for winter garlic?
Preparing a bed for garlic in the fall is carried out 2-3 weeks before planting it, most often at the end of summer:
- if the soil is too heavy, sand should be added;
- it is better to add peat and clay substrate to sandy soil;
- Peat soils can be improved by adding loam.
To fertilize the soil, complex mixtures with a low nitrogen content are used or a composition consisting of several ingredients is prepared:
- humus and compost - about 10 kg;
- humus and compost - about 10 kg;
- 250-300 g of wood ash;
- 35-40 g of superphosphate;
- 20-25 g of potassium sulfate.
When digging up the soil in the fall, it is not recommended to add fresh manure or droppings due to the possible acceleration of clove germination.
Then the soil must be dug well to a depth of 20-26 cm (shovel bayonet), removing the roots of the weeds. After digging, the beds are formed, adhering to the direction from north to south, 1 m wide and 20-25 cm high. If the weather is too dry, it is recommended to water the soil 2-3 times. It is better to sprinkle wood ash between the rows - this will help protect the plants from diseases and pests.
In order to reduce the likelihood of diseases, many summer residents use copper sulfate, a 1% solution of which is watered on the ground (1 tablespoon of powder per 10 liters of water).
For disinfection, you can use a 1% solution of manganese, Bordeaux mixture or a mixture of boric acid, manganese and vitriol (2 g of each component per 2 liters of water).
Favorable predecessors
Preparing garlic for planting begins with determining the location. Every year you need to change the location of the crop; the same area can become a source of various painful conditions and infections. Therefore, it is highly not recommended to use last year’s site: the same site will be suitable only in 3-4 years.
Good plant predecessors are:
- plants from the pumpkin family;
- legumes (especially peas);
- early ripening cabbage and cauliflower;
- greens (salad);
- winter rye;
- early root vegetables.
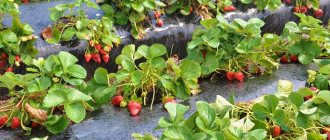
The area should stand without plants for some time so that the soil can recover before planting garlic. This culture is very picky, it needs good lighting and loves a lot of space. If there is not enough space in your summer cottage or garden, then the plants can be added to strawberries, cucumbers, black and red currants, raspberries and gooseberries. Garlic is even able to protect roses from blackness, and it will also repel many pests from itself.
Adviсe
The crop is not recommended to be planted near cabbage, peas and beans - they cannot tolerate it, as it inhibits their growth and development. Unfavorable predecessors are plants of the nightshade and bulbous families. It is not recommended to plant the crop after onions - bulbs are affected by the same pests, so the bed after them can only be used after several years.
Growing and caring for garlic
The beds are marked in advance, maintaining a distance between rows of at least 35 cm, and between holes of 10 cm.
Many gardeners practice planting green manure plants (peas, oats, mustard) between rows. Such auxiliary sowing is needed to retain snow during the winter months, and during the season, rotted tops can be used as fertilizer. When the sown seeds germinate to a height of 30 cm, the actual planting of garlic begins.
Boarding order:
- the holes in the row are spaced at a distance of 10 cm;
- Place a clove in each, deepening it a little;
- The holes are covered with rotted compost, then mulched with pine needles, sawdust, dry peat or leaves, spruce branches with a layer of at least 10 cm.
Immediately before planting, it is recommended to fertilize the soil with urea (10-15 g per square meter).
How to grow large garlic?
If the correct planting time is observed, immediately after the snow melts, the first young shoots appear in the garden bed. They should be immediately loosened and fertilized, and then watered well.
A good garlic harvest depends on several factors:
- To prevent the planted cloves from freezing, the beds should be well covered with snow;
- during the growth period, which occurs in spring-summer, plant care consists of timely watering and fertilizing;
- When shoots form, they must be removed so that the nutrients remain in the head.
Why does garlic rot in the garden?
The main reason for bulb rot is that the beds are too low. In such a situation, the heads are affected by various fungal diseases, begin to rot and become unsuitable for food.
Causes of garlic rotting:
- fusarium - a disease on the roots develops at high soil moisture, gradually rising along the stem, so it becomes obvious only after premature yellowing of the leaves;
- white rot of the bottom - develops when the soil is waterlogged even at low air temperatures in early spring, from which the stems and leaves begin to sharply turn yellow, dry out and fall off;
- penicillosis, or green mold - manifests itself in the formation of watery brown spots on the bottom and husk, due to which individual cloves begin to fade, becoming covered with a green coating; development occurs at high temperatures and humidity.
Care after landing
This type of garlic does not require special care. It only needs to be regularly watered, loosened, weeded and fed.
Before the garlic heads appear, watering should be quite abundant, then it is reduced. During the rainy season and 14 days before harvesting garlic, there is no need to water the plant.
The soil should be loosened in order to prevent the appearance of weeds and remove the dried layer of soil that prevents water from reaching the roots of the garlic.
Among other things, garlic must be fertilized every 10 days during the growing season. At this time, potassium-phosphorus fertilizers are needed. And during the formation of the teeth, you should feed the garlic with an infusion of mullein or dung: 1 kg per 10 liters of water, infuse for 4 days, and then add the same amount of water.
Diseases and pests of garlic
The most common types of pests:
- stem nematode - a white worm 1.5 mm, feeds on plant sap, found on clayey, heavy soils, affected plants develop poorly, leaves fall off, the bulb begins to disintegrate;
- onion and garlic mites - heat-loving pests attack the roots and turn the bulbs into dust;
- onion fly - reproduces during periods of high humidity, lays eggs at the base of plants, and the emerging larvae feed on the juicy pulp of garlic, then go into the soil.
Garlic diseases: rust, black mold, etc.
When to harvest garlic from the garden?
Spring varieties (summer-autumn) do not bolt, so they should be dug up immediately after the foliage turns yellow and lodging (the second half of August).
It is recommended to harvest winter (winter) garlic from the garden in early July in dry weather. If you are a little late, the scales of the bulb will begin to burst and the cloves will fall apart. This may reduce the shelf life of garlic in the future.
The bulbs should be carefully dug out with a pitchfork, then bundles of 18-20 pieces should be formed. To dry, the crop must be laid out in a vertical position in places where there is indirect sunlight or partial shade.
Some gardeners dry dug-out plants directly in the beds for 5 days (after shaking off excess soil, leaving the foliage behind).
Planting garlic in open ground video
Yulia Minyaeva talks well about how to plant spring garlic in the ground in the spring in this video.
In principle, I agree with her on almost everything, I just try not to delay the landing for the reasons that I indicated above.
And so, a good video: Yulia makes the germination of cloves before planting and furrows by eye, without any hassles with stretched threads or crawling with a board along the beds. This appeals to me. I recommend checking out:
This is what the whole process looks like. Everything is quite simple.
How to properly remove garlic and storage rules?
After drying, the roots on each bulb are cut to 2-3 cm in length, and the stems are left 10 cm. Before storing for winter, it is necessary to sort the heads by size. Damaged or badly decayed specimens should be discarded. Heads with 3 covering scales have the highest shelf life. One effective way to prepare for storage is to pre-rinse the heads in a solution of table salt and then dry them.
Garlic storage rules:
- spring - at a temperature of +16...+20°C;
- winter crops should be stored in the cold at +2...+4°C, however, due to disease damage and drying out, such varieties cannot be stored for a long time;
- The humidity in the storage room should be maintained at 50-80%.
Methods for storing garlic:
- in braids that are woven from false stems and bulbs, removing the leaves (for strength, twine is woven with a loop at the end) - the finished braids are hung in a dark and cool room (basement, pantry or closet);
- in bunches (brooms) - the stems are tied, forming a panicle, and then suspended from the ceiling;
- in grids - this method requires periodic checking and rejection of damaged heads;
- in wicker baskets in a cool room;
- in sterilized glass jars, and the heads should be sprinkled with salt;
- in a shallow wooden container, sprinkled with coarse salt;
- in fabric bags, where the heads can be sprinkled with onion peels.
Choosing a place
A dry, well-lit place is suitable for planting garlic, preferably on the south side of the site, where the snow melts first. The culture does not tolerate stagnation of water at the roots; it is better not to place garlic in lowlands. If there is no choice, they build high beds, which are enclosed with a box of bricks, plastic, or boards. The height of the structure is 20 cm. It would be correct to place the garlic bed from south to north.
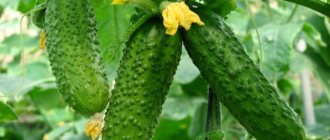
Next to garlic, it is useful to cultivate strawberries, tomatoes, beets, cucumbers, and radishes. Biologically active substances contained in garlic, including natural phytoncides, repel pests and reduce the risk of fungal diseases.
The use of garlic peels for the vegetable garden or garden
Garlic peel is widely used in the fight against vegetable and garden pests, as well as for protection during winter storage of crops.
Practical examples of its use:
- Sprinkling husks over stored root crops prevents them from rotting and becoming infected;
- adding to a whitewash solution for fruit trees;
- decoctions and tinctures of onion and garlic peels are used to combat aphids, mites, Colorado potato beetles, weevils on strawberries, caterpillars on cabbage, carrot flies and other garden pests;
- adding it to holes when planting potatoes, tomatoes and vegetables repels Colorado potato beetles and wireworms;
- To reduce scab on the leaves of berry bushes during the ripening period, the husks are poured into the root circle.
Therefore, after harvesting a rich harvest of garlic and throughout the winter, as the heads are consumed for food, the husks should be collected and placed in fabric bags to be used beneficially in the next gardening season.
Planting garlic cloves according to the scheme
Planting garlic in spring in open ground of spring varieties is carried out as follows:
- Grooves are made at a distance of 20-30 cm;
- The bottom of the groove is sprinkled with sand or wood ash;
- Depending on the cloves, maintain a distance between them of 5 to 10 cm;
- There is no need to press your teeth into the ground with force! Lower the clove into the hole (you can use a screwdriver to make it), sprinkle with soil. Lightly tap it on top to secure the clove;
- The depth of the hole should be no more than 4 cm, depending on the size; there should be a layer of soil above the clove of at least 2 cm;
- The beds are mulched using sawdust, dry grass, and straw.
The photo below shows planting patterns for winter and spring varieties:
If the soil on the ridge was not watered before planting, then you need to spill it with warm water before laying the mulch.
Ask a Question
To get a rich harvest of garlic that is planted in the spring, even of the winter variety, you will need to take care of the plantings. There are no particular difficulties with care, all procedures are standard: irrigation, removal of weeds and fertilizing. What points should not be missed when caring for a crop? Let's take a closer look:
1) After planting the cloves, the bed is watered regularly for 1 month. It is important to control watering so as not to oversaturate the soil with moisture. Then water it if the weather is very hot for weeks. And before harvesting in August, the ridges are not watered at all;
2) When planting garlic on a head in the spring, loosening the soil is of greater importance. It is often combined with weeding. Loosening provides the soil with oxygen, promoting better growth and development of garlic cloves;
3) Apply fertilizers. 15 days after planting, potassium chloride is added to the soil. When the garlic head forms, feed the plants with potassium sulfate (60 g) and superphosphate 910 g) per 1 m2 of area.
It is better to add organic matter during digging and planting. Wood ash is added in the fall for spring digging of the ridge.
Still have questions? Ask, I will be happy to answer!