Propagation of cherries by cuttings: pros and cons
Propagating cherries by cuttings has its advantages and disadvantages. Cuttings are the process of rooting small cut shoots with 3-4 buds. In order to get a larger number of trees of the varieties you like, you can propagate the existing trees on the site.
Propagating cherries by cuttings is not as difficult as it might seem at first. The cuttings take root well and grow quickly. Ease is the first advantage of this propagation method.
Another big advantage is that plants obtained from cuttings completely retain all the properties and qualities of the mother tree from which they were cut. Rooted cuttings grow very quickly. After three years you can expect fruiting.
Naturally, the advantage of cuttings is their low cost.
However, this method of propagating cherries is not without its drawbacks . Of all the cuttings planted, half do not take root at all. Planted cuttings require watering using the micro-sprinkler method.
In addition to cuttings, there are other methods of vegetative propagation of cherries. One such method is the propagation of cherries by root suckers.
How cherries reproduce - sexual and asexual methods
To obtain planting material for this crop, you need to know what kind of reproduction is possible in cherries. According to the biological characteristics of a given plant, this can occur in two ways: sexual and asexual.
In the first case, a new seedling is formed after the process of pollination of female flowers by male ones. As a result, seeds are formed that inherit certain characteristics of the parent tree. But they also develop new properties that help them better adapt to the conditions of the growing region.
With the asexual method of reproduction of cherries, the offspring completely retains the species properties. In this case, cuttings, layering, and root shoots can be used to obtain young seedlings of the crop.
Attention! With asexual propagation, the commercial and taste qualities of the future harvest become significantly higher.
Features of cherry propagation by cuttings
A cutting is a part of a plant separated from it specifically for subsequent propagation. Unlike grafting, this method allows you to obtain a rooted seedling that repeats the properties of the parent tree both in the root system and in the above-ground part. However, not all varieties root well in this way. According to the observations of breeders, it is best to use varieties that produce strong root shoots.
Using cuttings is the easiest way to propagate cherries, which even novice gardeners can do.
The following cherries are considered suitable, with an effectiveness of up to 80%:
- Vladimirskaya;
- Rastunya;
- Shubinka;
- Zakharovskaya;
- Nadezhda Krupskaya.
Did you know? According to the botanical classification, the cherry is part of the Plum genus, which also includes the apricot. Its oldest form, Bird's Cherry, is commonly called sweet cherry.
Suitable cherry varieties
As a result of cuttings, not all varieties show equally high survival rate.
The most suitable ones with an effectiveness of up to 80% are:
- Vladimirskaya. An ancient (more than 300 years old) and very popular variety in Russia with fruits of medium ripeness. It grows as a large bush (2.5–4 m) with several central conductors and a dense weeping crown. When grafted, it is a single-trunk tree. The fruits are small, turnip-shaped, weighing a maximum of 3.4 g (usually 2.5–3 g). The variety is characterized by frost resistance, productivity and good transportability. The outer shell of the berry is burgundy, almost black, dotted with gray dots. The pulp is dark red, dense, juicy, the taste is pleasant sweet and sour, with barely noticeable tart notes.
- Rastunya. Local variety of the Middle and Lower Volga region of folk selection. The tree is tall, with a wide pyramidal crown of medium density. Fruits in 4-5 years. The fruits are small (up to 2.5 g), round, slightly flattened, formed in inflorescences (from 1 to 3), ripen in mid-July. The pulp is dark red, medium density, juicy. The taste is sweet and sour, slightly astringent. A medium-ripening variety with above-average yield, winter-hardy and drought-resistant.
- Nadezhda Krupskaya. The variety is widespread in Vladimir and other regions of the Non-Black Earth Region. The tree is bush-shaped, reaches a height of 2 m. The crown is dense, rounded, somewhat weeping. The branches are thin and hang down to the sides. The elasticity of their wood allows them to withstand abundant harvests of large berries. Cherries begin to bear fruit 2-3 years after planting. The fruits ripen mainly in July. The yield is high and annual: an adult tree produces an average of 10–12 kg of berries. The fruits are medium in size (3.5–4 g), the skin is very thin, the flesh is light red. Winter hardiness is average.
Features of cherry
Beginning gardeners usually practice propagating fruit trees on apple trees. This responsive and flexible tree forgives beginners all mistakes and pleases with good results. Then, inspired by success, they take on the cherry and... fail.
One of the reasons for this is that the main difference between pome (apple, pear) and stone fruit (cherry, plum, sweet cherry, apricot, cherry plum) in terms of reproduction is mixed buds. An apple tree has a growing point in every bud, and sometimes also a flower. Such buds are called mixed. Cherries have simple buds. They are either only floral (generative) or only growth (vegetative). It is difficult to distinguish them until they bloom, but after that it is too late.
Simple generative buds are found in stone fruit trees, mixed - in pome trees
The second feature of cherries is their thin cambial layer. The cambium is a small layer of green cells just below the bark. The rest of the wood consists of dead cells and is a support, like a skeleton for a person. The cambium of a cherry is almost twice as thin as that of an apple tree; it quickly dries out and oxidizes from interaction with water and air. Therefore, you need to work with cherries quickly and accurately, having prepared your tools in advance. Due to the small cambium layer, stone fruits have a thin bark that is easily damaged during work. Gum appears on the wound (the tree’s protective reaction to damage), the tissues underneath it die without access to oxygen, and the wound grows stronger.
You need to work with cherries as carefully as possible, avoiding unnecessary wounds, especially on the central conductor and skeletal branches. Here they do not heal for a long time and can lead to the drying out of a significant part of the crown.
The cambium of the cherry is very thin, 2 times smaller than that of the apple tree.
Propagation of cherries by cuttings: choosing the appropriate material
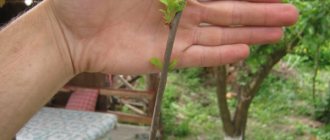
For propagation, take the tops of last year's shoots or current year's shoots with a diameter of several millimeters. It is recommended to take cuttings from branches that are on the south side of the tree. The shoots should not have time to become stiff. They take shoots whose lignification has just begun.
Before you start cutting cuttings, you need to carefully inspect the tree. The branches from which cuttings will be taken should be free of traces of diseases and pests. Careful selection of planting material is the key to healthy, abundantly fruiting plants in the future.
In addition to cuttings, you can use root shoots. It is important not to confuse them with root suckers, which are already small trees.
Root shoots are small sections of the root on which there is a growth bud.
Root shoots are more convenient than cuttings in that they do not require rooting; the root is already there. It is important that the mileage increases. Root shoots make good seedlings.
Finding root shoots is a very long and labor-intensive process. To get just a few seedlings, you will have to disturb the root system of many trees and do a fair amount of shoveling work.
Propagation of cherries by green cuttings
Green shoots will grow well. They are called so because their upper part is green. They spread more easily than root shoots. It is advisable to take green cuttings from young trees. The older the tree, the worse the survival rate of the cuttings will be.
Some people often wonder whether it is possible to take cuttings for propagation from shoots growing near the mother tree. This can only be done if it is known for sure that the mother bush did not grow from a graft. For grafted trees, this method of propagation is unacceptable.
By grafting
Propagation of cherries using the grafting method is very simple and very effective. For it, one- or two-year-old wild seedlings are used, into which more improved, intensive varieties will be grafted, with increased fruit quality characteristics, rapid ripening and low crown.
Annual shoots with a trunk diameter of at least 5 mm are harvested in the first half of winter. But if you live in the southern regions, this can be done immediately before the vaccination itself, in the spring.
Shoots are cut from mother trees and their sections are placed in water at room temperature for several hours. When the shoot is saturated with moisture, the required number of cuttings are cut from it, each of which should have at least 4 buds. Also, in parallel, a special mixture (anti-transpiration) is prepared from wax or paraffin and the resulting cuttings are treated to prevent drying. If you do not carry out this treatment, then you need to cover the grafted part with a plastic bag and leave it until shoots grow from the buds. The grafting procedure must be carried out before the period of active sap flow begins. The best time is mid-March.
This method is suitable for any cherry varieties, including Sania, Vladimirskaya or Fertile Michurina.
Grafting cherries onto cherries gives good results. This is how excellent varieties Sashenka, Kubanskaya, Chudo-cherry, Nadezhda, Poppy, Yuzhnaya, Dessertnaya Morozova were obtained.
Optimal timing for summer cuttings
Summer is the most active season of work at the dacha, among which plant propagation plays an important role. Suitable air temperatures and long daylight hours help accelerate the formation of roots in young plants and their survival.
Cherry cuttings are carried out throughout the summer, but the result will be more effective if the procedure occurs at the beginning of June. During this period, the plant develops most intensively, saturated with nutrients for growth: nitrogen, phosphorus, potassium, carbohydrates.
Favorable days
Many gardeners cut cherry trees in accordance with the lunar calendar, which indicates the phases of the waxing and waning moon and favorable days for such procedures.
Initial material for planting is harvested only on the waxing Moon on the following dates:
- June: 1–4, 21–31;
- July: 24–27;
- August: 1, 2, 20–31.
Prevention of root growth
Gardeners often use dug up root shoots to start a new garden. Although propagation of plants by root shoots can be quite successful, if you do not live in the country permanently, it is recommended to grow rootstock from seed. Experienced gardeners note that if a plant was grown from a root shoot, it, in turn, is often prone to the formation of root shoots.
Some, tired of fighting the growth that litters the garden, but not wanting to part with the tree, dig sheets of slate or metal into the ground a meter from the root system. However, this method of prevention cannot be called too effective, because, firstly, root shoots will still form next to the plant, and secondly, such underground fences, when decomposing, can change the composition of the soil. Therefore, if a tree produces a lot of shoots, and you do not have enough time and energy to regularly fight new shoots, it is easier to part with the plant.
Root shoots can become not only a source of trouble, but also good planting material for those who live in a private house and have the opportunity to regularly care for the garden. Give the young shoots a year to take root, then dig them up, replant them in a new place and plant a cutting of any variety you like (for example, using the budding method).
Source
Methods of propagation of cherries, their advantages and disadvantages
Depending on the method of propagation, cherry trees are divided into self-rooted and grafted. Each of them has its own pros and cons.
- Self-rooted cherries retain their variety even if the mother plant is completely destroyed by frost or drought. This is their main and biggest advantage. Otherwise, varietal trees with large, tasty fruits are greatly pampered by selection and are inferior to grafted ones.
- Grafted trees are trees that consist of two parts - a rootstock and a scion. The rootstock is the roots, the lower part. For the rootstock, zoned plants are chosen that are well adapted to local conditions. They must be winter-hardy, be good at extracting moisture from the lower layers of the soil, and keep the tree from falling when heavily loaded with crops (this property is called anchorage). The graft is a cultural part. The size and quality of the fruit, harvest time, and disease resistance depend on the scion variety.
In a grafted tree, the grafting site is noticeable at the bottom of the trunk
There are three main ways to propagate cherries:
- seed propagation;
- cuttings;
- graft.
The last two are also divided into several types.
Features of cuttings depending on the type of cherry
Not all cherry varieties are capable of rooting.
Well-rooted (80–90%) include:
- Shubinka;
- Zhagarskaya;
- Dawn of the Volga region;
- Vole.
The following varieties take root moderately (up to 50%):
- Fertile Michurina;
- Half fat;
- Apukhtinskaya;
- Dessert Volga.
Depending on the region
In the central zone and southern regions of Russia, where there is stable snow cover in winter and the ground does not freeze much, cuttings are planted in the soil in August.
In harsh climatic conditions, planting is carried out in early June. For the winter, young plants must be protected from frost.
Seed propagation
This is a method in which a new plant is obtained by sowing a seed. It is rarely used for propagation of varietal highly productive plants, since the offspring in this case do not repeat the characteristics of the parents. Seed propagation is used in the following cases:
- in selection, when parental pairs are selected artificially, and pollination also occurs artificially. Of course, you can try to sow seeds from any tasty berry. Sometimes very interesting shapes are obtained this way. The harvest from such trees can only be harvested in the 7th–10th year;
- when propagating wild forms, when the quality of the berries is of secondary importance. Plants obtained from seeds are better adapted to the conditions of their site. This is especially true for northern regions;
- to obtain rootstocks with subsequent grafting of a cultivated variety onto them. The rootstock from the seedling produces less root shoots, has a clearly defined central root, holds the tree in the ground better and actively extracts water from the deep layers of the soil.
In order to obtain a new plant, the seeds are first separated from the pulp. Then they are washed, disinfected and stratified.
Stratification
Stratification lasts about 2 months in a humid environment at low positive temperatures. The easiest way to do it is in natural conditions in winter. To do this, take a 3-liter glass jar and steam it. Then the substrate is selected. It should be loose, hold moisture well and not cake. Slightly rotted sawdust, dry grass cuttings are suitable, you can add a little sand. The substrate is pickled to avoid rotting and molding of the seedlings. Benazol, Maxim, and a hot solution of manganese are used as a disinfectant. Excess moisture is allowed to drain, and the disinfected mass is mixed with prepared seeds 1:1 or 2:1. The jar is filled 2/3 full, covered with a plastic lid, and then buried in the garden.
In the spring, dig up the jar and carefully shake out the contents. Most of the seeds should have sprouted by now. They are planted in pre-prepared beds or cups with nutritious soil. Then the young plants need to be regularly watered, weeded and fed.
If there are a lot of seeds, you can sow them in the fall directly into the ground to a depth of 2–3 cm. The percentage of germination in this case will be lower, but such plants will be stronger and frost-resistant. In winter, the bed is additionally covered with snow. In the spring of next year, the strongest seedlings are transplanted to a permanent place.
Cuttings
It is often confused with cutting grafting. Cuttings are a method of propagation in which roots appear on a part of the mother plant, and after that it becomes independent. In this way, rootstocks are propagated or rooted plants are obtained. However, such cherries produce a lot of shoots and need support at first, since they do not have a central root.
Cherries reproduce relatively successfully:
In some sources you can read that cherries practically do not reproduce by cuttings. This is not entirely true. It has been noticed that those stone fruit plants that produce little growth do not produce roots well on cuttings. And vice versa.
Reproduction by shoots
This is the simplest of all possible methods. There are only two disadvantages - grafted trees cannot be propagated this way and there is a possibility that the cherry tree will also produce many offspring in the future. Propagation itself is elementary - the young plant is dug up, cut off from the roots of the mother plant and transplanted to a new place. It is better to dig just before the leaves fall or before the buds open.
If you carefully pull out a young cherry with a large lump of earth and move it to a new place, then digging can be done in the summer. After this, the soil under the seedling needs to be regularly watered, weeded and mulched. Feeding begins no earlier than 3 weeks later, when the plant has recovered from the disease and has sprouted new roots.
The shoots are carefully separated from the mother bush
Using layering
This culture does not reproduce well by layering, but you can try. If you take a branch located above the graft, it is possible to obtain a rooted plant of the same variety from the grafted tree.
To obtain cuttings, it is better to choose a young tree 3–5 years old with long growth from the previous year. In early spring, the lower branch is carefully tilted to the ground and pinned. In this case, thin, unbranched branches should lie horizontally. You can pour a small mound of earth or place a box of earth on low sawhorses. The depth of the soil is at least 10 cm.
To obtain layering, early in the spring, the branches of the tree are carefully bent to the ground and pinned
New branches will now grow vertically. Gradually, as they grow, they are covered with loose, damp soil to a height of at least 15 cm. A mixture of rotted sawdust and sand is best suited for such hilling. The mound is watered regularly; the inside should be constantly moist. The crown leaves are always located on the surface.
Young roots should appear by mid-summer. In the autumn, before leaf fall, the sawdust is carefully dug up, the seedlings with roots are separated from the mother plant with pruning shears and planted.
Green cuttings
Green cuttings allow you to get many rooted plants from one mother plant in a short time. It is usually used in large nurseries, since the process as a whole is quite complex and painstaking. Every stage is important, from preparation to planting.
Propagation by green cuttings is usually used in large nurseries
If you didn’t manage to propagate cherries the first time, don’t be disappointed. Skill comes with experience. The main thing is to do the work carefully, carefully, patiently, paying attention to small details.
Source
Reproduction by grafting
Grafting is the “implantation” of part of one plant into another. The operation is equivalent to surgery, so special attention must be paid to the instrument. The knife is sharpened sharply. Nowadays they produce modern branded knives made of hardened steel, which do not require long sharpening and polishing. It is enough to periodically sharpen them on a special diamond-coated whetstone. However they are very expensive.
Some gardeners use a paper knife to graft a tree, but its blade is too thin and difficult to control. The result is a very long, irregularly shaped cut with little wood.
Tools used in the tree grafting procedure must be very sharp and well disinfected
The following types of vaccination are distinguished:
- budding (kidney grafting);
- copulation (grafting with cuttings);
- regrafting thick branches into splits.
Budding
Budding is the most common and well-known method. The main task when budding a cherry is to choose the right bud.
A bud (eye) is taken from an annual shoot. The shoot must be mature, that is, with a hard, non-drooping crown. You should not delay budding - the period of shoot growth for cherries quickly ends. After it, the cells divide worse, the graft cambium does not grow well with the rootstock.
Cherries have three types of annual shoots:
- short, up to 20 cm in length. Such shoots consist exclusively of flower buds, the growth one is located at the very end. Eyes for budding are not taken from such branches;
- medium, 25–40 cm in length. In such branches, growth buds are located below at the base of the shoot (3–4) and at the top, immediately under the crown (2–3). At the top, you also need to look at the degree of ripening of the wood of the shoot. If it is still soft and easily separated from the bark, then the buds are taken only from below;
- long, more than 40 cm. Such shoots form on young trees or are specially provoked by pruning in mother plantings. If they appear on ordinary fruit-bearing trees, it means they were pruned and fed incorrectly. On such branches, usually all the buds are full-grown, so they can be safely cut off for budding.
Before grafting, the rootstocks are heavily watered for two days in a row so that the bark comes away from the wood well. Then the rootstock stem is wiped from the soil to a height of about 15 cm with a damp and then dry rag. This is necessary to remove dust and stuck lumps of earth.
After connecting the rootstock and scion, the trunk is tightly wrapped with a special tape
Unlike an apple tree, it is better to graft a cherry tree not into the butt, but by the bark into a T-shaped cut. With this grafting method, there is no need to combine the cambium layers. The buds of this tree are convex, and when wrapping they are left outside so as not to be damaged.
Video: summer budding
Copulation
Copulation is performed in early spring, as soon as sap flow begins and the buds begin to swell. If the operation is performed in the summer, the cuttings dry out or become moldy faster than they have time to take root. Cuttings for such grafting are cut in advance and stored in a dark, humid place at a temperature of 2–4°C. Copulation is done on a clear day, when sap flows well in the rootstocks.
To check, you can cut a small twig on a birch tree. If juice is dripping, the weather is suitable.
Copy process:
- The rootstocks are wiped from dirt, then dry.
- At a height of 15–20 cm, an oblique oval cut is made, completely removing the crown. You will get a stump with a long (2–2.5 cm) cut. It is split in the middle, 1.5 cm deep.
- Then they take a cutting, cut off 3-4 buds and repeat the same oblique cut with splitting on the lower part. The top cut remains round. It is made literally a few millimeters higher than the bud, since a stump without a bud dies and can rot.
- After this, the oblique cuts are combined, the tongues, cut deep into the stems, are inserted into each other. It is imperative to ensure that the cambium is aligned; on the scion and rootstock it should be in close contact at least on one side and below.
- The grafting site is wrapped with film. They start from the bottom, carefully, with a slight tension, wrapping the plant in a spiral so that one turn extends slightly onto the bottom one. There should be no gaps in the cortex.
- The winding is completed 1–1.5 cm above the copulation cut. The top of the graft is coated with a thin layer of garden varnish or wax to reduce moisture evaporation.
When copulating, be sure to monitor the alignment of the cambium
Grafting thick branches into clefts
This method allows you to re-graft old plants or have several varieties on one tree. It, like copulation, is used in early spring, during the beginning of sap flow.
- The selected branch is cut down with a garden hacksaw. The cut should be smooth, round, without protrusions.
- The stump is carefully split approximately in the middle, and a screwdriver or a strong thin branch is inserted into the cut.
- Two cuttings (about 15 cm) with 3–4 buds are cut, the upper cut is as for copulation. The bottom of the cutting is cut obliquely on both sides, making a long flat wedge.
- These wedges are inserted from both sides into the splitting of the hemp until the very beginning of the cut. It is important to monitor the combination of cambium on the cutting and rootstock. To do this, the graft is inserted strictly from the side, without a protrusion or depression.
- After this, the screwdriver is pulled out and the grafting site is wrapped with film.
- The open upper sections of the hemp and cuttings are covered with garden varnish.
You can add additional shading by putting on a paper cap. Film is not suitable in this case, as condensation forms in it, which leads to mold and rot.
Grafting thick branches into a cleft allows you to grow several varieties on one rootstock
Adviсe
Tip 1
The seed propagation method is only suitable for standard species. It is also used by breeders who are working on developing new varieties by crossing existing ones. This method is also used to obtain wild seedlings for subsequent grafting.
Tip 2
When propagating by grafting, special attention must be paid to the knife - it must be sharp. It is not recommended to use a utility knife that has a blade that is too thin - it is difficult to control, which leads to a long, irregular cut.
Advice from experienced gardeners
To improve survival rate and obtain healthy and strong plants, you can use the following recommendations:
- 2 weeks before cutting, a cutting location is selected on the selected shoot. The base of the future cutting is wrapped in black material (for example, electrical tape or adhesive tape) to a width of 3–4 cm. Without access to light, the area under the tape becomes discolored, and cell degeneration occurs. Remove the protection from the cut shoot and plant it as usual. This method increases rooting by 30%.
- It is better to take green cuttings from young trees, since rooting strength decreases with age.
- To prevent foliage burns on green cuttings when applying fertilizers, after fertilizing they should be watered with clean water.
- The cut is made with a sharp knife or razor blade, holding the shoot suspended.
- The planting sites for root cuttings can be marked with pegs.
An existing cherry tree can be easily propagated in a garden plot if its characteristics suit the gardener. The use of cuttings guarantees the preservation of the necessary qualities and does not require special skills.
Was this article helpful?
Thank you for your opinion!
Write in the comments what questions you have not received an answer to, we will definitely respond!
You can recommend this article to your friends!
Already helped 26 times
What cuttings are suitable
Everyone can breed their favorite variety. Planting material is harvested during the active growth of the mother tree. Approximately mid or late July, depending on the region of residence.
In order for the seedlings to be of high quality, it is necessary to carefully examine the branches from which cuttings will subsequently be cut. They should not show signs of pests or the influence of pathogens.
It is better to choose branches located on the south or southwest side of the tree.
Own-rooted seedlings are obtained by cuttings or using shoots from a selected tree. They retain all the characteristics of the mother tree. This is why they are appreciated.
Reproduction by layering of cherries will not cause difficulties. To do this, you need to secure the branch with pins and wait until the fixed branch puts out roots. Then plant it in a permanent place.
It is necessary to qualitatively reject planting material. Since this is the basis of the future harvest.
The genes of the mother tree, subject to the correct technology, are adopted by the offspring and are preserved throughout the life of the new plant.
Caring for cuttings
The faster the cuttings grow, the sooner you can wait for the first fruits to appear. To stimulate plant growth, you need to regularly fertilize them with complex fertilizers and spray them with growth stimulants. This must be done 3-4 times a season, alternating medications.
The first feeding of the cuttings should take place approximately a month after planting. For the first feeding, urea, potassium chloride or superphosphate are suitable.
After rooting, we must not forget about the cuttings; they require constant care. Every other day, the plants need to be watered ; the soil should not be allowed to dry out, but excess moisture is also harmful. The optimal amount of water at first will be 10 liters per square meter. Gradually, watering can be reduced. Once the cuttings grow into small trees, they can be watered several times a season.
During the first 2-3 weeks after planting, the cuttings should be kept under film . Every day the film must be lifted in order to ventilate the cuttings.
Young cherry trees can be destroyed by pests or diseases, so the seedlings need to be treated . Frail plants especially need care and attention. Preventative treatments for diseases are simply mandatory.
To combat insect pests, some gardeners install traps consisting of special sweet, sticky mixtures. These mixtures are capable of attracting insects.
Further care
Propagation by cuttings is a relatively simple procedure, but after planting the plants require care, which includes the following:
- Watering. Young plants need a lot of moisture. The soil in the temporary area is constantly moistened, but waterlogging is not allowed. When water stagnates, the root system will begin to rot.
- Feeding. The cuttings are fertilized every 2 weeks. For this, superphosphate, ammonium nitrate and potassium salt are used. To speed up the appearance of green shoots, nitrogen is added.
- Protection from drafts. In the first month after planting, the cuttings are covered with a jar or plastic wrap. This helps maintain a relatively stable microclimate. The cover is removed every day for a couple of hours.
- Insulation. For the winter, the cuttings are covered with a large layer of sawdust, peat, vegetable tops or spruce branches.
Other ways to propagate cherries
Another vegetative method of propagating cherries is propagation using root shoots . This method is only suitable for propagating trees that were not grown on rootstock.
This is done in the spring. For propagation, it is advisable to take root shoots growing as far as possible from the mother tree. Such shoots will take root better in a new place. Also, if you start digging root shoots too close to the mother tree, you can damage its roots.
First you need to select suitable shoots, then you need to carefully remove the soil at their base and use a sharp knife to separate them from the root system of the mother tree. The cut site is coated with garden varnish, and the roots are sprinkled with earth. Thanks to the presence of their own roots, such seedlings take root very quickly.
If you separate and plant them in the spring, by autumn they will already be full-fledged plants with their own root system.
Cherry propagation by seeds
Cherries can also be propagated by seeds. When propagated by seeds, the properties of the mother plant may be lost. Before sowing, seeds must be stratified . Stratification is the treatment of seeds at low temperatures. The seeds should be mixed with slightly damp sand and placed in the refrigerator for 1-2 months.
Seeds are planted in April. The planting depth is 3-4 centimeters. Most often, cherries are grown from seeds in order to then use these seedlings as a rootstock.
In industrial nurseries, the method of propagating cherries using grafting is popular. This method is much more effective than cuttings. Plants develop and grow faster; grafting allows you to quickly increase the number of plants.
Reproduction by layering
A simple way is to propagate cherries by layering. Cherries are propagated by horizontal and vertical layering.
When propagating by horizontal layering, take a branch and bend it to the ground. In this position it is fixed using a special pin. The place of fixation is sprinkled with earth and watered with water.
During propagation by horizontal layering, the ground part of the bush is cut down. This should be done when the cherry is at rest. When the first shoots begin to appear, they will need to be earthed up. This is done repeatedly; the height of the mound of earth should be within 15-20 centimeters. Once the shoots are in the ground, they will begin to take root. After a year, it will be possible to separate the shoot and plant it in a permanent place.
Selection and preparation of cuttings
How to take cherry cuttings? 2 days before the procedure, the mother tree is watered abundantly so that the plant tissues are well saturated with moisture. The best time for this is early morning or evening.
A higher survival rate is observed for green cuttings taken from the top of the current year's shoots.
Advice! Gardeners have a way to check the suitability of planting material for cutting - wrap it around your finger. If it doesn't break, you can start the procedure.
First inspect the young branch, which should be healthy and without damage. Cut cuttings with a diameter of 4–5 mm and a length of 5–7 cm so that each has 2 buds. 1.5 cm of the cutting is left under the bottom, and a cut is made from the top directly above the bud.
A sharp knife or razor is used for this work, since a blunt instrument damages the vascular system of the workpiece. The cut cuttings are immediately immersed with their bases in water to prevent the leaves from drying out.
How to propagate cherries using woody cuttings? To do this, at the end of summer they are cut 10–12 cm long from annual shoots. The lower cut is made 3–5 mm below the bud, the upper cut 5–10 mm above.
The cuttings are tied into bunches, buried halfway in sand or wet sawdust in a cool room and stored until spring. At the same time, the substrate is moderately moistened; drying out or soaking is unacceptable.
Cherries are propagated by air layering much less frequently, but some gardeners resort to this method. Work order:
- In early June, the lower branch of a young tree (thin, unbranched, 3–5 years old) is bent to the ground and pinned.
- Make sure that the shoot lies horizontally.
- The folded area is sprinkled with soil and watered.
A full-fledged root system is formed within a year. Then the cuttings are separated from the mother tree and planted in a permanent place of growth.
The branch for air layering is taken above the grafting site, as a result a young self-rooted cherry of an identical variety is obtained.
Cherry cuttings
Rooting methods
Before rooting, the cuttings are kept for 12–24 hours in a solution of a root formation stimulator (“Epina”, “Kornevina” or “Heteroauxin”).
Rooting in the ground:
- Take any container: containers for seedlings, cut-off 2-liter plastic bottles, or specially put together boxes.
- Fill it with a nutritious substrate of turf soil and humus (1:1), add superphosphate, nitrogenous fertilizers and ash.
- Carefully moisten and deepen the cuttings by 3 cm, keeping a distance between them of at least 10 cm.
Immediately after planting, the container is covered with film to create a greenhouse effect and accelerate root formation. The mini-greenhouse is located in a shaded place outside or in a bright room with an air temperature of +22...+25°C.
It is important to create high humidity in the greenhouse, so once every 5 days the cuttings are sprayed with warm water from a spray bottle, periodically watered and ventilated. With proper care, roots will appear in 2 weeks. It will take the same amount of time for them to take root.
Some gardeners use a simpler rooting method. To do this, cuttings kept in a growth stimulator and moistened with a spray bottle are packaged in plastic bags and placed in partial shade.
At summer temperatures and high humidity, root buds will form. In September, plants are planted in light soil and mulched in late autumn.
Is it possible to propagate a tree by shoots, and will they bear fruit?
Is it possible to grow cherries from shoots? This method is considered the easiest, but only varietal or own-rooted plants are suitable for it . Their shoots will produce trees that will fully retain their varietal qualities.
Only strong, developed offspring 1-2 years old are selected. In early spring, cut the root coming from the mother plant. After this, the shoots are shortened by 1/3, watered and fertilized.
In October, the root is cut from the second side. After a year, the plant is dug up and transplanted to a permanent place.
What other methods of reproduction are there?
Vegetative propagation, in addition to cuttings, includes grafting and cutting off root shoots. Generative propagation is ensured by sowing seeds into the soil.
Seminal
Propagation of cherries by sowing seeds does not ensure the preservation of the properties of the mother plant. Sowing is carried out with stratified seeds in April, to a depth of 3-4 centimeters. Stratification is the process of treating seeds with low positive temperatures. To do this, seeds mixed with wet sand are placed in the refrigerator for 30-60 days.
Optimal conditions
In order for the cuttings to take root, the necessary conditions are created under which future seedlings take root and become full-fledged plants. Agricultural management consists of the appropriate soil composition, the correct choice of planting day and other related factors.
Soil composition
In order for the cutting to take root faster, it is necessary to ensure the supply of necessary nutrients. Ordinary soil is mixed with humus, superphosphate, wood ash and mineral fertilizers containing nitrogen are added.
Coarse river sand is poured into the bottom of the groove or hole to improve drainage. A layer of prepared soil mixture is poured on top of it. Then the cuttings are installed in a vertical position and sprinkled with soil.
Disembarkation time
For quick rooting, it is recommended to keep it in a solution that stimulates root growth. In this case, the cuttings are planted in the morning. Experienced gardeners advise planting cuttings in the evening if they have not been soaked in stimulants. After planting is completed, cover the soil with polyethylene, creating the so-called greenhouse effect.
Cuttings are taken early in the morning and in the evening. Select a healthy branch, then divide it into a number of segments, about 30 cm each.
Dimensions and depth of the hole
It all depends on the number of cuttings selected for planting. If there are a lot of them, then the bed is made wide; if there are few, then a small area is enough. A hole is dug and filled with a nutrient mixture, then a cutting is stuck into it to a depth of 3 cm.
Cherry propagation methods
The cherry tree is a true decoration of any garden, so this plant is in justifiable demand and popularity. To start a beautiful garden, you need to become familiar with the reproduction characteristics of this fruit plant. This procedure is simple. It requires basic knowledge regarding cherry breeding. There are several basic methods for propagating this crop. To achieve the desired result, you must strictly follow all the rules and recommendations.