The technology of growing tomatoes in buckets and containers without a bottom was first described in F. Allerton’s book “Growing Tomatoes,” which hit the shelves of Soviet stores in 1957.
Since then, the method has been undeservedly forgotten. Although some cunning summer residents managed to adapt it to their needs and conditions.
So what is its essence and what benefits does its development bring to the amateur gardener?
Preparation
Capacities
When preparing materials for planting tomatoes, you should first pay attention to:
- Bucket color. It is better if they are light in color, but if they are not, then dark buckets need to be wrapped in light (white) material so that their rhizomes do not overheat.
- The material from which the buckets are made is not important at all; they can be made of plastic or metal.
- Volume. Buckets must have a volume of at least 10 liters.
- Quality. The more worn out and used the bucket looks, the better. Numerous cracks, chips and holes improve the evaporation of excess water and ventilate the root system of tomatoes. When using new buckets, it is necessary to make a large number of breaks and holes in the bottom and along their edges.
Important! For the method of planting tomatoes upside down, you will need buckets with a hole diameter in the bottom of the container of about 5-10 centimeters.
Semyan
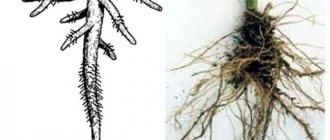
Tomato seeds must be thoroughly sorted to select the largest and most undamaged ones before sowing in buckets. It is possible to buy seeds in a special store or prepare them yourself in advance. For this purpose, it is necessary to leave several of the largest and most ripened tomatoes in the fall. Last year's seeds are best suited for growing seedlings.
When using purchased seeds, be sure to monitor the expiration date. Seedlings will sprout much better if the seeds have the shortest expiration date.
Self-prepared seeds must be thoroughly heated with a lamp and treated with a solution of potassium permanganate. Purchased seeds are most often already treated with such a special solution.
You can learn more about preparing tomato seeds for sowing here.
The rest of the material
In order to increase the yield of tomatoes, it is best to prepare special soil for tomatoes in advance before planting them.
- In the fall, you need to fill the buckets with humus. To create humus we will need:
- ordinary soil from the garden (it is best to take it from cucumber beds);
- ash.
- Then you need to mix the above components together and place them in buckets. It won’t be superfluous to add special substances so that processes in the soil occur more intensely.
- The resulting mixture should be filled with water and left for the whole winter directly in buckets in the greenhouse.
- They can be arranged in any convenient way or dug into the ground to a depth of about 20 centimeters.
- You constantly need to add snow to the buckets so that the ground is completely saturated. When the snow melts in the spring, the soil will be thoroughly saturated with melt water.
- As for the soil, you can also pour expanded clay into buckets or cover it with small pieces of old planks so that there is always air access to the root system of the tomatoes. Next you need to start putting:
- the first layer in the form of hay, grass, food remains;
- the second layer is sand with the addition of two glasses of ash;
- the top layer is garden soil.
- It is necessary to water the soil with plenty of warm water. You can also use the process of slaking the lime, which will lead to its strong heating and pour boiling water on it. Such warming of the earth will allow seedlings to be planted and the harvest to be harvested much better and earlier in time.
- After several days, you need to plant two or three plants in one bucket with a volume of about ten liters.
Reference! You can fertilize with only one fertilizing with mineral fertilizer before the tomatoes begin to bloom. You can also resort to a type of fertilizer such as magnesium sulfate. It should be applied in early spring when the snow begins to melt or directly into the hole when planting, approximately one tablespoon per bucket of soil.
How to plant tomatoes in buckets
There won’t be any special problems with planting, the main thing is to prepare the containers and substrate in advance, and the process itself is practically no different from the classic version.
Conditions in the greenhouse
The air temperature in the greenhouse should be within +25. +30 degrees, the room must be regularly ventilated. Basically, growing tomatoes in a greenhouse in buckets requires the same conditions as growing them in beds.
Did you know? In order for the immune system to function properly, it is enough to drink a glass of tomato juice (preferably freshly squeezed) every day, as it contains the daily requirement of vitamins A and C necessary for the human body.
Choosing buckets
The material from which the buckets are made does not matter; they can be plastic or metal. But the color of the planting containers plays a big role: if they are black or dark, it is better to wrap them with light cloth or paper so that the roots of the plant do not overheat.
The most interesting thing is that the older and more worn out the bucket, the better. Numerous holes and cracks contribute to the evaporation of excess moisture and ventilation of the root system.
If you are going to use new buckets for planting, you will have to work hard on them and make as many holes as possible in the bottom and along the edges of the container.
You can also plant tomatoes in buckets upside down; for this method you need containers that already have a hole in the bottom (or you need to make one specially). The diameter of the hole should be 5-10 cm.
Soil for growing
Experts recommend preparing the planting substrate in advance, in which case the results will definitely exceed all expectations.
In the fall, you need to fill the containers with humus mixed with ash and pour plenty of water over the resulting mixture, then place the containers in the greenhouse.
In winter, it is advisable to cover buckets with soil mixture with snow, so that when it melts in the spring, the soil will be thoroughly saturated with melt water.
Important! Even if it was not possible to prepare the soil in advance, it’s okay - you can plant it in the same soil that you use for planting tomatoes in the beds.
Landing rules
You can plant tomatoes in buckets earlier than in beds. The soil in the container warms up quickly enough, so there is no need to worry that the seedlings will freeze. One bush should be planted in each bucket.
It is better to plant cup tomatoes upside down at the end of May, this is due to the fact that this method is used mainly for decorative purposes, and they are usually hung in the open air on a summer cottage or balcony.
After the hole in the planting container is prepared, it is sealed with paper or foam plastic, this is necessary so that the plant does not fall out.
Then a seedling bush is placed in the container so that the tomato stem hangs upside down by about 5 cm, and the root of the plant is covered with planting substrate. After this, the bucket is hung by the handle in a sunny area.
Read also: Cucumbers on the windowsill: how to feed them at home, fertilizers
Caring for adult plants from A to Z
Which watering is better?
Tomatoes do not tolerate excess moisture and stagnation of water; before the ovaries appear, it is recommended to only lightly moisten the soil, avoiding drying out. After the ovaries appear, water once a week at the rate of a liter of water per bush.
When watering, you can add a couple of pinches of wood ash to the water in a bucket. If automated irrigation is used, sprinkle the beds with ash. This will boost the plants' immunity and accelerate their growth.
Loosening
The first loosening is carried out immediately after planting the seedlings in the ground, the next ones at intervals of two weeks. This helps retain moisture and improves oxygen access to the roots.
We talked about the soil requirements for growing tomatoes, as well as how to keep the soil in good condition in your garden here.
Top dressing
When adding nutrients, it is important to ensure that the amount of nitrogen does not exceed phosphorus and potassium. Feeding is carried out every two weeks
For ten liters of liquid add:
- 15 gr. ammonium nitrate;
- 50 gr. superphosphate;
- 30 gr. potassium
Bush formation
In order for tomatoes to ripen faster, you need to carry out pinching, leaving the main stem and removing excess shoots. The procedure must be carried out regularly
Protection from pests and diseases
To prevent the plant from suffering from all sorts of ailments and pests, you need to observe crop rotation, dig up and disinfect the soil before planting, remove diseased plants to protect healthy bushes, and prevent drops of water from falling on the leaves during watering.
Also, when choosing seed, it is recommended to give preference to strong varieties and hybrids that are resistant to diseases and pests.
If the pests still reach the plant, then you need to move on to more radical methods. Use products that can be purchased in specialized stores.
We invite you to watch a video about protecting tomatoes from pests and diseases:
https://youtube.com/watch?v=NPcqYrcLZag
How to grow tomatoes: step-by-step instructions
Seed selection and preparation
There are a huge number of varieties and hybrids of tomato seeds on the market.
The first thing you should pay attention to when selecting seeds for sowing in a greenhouse is the self-pollinating nature of the varieties. To avoid mistakes, give preference to F1 hybrids
As for other characteristics - ripening time, resistance to diseases and pests, color, size and taste - here everyone chooses what suits him best.
Seeds can be divided into two large groups: granular (coated with a shell consisting of a starting set of nutrients) and regular, unprocessed. The first type does not require soaking and is suitable for spot sowing, but requires a regular level of soil moisture for germination. The second ones are smaller in size, germinate faster, they can be soaked before sowing, or treated with fungicides.
Sowing tomato seeds
How to grow tomatoes in a greenhouse. You should start by growing seedlings. tomatoes. Thus, the strongest seedlings are selected for cultivation in the greenhouse.
The soil should be loose, soft and light, with good drainage and aeration. Before sowing, it is necessary to prepare peculiar beds-furrows 1.5 cm deep, which are then thoroughly watered. Then, in increments of 0.8 - 1 cm, seeds are placed in them. After that, the crops are sprinkled with soil mixture and using a fine sprayer (so as not to knock the seeds out of the bed with a strong stream), the crops are moistened. In order for seedlings to appear faster, it is recommended to cover the crops with film.
It helps maintain constant temperature and humidity in the greenhouse with seedlings. After the first shoots appear, it is important to carefully ensure that the soil does not dry out. At the same time, from time to time it is necessary to ventilate the greenhouse with seedlings in order to avoid the appearance of mold on the soil surface
It is best to do this after watering, so that the tomato leaves do not lose their tightness due to changes in humidity and temperature. When the tomatoes reach a height of 20 - 25 cm, they should be planted - that is, transplanted with wider steps to a permanent habitat in the greenhouse. When pruning, you need to make sure that one bush does not interfere with the development of another. On average, the distance between them should be at least 40 cm. This will allow both the root system and the above-ground part to actively develop. After transplanting the seedlings, it is watered; the next day after watering, the root areas need to be loosened, which will improve air exchange.
What varieties of tomatoes to choose for growing in a greenhouse
Both determinate (low-growing) and indeterminate varieties of tomatoes are grown in the greenhouse. Which bear fruit until frost.
Among the first, it is worth highlighting Openwork, Bourgeois, Spring of the North.
Among the tall, powerful tomatoes we can distinguish Octopus, Major, and Happiness.
Such hybrids as DJ, Kirzhach, Drive, Super Red, PinkMagic, Tolstoy, Malvaria, Three Sisters, Blue Bunch are particularly resistant to diseases and have good fruiting.
How to grow tomato seedlings at home
At home, tomato seedlings should be sown in special seedling boxes. Expanded clay is placed at the bottom, serving as drainage and protecting the root system from excess liquid. Then the box is filled with soil, which needs to be watered with warm water. To make it easier to plant in rows, you need to mark grooves 1.5 cm deep. Seeds are placed in these grooves, then they are sprinkled with dry soil mixture and gently sprayed with water (you can use a spray bottle).
At the end of sowing, the boxes are covered with film and placed in a warm place, protected from drafts. After the emergence of seedlings, you can begin to gradually open the greenhouse slightly - hardening off the plants in order to gradually accustom them to their normal habitat.
After the appearance of two to three true leaves, the seedlings are picked, transplanted into individual pots or boxes, but with large steps.
Method for picking tomato seedlings into a snail
Another great way to pick: in snails
And it doesn’t matter whether it’s picking peppers, picking eggplants or picking tomatoes. This picking method is universal
This method is very space-saving and is especially suitable for those who have a lot of seedlings. The root system of the plants is not injured, and the seedlings grow strong and healthy.
Planting tomatoes
In early May, after persistent night frosts have passed, you should begin planting tomato seedlings in buckets. For this:
- Place crushed stone, broken brick or other construction waste in a 3 cm layer at the bottom of each bucket and cover with soil mixture;
- Make a hole 20 cm deep in the middle of the container. Spill it with water in which to dissolve any growth stimulator according to the instructions;
- After the water is completely absorbed into the soil, plant one seedling at a time. Try to bury the seedlings into the soil up to the root collar. However, make sure that the soil does not cover the growing point;
- For better survival of the root system, compact the soil around the stem a little and gently water it with warm water.
Advantages of the method
Growing tomatoes in buckets is not difficult.
A container with a seedling feels great in open ground and a greenhouse. Gardeners consider the following points to be advantages:
- the water and the soil itself quickly heat up in the bucket, as a result the growth and development of the bush accelerates;
- when watering, water does not spread over the surface of the soil, but penetrates directly to the roots;
- fertilizers are fully supplied to the root system;
- the land can be renewed annually;
- the risk of spreading infection is reduced;
- plantings take up little space and can be moved;
- during heavy, prolonged rains, containers can be placed under the roof;
- no need to fight weeds;
- tomatoes begin to ripen two or even three weeks earlier.
On grown tomato bushes, juicy, fleshy, large fruits are formed, with a dense skin that protects against cracking. A container with seedlings can be kept both in a greenhouse and in ordinary garden beds.
To grow tomatoes in buckets, you need to choose the right variety. This method is suitable for planting hybrids and varieties of tomatoes that have a compact root system and weakly leafy branches.
The reviews note only the positive aspects of such growing in a bucket: “Many years ago I started planting tomato bushes in buckets. And it all started by accident. There were extra sprouts of seedlings left, which it was a pity to throw away. I planted one seedling each in old, leaky buckets filled with soil from the garden beds. I placed the seedlings in the greenhouse, away from the beds.
What was unexpected was that the greenhouse tomatoes in buckets began to ripen 2.5 weeks earlier than the rest of the plantings. Their stems were strong, and their fruits were large and very tasty.
The next year I again planted several sprouts separately. The result again pleased with a tasty harvest. Moreover, I noticed that the more holey the bucket, the more harvest I was able to harvest! Now I plant only in separate containers, the care is minimal, I have never had any diseases, and all family members like the taste of tomatoes!”
Growing technology
You can grow tomatoes in both metal and plastic buckets with a volume of at least 10 liters. You can take old, deformed containers. It must be remembered that the black and dark brown color of the container will heat up more strongly in the sun, which will have a bad effect on the plant. Therefore, buckets of this color need to be wrapped in light-colored material.
Numerous holes are made at the bottom of the prepared container. Excess moisture will escape from the holes made. One sprout is planted in each bucket.
In the last days of October, a mixture of humus and wood ash is poured into a bucket and watered. The ideal option would be to take the land where cucumber beds used to grow.
Buckets are placed in neat rows in a greenhouse or dug into the ground in a garden plot. It is recommended to ensure that there is always snow in the buckets throughout the winter. It saturates the soil well.
Snow melts in buckets much faster than in beds. In addition, the earth warms up faster, so seedlings can be planted much earlier.
Some gardeners come up with other ways to grow tomatoes in buckets in a greenhouse. Growing tomatoes with the root system up is popular. To do this, select a bucket, make a hole at the base through which the seedling is pulled. The roots are covered with earth and compacted.
Read also: Cucumber Mamluk F1 - reviews about the variety, description, photo
This method allows you not to resort to weeding and loosening during cultivation. The bucket can be hung anywhere, thus saving space, which is always in short supply.
Growing tomatoes in open ground
I used to think that it’s not worth growing tomatoes in open ground at all, why? After all, there is a greenhouse, there are better conditions there, and so on. But when I tried it, I was somewhat perplexed; my harvest outside turned out to be better than in the greenhouse. And he didn’t particularly care for the street ones. Why am I saying this? Yes, just like that))) Of course, you can choose for yourself where and how to grow tomatoes, I will share with you my experience and basis.
growing tomatoes in open ground
Of course, on the one hand, it is better to grow tomatoes in a greenhouse, but to be honest, there is more hassle, and the varieties themselves for soil produce good yields. Don’t chase after the best varieties, saying that this one is better, and the other one will give more fruit, and so on, experiment yourself, select it to suit your weather conditions.
First you need to choose a place to land. This is a very important stage.
- It should be on the sunny side and not in the lowlands. Light should always fall on the bushes, and moisture, for example after rain, should not linger in the bushes.
- The soil should not be acidic; it is better if the acidity is neutral. How to determine? Take a sample for chemical composition. But I didn’t do that, I don’t know. I believed my grandmother when she said that sorrel grows poorly here, which means tomatoes will grow well. Horsetail also grows well in acidic soil.
- The soil needs to be fertilized in the same way as in a greenhouse. But no fresh manure.
- Growing tomatoes is prohibited where corn and nightshades were grown. The best areas are where they grew: root vegetables, radishes, cabbage, legumes, lettuce.
How to grow tomatoes
Tomatoes are grown in greenhouses and in open ground, but to get a good harvest, it is better to use seedlings. If you don’t have time to grow it at home, you can purchase ready-made bushes for planting at gardening stores. But in this case, there is a risk of getting a low-quality product; besides, if you plant the seedlings yourself, it is easier to control what fertilizers were applied and provide quality care.
Today, there are many successfully used methods for growing vegetable crops. Tomato is no exception - it can be planted in several ways: in a bucket, in paper and under film.
Experiments with growing tomatoes began due to the reluctance or lack of ability of gardeners to tinker with seedlings. And now everyone can choose the most comfortable method for themselves, because the dacha has become not only a garden for growing vegetables, but also a place of relaxation. Tomatoes are also grown without seedlings - under covering material or film.
How to grow tomatoes
Note! Tomatoes should not be planted after potatoes, peppers or eggplants, because these crops have similar diseases. It is also not recommended to plant tomatoes in a place where they have already grown for 4 years. It is also better to exclude the proximity to potatoes in order to prevent infection with late blight.
But after legumes, cucumbers, zucchini or pumpkins, tomatoes will grow well
It is also better to exclude the proximity to potatoes in order to prevent infection with late blight. But after legumes, cucumbers, zucchini or pumpkins, tomatoes will grow well.
The bed should be prepared when the earth begins to warm up: loosen the soil, add fertilizer and water. Fertilizers should be used organic: peat, humus. Wood ash is also used. To answer the question of when to plant tomatoes under covering material, you need to understand in what climatic conditions they will grow. Tomatoes, both seedlings and seeds, should be planted as soon as the danger of frost has passed; for the middle zone this is usually mid-May. For planting seeds, you must choose early-ripening varieties, otherwise they may not germinate.
Seeds, prepared in advance (warmed up, disinfected, washed) are sown in furrows that should not exceed 1 cm in depth.
Important! To disinfect the seeds, they must be kept in potassium permanganate for about 15 minutes. Then the planting must be sprinkled with a layer of earth, watered with warm water and covered. This achieves a greenhouse effect, and the seeds germinate much earlier
For example, agrofibre or polyethylene is used as a covering material. It is important to sow seeds at a great distance, because replanting is not carried out subsequently, and if the plantings are thickened, the leaves may turn yellow. Next, you need to water the plants 3-5 liters per bush, depending on its size, about once a week. At the same time, make sure that water does not get on the leaves.
This achieves a greenhouse effect, and the seeds germinate much earlier. For example, agrofibre or polyethylene is used as a covering material.
It is important to sow seeds at a great distance, because replanting is not carried out subsequently, and if the plantings are thickened, the leaves may turn yellow. Next, you need to water the plants 3-5 liters per bush, depending on its size, about once a week
At the same time, make sure that water does not get on the leaves.
How to grow a tomato plant in an upside down bucket
This growing method was invented by gardeners from Europe. In our country, this technique has been simplified, but it has not become less effective.
Gardeners who have already used this method claim that its use has a positive effect on productivity and also helps to save usable space in a small summer cottage. A hanging container can be placed in a place not suitable for planting. In addition, tomatoes grown in buckets can serve as a decorative element in a summer cottage.
Preparing a greenhouse installation for tomatoes
If the greenhouse has already been used, in the fall you need to remove the remains of old plants and weeds from it, and then dig up the soil.
In spring, the soil is loosened and ash is added. Nitrogen plays a major role in the proper development of tomatoes. You can saturate the soil with it using manure. Planting green manure plants such as phacelia, mustard or peas also has a good effect.
The most serious threat to tomatoes is late blight. To prevent the seedlings from getting sick, the soil can be treated with one of the appropriate preparations purchased in the store, or with the following solution: 3 kg of slaked lime and 500 g of copper sulfate are diluted in 10 liters of water.
Landing
The technology for planting tomatoes in buckets includes preliminary germination of seedlings:
- selected large seeds are treated with a weak solution of potassium permanganate, soaking in it for 15-20 minutes;
- the disinfected seed material is kept in damp gauze for 1-2 days for swelling;
- sow seeds in containers to a depth of 2 cm;
- the pots are placed in a warm place where the temperature is maintained at 18-21 °C during the day and 15-17 °C at night;
- when 2-3 leaves appear, seedlings are pricked if necessary, deepening the stems to the level of growth of cotyledon leaves;
- on the 10th and 20th days, as well as 7 days before the expected date of transplantation, the seedlings are fed into buckets.
They begin to plant tomato seedlings in buckets when they grow 7-12 leaves. At the same time, if it is possible to place the container in a warm room or a heated greenhouse, the planting dates can be shifted.
Planting technology:
- Make a hole in the center to a depth of 15-20 cm and water it with warm water and potassium permanganate (1 g per 10 l);
- after 10 minutes Tomato seedlings are planted, one plant per container, with the stems buried to the level of growth of the lower leaves;
- Water the planted tomatoes, avoiding the formation of a crust.
Preparing for the next season
Processing of structures
One of the reasons for such an early revision is the need to remove the remains of plants that have already bear fruit. They are removed for preventive purposes and to minimize the risk of spreading any disease. The greenhouse itself should be washed well with soapy water.
The frame is checked for the absence of rusty areas. If rust is found on it, it must be cleaned, primed and painted.
The base of a wooden greenhouse should be treated with an antifungal agent. Gardening shops have ready-made solutions, but you can make your own from copper sulfate or burn a smoke bomb.
Soil cultivation and enrichment
To grow excellent tomatoes in a greenhouse, which are a little troublesome to grow, it is worth fertilizing the soil. This can be done in the spring, but it makes sense to do all the work at once, and at the beginning of the next season just plant the seedlings.
The soil should be dug up and the top part of the soil removed. Then the soil is watered with a solution of copper sulfate. Dosage calculation - 1 tbsp. spoon per bucket of water (10 l.).
This must be done in the outgoing season. Then, if desired, you can apply mineral or organic fertilizers.
Preparing for spring planting
In spring, 2 weeks before planting seedlings, it is advisable to loosen the soil. You can also add some fertilizer (organic) if the soil is low in nutrients. The width of the beds should be at least 90 cm, and the height - 40 cm. And it is recommended to allocate at least 60 centimeters for the passage.
Experienced gardeners advise dividing the greenhouse into 2 halves, which can be fenced off with film and grow tomatoes in one, and cucumbers in the other. And alternate their placement annually.
Optimal timing for planting seedlings in a greenhouse
The planting time is largely determined by the growing region. I will give in the table the recommended timing for planting tomatoes in a greenhouse.
| Region | Deadlines |
| Central (regions: Moscow, Tula, Bryansk, etc.) | II ten days of May |
| North-Western (regions: Novgorod, Kaliningrad, Tver, etc.) | II ten days of May |
| North Caucasus (Stavropol Territory, Chechen Republic, etc.) | III ten days of March |
| Northern (regions: Murmansk, Arkhangelsk, etc.) | III ten days of May |
| Central Black Earth (regions: Voronezh, Lipetsk, Oryol, etc.) | II ten days of May |
| Privolzhsky (regions: Nizhny Novgorod, Perm, etc.) | I ten days of May |
| Southern (regions: Astrakhan, Rostov, etc.) | III ten days of March |
| Far Eastern (regions: Amur, Magadan, etc.) | III ten days of May |
| Ural (regions: Chelyabinsk, Magadan, etc.) | II ten days of May |
The timing is suitable for polycarbonate unheated greenhouses, where the average temperature is +25°C. If the room is heated, the planting dates are shifted a couple of weeks earlier.
Advantages of the variety
unique variety of tomatoes
The tomatoes ripen well and the top ones are not inferior in quality to the first fruits from the lower branches. Octopus tomatoes are suitable for pickling, which is great. It is impossible to eat such a quantity of vegetables fresh.
If you don’t bother too much, but grow this variety like ordinary tomatoes, then it will be the most ordinary tomato. Varietal properties will not appear clearly. Still, it is worth making the effort to get from the plant all that its potential is capable of.
Not everyone was able to discover all the advantages of Octopus, which is why reviews of it are very contradictory. If you are interested in a tomato tree, study thoroughly all the intricacies of growing it and success will be guaranteed.
Step-by-step instructions for landing
Not overgrown seedlings
Tomato plants that are approximately 1.5 months old are excellent for planting in a polycarbonate greenhouse. They should be strong, with thick stems and 8-12 true dark green leaves and well-developed roots. The height of tomato plants should be approximately 30-35 cm, no more.
The sequence of actions when planting normal, not overgrown, tomato seedlings:
To make the process of removing tomatoes from planting containers easier, the plants are well watered shortly before planting. Wells are prepared for seedlings, which are placed according to the selected pattern depending on the type of tomato (determinate or indeterminate). When planting, fertilizers (mineral or organic) are not applied if they were added during soil preparation. Water each hole well, and then plant one tomato in it strictly vertically. Planting tomatoes must be done carefully so as not to destroy the lump of earth in which the roots are located and not to accidentally break the stem. Each tomato plant is planted in prepared holes and buried 3 cm above the earthen coma. After some time, additional roots will grow on some of the stems located underground, which will only enhance the nutritional capacity of the tomatoes. The planting density of tomato seedlings is maintained as required for the selected variety. After placing all the plants in the holes, the seedlings are sprinkled with soil, which is compacted a little so that the roots of the seedlings are in better contact with the soil. For the first couple of days they are shaded so that they do not suffer from the sun
The material used for shading is then removed.
A week or two after planting tomato seedlings in the greenhouse, the ground around them must be mulched with straw or hay in a small layer of approximately 3-5 cm, so that the moisture is retained in the soil as long as possible and evaporates less. This allows you to reduce the frequency of watering and thus reduce the air humidity inside the polycarbonate greenhouse. This will help avoid the risk of developing late blight, which especially often appears on plants under conditions of high humidity and sudden temperature changes.
Stretched or overgrown seedlings
Stretched or overgrown tomato plants are planted as follows:
- In greenhouse beds, make a groove about 5-7 cm deep along the entire length.
- Distribute the seedlings reclining across the bed to outline their location.
- If the tomatoes were grown in a pot, then the earthen ball is quite voluminous and in order not to squeeze the stem at the base of the seedlings, make an additional depression in the groove so that the earthen ball with roots fits there.
- Watering is carried out with warm water separated from chlorine at the rate of 3-4 liters per 1 plant.
- When the water is absorbed into the additional depression, an earthen ball with roots is placed in it, and the plant is placed lying at an angle of approximately 30°.
- The part of the stem on which the leaves were torn off is covered with soil.
- There is no need to tie up the tomato right away, as you can break the stem; it will gradually tend to the top.
Thus, it is possible to plant even very long tomatoes that have become very outgrown or stretched out.
When planting overgrown tomato seedlings, ensure compliance with the pattern and density of plant placement. After all the tomatoes have taken root, mulch the soil around them.
Growing upside down in buckets
European gardeners invented an unusual way of growing tomatoes. In Russia, this technique is used in a simplified form, but it is fully justified. According to reviews from experienced vegetable growers, the method allows you to get better yields than with traditional cultivation and allows you to save space in a small garden. Hanging containers can be placed in places unsuitable for planting vegetables, and with a creative approach, you can decorate the area with tomatoes grown in buckets.
To plant using the original method you will need:
- a bucket with a capacity of at least 10 liters;
- a piece of foam rubber or capillary mat;
- a piece of cardboard;
- a container of suitable diameter for water.
Make 1 hole in the bottom of the bucket with a diameter of about 5 cm. The container must be placed on an elevation so that there is free space under the bottom. When planting seedlings using this method, the bush is turned upside down and pushed into the hole. The roots should be inside the bucket, and the stem should be below, under the perforated bottom of the container.
The hole in the bottom of the container must be sealed using a cardboard washer. In the center of a piece of material, cut a hole slightly larger than the thickness of the seedling stem, make a side cut from the edge of the washer to the middle and put it on the stem of the bush. Fill in the soil, carefully spreading it around the stem and roots. At least 10-15 cm of soil should be left above the root system.
Spread a capillary mat on top of the soil and place a container with a small hole on top. When water is poured into the vessel, it will gradually saturate the mat and enter the soil. The seedlings do not have to be watered, you just need to monitor the presence of water in the tank. The cardboard washer will prevent the soil from spilling out during planting, but in a humid environment it will get wet and will not interfere with the growth of the stem in thickness.
Russian gardeners most often do not need drip watering for their tomatoes: rainfall in some regions is too abundant, and tomatoes have enough natural moisture. Therefore, instead of an irrigation tank, domestic vegetable growers plant another tomato bush on top (preferably compact varieties) or small ornamental plants. This way the plantings look more beautiful, and moisture from the soil surface evaporates more slowly.
The final stage of any method of planting tomatoes upside down in buckets involves hanging them:
- To place containers, you can use single metal poles dug into the ground, taking into account the total load on them. On such a support you can place 4-5 buckets of tomatoes, hanging them on welded hooks. Such supports can be installed in any place inconvenient for farming and used to decorate the site.
- By digging in 2 pillars and connecting them with a horizontal beam, you can hang containers in the form of a gate or arch, or a living wall of plants. The pillars can also be installed in a circle. Then inside it you will get a comfortable gazebo.
- You can hang containers on a wall or fence. Unsightly surfaces will be decorated, and the space in the garden will remain free.
According to gardeners, such planting significantly reduces the incidence of late blight and other infections, the pathogens of which enter the plant precisely with soil particles. In addition, tomatoes are easy to shoot and pick without bending over the bushes.
Rules of care
Caring for tomatoes in buckets involves the usual steps.
- Watering should occur as the soil dries out. If the buckets are dug into the ground, then you can water the space outside the container. Avoid getting water on the green part of the plants.
- The room in the greenhouse must be ventilated and the air temperature and humidity monitored. Air humidity is no more than 70%, temperature is no higher than 30 degrees.
- Weeds must be removed promptly.
- Many varieties of tomatoes require pinching during care.
- During the entire growing season, fertilizers must be applied at least three times.
It is necessary to carry out hilling. The procedure helps strengthen the root system, the stem becomes powerful, and the leaves are rich green. Since the area around the bush is small, the work will take a little time.
Mulching is recommended, although seedlings in buckets do not need this step as much. But still, mulch can reduce the risk of infection spreading, pest attack, weeds will not appear, and moisture will not evaporate. As mulch, you can choose peat, chopped meadow grass, sawdust, and straw.
The best days for planting tomatoes for seedlings according to the lunar calendar in 2020Read
To prevent a dry crust from forming on the surface of the soil, it is useful to loosen the soil, especially after watering or rain, if tomatoes are grown outdoors. Thanks to loosening, microelements and oxygen penetrate inside the plant faster.
Growing tomatoes in buckets is not complete without the pinching procedure. Pruning is necessary to increase productivity. Removing lateral, extra branches helps the plant direct all its energy to the formation of fruits, and not to the growth of leaves and stems. Tall varieties of tomatoes most often need this procedure.
If the stem stretches high up, then you need to install a peg to which the bush is tied. Sometimes low-growing bushes also need a garter. Placing a large number of fruits on branches can cause the stem to break. Thanks to the garter, light and air can freely flow to all parts of the plant.
Is it possible to grow tomatoes in buckets in a greenhouse, how to increase the yield
Gardeners are constantly striving to increase the yield of their crops, improve the quality of the final product and, of course, simplify a rather labor-intensive process as much as possible.
One of the “know-how” of this nature is growing tomatoes in buckets. Agree, this method is quite extraordinary and may seem dubious at first glance, but it has many advantages and has already earned popularity. And what are its advantages, let's figure it out.
Tomato care
The growing season of tomato plants in containers is faster due to the fact that the roots receive both moisture and nutrition in full. Caring for quickly growing bushes is practically no different from the agricultural technology of growing tomatoes in the standard way. Due to the limited space, there is no need to waste too much water - only what the ground absorbs is enough. Water the plants abundantly, once every 5-6 days. Water consumption is 3-4 liters per bush. After each watering, the soil is loosened, simultaneously freeing it from weeds.
If tomatoes are grown in a greenhouse, the room must be regularly ventilated, otherwise there is a risk of mold growing in the ground. Such a nuisance can happen due to excessive heating of the soil in the bucket. The air temperature in the greenhouse should not exceed 25 degrees Celsius during the day and 18 degrees at night. Air humidity – 65%.
“Bucket” plants are formed into one trunk - this will allow you to control the branching of the bush and better care for it. Pinching is carried out once a week, removing 4-5 shoots at a time.
During the growing season, at least three feedings are carried out. Fertilizers are first applied two weeks after planting the seedlings. This time, it is preferable to feed the tomatoes with mullein diluted in water (500 grams per 5 liters of water) or nitrophoska (50 grams per bucket of water).
The tomato bushes are fed a second time after another couple of weeks. This period is marked by the beginning of flowering, and therefore tomatoes need additional reserves of minerals. It is best to apply fertilizing with complex fertilizer with the addition of potassium sulfate (30 grams per 10 liters of water). At the beginning of fruiting, tomatoes are fed with superphosphate (20 grams per 10 liters of water) and wood ash (a glass per bucket of water).
Although hilling plants in buckets is technically difficult to do, this agricultural technique cannot be completely neglected. You will still have to rake soil onto the trunk in order to stimulate root development and speed up fruit formation.
Tall varieties are tied to a support 15 days after planting the seedlings. Determinate varieties do not need to be tied.
Tomatoes growing in buckets get sick less often. However, they can still be affected by late blight and other fungi. At the first signs of infection (the first symptoms appear on the leaves in the form of dark spots), the bushes are treated with Bordeaux mixture, and potassium-phosphorus fertilizers are also applied. Spraying tomatoes with a soap-water solution (200 grams of grated soap per bucket of water) and garlic tincture (8 cloves of garlic per 10 liters of water) will help prevent the appearance of pests.
Growing tomatoes in a bucket allows you to get a rich harvest of very good quality fruits. Tomatoes grow well both in greenhouses and in open ground. Moreover, they ripen two weeks earlier than usual. This means that you will be able to enjoy delicious vegetables in July.
Important!
Pros and cons of growing tomatoes in buckets
Using this compact method, you can grow tomatoes on the balcony. Even deformed buckets can be used as a volumetric pot. Universal containers with a volume of 10 liters are suitable for growing medium-sized and tall varieties. Excess liquid will flow out of the bottom. The gardener will only need to carefully care for the planting material.
Advantages of growing tomatoes in buckets:
- The entire volume of liquid, along with useful substances, will be directed directly to the plant’s body. Preventing the liquid from spreading will allow water to enter directly into the root system of the tomato bush.
- Weeding weeds within the area limited by the capacity of the bucket is much easier than clearing weeds and loosening an entire garden ridge.
- If necessary, the tomatoes in the buckets can be moved to a more suitable location. An outdoor container can be placed under a canopy if the rains in the region are prolonged.
- In cool summer conditions, the soil is heated more intensively, which has a positive effect on the speed of seedling development, the quality of fruit filling and the ripening time of vegetables in comparison with planting in open ground.
- To extend the fruiting period, miniature plantings can be placed in a greenhouse at the end of the season.
Read also: When to plant eggplant seedlings in Siberia: timing, recommendations, choice of variety
The disadvantage of the method of growing tomato seedlings in buckets is the likelihood of overheating of the soil in conditions of excessively high air temperatures.
Appearance of landing
The majority of varieties can easily tolerate high soil temperatures, but when grown in a container, moisture evaporates much earlier. Tomatoes in buckets need to be watered more often than those growing in an open bed.