If your harvest of bell peppers turned out to be so large that you have already sent enough fruits for storage in the basement or cellar, and also managed to freeze the peppers in the freezer, including whole peppers for stuffing, then treat yourself to a dried delicacy.
You will need to choose a good variety , prepare the pepper for drying, and set the desired mode. This pepper can be stored for almost the entire cold season in several ways.
Features of preparing dried peppers for the winter
In order for the dish to be as tasty as possible, it is recommended to take into account the following features when choosing vegetables and preparing it. It is necessary to choose fleshy, elastic fruits, since they greatly decrease in volume. Vegetables must be without signs of spoilage.
Acute
Hot peppers are small in size, so you can cut them in half or leave them to dry whole.
Bulgarian
It is recommended to cut sweet peppers into pieces of arbitrary size, after removing the stalk and seeds. To make the snack not only tasty, but also beautiful, it is recommended to use fruits of different colors .
If you remove the skin from the fruit, the finished dish will be more tender. To do this, vegetables must be placed in boiling liquid for 1-2 minutes, then doused with cold water. After this, pick up the skin with a knife. It will come off easily.
Preparing the vegetable
How to dry chili peppers at home? To prepare chili peppers for the winter, you must first prepare them. To do this, peppers are sorted, selecting pods of uniform color (green, red)
It is worth paying attention to the presence of specks or any damage on the surface of the vegetable.
If even the smallest dots are present on the pepper, especially if they have an orange tint, then such a pod must be removed from the total mass - it is spoiled and will not last for further long-term storage.
The selected peppers are thoroughly washed under running water and dried on a paper or cotton towel. It is better to place clean peppers in a warm room for 1-2 days for light drying.
If you decide to dry the whole pepper, then at this stage the preparation process ends, but if you want to dry the crushed pepper, then you need to cut the fruit crosswise, remove the seeds and stem.
Next, the pepper is cut with scissors into half rings or small cubes, no more than 0.5 cm thick.
Carefully! When preparing and drying hot peppers, you must follow some safety rules:
work must be carried out strictly with gloves (latex surgical gloves can be used, after first washing the top layer of the gloves with ordinary soap); try not to touch your face with your hands until you finish working; When slicing hot peppers, it is important to ensure that small pieces or splashes of pepper juice do not get into your eyes; After finishing handling the product, wash your hands thoroughly with plenty of water.
Watch a video on how to properly string hot peppers onto a thread for drying:
How to cook dried peppers
Below is a classic set of ingredients. You can diversify it if desired. If you add a little sugar, the finished snack will have a savory sweetish taste. Spices can be added based on the family's taste preferences. Oil can be replaced with sunflower oil.
In the oven
- pepper – 1.5-1.8 kg;
- oregano;
- rosemary;
- black pepper;
- salt;
- olive oil – 85-90 ml;
- garlic – 3 cloves.
- Preheat the oven to 100-130 o. If there is a convection mode, you need to set it, then the air will circulate well and the moisture will evaporate.
- Wash the vegetables, dry them, remove the core. Cut into large pieces, or strips.
- Prepare a container of the appropriate size, add the slices, add spices and salt, and mix.
- Place skin side down on a baking sheet lined with parchment and cook for 1.5-2 hours. Turn over periodically.
- Place the prepared peppers tightly in clean, sterilized containers, add chopped garlic, pour in the specified amount of oil, and close tightly. The oil should completely cover the pieces. If necessary, the amount of oil must be increased.
In the dryer
- Place slices of washed, peeled pepper in a container. Sprinkle with spices, salt, and sugar if desired.
- Place in a single layer on a drying rack or mesh. There should be space between the pieces so that air can circulate freely.
- Set the temperature to 75-80 o. Cook for 3-4 hours, turning occasionally.
- Place the pieces in sterilized containers and add chopped garlic between layers.
- Pour in oil, close, and store.
In the microwave
It is more difficult to cook peppers this way. The pieces need air to escape, otherwise they will cook in their own juices. The vegetable should be evenly drained of excess liquid.
- Dry the washed vegetables, peel and cut into slices.
- Sprinkle peppers with spices and salt and mix.
- Place in a flat container and place in the microwave for 5 minutes.
- After the time has passed, remove, drain the separated juice, and leave for another 5 minutes.
- Repeat the procedure until completely cooked.
- Place the finished pieces in a sterilized glass container, add garlic slices, add oil, close, and refrigerate.
Sun-dried tomatoes - a quick recipe
Interesting!
Delicious whole stuffed chicken in the oven Ingredients:
- tomatoes;
- thyme;
- dry garlic;
- salt;
- olive oil.
Preparation:
- Cut the prepared tomatoes in half through the stem.
- Place the tomato halves immediately on a wire rack lined with parchment.
- Sprinkle the tomatoes with dried thyme, then dried garlic and add a little salt.
- Now sprinkle the slices with olive oil.
- We send the tomatoes to dry for at least 6 hours in the oven on the “Convection” mode at a temperature of 50 ° C. It is advisable to open the oven door slightly so that the tomatoes are dried and not dried.
- Place the finished sun-dried tomatoes in a clean jar, add oil and store the snack in the refrigerator.
- Tomatoes should not be watery, otherwise they will dry out for a long time, and the taste will not be the same. Among domestic varieties, “Chio-Chio-San” and “Buyan” would be a good choice. Cherry tomatoes are also a very tasty snack.
The main components are spices. Sun-dried tomatoes go perfectly with Provençal herbs, which include rosemary, thyme, oregano, and basil.
Ingredients:
- tomatoes;
- salt;
- fresh garlic;
- fresh thyme;
- olive oil.
Preparation:
- Cut small tomato fruits into four parts. If desired, you can remove the pulp along with the seeds.
- Place the tomato slices on a baking sheet lined with parchment or on a drying rack and sprinkle with salt. We do not add spices yet, as during the long drying process they lose their aroma.
We cook tomatoes in a dryer at a temperature of 50 ° C for 20 to 24 hours or put them in an oven preheated to 50 ° C for 5-6 hours.
- Then put several sprigs of fresh rosemary and the same number of slices of fresh garlic at the bottom of the jar.
- Next, lay out the sun-dried tomatoes and thus layer the tomatoes and spices.
Pack the contents of the jar well and fill with oil - olive or odorless vegetable oil. The oil should completely cover the tomatoes.
We close the jar with a lid, let the preparation brew for a couple of weeks and use it for its intended purpose.
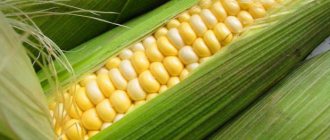
Interesting! Simple and tasty salads with canned corn
We offer another recipe for sun-dried tomatoes that can be prepared for the winter at home. Drying tomatoes in the oven will take from 1 to 1.5 hours, but it all depends on the size of the tomatoes and how the oven itself works.
Ingredients:
- tomatoes;
- salt;
- sugar;
- oregano;
- garlic;
- olive oil.
Preparation:
- We choose meaty tomatoes, you can use cream or cherry tomatoes. Cut in half and cut out the core.
- Afterwards, add the tomatoes, mix and leave for 10-15 minutes so that excess juice comes out of them, which will then need to be drained.
- Place the tomato slices on a baking sheet with parchment and lightly sprinkle with granulated sugar. During the drying process, the sugar caramelizes and gives the sun-dried tomatoes a richer flavor.
- We also sprinkle the tomatoes with oregano and, if desired, drizzle with olive oil.
- Place the tomatoes in the oven for 1-1.5 hours, temperature - 120 °C.
Chop the garlic into a clean jar, put the sun-dried tomatoes and pour olive oil over everything.
If you want to extend the shelf life of sun-dried tomatoes, then you need to sterilize the jar and add 1-2 tbsp along with the oil. spoons of vinegar.
You can dry tomatoes in the dryer, oven, and even in the microwave. This is the easiest and fastest way to prepare a delicious and aromatic Italian snack.
Ingredients:
- 5 tomatoes;
- 2 cloves of garlic;
- 20 ml olive oil;
- 1 tsp. Provençal herbs;
- salt to taste.
Preparation:
Cut durum tomatoes in half, and then cut each half into thin slices.
- We transfer the tomatoes to the plate on which the tomatoes will dry in the microwave.
- Now salt the tomato slices and sprinkle with Provençal herbs.
- Then put the tomatoes in the microwave for 6 minutes, setting the power to highest.
- At this time, chop the cloves of the spicy vegetable into plates.
- Then take out the tomatoes, cool and repeat the drying process two more times for 6 minutes.
- Place a layer of sun-dried tomatoes on the bottom of a clean jar, then garlic and tomatoes again.
- At the end, add the remaining garlic and pour olive oil into the tomatoes.
- Close the jar with a lid and put it in the refrigerator.
If tomatoes are prepared without the use of olive oil, then it is better to store them in closed cotton bags and always in a cool, dark place.
How to check readiness
Readiness is checked by appearance. The finished pepper will have a mesh on its skin, it will darken slightly, and the flesh will become three times smaller. The slices become slightly dry, but elastic. If the slices are not pliable by the end of the recommended cooking time, let them dry for another 10-15 minutes.
If the pieces become brittle and crumble, they have dried out.
Storage of the finished product
You can store the pepper in the oil in which it was cooked, this way the rich taste will be preserved. Place pieces of dried pepper in a small sterilized jar in a dense layer and completely fill with sunflower or olive oil. The oil should be 2-3 centimeters above the stacked peppers to prevent air from entering. The jars are stored in the refrigerator and used as needed.
As a result of drying, you will get an indispensable ingredient for preparing various salads or pizza. Dried peppers are consumed both ready-made and used as a decoration for meat or fish dishes. It also makes a great snack. Properly prepared dried peppers will serve as a guarantee of tasty and healthy nutrition, which is important during periods of exacerbation of viral diseases.
Storage rules and periods
The product must be stored in the cold (cellar, refrigerator), darkness, for 4 to 6 months. If mold has formed on top of the oil, the product should not be consumed. To extend the shelf life to 7-9 months, it is recommended to add 15-20 ml of vinegar per one-liter container.
Peppers prepared by drying will be an excellent appetizer not only for a family dinner. This dish will deserve its place on the holiday table. The set of spices can be varied if desired. Don't be afraid to experiment, because this is how new culinary masterpieces are born.
Source
Drying methods
If you plan to prepare dried peppers for the winter at home, then it is best to use the oven.
Electric ovens are famous for more uniform and faster heating. For those who constantly dry vegetables for the winter, it is optimal to purchase a special electric dryer. But don’t be upset if the oven runs on gas - you can also cook delicious dried peppers in it. A slightly more difficult way to dry peppers is to use a microwave oven. First, the size of each batch of peppers is much smaller than using the oven. Secondly, microwave ovens do not have the necessary ventilation.
Preparing dried peppers for the winter
Drying is one of the best ways to preserve perishable vegetables for the winter. These include bell pepper and hot pepper . The method is based on the principle of partial evaporation of moisture.
The result is elastic slices that, when pressed, bend and do not crumble into dust. In this matter, it is important to choose quality products and prepare them correctly. For drying, household appliances are used: microwave, oven, electric dryer.
The finished product is perfectly preserved in oil in the refrigerator or in glass containers without additives.
Bulgarian
To prepare delicious dried peppers, use these tips for selecting and preparing fruits:
- Buy vegetables with bright colors and thick flesh. They should not show signs of rot, stains or cracks.
- Wash the fruits in warm water and dry with a paper towel. Cut large ones into quarters, medium ones - in half. Remove the tails and seed pods. Peppers are sometimes peeled to enhance the flavor. But this is not a mandatory rule. Cook as you wish.
- To remove the skin, pour boiling water over the fruit and leave for three minutes. Then transfer to cold water. Using a knife, lift the peel and quickly remove it.
- Before starting the drying process, grease the peppers with vegetable oil, sprinkle with spices and chopped garlic. Add a little sea salt or sugar. This will enhance the taste of the product.
Tips and tricks for cooking and preserving
Do you want the preparation process to be enjoyable, and the result to please your family and guests? It's easy: we've collected tips from experienced housewives that will certainly come in handy:
- It is better to combine yellow ground peppers with green ones, and prepare red ones separately;
- The seeds may not be removed, but the dish will turn out bitter;
- if you use whole peppers for winter preparations, do not forget to make a puncture in the area of the stalk about 1 cm deep;
- young peppers are most susceptible to marinade, which means their taste will be more intense;
- Add mustard seeds to “boring” recipes.
Advantages and disadvantages of the method
The main advantage of drying peppers is the ability to preserve most of the vitamins and minerals necessary to maintain immunity during the cold season. Compared to dried peppers, the taste of dried peppers is brighter and richer.
With regular use of the product, the condition of hair and nails improves. A large amount of fiber normalizes the functioning of the intestines, and consequently, other interconnected systems of the body.
Potassium and magnesium regulate the functioning of the heart and blood vessels, prevent the formation of blood clots, and promote blood thinning. Pepper has a beneficial effect on the condition of the mucous membranes and skin.
The calorie content of dried peppers without additives in the form of vegetable oil and spices is 118 kcal per 100 g.
There is no need to talk about the disadvantages of drying peppers. Here are some solid advantages:
- not too time consuming;
- can be stored for a long time in dry form and even longer in oil filling;
- the product does not lose its taste and is able to enrich dishes made from cereals, meat, flour, and other vegetables.
The benefits of dried peppers
Another important advantage of these peppers is, of course, their benefits.
After all, only the drying process allows you to preserve all the vitamins, macro- and microelements contained in large quantities in this juicy vegetable. By adding it to your daily diet, you will support your immune system and also improve the metabolic process in your body. All this is due to the high content of vitamins A, PP, C, B, as well as magnesium, manganese, calcium, phosphorus and sodium. This combination of beneficial substances has a beneficial effect on the growth of hair and nails, improves the functioning of the digestive system and helps accelerate the regeneration of the skin and mucous membranes. The use of bell pepper is indicated for people suffering from diseases of the cardiovascular system and musculoskeletal system. In general, pepper is an almost universal vegetable that helps with arthritis, radiculitis and even neuralgia. The vegetable is recommended for those who want to strengthen their teeth and gums.
Like any product, pepper has its contraindications. You should not abuse this delicacy if you suffer from high blood pressure, liver and kidney diseases, excessive stomach acidity and a tendency to epilepsy. Remember that peppers, like a sponge, absorb various pesticides, so wash them thoroughly before eating.
How to cook dried peppers
To prepare dried peppers, household appliances are used: microwave, oven and electric dryer. Each of their methods has advantages and disadvantages. Let's talk about them in more detail.
In the oven
Modern ovens are equipped with many useful features. One of them is convection, which allows you to dry any fruits and vegetables without much effort.
The mode ensures free circulation of air inside. Thanks to this, excess moisture quickly evaporates. If you have an older oven model, simply keep the door ajar.
Preparation:
- Prepare the peppers by covering a baking tray with baking paper.
- Place the pieces skin side down. You can put garlic, spices and oil inside the boats.
- Set the temperature to 100-120°C and leave for 1.5 hours.
- Turn off the oven, leave to cool for a while, then set the same temperature and cook for 40-60 minutes.
- Leave in the oven until completely cool.
In the dryer
Drying peppers in an electric dryer is as easy as shelling pears:
- Place the prepared vegetables on the racks, leaving space between the slices.
- Set the temperature to 75°C. Check the vegetables every 30 minutes and turn if necessary. Remember that the peppers should not dry out completely.
- The preparation time for the product is 3-4 hours.
In the microwave
Microwave dried peppers are the most difficult to prepare. It is necessary to constantly be on the alert and monitor the vegetables. The main task is to prevent the vegetables from being cooked.
Sun-dried tomatoes at home in the oven: a classic and unusual recipe
Features of drying - the knowledge necessary for high-quality preparation of sun-dried tomatoes at home in the oven.
- Dry the fruits at a temperature no higher than 80C, otherwise they will simply bake or turn into coals;
- cooking time 10-12 hours;
- cut the fruits into slices, pour olive oil, sprinkle with salt and spices;
- During the drying process, be sure to turn the vegetable slices over;
- Place foil on a baking sheet and vegetables on top, cut side up;
- the oven door must be ajar so that moisture can escape;
- After drying, the vegetables must cool completely with the oven door closed.
Recipe No. 1 Traditional sun-dried tomatoes
Ingredients:
- tomatoes;
- aromatic dried herbs (basil, parsley, cilantro, oregano, rosemary);
- salt, ground black pepper or a mixture of peppers;
- garlic;
- extra virgin olive oil.
Preparation:
- prepare the fruits - wash, dry and cut into four slices;
- remove seeds with a teaspoon;
- cover a baking sheet with foil;
- lay out the fruit slices, lightly salt, season with sugar, and pepper;
- place in the oven for six to ten hours at a temperature not exceeding 90C;
- After drying, leave the vegetables to cool;
- Place a bay leaf and a sprig of oregano on the bottom of the glass container;
- Sprinkle each layer of tomato with aromatic herbs;
- heat (do not boil) olive oil, squeeze garlic into it;
- pour over the dried wedges;
- Close the jars and let cool;
- put in a cellar or other cold place.
Recipe No. 2 – Extraordinary sun-dried tomatoes “Ajour” with Italian herbs
Products:
- tomatoes – 1 kg;
- extra virgin olive oil - after the finished product is released (we will pour it into the dried wedges);
- Italian herbs;
- salt;
- rosemary - optional;
- small head of garlic.
Preparation:
- a few hours before cooking, pour Italian herbs (rosemary, basil and others) into a small container and add oil;
- cover with a lid and place in a warm place;
- wash, dry and cut the fruits into four to six pieces, depending on size;
- pour aromatic oil over the slices;
- squeeze the garlic there;
- mix well and let stand for an hour (not in the refrigerator);
- carefully place the slices on a baking sheet, being careful not to let excess water get in;
- place in the oven, heated to a temperature of 100C, for approximately six hours;
- the oven door must be slightly open;
- Place the finished product in a glass container and pour in hot oil;
- roll up and put in the cellar or refrigerator.
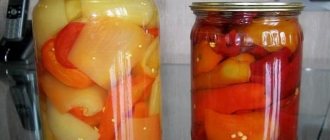
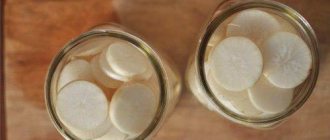
Dried peppers for the winter in oil
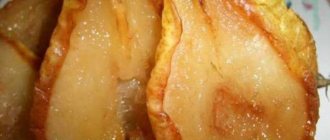
To prepare dried peppers in oil, use a simple recipe (the photo shows the finished result).
Ingredients:
- bell or hot pepper – 1 kg;
- extra virgin olive oil – 50 ml;
- balsamic vinegar to taste.
Preparation:
- Wash the peppers, dry them, remove the stem and core. Rinse with cold water and place cut side down in a bowl. This will ensure free flow of water.
- Line a baking sheet with parchment or grease with oil. Arrange the slices.
- Preheat the oven to 120°C, place the baking sheets and cook for 3-4 hours. Gradually reduce heat to 110°C.
- Remove the vegetables after the cooking time has passed and leave to cool.
- Heat the vegetable oil in a water bath or in the microwave. Add garlic if desired.
- Place the peppers in a jar, pour in warm oil, add a little balsamic vinegar and close the lid.
Reference . Vinegar extends the shelf life of the product.
Store in the refrigerator or cellar.
In seasonings and spices
Dried peppers in aromatic herbs and spices will delight you with a rich taste and pleasant aroma.
Ingredients:
- sweet or bitter pepper – 1 kg;
- rosemary, thyme, oregano;
- salt, black pepper - to taste;
- Extra Virgin olive oil – 80 ml;
- garlic – 3-4 cloves.
Preparation:
- Wash the vegetables, peel them, rinse with water. Cut into 2-4 pieces depending on size.
- Cook in the oven at 100°C or in an electric dryer at 75°C. Adjust the time as you wish and constantly monitor the slices so as not to dry out.
- Peel the garlic and cut into thin slices.
- Place chilled peppers in a glass container, add spices and garlic.
- Pour in olive oil and close the lid.
Store in the refrigerator on the top shelf.
Culinary recipes and photo recipes
Sun-dried peppers
Sweet bell peppers have a huge supply of useful substances; the drying process allows them to be preserved almost in their original form. The pepper will get rid of excess moisture, but will still remain soft. Garlic, hot pepper and dry seasonings will create a fragrant crust on the pepper pulp. Dried peppers are stored covered with vegetable oil. Then this oil can be used in salads and sauces, it will acquire a very pleasant taste. Dried pepper “boats” are served with boiled potatoes, homemade cheese, and any meat and fish dishes.
Ingredients for making dried peppers for the winter:
- bell pepper – 1.5 kg
- garlic – 2 heads
- hot pepper – 1 pod
- mixture of dry Italian herbs - 1.5 tbsp.
- salt – 1.5 tsp.
- vegetable oil (sunflower or olive) – 200 ml
Recipe for making dried peppers at home:
To prepare for the winter, it is better to take red and green peppers to see how color can change the taste of the finished product. The red halves will be tender with a mild sweetish flavor, while the green halves will be sharper and denser. They should be served in pairs; the contrast of flavors creates a wonderful effect.
The peppers are washed and sorted. It is better to immediately discard limp and damaged fruits. You should choose varieties with thick, juicy pulp. They take longer to dry, but the taste will be impeccable.
Sweet peppers are cut into halves and the seeds are shaken out.
Garlic is peeled and washed. The cloves are cut into thin slices. Place 2-3 cloves of garlic in each half of the pepper.
Peppers are sprinkled with Italian herbs and salt. If you don’t have a ready-made mixture of dry spices, you can choose dry crushed seasonings at your discretion: dill, basil, oregano. Seasonings can be sprinkled boldly without fear of excess. And you need to salt very carefully so that only a few grains get into each half. Dried peppers should not be over-salted. The pulp of hot pepper is cut into miniature pieces, sprinkled with halves of sweet pepper.
Storage conditions for hot peppers
It is better to store red pepper in pods in a dark and dry place where there is good ventilation, and grind it as needed (ground still loses its pungency, color and aroma faster).
It must be handled with special care: even when using the pods themselves, dust is produced that has a highly irritating effect on the mucous membrane (especially the eyes and nose) and skin. It can easily cause intense watery eyes, swelling of the face and sneezing.
And if you eat a significant amount of it uncontrollably, you can get an acute gastrointestinal disorder.
When to harvest hot peppers. When to Harvest Peppers
Timely and correct harvesting, rules, regulations, errors, elimination of all types of losses.
Share your advice. When to harvest peppers so that they are stored well. I heard the opinion that peppers are left in a film greenhouse until the first frost. Cleaning up the last of the debris begins at minus five. I would like to know your opinion. Do you wait until the last minute or do you pick the fruits as soon as they turn red and send them off to ripen? What considerations guide you in this? Early ripening bell peppers are harvested 60-70 days after planting, focusing on color and size. Once a week, a full harvest is carried out, cutting off the fruits along with the stalk. Mid-ripening varieties will be “ready” in 110-130 days, and late-ripening varieties in 130 days. You can read more on the topic here.
Peppers can be stored for no more than three weeks. Then they wither and wrinkle. They will keep in the refrigerator for a month. If you do not harvest peppers for preservation, it is better to send them for dispensing. This way they will become sugary and tasty. The removable ripeness of pepper is counted a month plus a week, depending on the weather, after the formation of the ovary. They are collected for pickling and canning. There is another more interesting question. How to remove bitterness from peppers. This is really the topic)
Share your advice. When to harvest peppers so that they are stored well. I heard the opinion that peppers are left in a film greenhouse until the first frost. Cleaning up the last of the debris begins at minus five. I would like to know your opinion. Do you wait until the last minute or do you pick the fruits as soon as they turn red and send them off to ripen? What considerations guide you in this? Early ripening bell peppers are harvested 60-70 days after planting, focusing on color and size. Once a week, a full harvest is carried out, cutting off the fruits along with the stalk. Mid-ripening varieties will be “ready” in 110-130 days, and late-ripening varieties in 130 days. You can read more on the topic here.
Well, as if there are two ripenesses - technical and biological. Green, when the peppers have already reached their varietal size - this is technical ripeness. Many, for cooking, for preservation, prefer just such and do not specifically wait for biological ripeness. If the peppers are still green, and it’s cold propped up, then those that have reached their size can be ripened and the best option is to pull out the bush and tie it root up in a suitable place. You can also store ripe peppers - red, yellow... And when the peppers turn red, yellow, or orange - this is biological ripeness, that is the seeds are ripe.
Benefit or harm?
Dried sweet peppers are one of the opportunities to saturate our winter diet with vitamins from products that appear on our table fresh only in the second half of summer and autumn.
Paprika contains : B vitamins, carotene, vitamin E, folic acid, zinc, “heart vitamin” potassium, well-absorbed forms of phosphorus, sodium, calcium, iodine. Ripe peppers contain a lot of iron and copper, which we need for blood formation .
harm to human health only if the person who eats it has:
- angina pectoris
- severe hypotension,
- any type of gastrointestinal ulcer,
- gastritis,
- liver problems,
- problems with the urinary system,
- hemorrhoids.
In the absence of the listed diseases, dried paprika can be safely added to suitable dishes to:
- support the immune barrier,
- improve the growth of nails, hair,
- improve the quality of vision,
- suppress hypertensive manifestations,
- reduce the risk of vascular blockage,
- stimulate appetite
- reduce the likelihood of developing diabetes.
The energy value and calorie content of dried paprika is 10 times higher than that of fresh paprika and equals 390-400 kcal. The product obtained from green fruits has the lowest calorie content, since initially the pulp of green sweet pepper contains no more than 20 kcal. For comparison: the calorie content of yellow-sided and red fresh fruits is 30-40 kcal.
Selecting and preparing pepper pods for drying
Having decided to prepare a healthy seasoning for the winter using the traditional method, first of all select suitable fruits. Any variety of hot pepper, both red and green, is suitable for drying. Even unripe fruits, picked in advance, have sufficient pungency, since capsaicin is synthesized in peppers even before ripening. During the drying process, the taste of such fruits will change, more sweetness will be added, and their color will become similar to ripe peppers of the same variety.
The selection criterion is the absence of signs of spoilage on the fruits, such as black spots, rotten parts, scab and the like.
Before drying, the peppers are washed in running water, removing adhering soil and dust. If you plan to get a less spicy seasoning, remove the seeds before drying by cutting the fruit in half and removing the core. The seeds of hot pepper varieties contain more capsaicin than the pulp, so the plant protects future offspring from being eaten by animals. For those who want to get a spicier seasoning, it is recommended to dry the whole peppers; if they are stored in powder form, they are also crushed along with the seeds.
Drying hot chili
Hot peppers can be dried at home either whole or chopped. Before grinding, it is cut lengthwise, the stalk is removed and the seeds are cleaned. Subsequently, cut into half rings about 0.5 cm wide.
Oven drying method
In order to properly dry any vegetable until fully cooked, you need dry air and moderate heat. An oven (electric or gas) is ideal for this. Necessary:
1. Prepare the vegetable.
2. With this method, the pods can be taken whole or chopped.
3. Heat the oven to 50 degrees.
4. Place the peppers strictly in one layer on a baking sheet pre-lined with baking paper.
5. Place the baking sheet in the oven, but do not close the door, otherwise the vegetable will simply bake.
6. Monitor readiness: time depends on the amount of pepper and its integrity (cut or not).
7. Stir occasionally.
Typically this drying takes from 3 to 5 hours.
Way to air dry
There are two ways to dry the future seasoning in the air: on a newspaper and by hanging it on a rope.
In order to dry on paper, lay it out on a wide windowsill and scatter the pepper in one layer, turning it over periodically. 9-10 days will be enough. The method is not the most convenient, it is only suitable for a small amount of vegetables and requires wide window sills.
Line drying allows you to create as many bundles as you like. Mushrooms, apples, and many other vegetables and fruits have been dried in this way for many centuries.
To dry peppers on a rope you need:
- 1. Prepare the peppers.
- 2. Take a needle with a wide eye and thread a strong, long thread.
- 3. String peppers on a string like beads.
- 4. Remove the needle and secure the rope where needed and at a convenient height.
The basic rule: the peppers should not touch each other. This way they will dry evenly and not rot.
On the vegetable grill
A very convenient way. It is necessary to purchase a dryer for mushrooms, peppers and vegetables. This is a lattice with a fine mesh on fairly high legs. It is attached to the stove. And then:
- the burner turns on, the power is determined to be average;
- Place vegetables (almost any that can be dried) on the grill in one layer;
- dry for about 3 hours.
How to use an electric dryer?
An equally useful thing for any housewife is an electric dryer. It’s even easier to use than a vegetable dehydrator:
- 1. Arrange vegetables (fruits, berries, herbs) in one layer.
- 2. Turn on full power according to the instructions.
- 3. Dry, stir occasionally.
Vegetables are dried in this way for about 12 hours. It is necessary to stir so that the pepper does not stick to the grill.
What are the benefits of dried bell pepper?
As already mentioned, dried foods retain vitamins and microelements; their benefits can be considered on an equal basis with fresh ones. So, what can dried bell peppers boast of?
- The colorful vegetable contains high levels of minerals, the main components of which are iron, manganese, potassium, selenium and magnesium. Each of them has a positive effect on the functioning of the body, improving the functioning of all systems - from head to toe.
- Pepper is rich in vitamins. The first place of honor is occupied by vitamin C (especially if a green or red variety was used for drying) - a powerful antioxidant is necessary for our body to synthesize collagen, which in turn maintains the integrity of blood vessels, increases skin elasticity (ladies, remember), improves the body’s resistance to infections.
- Red pepper, compared to others, contains a large amount of vitamin A and B. So use it more than others. Vitamin B promotes the production of melatonin, which the body needs to regulate its internal clock, helps with insomnia and promotes healthy sleep.
- Carotenoids help fight free radicals that we acquire from environmental toxins that can lead to cancer. Yellow and orange peppers are especially rich in them.
- One handful of chopped fresh peppers contains up to 40 calories, and dried ones contain even less. And if you decide to watch your figure, then the vegetable is ideal for a snack.
- Bell pepper has anti-inflammatory properties. By reducing inflammation in the arteries, it helps prevent cardiovascular disease and diabetes.
- A snack made from dried sweet peppers is suitable for people with high cholesterol levels, because it contains the alkaloid capsaicin, which reduces the amount of this substance.
We recommend reading:
benefits of fresh bell pepper Read
Winter storage of hot peppers
For the winter, capsicums can be harvested raw in order to preserve as much nutrients, vitamins and minerals as possible.
Yes, with this method, by mid-spring its pungency gradually decreases, but the taste still remains wonderful, so the benefits are enormous.
Every housewife has her favorite recipes for storing hot peppers.
It is important to use them correctly
Method 1
For 1 kilogram of spicy vegetable - half a glass of apple or wine vinegar (consistency 5-6 percent), 1 tablespoon of salt (it is important to take non-iodized). Choose a ripe pod (the spicy ones can be green, yellow or red, but the latter is considered to be more pungent)
Choose a ripe pod (the spicy one can be green, yellow or red, but the latter is considered to be more pungent).
Wash it, remove the stalks, but do not remove the seeds, then pass through a meat grinder with a large grid. Add salt, pour vinegar, mix everything thoroughly.
Place in jars up to the neck, and then close with plastic lids. Store in a dry and dark place where the temperature is always low.
Method 2
Wash the hot peppers and dry them on a paper napkin.
Take a plastic bag, put peppercorns in it and put it in the freezer.
lifesguide.ru