Preparing garlic for planting
Growing winter garlic begins with the selection and preparation of planting material.
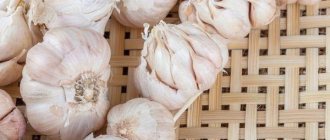
Planting material must be absolutely healthy. The garlic should be separated into cloves and examined carefully. For prevention, on the day of planting, planting material should be soaked for half an hour in a weak solution of potassium permanganate. Instead of potassium permanganate, a 1% solution of copper sulfate is also used. This procedure will protect the garlic from pathogens.
Read more about which varieties to choose for planting: The best varieties of winter garlic
How to preserve vegetables from autumn?
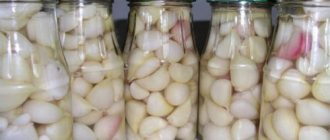
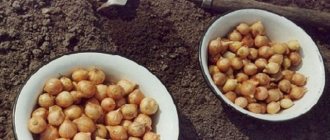
If it was decided to plant garlic in the spring, then the question of storing it arises. There are a large number of simple ways:
Cooling. This includes storing garlic anywhere with low temperatures. This could be a refrigerator or a pantry.- Oversleeping. You can sprinkle the garlic with salt, flour, onion peels and even expanded vermiculite. It is better to store this garlic in a jar or pan. Layers of garlic and sprinkles alternate. The top of the garlic should be 2 cm deep. During the winter, the contents of the jars should be sorted out, removing spoiled vegetables and changing the filling.
- Braiding hair. Using a rope, the heads are attached to each other using the braid principle. This garlic can become a natural and unusual decoration for the kitchen.
- Storage in boxes, nets, nylon stockings. Only strong, hard heads that have at least three layers of husk can be stored.
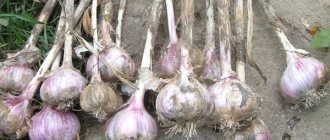
The plants are collected and dried for a month. Then, if braiding is not planned, the garlic is trimmed. You need to cut the stem, leaving 5 cm, and the roots, leaving 1 cm. The optimal storage temperature is from +2 to +20 degrees. Humidity should be at 70-80%. Do not store garlic near a radiator, heater, stove or other heating appliances. This way it will quickly dry out and lose moisture. It is not recommended to keep garlic at home for longer than 4-5 months.
Preparing a bed for winter garlic
The key to a good harvest is the developed root system of the plant. Garlic has fibrous roots, located mainly in the top layer of soil. To provide plants with a sufficient amount of nutrients, they require highly fertile soil (preferably with normal or low acidity).
To enrich the soil in the area where garlic will soon grow, fertilizers should be added to the soil at the end of August - beginning of September. For 1 sq.m there should be 10 kg of humus, 2 tbsp. ash, 1 cup chalk, 2 tbsp. potassium sulfate and 1 tbsp. superphosphate. After application, the soil must be dug to a depth of at least 20 cm. Remember that under no circumstances should organic fertilizers be applied to this crop, as they reduce the quality and keeping quality of the cloves.
Beds for winter garlic should be placed on the sunny side, oriented from north to south. It is recommended to make them no more than 1 m in width, and up to 25 cm in height. After digging, the soil must settle a little before garlic can be planted in it.
It is better to plant garlic after early crops, which allows you to properly prepare the soil for planting. If the area is heavily clogged, then after harvesting the “predecessor” plant, it is worth treating the beds with a herbicide (you can use Hurricane Forte). After 2-3 weeks, the soil is dug up onto the bayonet of a shovel.
The best predecessors for winter garlic: cucumbers, zucchini, squash, grains and winter crops (clover, alfalfa). Garlic can be returned to its original planting site no earlier than after 4-6 years.
Preparation of planting material
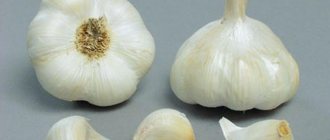
How to choose and prepare garlic for planting? Pay attention to the cloves - they should be of the correct shape and uniform color. If you do not have a good harvest from last year, it is better to buy local “nameless” planting material from grandmothers on the market or in trusted online stores.
Store-bought garlic is not suitable for planting. It can be brought from a region with a warmer climate, and also treated with special substances for long-term storage.
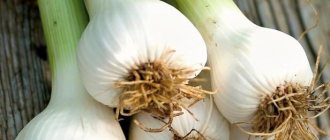
Before planting garlic in open ground, the bulbs are disassembled and the largest cloves are left without damage, with a shiny shell.
To avoid fungal infections, garlic cloves are soaked in potassium permanganate. Some for 15-20 minutes, some for a longer time, there is no single recipe here. Some gardeners use bactericidal concentrates, for example, Fitolavin. If there are no special antibacterial drugs on hand, a saline solution (30 g per 3 liters of water), copper sulfate or an infusion of birch ash is suitable.
Before planting, be sure to dry the prepared material!
Also, the planting material must be stratified - keep the garlic in the refrigerator for hardening for 12-14 days before planting.
Planting garlic before winter
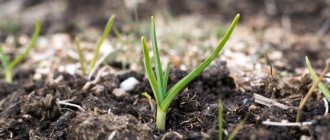
When to plant winter garlic? Planting is carried out upon the onset of stable cold weather without frost. Under such conditions, garlic mainly develops its root system and the growth of above-ground vegetative mass is retarded. It is quite difficult to name the exact timing of planting winter garlic, because it can vary in different regions. In addition, a lot depends on the weather. In the middle zone, garlic is usually planted before winter in October.
The size of cloves suitable for planting should be within 3-4 cm. It is preferable to use a two-line planting pattern: with a distance between cloves in a row of 10-12 cm, between “lines” - 10-15 cm, and between rows - 35-40 cm. The grooves should be made 6-8 cm deep. When planting, do not press the cloves into the ground, but simply place them in the groove in a vertical position.
You can read more about planting garlic before winter here: Planting garlic before winter - all the subtleties of planting with cloves
How to plant garlic in the ground?
Garlic reproduces by cloves and aerial bulbs (garlic bulbs that ripen in shoots). The quality and quantity of the harvest directly depends on the planting material.
The garlic cloves should be approximately the same size, not damaged, not soft, of the correct shape without curvature, also excluding cloves left without a shell.
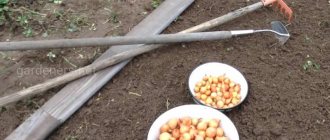
To plant, use a small, thick stick to make holes for the garlic cloves to plant. You can also make furrows and spread the teeth at a distance of 15-20 cm from each other.
The depth of winter planting of garlic is 12-15 cm.
Garlic bulbs
sown together with the cloves according to a 2x10 cm pattern and to a depth of 3 cm. Next year you will receive excellent quality planting material from them.
to mulch the garlic plantings for the winter.
peat, grass, soil with sawdust in a layer of at least 2 cm in case of frost. If there is no snow yet, but severe frosts strike, it is better to cover the area with roofing material or film for protection and remove it when it snows or gets warmer.
Caring for winter garlic
After planting winter garlic, the furrows should be covered with earth or compost, without compacting the soil too much. It is advisable to mulch the top of the bed with dry litter or cover it with spunbond (especially in regions with cold climates).
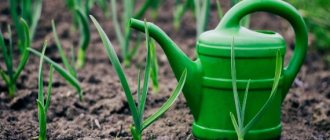
In the spring, after the snow has melted and the first shoots appear on the surface of the soil, the garlic needs to be fed with nitrogen fertilizers. Urea is well suited for these purposes. It is used at the rate of 12-20 g per 1 sq.m of soil. After applying fertilizer, the row spacing should be well loosened. After planting garlic, all that remains is weeding and loosening.
Summer care consists of timely watering, which is carried out 2-3 times during the growing season. But remember not to water garlic with cold water, as the plants will immediately become sick. The water needs to be heated in the sun. For fertilizing with mineral fertilizers, a phosphorus-potassium mixture is best suited: approximately 2-3 matchboxes per 1 sq.m of bed in the phase of 2-4 fully developed leaves.
Collection and storage
When growing garlic, it is very important to start harvesting on time. If you delay the timing, the bulbs crack, crumbling into individual cloves. The main sign of full maturation is yellowing and lodging of the feathers. Ripe heads are also distinguished by the following characteristics:
- Dry and dense covering scales.
- Well-defined tooth shape.
- Drying neck.
The harvest is harvested in dry, warm weather. The bulbs are carefully dug up with a pitchfork and then removed from the soil. The dug up plants are cleaned of soil residues and laid out for further drying in a dry, well-ventilated place. 15-20 days after the above-ground part has completely dried, they begin to trim the stems. At the same time, stumps 3-4 cm long are left on the bulbs. At the same time, the roots are also trimmed, and it is very important not to violate the integrity of the bottom.
Interesting! Some gardeners prefer not to trim the stems. Dried garlic is woven into braids, which are then hung in a cool, dry place.
To obtain high-quality, long-storable garlic bulbs during harvesting and drying, they must be protected from mechanical damage. They should not be thrown sharply, nor should they be tapped on hard surfaces. Also, you cannot cut off the above-ground part immediately after digging. Substances in the leaves promote ripening.
Winter garlic is stored cold. To do this, the dried and sorted bulbs are placed in a wooden box, which is then transferred to a dry basement or cellar with a temperature not exceeding +5°C.
Diseases of winter garlic
Rotten
The most dangerous for the crop are bacteriosis and penicillium bottom rot , which infect garlic during storage and enter the soil with planting material. In diseased plants, the tops of the leaves first turn yellow, and then the entire leaf dies.
To protect the crop from rotting during storage, harvesting should be done when the garlic heads are fully ripe. When trimming stems, you should leave a long neck (up to 10 cm). The dug up and trimmed garlic must be dried in air or in a dryer. Properly dried onions rustle when poured.
Store garlic at a temperature of 1-3°C and air humidity not higher than 75%. By following the described technology, you can always get a good harvest of garlic with a long shelf life.
Rust
Another terrible disease for garlic, rust , manifests itself in the form of individual specks the color of rusty iron, which after some time completely cover the entire plant.
At the first signs of disease, it is necessary to treat the garlic planting with fungicides: 0.4% Oksikhom solution, 0.2% Ridomil solution, 0.3% Ordan solution or 0.3% Bravo solution. Moreover, the procedure must be repeated 2-3 times with a break of 1-2 weeks.
The listed preparations for treatment can be alternated. The packaging always indicates the name of the drug, concentration, list of diseases and application rate, so always carefully study the recommendations for the use of drugs.
What diseases and pests can you encounter?
Although garlic is an unpretentious crop, in some years it can suffer from a number of pests and diseases:
- Bacterial rot or bacteriosis. Appears during cultivation or storage. Infection occurs in the summer. Sources of the pathogen are contaminated planting material and soil.
- Fusarium. Manifests itself as bottom rot. The first signs of the disease appear during cultivation. First, the lower part of the bulb softens, after which a white or yellow coating appears.
- Penicillosis or green mold. Distributed only during storage. Increased humidity and temperature in the storage contribute to the progression of the disease. Sources of infection are plant debris and infected plants.
- Stem nematode. If left untreated, it destroys the entire crop. Mostly distributed on heavy loams and clays. They are white worms 1.5 mm long. It feeds on plant sap. Garlic damaged by a nematode is stunted in growth, turns yellow and dies.
- Onion fly. It spreads strongly in wet, rainy years. Damage to garlic plantings is caused by larvae, which, while feeding, penetrate into the bottom, eating away all the soft tissue there. Under favorable conditions, 2 to 3 generations of the pest develop during the growing season.
- Root mite. Damages garlic during storage. Infection occurs during the growing process. Females lay 300 to 500 eggs at the bottom of the bulb, from which larvae subsequently hatch. While feeding, they damage the tissue of the bulb, which leads to drying out.
See also Description and control of diseases and pests of garlic
When to harvest garlic?
Winter garlic is usually harvested from mid-July to early August . To determine the “readiness” of garlic, you need not to cut off the flower arrows of the 2-3 largest specimens in the garden and allow the plants to bloom. When the seeds are ripe and the flower shells begin to crack, you can dig up a few heads to make sure they are ripe.
As soon as the garlic is ripe, harvest immediately. Because heads overexposed in the ground will subsequently be poorly stored.
Be sure to plant garlic before winter so that in July of the next season you can harvest the first heads of garlic - such an important and useful product.
Popular varieties
Each variety of winter garlic has its own advantages and disadvantages. For example, some allow you to grow large heads that are poorly stored. Others are smaller, but they lie well until spring. That is why experienced gardeners prefer to grow 2-3 different varieties at the same time.
The most popular of them are discussed below:
- Podmoskovny. Mid-season, well stored. The average weight of the heads is 50-60 grams. Each of them contains 5-7 cloves. The covering scales are light with a characteristic purple pattern. Winter hardiness is high.
- Lyubasha. Mid-season, winter-hardy, drought-resistant variety. The bulbs are flat-round, weighing up to 120 grams. Valued for its resistance to fusarium and its ability to be stored for long periods of time.
- Alekseevsky. Large-fruited and high-yielding. It has a more delicate taste. The bulbs will consist of 4-5 cloves. A distinctive feature is its wide leaves, which, with good care, reach a height of 1 meter.
- Komsomolets. Unpretentious and frost-resistant. The height of plants, depending on growing conditions, can be from 30 to 45 cm. The average weight of the heads is 50 grams. Each of them consists of 8-10 cloves.
Selection of seed
Before learning how to grow this vegetable, it is important to choose the right seeds. To plant in winter, you need to take seeds from the current year. To do this, in the spring we plant and grow garlic from bulbs, which ripen only in winter varieties. The heads obtained by autumn will become seed material in winter. When choosing winter seeds of grown garlic from aerial bulbs, use the following rules:
- Choose the most beautiful and dried heads.
- Be sure to check the planting material at the market. Free one head from the scales - the cloves should be clean, not dried out, without plaque, yellowness or dents.
- Do not separate the cloves from the head until planting, otherwise the rhizomes of the cloves will dry out, leaving no chance for a harvest.
- The most popular varieties among gardeners are the large-tooth varieties Kiselev, Mestny Danilovsky, Parus, Gribovsky 80, Yubileiny Gribovsky, Komsomolets, Otradnensky.
There are several types of winter garlic
Fertility Secrets
You often ask how I manage to grow such large garlic:
- firstly, I plant it in loose soil and be sure to mulch the surface with hay or straw;
- secondly, after harvesting, I annually grow green manure in the beds and always fertilize the ground with humus every three to four years.
It will not be possible to make your plot truly fertile in 2-3 years. This takes 5-6 years.
If you planted bulblets to renew the planting material, they will give you single cloves, and if you plant single cloves before winter, they will already grow into full-fledged heads of garlic.
* * *
Garlic can be added to salads, sauces and other dishes. It can be pickled for the winter. This is a tasty and very healthy vegetable. Take care of the fertility of the soil on your plot, and you will always have large and high-quality garlic.
All the best.
General advice for gardeners
General care, breeding, diseases and treatment - all this is included in the minimum program necessary to obtain a harvest.
- Seeds need to be renewed every 3-5 years. The easiest way to do this is with bulbs.
- The larger the seed, the larger the heads will be.
- There is a difference at what depth to plant garlic in winter. Excessive deepening will lead to the formation of small bulbs. For the same reason, the ridges formed on the ridges after winter must be carefully leveled with a rake.
- At the beginning of the growing season, the crop needs nitrogen; excess phosphorus negatively affects the quality of the heads.
What pests can you encounter?
Garlic is threatened:
- garlic mite, which first infects the leaves and then the head. Yellow and dark green spots appear on the cloves, the crop is not stored and rots;
- the onion leaf beetle eats the vegetative parts of garlic, lays eggs, from which voracious larvae emerge;
- The onion fly lays eggs, from which larvae emerge. They eat away large cavities in the cloves, causing the garlic to deteriorate and rot;
- stem nematode affects both above-ground and underground parts of garlic;
- Onion thrips feed on leaf juices.
To prevent infection, in all cases it is recommended to use healthy seed that has been previously treated. In serious cases, traditional methods of control and modern chemicals are used.
Tips and recommendations from experienced gardeners
When growing winter garlic, you may encounter common problems. To avoid difficulties and not ruin the harvest, you should use the recommendations of advanced gardeners.
How to grow garlic in large heads
To grow large heads of garlic, it is important to choose the appropriate variety. Such varieties of garlic as Gribovsky Jubilee, Poretsky local and Danilovsky produce large-sized harvests. The procedure for performing planting work and further care does not differ from the standard one.
Landing dates
Spring garlic is planted in April or May, depending on the weather conditions of the region. Wait until the snow melts and the soil warms up to +5... +6 degrees. There should be no stagnant water, otherwise the cloves will rot. But there is no need to wait until the soil is completely dry. Cool weather and moderate soil moisture are ideal planting conditions.
Winter varieties are planted about a month before the onset of frost. In the north of Russia, work is carried out at the end of September - beginning of October, in the south - until the end of the first week of November. Before the arrival of winter, the cloves will have time to take root, and in the spring, when temperatures above zero, they will begin to actively develop the root system.
What is required for the growth and good harvest of the crop?
To get a good harvest, you need to grow the crop in favorable conditions. When planning planting, you should choose a place on the site, check the composition of the soil and take into account the rules of crop rotation.
See also
Why does garlic grow small in the garden and is not divided into cloves? What to do?
Read
Required soil composition
Garlic prefers light, fertile soil, such as sandy loam. If the site has alumina or loam, before sowing it is necessary to saturate the soil with expanded clay, which will perform a drainage function. Humus and peat are also added to the soil. The soil acidity level should be at 6-7.
Optimal place
An area located on a hill and constantly illuminated by the sun throughout the day is suitable for planting garlic. It is important that water does not stagnate in the beds and that the snow cover quickly disappears with the onset of spring. If there are no suitable places, you can build high beds so that excess moisture flows into the rows and saves the roots from rotting.
Favorable and unfavorable antecedents
When planting, it is important to consider the rules of crop rotation. It is unacceptable to grow garlic in one place for several years in a row, since pests and disease carriers characteristic of the crop accumulate in the soil. The optimal frequency of planting in one place is once every 5 years.
Suitable precursors for winter garlic are legumes, various greens, cabbage and cucumbers. Undesirable precursors include onions and potatoes.
What is it recommended to plant garlic with?
Properly selected neighboring crops have a beneficial effect on the development of garlic. The list of eligible neighbors includes:
- Carrot. Crops provide mutual protection against a number of diseases and pests.
- Spicy crops. In the garden next to the garlic, it is recommended to sow leafy greens, including basil, dill, parsley, and arugula.
- Flowers. Next to garlic you can plant daffodils, hyacinths, gladioli and tulips.
FEATURES OF INDUSTRIAL GARLIC CULTIVATION
Garlic is one of the most ancient vegetable plants. It is known that it was grown in ancient Egypt. The homeland of garlic is the mountainous and foothill regions of Central Asia. Garlic (Allium sativum L.) is a biennial and perennial plant of the Bulbous family.
Garlic is a cold- and winter-hardy (winter forms) crop; it is grown everywhere in Ukraine. Depending on the ability to form arrows, arrowing and non-arrowing forms are distinguished. Winter varieties come in two forms, while spring varieties are only non-shooting. The growing season of winter shooting varieties is 110-120 days, winter non-shooting and spring varieties are 75-90 and 90-110 days, respectively. Plants planted in autumn are more productive, ripen 2-3 weeks earlier than spring plants, and are stored until December - January. The optimal period of use is summer-autumn. Spring varieties are planted early in the spring, they are less productive, however, the bulbs have good shelf life (especially when cold stored at -1-+3°C). In this regard, it is advisable to use spring products in the winter-spring period.
The most common varieties of garlic in Ukraine are winter shooters - Leader, Promin, Parus, Prometey, Sofievsky, Spas, Starobelsky, Kharkov violet, Yubileiny Gribovsky, Donetsk violet; winter non-shooting - Saki, Ukrainian white. Unfortunately, not a single spring variety is included in the state register of varieties.
Place in crop rotation
The initial stage of the technology for growing any crop is the selection of the best predecessor when alternating crops in crop rotation. The timing of harvesting the previous crop should allow for high-quality basic tillage, leave behind a weed-free field and have no common pests or diseases with the subsequent crop. Due to the autumn planting period for garlic, the predecessor must vacate the field no later than the end of July. Garlic is one of the crops that respond positively to the aftereffect of organic fertilizers. That is why it is better to place it after well-fertilized legumes, pumpkins, early white cabbage and cauliflower, root crops for bunch production, and early green crops. Of the field crops, cereals are used as a precursor for garlic, legumes for green fodder, hay and haylage, annual and perennial grasses for fodder, pure and green manure fallows. Garlic should not be placed after potatoes, tomatoes, or other crops of the bulbous family, as they have common diseases and pests. Placing garlic crops on fresh manure has a negative impact, and the phytosanitary condition of the plantings and the quality of the products deteriorate.
The return of garlic to garlic or onions is allowed no earlier than six years.
The relatively underdeveloped root system of garlic requires high soil fertility. Garlic is placed on structural loamy and sandy loam soils rich in organic matter. The soil must have good water-retaining characteristics, an optimal reaction of the soil solution (pH is 6.5-7.9. This crop cannot be placed either in low places where melt water accumulates in the spring, or in high places where there is wind in winter the snow blows away and the garlic can freeze.
Garlic fertilizer
The optimal rates of mineral fertilizers, which allow one to obtain high yields of garlic, are N90.100P100K100.1l0. Under the conditions of a specific farm with appropriate soil conditions, the rate of application of nutrients is calculated based on the content and coefficients of consumption of nutrients from the soil, the dose of organic matter and taking into account other individual aspects. Phosphorus-potassium fertilizers are applied during basic soil cultivation. To prevent nitrogen losses, nitrogen fertilizers are applied as top dressing in the spring, when the soil is “ripe” and garlic sprouts appear. Garlic responds positively to the application of microfertilizers, which are used in the preparation of planting material, dusting the cloves with a mixture of microfertilizers, or soaking them in a solution of microelements and fungicide-protectants. At the same time, an improvement in overwintering is observed, the plants become more resistant to diseases, pests and unfavorable factors, which ultimately has a positive effect on the yield and quality of products.
Tillage
Immediately after harvesting the predecessor, the field is peeled to a depth of 6-8 cm using disc implements. When a field is clogged with perennial rhizomatous weeds, the next operation will be disking; it is carried out after 12-14 days in a perpendicular direction to the first treatment, to a depth of 10-12 cm. When mass shoots of weeds appear, plowing with harrowing is carried out to a depth of 25-27 cm, no later than 58-30 days before planting garlic. Phosphorus-potassium fertilizers and humus are added for plowing, if planned. When weeds appear and heavy rainfall occurs, 1-2 cultivations or harrowing are carried out. Pre-planting cultivation is carried out on the day of planting garlic at an angle of 90° to plowing.
Preparation of complete material
This is the most labor-intensive stage in the production of garlic, but its high-quality implementation allows you to more than compensate for the costs. From the beginning, the bulbs are sorted, discarding small ones damaged by diseases and pests that are not typical for this variety. Subsequently, within 1-2 days, the bulbs are divided into cloves and sorted. When sorting, small teeth affected by diseases and pests are rejected. When sorting cloves of bolting winter varieties, they are divided into groups: large, weighing more than 6 g, medium - 3-6 g, small - 2-3 g, waste - less than 2 g, diseased, damaged. Non-shooting garlic cloves are divided into three groups: large - more than 1.7 g, medium - 1.1 -1.7 g, waste. Each of the selected groups is planted separately, with an individual planting density. Large teeth set less often, small ones correspondingly denser. When improving the health of planting material, as well as the production of commercial garlic through aerial bulbs, the latter are also sorted into groups: 6-8 mm in diameter, 4-5 mm, up to 4 mm. Grown single teeth are sorted as follows: large - more than 14 mm in diameter, medium - 10-14 mm and small - less than 10 mm.
To destroy pathogens, before planting, the cloves are treated with fungicides: 3% benlate solution, exposure 3-4 minutes, 3% solution of foundationol, exposure 1-2 minutes. When etching, a preparation containing microelements (Rexolin, Reacom, Aquarin mix and others) is added to the working solution. To destroy nematodes in seed garlic, carbonation is carried out with sulfur dioxide (100 g of sulfur per 1 m3 of volume) in sealed containers.
Planting garlic
Each region has optimal planting times. So, in the southern and western regions it is planted in the third ten days of October, in the northern and eastern regions - in the second ten days of September, in the central regions - in the third ten days of September - early October. Garlic should enter winter in a well-rooted state with seedlings 0.5-1.5 cm long. Planting dates coincide with the moment when the soil temperature drops to 10-12°C. Spring forms are planted in the fall at the same time as winter ones, and in the spring - from the moment field work begins. Winter planting of spring garlic ensures an increase in yield by 30-40%, but at the same time its keeping quality deteriorates during storage.
Aerial bulbs are sown in the fall, at the same time as cloves are planted, or in early spring. There is a direct technology for producing commercial garlic from aerial bulbs. To do this, large and medium-sized (4-8 mm) aerial bulbs are sown in moist soil on July 1-5. Crop care is traditional. As they appear, weeds are destroyed, the soil is loosened between the rows, and watering is carried out. Before frost, well-formed plants with a powerful root system grow, without forming a bulb.
Garlic is a crop that takes up little space and has a small nutritional area. Therefore, in order to obtain a high yield of high-quality products, it is necessary to scrupulously approach the choice of planting method and scheme. The most optimal placement of garlic plants is one that forms the feeding area of one plant in the range of 0.0-25-0.05 m2, square or rectangular. The above parameters are achievable when planting in a wide row (45, 60 cm), while the distance between plants in a row ranges from 4-5 cm when planting with cloves and single cloves weighing 2-4 g, 6-8 cm with larger cloves weighing 4-4 g. 6 grams. You can also plant using the strip method - two-row according to the scheme 20+50 cm, three-row - 40+40+60 cm. On waterlogged soils, they practice growing garlic on ridges 1.4-1.5 m wide. When grown using this method, the cloves are planted in a strip five-six-row method, the distance between rows is 20 cm, and in a row -10-12 cm. The planting rate for propagation by cloves and single-claws depends on their mass and feeding area and ranges from 0.6 to 3 tons per 1 ha, quantitative planting rate large and medium cloves, single cloves are 300-450 thousand/ha, small ones 500-600 thousand/ha.
Aerial bulbs are sown in a wide-row (45 cm) or three-row belt method, according to the scheme 40+40+60 cm, the width of the sown strips is 12-16 cm. The seeding rate per 1 linear meter of a row is 60-80 germinated bulbs, the weight norm is from 100 to 500 kg/ha depending on the size of the aerial bulbs.
An important element in growing garlic is planting depth. It directly depends on the mechanical composition of the soil, the size of the teeth and single teeth, and the presence of moisture in the soil. On light soils, large cloves are planted to a depth of 8-9 cm, counting from the bottom; on loamy soils, the planting depth corresponds to 6-7 cm. Small cloves are planted 1-2 cm shallower. The above-mentioned planting depth allows you to place the planting material in moist soil and prevent the cloves from sticking out. Aerial bulbs are sown to a depth of 4-5 cm. Along with preparing planting material, planting is also a rather labor-intensive process. For small robotic volumes, planting is carried out manually. In industrial conditions, to reduce the cost of manual labor and time, garlic is planted using converted CH-4 potato planters, SLS-8, SLS-8A onion seeders with devices for sowing garlic and other improvised mechanisms. To mechanize the process of sowing aerial bulbs, vegetable seeders SO-4.2 and others are used.
Caring for garlic plantings
Caring for plants involves creating optimal conditions for growth and development that will unlock the genetic potential of productivity. To protect planted plants from unfavorable wintering conditions, small growing areas are covered with straw, fallen leaves, mulched with humus, and well-decomposed peat. In the spring, when the soil thaws, straw and leaves are removed.
The primary activity is spring harrowing with light harrows across the rows. This operation will destroy weed seedlings, increase air access to the roots, and destroy soil capillaries through which unproductive loss of moisture reserves occurs. When crop shoots appear (in spring), garlic is fertilized in the morning with nitrogen fertilizers at a dose of N50 kg/ha of active substance, using MVU-0.5 machines; MVU-900. In case of soil crust formation and weed germination, inter-row cultivation is carried out using USMK-5.4 cultivators; UKR-5,6. If signs of mineral starvation are detected, together with cultivation, fertilizing with fertilizers containing the missing element is carried out.
Growing garlic in the southern regions requires 4-7 waterings throughout the growing season, as the soil dries to a level below 70% NV. If irrigation is possible in the central and eastern regions of garlic cultivation, it must be watered when soil and air droughts occur. On average, the irrigation rate for irrigating garlic plantings in the first half of the growing season is 250-300 m3/ha, in the second - 350-450 m3/ha of water.
A mandatory technique that increases yield and marketability by 25-30% (on commercial plantings) is de-shooting winter bolting varieties. They begin to remove flower stalks when they appear en masse. This operation is carried out manually, in small areas, or with special mowers, without damaging the upper leaves. On seed plots, the arrows are not removed. After ripening, they are dried, threshed, aerial bulbs are sorted and used to protect planting material from dangerous diseases and pests.
When industrially growing garlic, the following herbicides are used to control weeds: Gesagard 50 WR, sp. - at a rate of 3-5 l/ha or Stomp 330, k.e. — at a rate of 3-6 l/ha, against annual cereals and dicotyledonous weeds, applied by spraying the soil before crop emergence in the spring. Treflan 240, k.e. (Triflurex 240, e.g.) - at a rate of 4-6 l/ha or Treflan 480, e.g. (Triflurex 480, e.g.) - at a rate of 2-3 l/ha, against annual cereals and dicotyledonous weeds, used by spraying the soil before planting the crop with immediate incorporation into the soil (for winter planting periods - in autumn, for spring planting - in spring ). To increase the effectiveness of the action of soil herbicides, after their application, no mechanical tillage is carried out for 12-15 days, since this breaks the herbicidal film, and new weed seeds are carried into the upper seed layer of the soil by the paws of the cultivator.
Many harmful organisms parasitize and develop on garlic plants, the significant spread of which causes great harm to the plants, thereby reducing the yield and quality of grown products. The most dangerous pests of garlic are stem nematode, garlic mite, etc. These pests cause harm not only during plant growth, but also during storage of commercial and seed material. The main measures to combat the above-mentioned pests are: compliance with crop rotation, destruction of affected plants in seed plots, culling of infected bulbs during the harvesting process, preparation of seed material for planting, disinfection of bulbs with sulfur dioxide.
Along with phytophagous insects, garlic diseases cause significant damage. The most common and harmful diseases are downy mildew, neck rot, white rot of the bottom (fusarium), and viral diseases. The primary measures that prevent significant manifestations of the above-mentioned diseases include preventive measures. The main ones are maintaining crop rotation, placing garlic plantings in open, well-ventilated areas, systematically improving the health of planting material, and increasing plant resistance. Chemicals (fungicides) are used for both preventive and therapeutic purposes. Among the drugs that are approved for use on garlic plantings, the most effective in the fight against fungal diseases are systemic-contact fungicides.
To effectively protect plants from pathogens, the first (preventive) treatment is carried out with a systemic drug, as a preventive measure. Subsequent spraying is carried out when the first signs of the disease appear, constantly alternating preparations with various active ingredients to avoid the emergence of resistance in pathogens. Due to the waxy coating on garlic plants, adhesives (surfactants) Trend 90, Amigo and others must be added to the working solution of fungicides.
The fight against viral diseases is reduced to the use of healthy planting material and the fight against vectors of viral infection (thrips, ticks).
Harvesting
The timing and efficiency of garlic harvesting significantly affect the quality of the product and its suitability for storage. Cleaning is carried out in dry sunny weather in a short time of 7-10 days. Arrowing garlic begins to be harvested when the lower leaves turn yellow, the covering membranes of the bulbs dry out, and the inflorescence wrappers crack. Non-shooting varieties of garlic begin to be harvested when the lower leaves begin to yellow massively and the false stems begin to lodging. Delay in starting the collection, especially in wet soil, leads to cracking of the outer shells of the bulbs, increased losses, and deterioration in marketability. Bulbs with damaged shells are unsuitable for long-term storage and fall apart into individual cloves.
In industrial conditions, garlic is harvested using complex machines. Garlic is dug up with LUK-3 diggers and harvested with LKG-1.4 onion harvesters; LKP-1.8; MUCH-4. Before harvesting, the above-ground mass is mowed using forage harvesting machines KUF-1.8, KIR-1.5. Garlic is harvested using the EM-11 root harvester without mowing the above-ground mass. After harvesting, the garlic is dried in the sun or, in rainy weather, in dryers with active ventilation, gradually increasing the temperature from 25 to 40°C. When sorting, they clear the soil, cut off the roots, shorten the false stem to 10-20 mm, remove damaged, ugly, rotten bulbs. Sorting by size is carried out manually or using an SLS-7 machine.
Peeled, dried and sorted bulbs are placed in small boxes with a layer of 12-15 cm and placed in storage under controlled conditions.