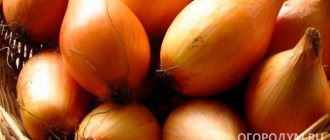
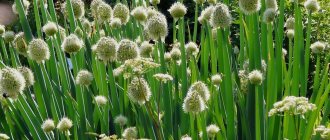
Popular onion varieties
Onions tolerate changes in climatic conditions more easily than a lack of sunlight (daylight hours). Therefore, when choosing varieties, pay attention to zoning.
Southern onion varieties form a bulb as daylight hours increase, peaking at 3 p.m. In warm regions this takes a long time, so over a long period the vegetable manages to gain mass in the garden.
If a southern onion variety is planted in the northern region, where daylight hours quickly reach their maximum in summer, the plant will finish its growing season sooner and form a bulb. She will not have time to gain weight and will remain small.
For the southern regions, salad onion varieties such as Kaba and Dnestrovsky are suitable. Among the spicy ones, the best option is Sunny, and the semi-sharp one is Iris. If you plant northern varieties in a garden bed in the southern regions, their leaves will actively grow, but the bulb will not have time to form.
For the northern regions, semi-sharp onion varieties such as Crimson Ball and Azelros are best suited. Among the spicy ones are Rostovsky, Bessonovsky, and among the salad ones - Lisbon White, Alice, Albion.
For long-term storage, choose onion varieties with good shelf life. Examples are:
- Stuttgarter. The first harvest in the garden can be obtained after 60 days when using seedlings. The bulb has a spherical, slightly flattened shape. Weighs up to 150 g.
- Centurion. Elongated bulb. The bottom is smaller, so there is little waste. The neck is thin and dries out faster than other varieties.
- Orion. The bulbs are spherical in shape. They weigh up to 200 g. They ripen quickly.
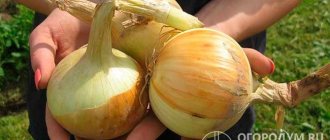
The following popular varieties of large onions are distinguished:
- Globo. It is mid-season, salad. The bulb can weigh up to 1 kg. This is considered one of the highest indicators. The taste is sweetish.
- Exhibition. The variety is mid-season. Bulbs weighing 500-800 g. The taste is sweetish.
- Texas yellow. Grows quickly. It has a straw hue and a mild taste.
Popular red varieties include:
- Bombay. The bulb is flattened and large. The pulp is semi-sharp. It has an average ripening time.
- Brunswick. Maturation occurs quickly. The bulbs reach 60 mm in diameter. They have a flattened shape.
- Carmen. Ripens early. It has a spherical flattened shape. Weighs up to 300 g. The pulp is semi-sharp and has a high content of vitamin C.
These varieties are considered the best.
When to plant onions
Onions are planted in spring and autumn. Don't rush into spring planting. If unexpected frosts occur, the seedlings will disappear. Typically, seedlings are planted when stable warmth has established and the soil has warmed up to 12–13 degrees at a depth of 10–11 cm.
In the southern part of the country, planting takes place as early as March. In the middle zone - at the end of April and during May. In regions with a cold, harsh climate, it is better to wait until the end of May - beginning of June. You shouldn’t be late either - this will negatively affect the size of the harvest.
According to folk tradition, onions are planted at the beginning of bird cherry flowering.
In autumn you need to focus on the weather. Plant too late and roots will not have time to form. Too early and the set will germinate before the winter cold and freeze. It is best to plant at air temperatures from -3 at night to +5 during the day, when warming is no longer expected. Approximate dates are October and early November.
Selection and preparation of seed material
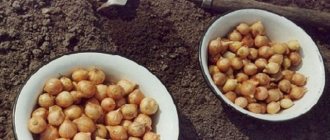
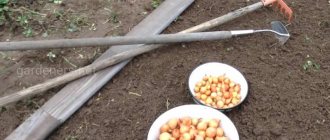
To get large onions in the garden, you need to use high-quality seed. You can purchase it or grow it yourself. In the second case, during harvesting, it is necessary to separate the heads into fractions.
Onions per head can be grown in a garden bed from seeds (called nigella), sets (another name is arbage) and seedlings. The most common way is to use sets.
Oat grass (the smallest fraction of sets) includes bulbs with a diameter of 5-7 mm, the first group - from 8 to 15 mm, and the second - from 15 to 22 mm. The last 2 options are best suited for planting in a garden bed.
The seedlings must be stored indoors at a temperature of 0…+20°C. A refrigerator will also work. If you keep the sowing in a warm room, the temperature should be from +17 to +20°C.
Do not store planting material near heating appliances.
Onion sets are prepared for planting in the following order:
- Select only completely intact and healthy seedlings.
- Trim the dry ends on top of the set with scissors.
- Disinfect planting material in hot water. You can use potassium permanganate or other methods. This is required to prevent fungal infection. After disinfection, the planting material should be dried at room temperature until it becomes free-flowing.
The day before planting in the garden, you need to place the seedlings in slightly wet burlap, and then plant them in open ground. Until then, you can keep it in the box all the time.
Preparation of planting material
Like any other crop, onions need pre-treatment before planting, which will help speed up their germination and protect them from diseases.
Preparing seeds for sowing
Planting onions with seeds is less popular than planting sets, but some gardeners believe that this method has its advantages:
- buying seeds will cost much less than buying sets,
- Onions grown from seeds do not shoot.
Experienced gardeners advise using annual seeds for sowing.
Before you start processing the seeds, carefully study the packaging: many manufacturers indicate the processing they have carried out. Often the prepared seeds are colored, for example emerald.
Unprocessed onion seeds are black in color.
Pre-sowing seed treatment includes several activities.
When working with seed, you should use only soft water - melt water, rain water, boiled water, or standing water for at least a day.
Disinfection:
- Method 1. Place the seeds for 20–30 minutes in a solution of potassium permanganate (1 g of powder per 1 liter of water). Then rinse and dry lightly.
- Method 2. Place the seeds in a container with water heated to 50°C for 30 minutes. Then remove and dry.
To disinfect seeds, you need to prepare a weak solution of potassium permanganate
Soak:
- Place the seeds at the bottom of a plate or container and fill them with water at room temperature so that it covers them by 3–5 mm. It is not recommended to overwater the seeds, as they may suffocate and not germinate.
- Place the container in a warm place for a day. During this time, the water needs to be changed 4 times.
Germination:
- Place a dampened piece of cloth (cotton or matting works well) at the bottom of a plate or container.
- Place the swollen seeds on a cloth.
- Cover them with another piece of damp cloth and place them in a warm place for 2 days. During this period, care must be taken to ensure that the fabric does not dry out.
Germination is an effective way to accelerate the emergence of seedlings
Pre-treatment of sets
Planting sets is more common for most gardeners. If you decide to sow onions in this way, then remember that all procedures must be performed immediately one after another, and then immediately plant the set in the ground.
- After purchasing, carefully sort and remove all bulbs that have defects (rot, spots, etc.). If you bought the sets in advance, try to store them in a dry place in a bag made of natural fabric (cotton, matting, etc.) or in a net to provide ventilation to the bulbs and avoid rotting.
- For a week, dry the seedlings near the radiator at a temperature of 35–40°C, laying them out in one row on a cloth or in cardboard boxes. There should be no humidity in the room.
- After drying, the sets need to be soaked: Pour hot (45–50°C) water over the bulbs for 15 minutes.
- Then place them in cold water (15°C) for the same time.
- Dry lightly on a towel.
- Brine. Ingredients: salt (2 tbsp) + water (2 l). Keep the seedlings in it for 3 hours. To make the procedure more effective, it is advisable to wash the seeds and place them in a solution of potassium permanganate, although such a solution can be used as an independent disinfectant.
Potassium permanganate solution is a popular means of disinfecting onions.
Onion soil requirements and planting period
You can plant onions in the form of sets in early spring or before winter. It's best to use the first option. Due to sudden changes in climatic conditions, autumn planting can lead to seedlings appearing early and dying during frosts, never reaching spring. In addition, due to severe stress, very small bulbs can form.
Sevok (arbazheika) is sown in beds in the southern regions from the end of March to the beginning of April, and in the middle zone - from the last week of April to the beginning of May. As for the northern regions, there - only after the frosts have passed and the soil has warmed up to +6...+10°C.
The suitable soil temperature for planting seedlings is +10...+12°C, and the air temperature is +3...+5°C. The first shoots appear on the 6th day. If planting material gets into dry, cold soil, the seedlings will develop slowly. This may result in the bulb not having time to grow to the desired size. Onion sprouts can withstand short frosts, but only down to -3°C.
Before planting onions in the garden bed, you need to decide on its location. A good place for a garden bed would be where potatoes, tomatoes, cucumbers, zucchini, cabbage, and legumes previously grew.
Garlic, radishes, beets, and carrots will be suitable neighbors. They can be grown in the garden the next year after onions. Onions can be planted in the same place only after 3-5 years.
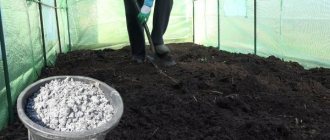
As for the requirements for the soil, it should not be acidified. Also, onions do not tolerate fresh organic matter. Therefore, it, like deoxidizers, needs to be added to the soil only a couple of years before planting onions in the garden.
A neutral soil reaction is required. The acidity level should be 6.5-6.7 units. The soil must be permeable, loose and fertile.
Non-standard methods of sowing onions in open and protected ground
There are several unusual ways to sow onions, and you can choose the one that is most convenient for you.
Sowing in ridges (Chinese method)
Gardeners who prefer to plant onions this way note the following advantages:
- grown bulbs are large in size;
- onions receive more light and hardly rot;
- plantings are easier to care for;
- fertilizers are not washed out and their consumption is reduced.
The disadvantages include the fact that the bulbs turn out to be the same disc-shaped shape, regardless of the variety.
If you decide to use this planting method, prepare the soil as usual. Planting is carried out at the same temperature.
Sowing onions in ridges is an effective way to obtain a high-quality harvest
Technology for making beds:
- Dig the bed shallowly and level it with a rake.
- Along the bed, use a hoe to form ridges 15 cm high at a distance of 20 cm from each other. On a bed 1 m wide, 2–3 ridges are placed.
- Bury the bulbs into the soil 3 cm at a distance of 10 cm from each other. Try not to press them too hard so that the soil underneath is loose.
- Cover the bulbs with soil from between the rows and water carefully.
Bridge method (per pen)
Used to produce green onions. A large size seed (3–5 cm in diameter) is suitable for planting. A special feature of this method is the cost-effectiveness of space for sowing: up to 13 kg of bulbs can be placed per 1 m2. This makes the bridge planting method well suited for greenhouses.
When bridge sowing, the bulbs must be placed close to each other.
Sowing technology:
- Trim the tails of the onions, and then carry out the usual pre-sowing treatment.
- Prepare a soil mixture: garden soil + humus or compost + peat + sand in equal parts.
- Plant the bulbs so that they are close to each other.
- Water the crops with warm water.
Video: planting onions using the bridge method
Belt method
The method consists of forming several planting strips separated by row spacing.
On a bed 1–1.2 m wide you can place 2 ribbons
Sowing technology (the indicated sizes are suitable for both sowing and seeds):
- Prepare the soil and planting material in the usual way.
- Divide the bed into ribbons (rows) 35–45 cm wide and row spacing 20–25 cm wide. In each ribbon, form 3 lines at a distance of 15–20 cm.
- Plant planting material in the prepared recesses at a distance of 6–8 cm from each other.
- Cover the crops with soil and water carefully.
- Mulch the bed with straw, peat or sawdust in a layer of 3–5 cm.
Planting an onion in a bottle (on a feather)
Used for growing green onions at home. If you decide to plant onions this way, you will need 2-5 liter plastic bottles.
You can grow onions in a bottle at any time of the year.
Manufacturing technology:
- Cut off the neck of the bottle down to the shoulders.
- Make holes on the sides at a distance of 4–5 cm from each other. Their size should be slightly smaller than the size of your bulbs so that they do not fall out if you are planting sets, and 2–3 cm if you are planting turnips. Place the lowest holes at a distance of 7–9 cm from the bottom. Also provide the “bed” with a pallet.
- Pour soil (you can use the mixture described above or a universal vegetable composition) to the bottom holes and moisten.
- Carefully insert the onion into the holes from the inside so that the growing point (the place where the stem breaks into leaves) is on the outside, and fill with soil up to the next holes.
- Repeat until the bottle is completely filled.
Planting onions under spunbond
Planting vegetables, including onions, under spunbond is gaining popularity among gardeners, since it makes caring for the plantings much easier: there is no need to weed them, spend excess water on watering and change the mulch.
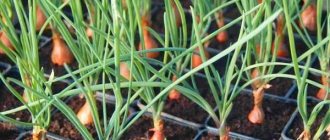
Onions grown on spunbond form high-quality greens
Planting Process Steps:
- Prepare the bed and seed as usual.
- Cover the bed with spunbond. Its ends can be reinforced with staples or buried in the ground.
- Make holes in the places where you want to plant onions.
- Plant onions as usual.
Rules for planting onion sets
The most common method of planting onions is using sets. In the fall, you need to remove weeds from the garden bed, water it and dig it 30 cm deep. Before this, if the soil is infertile, it should be added to it for every 1 sq.m. beds with half a bucket of humus, 25 g of urea, 15 g of double superphosphate, 20 g of potash fertilizers. In spring, it is necessary to add another 10 g of nitroammophoska before loosening the soil.
In the spring, a couple of weeks before planting the seedlings, you need to divide them by size. Those that have a diameter of more than 3 cm must be planted in a separate bed. This is due to the fact that large bulbs produce many feathers, which are used for greens. But the bulb itself does not have time to ripen.
Planting the sets in the garden bed is carried out in rows, between which 10-20 cm should be left. A distance of 5 cm is made between the sets. The planting depth is adjusted depending on the size of the bulbs. It is necessary to plant so that the tops are not covered with soil.
You need to water it with a stream. Sprouts appear after 9 days. You can't hill up, just remove weeds.
Timing for planting in open ground
Inexperienced gardeners often make a big mistake by planting onions too early in the spring. In damp and unheated soil, seedlings stop developing and rot. In conditions with low temperatures, the crop almost always shoots up, since in the cold the plant tends to quickly prepare seeds.
The appropriate timing of planting activities must be determined taking into account weather conditions and recommended dates according to the lunar calendar.
Depending on the region
Onions are planted after stable warm weather has established, preventing the return of frost. In this case, the minimum soil temperature at a depth of 15-20 cm should be at least +10°C .
The timing of spring planting differs in different regions, due to the peculiarities of the climate.
| Region | When to plant onions in spring |
| middle zone: Central part of Russia, Moscow region | from late April to mid-May |
| St. Petersburg and Leningrad region | second ten days of May |
| southern Russia: Kalmykia, Kuban, Stavropol region | second half of March |
| Ural and Siberia | the beginning of June |
Important! Since the dates are directly dependent on weather conditions, they can be moved back and forth.
According to the lunar calendar for 2022
According to the lunar calendar, favorable days for spring planting onions in 2022 are as follows:
- March – 22, 24, 27, 28;
- April – 1, 3, 5, 8, 9, 10,13, 24, 25, 26, 27, 28;
- May – 1, 2, 5, 6, 7, 10, 13, 17, 19, 20, 21, 22, 24, 25, 26, 28;
- June – 2, 3, 6, 7, 8.
Unfavorable days are considered:
- March – 19, 20, 21, 25, 26;
- April – 4, 15, 16, 17, 20, 21, 22, 30;
- May – 3, 4, 8, 9, 30, 31.
Lunar calendar recommendations
In addition to the dates recommended by the lunar calendar for planting, it is worth taking into account a number of factors:
- The waxing moon is a period of moisture accumulation in the root system. Sowing work is undesirable due to the high probability of rot.
- Full moon - water is retained only in the ground parts, so onions are grown only for feathers at this time.
- The waning moon is a time for the accumulation of useful substances in the root system. Ideal for planting onions.
Method of planting and sowing seeds in the soil
Growing onions from seeds is a longer but economical option. For example, for 1 kg of sets you need to pay about 200 rubles, and for a package of seeds - only 10 rubles. Therefore, the seedling method is mainly used.
Seeds are supposed to be sown for seedlings in late February or early March. It depends on climatic conditions. The procedure is as follows:
- Disinfect. Place the seeds in a solution of potassium permanganate. Requires 1 g of substance per half glass of water. Wait 10 minutes and rinse the planting material. Purchased seeds are usually disinfected in advance by the manufacturer.
- Activate. Keep the seeds in a growth stimulator solution for 8 hours. Prepare it according to the instructions on the package, dissolving it in boiled chilled water. For example, you can use Zircon, Epin.
- Prepare a place for planting seeds. Seeds are usually planted in a plastic box with holes for drainage and a height of at least 15cm. It is recommended to use commercial soil or compost. The box is filled with soil and watered with a fungicidal solution (for example, Fitosporin).
- Cover the boxes with plastic wrap and wait 3 days.
- Water the soil. Make grooves 1 cm deep, leaving 3 cm between rows. Place onion seeds 1 cm apart. Sprinkle with soil and spray with a spray bottle. Place in a warm place, covered with plastic wrap.
- Sprouts appear in 1-2 weeks. Then you need to remove the film and put the box in a bright place. Remains watered if necessary.
In May, transplant into the ground, making sure that there will be no frosts. Before doing this, you should water the soil in the box with water to make it easier to get the sprouts.
In May, transplant to the garden bed, making sure that there will be no frosts. Before doing this, you should water the soil in the box with water to make it easier to get the sprouts out. Before planting in the garden, it is advisable to trim the roots, leaving no more than 4 cm.
Sowing onions in protected soil
Onions grow well in protected soil, including at home.
Planting onions at home
As a rule, onions are grown at home to obtain “out-of-season” fresh greens, and you do not need to buy special seed - turnip heads purchased in the vegetable department are quite suitable. For planting, it is advisable to take large, dense heads with a developed root cup and shiny skin. It will be nice if the selected bulbs turn out to be slightly sprouted.
Large onions are suitable for planting greens at home.
Sowing technology:
- Prepare containers for planting and fill them with soil. You can take a universal vegetable composition or a mixture of garden soil, humus and vermiculite in a ratio of 1:1:0.5.
- Prepare the bulbs for planting by soaking them in warm (30–35°C) water for 2–3 hours.
- Place the bulbs in the soil up to the “shoulders” at a distance of 3–5 cm from each other.
- Moisten the soil and place the workpiece in a sunny, but not too warm (18–20°C) place.
Sowing onions in a greenhouse
If you want to grow onions in a greenhouse, then it is advisable to use sets with a diameter of 3–5 cm.
Sowing technology:
- Prepare the soil in the same way as in the garden bed, including the planting holes (grooves 4 cm deep at a distance of 10 cm from each other). It is advisable to do this in late August-early September. Remove some of the soil into a container and store at above-zero temperatures.
- In early to mid-October, when cold temperatures finally set in, place the dry onions in the prepared holes, maintaining a distance of 2 cm between the bulbs, and cover with soil.
- Mulch with a mixture of manure and straw or peat. The thickness of the mulch layer is 15 cm.
- In the spring, at the end of March, clear the bed of snow and remove the mulch, and cover the greenhouse with film.
Growing and caring for onions
Caring for onions in the garden is as follows:
- Weed removal. They should not interfere with the growth of onions in the garden.
- Loosening the soil, but only on the surface. It is better to carry out the procedure after watering. You can add another layer of fine mulch.
- Watering. In the first month, do it once a week. In summer, do this every 10 days or when the soil dries out. It is required to wet the soil to a depth of 25 cm. A couple of weeks before harvesting, the garden beds are not watered. When watering, it is best to use a sprinkler to avoid damaging the plants. The water should not be cold.
- Feeding. The first time is carried out a couple of weeks after the sprouts appear: take 1 tbsp per 10 liters of water. urea. The second time this is done in the 3rd week of June: for 10 liters of water you need to take 10 g of double superphosphate and potassium sulfate. The third time you need to fertilize only if you need to slow down growth. In this case, take 40 g of superphosphate per 10 liters of water.
These are the basic rules for caring for onions, which must be followed in order to get a good harvest.
Predecessors for the bow
This vegetable is not picky about where it is planted. But, despite this, there are plants after which it grows faster and gives a good harvest.
It is best to place seeds after:
- cucumbers;
- tomatoes;
- cabbage;
- potatoes.
These are the types of crops for which large amounts of nutritious and beneficial fertilizers are applied.
You should not plant in places where carrots, radishes or sunflowers grew. Also, do not forget that onions, like other types of plants, require rotation. This also applies to garlic.
It should be remembered that the neighbors of a spicy vegetable should not be legumes. Onions do not grow well next to peas and beans. Also, you should not place beans or soy next to each other.
Protecting onions from diseases and pests
Onions in the garden will have to be protected from various diseases and pests:
- Bottom rot. Mycelium develops on it. The bulb becomes too soft and begins to rot. To prevent the problem, it is necessary to prevent overflow and disinfect the planting material in the garden bed.
- Cervical rot. This disease manifests itself during onion storage. Mold with black dots appears. To prevent the disease, it is necessary to sow onions early in moderately moist, loose soil. And after harvesting, always dry completely.
- Downy mildew. Gray spots appear on the leaves of the onion, which then darken. To prevent this, it is necessary to disinfect the planting material with Bordeaux mixture.
It is also necessary to fight the onion fly, and not with the adults, but with the larvae. You can also use Bordeaux mixture.
Site selection
The choice of location of onion beds determines the yield and the degree of care for the plantings. Without sun and warmth, onions will not grow; the site should be on the south side of the slope. Shadow is undesirable. Sites in lowlands are not suitable: moisture will accumulate at the roots, and the bulbs may rot and die.
Daylight hours
The choice of variety depends on the length of daylight in summer. Ideal daylight time is 16 hours. But this parameter is achieved only in the southern regions.
Therefore, breeders have developed special varieties for northern latitudes; such onions need 10-12 hours of daylight.
With a lack of light, the feathers of the set acquire a yellowish tint, and the root system grows noticeably worse. In northern regions, where there are few sunny days and a short daily photoperiod, they resort to a little trick: they use foil or other reflective material, which is placed between the rows.
Predecessors
When growing vegetable crops, it is strictly contraindicated to violate the rules of crop rotation. The gardener runs the risk of not getting the expected harvest; the plants will be sick for a long time.
The correct choice of predecessors makes the gardener’s work easier. The soil was initially endowed with the basic nutrients necessary for onions to grow and develop; they were inherited from the life of previous crops that grew in the chosen location a year ago.
cucumbers
Planting sets after cucumbers is not only possible, but also necessary. As a rule, cucumber plantings are fertilized with large doses of organic compounds, the soil in the garden remains loose and nutritious. These two parameters are ideal for growing onions, which immediately after planting do not require additional feeding and fertilizers.
Zucchini
As with cucumbers, the seedlings in the squash beds will reliably grow and receive a dose of the necessary organic matter. It is believed that sets can grow after any vegetables, while it disinfects and disinfects the soil.
Pumpkin
A lot of substances necessary for onions remain in the soil after the pumpkin. In addition, the soil retains looseness, which is important for the development of the root system.
Cabbage
Onions can be planted in beds after growing various types of cabbage. The most preferred predecessor is white cabbage. It is important that the area where the cabbage grew is not in the shade or lowland: onions react negatively to stagnation of moisture in the roots and lack of light.
Potato
Potato diseases are not transmitted to bulbous plants; they belong to different families. Nutrient organic matter and a complex of mineral fertilizers are always laid under potato rows, so onions will feel good on former potato plantations.
Legumes
It is believed that any plant can be successfully grown after legumes, because it is an ideal predecessor. With onions, things are a little different. The influence of legumes on onions is neutral: there is little organic matter left in the soil; fertilizing is necessary before planting the sets.
Tomatoes
Tomatoes are excellent precursors for sowing. The set of positive aspects is still the same: fertility, abundance of residual organic matter, plants belong to different families, therefore, they do not transmit diseases to each other.
Green crops
It is recommended to grow onions in beds after greens. It is enough to add a complex of mineral and organic fertilizers. At the same time, rows of parsley and dill can be sown in onion beds as companion plants.
Neighbours
The seedlings are planted in rows in the beds. Gardeners often use another method of growing “onion” crops. Along with greenhouse plants or vegetable crops in open ground, onions are planted in the rows. What benefits does this method bring and how to choose the right friendly culture.
Beet
Root crops are planted in rows on the beds. Beets and onions belong to different families, but both types of vegetable crops love warmth, light and fertile soil. Therefore, they are often planted in beds side by side or together, alternating rows. Since onions ripen earlier, it is advisable to plant them at the edges of beet beds: the soil is disinfected, onions protect the beets from insect pests.
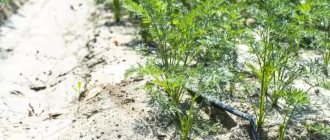
Carrot
Gardeners love and practice the combination of onions and carrots in one bed as a counteract to onion and carrot flies. The classic version of the neighborhood: the central row and edges of the bed are planted with onions, the remaining grooves with carrots. Prevention against insect pests was carried out for both types of plants.
Parsley
The spicy aroma of parsley and the pungent smell of onion plantings leave no chance for a comfortable life for insect pests. The duet is considered ideal. They plant neighbors by analogy with carrot beds.
Tomatoes
Tomato plantings in a greenhouse are often complemented by onions as a pest repellent plant. For tomatoes in open ground, this practice is most relevant, as it allows you to achieve a quick harvest of onions for greens. Onions receive warmth and nutritious soil.
Salad
The combination of onions and lettuce is quite popular in garden beds where salad greens are grown. Such beds can be decorated by planting onions, dill, and parsley in alternating rows. Cultures get along well with each other.
Spinach
Spinach greens make a great addition to “green” beds. Plants mature at the same time and require the same growing conditions.
Watercress
Provides protection against carrot midges and other insect pests. Onions are planted in rows along the edges of the bed or in the center of the watercress plantings.
Garden savory
A fragrant plant that, in tandem with onions, creates a fragrant, spicy planting. Goes great with spinach and parsley.
Chicory
Suitable for joint cultivation with onions, parsley and carrots. An excellent option for creating combined decorative beds.
Doesn't fit
Onions are an excellent neighbor for most types of vegetable crops. The plant has an antibacterial effect and can repel insect pests with a pungent aroma. But there are still a number of unsuccessful combinations with vegetables and herbs.
See also
Choosing a nigella onion variety, growing and care, when to harvest
Read
Peas
Onions and peas will not allow each other to fully develop. The onion suffers especially in this duet. The soil for peas has little nutrition; the legume crop interweaves delicate onion leaves already at the initial stage of development. Such collaboration should be avoided.
Beans
It is irrational to grow beans and onions in the same bed. The plants will interfere with each other: the onions will not receive additional light, and the lack of nutrients in the soil will negatively affect the harvest.
Options for combined beds
Professional gardeners often use onions as a member of combined beds. This method involves growing several crops in rows in one area. For example, a bed is divided into 5 furrows. The central row is planted with onions, the next two rows on different sides with carrots. Beets or onions are planted along the edges of the beds.
There are many options. The proximity of vegetable crops depends on the ultimate goals of vegetable cultivation.
Soil requirements
Onions need organic matter, but fresh manure will not do. A mixture of humus, wood ash and sand is used as fertilizer. Onions grow poorly in clayey, hard, not loose soils. Such soil must be fertilized, sand added and actively loosened.
The ideal soil option is chernozem: all nutrients are included from the very beginning, the soil is loose, you can do without deep digging and liming.
Autumn preparation
Planting material and land for planting onion plantations begin to be prepared in the fall. It is important at this time to determine the location and scheme for growing onions, calibrate the seed and properly store the seedlings during the winter. Pre-sowing preparation includes:
- Calibration and sorting.
- Drying to a free-flowing state.
- Maintaining optimal storage conditions in winter.
- Disinfection and disinfection.
Onions placed for storage must be dry, without signs of fungal diseases.
Peeling
Land preparation begins with peeling - surface digging to a depth of no more than 8 centimeters. During this period, weeds are pruned, but not completely removed, the soil is partially turned around, and the basis for a nutrient cushion of organic residues is created for the next year.
Peeling prepares the soil for autumn plowing and allows you to destroy colonies of insect pests.
Fertilizing the land
Autumn fertilization of onion plantings includes adding compost or humus to the beds. You can add superphosphate. The complex of fertilizers used depends on the initial fertility of the soil and its type.
Deep digging
Complete removal of weeds and deep digging of the soil is carried out just before frost. Compost and humus are laid out on the surface and “buried” deep into the bed during the plowing period. Over the winter, the fertilizers will rot a little more and end up in the root system of the vegetable. Deep plowing allows for loose soil in the spring.
Important! You cannot use fresh manure - the fertilizer can burn the plants and cause fungal diseases of the bulbs in the spring.
Liming as necessary
Onions do not grow well in acidic soils, so the beds must be limed. The presence of weeds in the form of horsetail in the beds indicates increased acidity of the soil. You can use express tests to determine this parameter.
Important! When liming is carried out in the fall in the spring, the procedure does not need to be repeated.
Chalk or slaked lime is used as a liming material. With this procedure, acidity is normalized.
Late fall
In late autumn, deep plowing is carried out and humus and compost are added. As a disinfectant, the beds are sprinkled with wood ash. The soil is considered completely ready for overwintering. With the onset of the first spring warmth, spring tillage activities begin.
Spring treatment
The land should be completely ready for planting onions by mid-April. As soon as the snow melts, they begin to cultivate the beds. It is important not to over-expose the onion, otherwise it will produce the first sprouts, which will drain all the strength from the bulbs; the set will take longer to grow and form a root system.
Loosening
Spring treatment begins with surface loosening. Weeds, debris and remnants of last year's plants, tops and leaves are removed from the beds. Onions are picky about soil looseness; there should be no weeds in the beds.
Digging
If deep plowing was carried out in the fall, then dig the beds shallowly - half a shovel deep. Then the soil is loosened and grooves are marked.
Fertilizer
Onions are undemanding when it comes to fertilizers; fertilizing is not necessary during the sowing period. It is important to follow the rules of crop rotation. Fertilizers will definitely not be needed if they were applied to the soil during the autumn preparation of the land.
Litmus test
It is important to determine the acidity level of the soil. This can be done using litmus tests sold in pharmacies or specialty stores. If the soil turns out to be acidic, liming is carried out, and if the procedure was performed in the fall, then it does not need to be repeated in the spring.
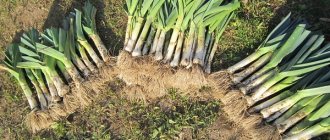
When to remove onions from the garden for storage
It is necessary to collect onions from the garden when half of the stems begin to lie on the ground and turn yellow.
Collection is carried out at different times. It depends on climatic and weather conditions. But as a standard, onions are removed from the garden at the end of July or August, since rains may begin in September, which can lead to their rotting. There is always a need to harvest before September even begins.
How to choose the right onions for planting
For planting, 1-2 year old seedlings are used. It is necessary to pay attention to the quality of planting material:
- the bulbs should be dry and dense,
- Do not use material with hatched sprouts;
- onions with mechanical damage are not suitable for planting;
- There should be no traces of rot and mold on the sets, or white coating on the roots.
It is also necessary to choose a variety intended specifically for growing per head. The quality of the future harvest and its shelf life directly depend on the quality of planting material.
Rules for storing onion harvest
A very important point is to dry the onions after harvesting from the garden. To do this, you need to lay out the bulbs in a well-ventilated area, first shaking off the soil. The remaining soil is removed only after the bulbs are completely dry.
You can leave the vegetables to dry directly in the garden. But in this case, the air temperature should be about +30°C. In the evening they should be covered to prevent dew from getting them wet. It will take 10-15 days. You can weave braids from onions and hang them to dry in this form.
Rate this article:
How to prevent arrows from appearing
Premature appearance of arrows can be caused by various reasons. The main one is improper care of planting material.
The seedlings should only be kept at room temperature. If the thermometer readings are below 0 degrees, this will cause arrows to appear. In this way, the culture preserves itself and tries to produce “offspring” as early as possible. Therefore, in order to obtain high-quality green mass, and then large heads, it is necessary not to subject the planting material to frost stress.
As for purchased seeds, it is recommended that they undergo an adaptation period. To do this, place the seeds in a fabric bag and keep them in a warm place for two weeks. If this is an apartment, then it would be good to hang it on batteries. At the same time, it is important to ensure that the sun does not fall on it, otherwise the vegetable will begin to sprout. And this is no longer desirable.
Some specialists resort to another adaptation method. Take a deep container, place planting material in it and fill it with warm water. The temperature of the liquid should be about +45 degrees, but not higher. Keep it in this state for 8 hours, periodically adding water. At the end of this time, the onion must be removed and spread out so that it dries well.
Sowing rules
It is customary to plant onions when the ground temperature rises above 10 degrees Celsius. If you plant a crop in poorly heated soil, the heads will form small, and the feathers, on the contrary, will become very elongated. Planting times vary from region to region, but most areas plant onions between mid-April and June. To ensure high germination and a happy harvest, follow the sowing instructions:
- make grooves 2-3 cm deep;
- bulbs are sown in the grooves, keeping a step of 5-6 cm. If the heads are large, with a diameter of 15 cm or more, the step is made larger - about 7-8 cm;
- After planting, sprinkle the vegetables with a layer of fertile soil, and add ash and other organic fertilizers to improve the composition.
There is no need to cover the garden bed after sowing; nothing bad will happen to the vegetables. The first shoots are expected 2-3 weeks from the planting date.