Greetings. You know, the answer to the question: “How to grow tomatoes in a greenhouse?” , I have known since childhood. Grandfather and grandmother grew tomatoes both for themselves and for sale. We always had early tomatoes on the table, and this is all because they planted tomatoes in the greenhouse using seedlings.
And I would like to share with you the secrets of an early and rich harvest. Tell you how to properly grow seedlings and their subsequent planting in a greenhouse. I will share family secrets on caring for tomatoes and combating possible difficulties: pests and diseases. And following my recommendations you will grow an early harvest of tomatoes. I suggest studying and implementing.
Why do I grow tomatoes with seedlings in a greenhouse?
I turn to growing tomatoes in greenhouse conditions for a lot of reasons:
- Possibility of harvesting ultra-early and late harvests - from early spring to late autumn.
- Growing tall bushes that do not take root well in open ridges. It is these seedlings that produce large fruits up to 0.5 kg.
- The possibility of planting productive heat-loving varieties that do not do well in harsh Russian conditions.
Greenhouse plants do not require additional care - all activities are simple and familiar, even a beginner can do it.
tall tomatoes in a greenhouse
Nuances of caring for greenhouse tomatoes
Features of agricultural technology for greenhouse tomatoes:
- prohibition on watering during the first 10 days after planting;
- mandatory ventilation of the greenhouse in hot weather and after each watering with opening of both side and top windows (the crop does not like high air humidity);
- maintaining optimal temperature (22–26ºС) and air humidity (45–60%);
- “help” in pollination (shaking flower brushes on warm sunny days, then immediately spray the soil and flowers with a fine spray bottle);
- regular removal of stepchildren, formation of a bush (under optimal conditions, tomatoes grow green mass more actively, plantings thicken to the detriment of the harvest);
Stepchildren take away nutrients from the plant that could be used for fruit ripening, so their removal throughout the active growing season is an absolutely necessary procedure
- application of organomineral and mineral fertilizers containing potassium and phosphorus once every 2–2.5 weeks.
Video: caring for greenhouse tomatoes
The climate in most of Russia is such that greenhouse cultivation for tomatoes, which are originally a southern heat-loving crop, is often the only possible method of cultivation. Shelter allows you to obtain harvests regardless of the vagaries of the weather. Agricultural technology in this case has some features compared to growing tomatoes in open ground. There are nuances in preparing the soil, in the planting scheme, in the timing, and in further care.
- Author: Yulia Golova
27 years old, higher legal education, broad outlook and interest in a variety of topics. Rate this article:
- 5
- 4
- 3
- 2
- 1
(7 votes, average: 4.9 out of 5)
Share with your friends!
When to plant tomatoes in a greenhouse
I determine the readiness of tomatoes for moving by the following criteria:
- Height 20-25 cm.
- 8-12 developed true leaves.
- Formation of 1-2 inflorescences.
- Approximate age: 50-55 days.
I will also introduce you to the approximate dates.
Planting tomatoes by region
Planting seedlings in heated glass greenhouses:
- Northern regions: early May.
- Mid-latitudes: end of April.
- Southern regions: early to mid-April.
Moving to unheated greenhouses:
- Northern regions: second half of May.
- Middle latitudes: first ten days of May.
- Southern regions: end of April.
Planting in light film greenhouses:
- Northern regions: early June.
- Mid-latitudes: end of May.
- Southern regions: early to mid-May.
I advise you to focus on the characteristics of a particular year - cold summer, warm spring, sharp frosts, prolonged thaw, etc.
Planting tomatoes according to the lunar calendar
I will list the favorable dates according to the lunar cycles for 2021:
- in January 2022, you can plant tomatoes on seedlings 2, 14, 17, 18, 20;
- in February 2022, 6 - 9, 11, 12, 14;
- in March it is best to plant tomatoes 7 - 10, 15, 16
- In April, the best planting days for tomatoes are 6, 7, 11 - 12, 17, 18.
- May when to plant tomatoes: 2, 3, 8,9, 15 - 18.
The seedlings planted these days develop strong, healthy, and disease-resistant.
tomato seedlings
Greenhouse and soil preparation
Before planting tomatoes in a greenhouse, it needs to be prepared. If everything is done correctly, you can move young plants or sow seeds for seedlings quite early.
Soil development
Plant tomatoes in warm, fertile, moist, loose soil. Bringing these parameters into line with cultural requirements requires separate consideration.
Improvement of structure and fertilization
There is no need to dig up the garden every year. Tomatoes and other annual crops growing in separate bushes are planted in holes, where organic matter and fertilizers are added, and that’s it. This is not done in protected ground.
The beds are completely dug up, preferably in the fall. Add organic matter and fertilizers:
- Do not add nitrogen to the soil at the end of the season - it will be washed away until spring;
- phosphorus and calcium, on the contrary, begin to “work” only after a long period; they are recommended to be added in the fall.
Once every few years you can completely change the substrate. Or you will have to move the greenhouse to a new location every season.
Moisture saturation
If winter is rich in precipitation, and gardeners live in a private house, it is enough to throw snow inside the structure. In the spring it will melt and the soil will be saturated with moisture. Otherwise, you will have to wet the bed at least enough to fill a spade. This is approximately 26 cm. In order for the water to reach the required depth, you will have to water it repeatedly.
Temperature increase
The faster the ground warms up, the sooner you can plant tomato seeds or seedlings. The temperature should be increased only after moisture charging:
- Pour hot water over the bed and cover with foil.
- Cover the area with black non-woven material. The method works exclusively in sunny weather; it will take a much longer period of time.
You will have to measure the soil temperature with a special thermometer. You can use the cheapest cooking probe.
To prevent the earth, which has been heated during the day, from cooling down at night, it is protected at sunset with an additional layer of insulation.
Disinfection
The soil, especially if nightshade crops were planted in the same place in the previous season, must be disinfected in any convenient way, for example, with solutions:
- copper sulfate;
- Fitosporina;
- Trichoderma;
- Carbation;
- Baikal.
You should first read the instructions for the selected drug. Some are used immediately before planting, others – at least a month in advance.
Greenhouse preparation
The structure needs the same care as a greenhouse. All parts, no matter whether they are removable or have stood all winter, and protective coating:
- cleaned mechanically;
- wash;
- disinfected.
Covering material is pulled over the arches 7-10 days before sowing or planting tomatoes.
Insulation
The greenhouse is designed to plant tomatoes or sow seeds as early as possible. It is not heated, therefore, it needs protection from sudden cold snaps, because if the threat of a critical drop in temperature did not exist, then the structure itself is not needed.
We'll have to keep an eye on the weather forecast. During the day, the sun heats the bed; when it’s cool outside, it’s hot inside. But at night, seeds and plants can freeze.
It is recommended to prepare warm old blankets and “out of order” outerwear in advance. As soon as a cold snap is predicted, the structure is insulated in the evening. When the sun comes out, the shelter is removed.
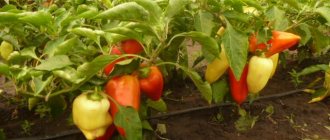
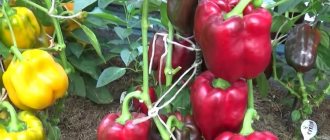
Review of favorite tomato varieties for planting in a greenhouse
Let me introduce the reliably proven varieties of greenhouse tomatoes:
- Major. Indeterminate high-yielding tomato. Fruits with dense pink pulp and a pleasant smell. The variety is resistant to both unfavorable conditions and diseases.
- Miracle of the earth. A high-yielding and early-ripening variety that is very popular among gardeners. The seedlings are tall, the fruits are heart-shaped, very sweet. Some tomatoes can reach a weight of up to 900 g. Plants are resistant to sudden temperature changes and drought.
- Gondola. Mid-season, indeterminate hybrid variety. The fruits weigh 150-500 g. The pulp is red and dense. Tomatoes have excellent keeping quality. They can be eaten fresh, salted, pickled, as part of side dishes and sauces.
- Kohawa. Ultra-early ripening and high-yielding variety. The tomatoes are flat round, weighing up to 150-180 g. The first fruits appear on the 90th day of the plant’s life. The seedlings are resistant to fungal diseases.
- Silhouette. High-yielding mid-early hybrid tomato. The fruits have an unusual rounded-flattened shape with excellent taste. The variety is resistant to unfavorable conditions.
- Dina. Mid-season productive variety. The seedlings are medium-sized, the fruits are round, large (150-200 g), very sweet, interesting bright orange color, rich in keratin. The variety is resistant to diseases and drought.
- Lelya. A recent discovery by breeders is an early ripening and high-yielding tomato. The fruits are small (up to 100 g) with bright red tasty pulp.
- Hurricane. An early-ripening, productive variety. The average weight of tomatoes is 80-90 g. Suitable for consumption fresh, pickled, or processed. The first harvest is harvested 85-90 days after planting.
- Long Keeper. Late high-yielding variety. The plant is of medium height, the fruits are large (up to 300 g), round. Tomatoes ripen well when stored.
- Bull's heart. A variety that has long won recognition among gardeners. Depending on the variety, it produces black, red and yellow fruits weighing up to 300 g, with juicy and fleshy pulp. The plant has record yields.
I never stop at one variety. I prefer to grow ultra-early, mid-ripening and late-ripening ones so that I have delicious tomatoes on my table all summer. When choosing a tomato variety, I focus on the following characteristics: yield, shelf life, ripening time, taste, bush size, approximate weight, fruit size.
tomato varieties
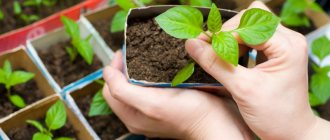
Seedling
Prepared tomato seeds are planted in nutrient soil. It is most convenient to plant 1-2 grains at once in separate peat cups.
If the seedlings are planted all together, when the first true leaves appear on the stems, they are picked (planted in separate pots). This must be done very carefully so as not to damage the roots of the plants.
Using a tool, small holes are made in the beds, cups with grown and hardened seedlings are placed in them, and sprinkled with a thin layer of soil.
How to grow tomato seedlings correctly
A rich harvest begins with proper seedling preparation. I take care of future plantings by purchasing seeds and breeding seedlings.
Preparing seeds for sowing tomatoes
I approximately sow seeds for seedlings from the beginning of February to the last days of March. The timing varies depending on the type of culture:
- Early. End of March.
- Mid-season. Continuing March.
- Late. End of February.
If you do not want to spend time preparing seed, I recommend purchasing coated seeds that have already been processed by the manufacturer. They are planted in the ground immediately, dry. The rest of the seeds require simple preparation:
- Disinfection in Fitosporin solution for 15 minutes.
- Soak for 15 minutes in a growth stimulator solution. I use sodium humate: ¼ teaspoon per 1 liter of water.
After such simple preparation, the seeds are ready for sowing.
treatment of tomato seeds with Fitosporin-M
Preparing the soil for seedlings
Tomato seedlings do not require special soil - any fertile and loose soil will do. I buy humus and turf soil treated from viruses, fungi and pests at the garden center. You can pay attention to special soil mixtures for nightshades and tomatoes. “Living Earth” and “Tomato and Pepper” soil are popular.
Planting seeds for seedlings is simple:
- Make holes in the bottom of each container to drain excess water and allow air to reach the roots.
- Pour the soil mixture into the prepared cups.
- Make shallow (1-1.5 cm) grooves. If you have prepared the boxes, maintain a distance of 5-7 cm between them with the indentations.
- Spill the soil with heated water.
- Place the seeds in the depressions, cover with soil, and compact the substrate a little with your hands.
- Cover with glass or wrap with cling film.
- Place containers on pallets.
Now you need to move the boxes and glasses to a well-lit, warm place and wait for the first shoots.
Caring for tomato seedlings
The first seedlings appear after 7 days. By the 5th week of development, the gardener makes sure that the plants do not stretch out - this is the time of their increased growth. The seedlings are kept in a well-lit place, the pots are turned 180 degrees every day so that the seedlings do not reach for the light.
The temperature regime is maintained as follows:
- First week. During the day – 16-18 C, at night – 13-15 C.
- Before the dive. During the day – 18-20 C, at night – 15-16 C.
- After the pick. During the day – 20-22 C, at night – 16-18 C.
- Before moving to the greenhouses. During the day – 18-20 C, at night – 15-16 C.
With watering, things are as follows:
- The first watering is when sprouts appear.
- The second – after 7-14 days.
- The third is before the pick.
- After picking - weekly watering.
Use water heated to room temperature, and water the plants at the roots.
After picking, additional feeding is needed:
- A week later. 1 tbsp. spoon of nitrophoska per 10 liters of water. Consumption: 1/2 cup of suspension per 1 bush.
- In 14 days. For 10 liters of water – 1 tbsp. spoon of the drug “Signor Tomato”, 1 tbsp. spoon of superphosphate. Consumption: 1 glass of solution per 1 plant.
- In 2 weeks. For a bucket of water - 1 tbsp. spoon of nitrophoska. For 1 bush – 1 glass of solution.
Fertilizing is carried out after watering. If the soil settles, add more substrate.
Picking tomatoes
If you are propagating seedlings in common boxes, when 2-3 leaves appear, the seedlings are given a pick:
- Take pots with a height and diameter of 8 cm, fill them with the same seedling soil mixture.
- Spill the soil with manganese solution (0.5 g per 1 liter of water).
- Transplant only the strongest and most robust seedlings.
When picking, you can bury seedlings that are too elongated up to the cotyledon leaves.
picking tomatoes
How to pick tomato seedlings: video
How to prepare tomato seedlings for planting in the ground
Already in April - May it is worth starting hardening:
- Open windows in rooms where plants are located. Start with several hours, gradually increasing the ventilation time. At the same time, avoid drafts.
- As soon as the weather gets warm outside, move the plants to the balcony. Start with a 2-hour “walk” and gradually increase the time.
Hardened seedlings acquire a characteristic greenish-purple hue. It should be sent for “walks” pre-watered.
The last preparatory step is pinching 2-3 lower leaf plates. In their place, short “stumps” (2-3 cm) are left. This promotes improved air circulation and good lighting of the plantings.
Growing and caring for seedlings
Growing tomato seedlings is perhaps the most crucial period in the entire cycle of growth and development. After all, without high-quality and healthy bushes, you won’t get strong, strong, well-bearing plants. Therefore, it is so important to pay special attention to the process of growing seedlings. How to avoid making mistakes and, having achieved good seed germination, get strong bushes and a good harvest later? Just follow the instructions.
Tomato seedlings
Step 1. Prepare the soil for seedlings. You cannot sow seeds in soil collected anywhere. It is best to take turf soil from your plot in the fall (not from the greenhouse) and leave it in bags on the balcony or outside - this will rid the soil of weeds and pests.
Soil for seedlings
Step 2. Around January, bring the soil home, sift through a large sieve, removing sticks, pebbles and other debris - the soil should become light and clean. Spill it with water and put it out in the cold again. After a few days, bring it in and let it thaw again.
The soil for seedlings must be cleared of debris.
On a note! Freezing does not always protect against infections, which is why some summer residents advise additionally steaming the soil. To do this, soak it in a water bath for 2-3 hours.
Step 3. Now prepare the soil mixture - mix the soil with peat and humus in a ratio of 1:1:1, lightly moisten and add coarse sand, superphosphate and ash (based on a bucket of soil - a liter of sand and a tablespoon of ash and superphosphate). If you use ready-made soil from the store, then additional fertilizer is not required.
Preparation of soil mixture
Step 4: Disinfect the seedling boxes by at least rinsing them thoroughly under running water. Containers should not be less than 7 cm in height.
Container for seedlings
Step 5. Fill the boxes or cups for the seedlings with soil, water them and let them sit for a couple of weeks.
The container is filled with soil
Step 6. Start preparing the seeds. Dilute a little Fitosporin-M and place the seeds in the resulting solution for 15-20 minutes, and then soak in any growth stimulant.
Seeds need to be prepared
"Fitosporin-M"
Prices for Fitosporin-M
phytosporin
Step 7. Make small grooves about 1.5 cm deep in the pre-moistened soil and place the seeds in them at a short distance from each other. Sprinkle with soil and cover with plastic wrap immediately or 3-5 days after planting the seeds.
You need to make small grooves in the moist soil
On a note! Tomato seeds are sown around February-March, although this largely depends on the specific variety. However, these are the approximate dates.
Step 8. Place the boxes with the sown seeds in a warm room where the air temperature does not drop below +22 degrees.
Containers for seedlings on the windowsill
Step 9. After the first shoots appear, slightly reduce the air temperature in the room with the seedlings, but maintain at least +18 degrees during the day.
Tomato shoots
Step 10. Do not forget that the plants must breathe - open the film slightly, and eventually remove it altogether.
Step 11. Water the seedlings with warm water, gently under the roots (it is especially important to be careful while the plants are still very tiny).
Watering seedlings
Prices for tomato seeds of different varieties
tomato seeds
Preparing a greenhouse for planting tomatoes
Before moving tomatoes, you need to properly prepare the greenhouse. I will introduce you to the techniques that I use personally.
How to prepare the soil for planting tomatoes
Traditionally, I replace greenhouse soil once every five years. During this time, it manages to be completely depleted, even if you regularly applied fertilizers.
First thing in the fall, I disinfect the greenhouse substrate using improvised means:
- A solution (1%) of Bordeaux mixture.
- Suspension (1%) of copper sulfate.
- Dolomite flour (50 g per 1 m2).
Then I proceed to the actual preparation of the land:
- I arrange the lower insulating layer - first a 10-centimeter layer of sawdust, dry pine needles or straw. On top is another 10-centimeter layer of rotted compost.
- I fill the insulating bedding with garden soil - it turns out to be a raised ridge 30-40 cm high.
- If the ground is turf, fertilizers are applied during digging (per 1 m2): 3 tbsp. spoons of superphosphate in granules, 1 tbsp. spoon of potassium magnesia, 1 tbsp. spoon of potassium sulfate, 2 tbsp. spoons of ash, 1 teaspoon of urea (replacement - sodium nitrate).
- If the soil is clayey or loamy, an additional bucket (per 1 m2) of peat, humus and crushed sawdust is required.
- If the substrate is peat, additionally add (per 1 m2) 1 bucket of turf, humus, wood shavings or sawdust, and ½ bucket of coarse sand.
After such preparation, the greenhouse is completely ready for the spring transfer of seedlings.
Temperature
Tomatoes can be transplanted into a greenhouse when the temperature is set:
- Priming. Not lower than 13 C at a 10-centimeter depth.
- Air. 20-25 C.
If your greenhouse is heated, these conditions can be created artificially at any time - plant seedlings in early spring and eat fresh tomatoes until late autumn.
Preparing the landing site
Tomato seedlings begin to be grown long before planting in the ground. The soil in greenhouses should also be prepared in advance.
Warming up the soil
For the successful growth of heat-loving plants, not only air temperature, but also soil temperature is important . They absolutely cannot be planted in cold soil. In the best case, the seedlings will get sick and do not take root well in the new place; in the worst case, they will simply die. Therefore, before planting tomatoes in the greenhouse, the soil needs to be warmed up. In a heated greenhouse, this is not a problem, as is the case when planting is done at the end of May - June, since by this time the earth warms up on its own. But what if you want to get an early harvest? The instructions below will help you solve this problem:
- Make sure that all the windows in the greenhouse are closed and there are no gaps from torn film or cracked glass anywhere. If necessary, correct any problems.
- Cover the glass or polyethylene greenhouse with an additional layer of transparent film.
- Dig up or loosen the soil inside, then spread black film on top. The soil underneath will warm up faster, since the black color attracts the sun's rays.
Black polyethylene film
- Close the doors tightly.
Of course, you can put a heater inside, but this is done only if you live permanently on the site. After a few days, you can check the soil temperature using a regular household or special thermometer. Planting tomatoes in a greenhouse is allowed at temperatures above +10 degrees. It’s even better to wait until the earth warms up to +15 degrees.
In the photo - a device for measuring temperature and soil moisture
Making beds
The beds in the greenhouse are made about a week before the tomatoes are planted. Their device consists of creating embankments 30-40 cm high from fertile soil mixed with humus. The ridges are made 60-80 cm wide by raking soil from the row spacing. In this case, the width of the passage between the beds must be at least 60 cm. Seedlings will subsequently be planted in one row on each such bed.
Advice. If the greenhouse is small, single-row planting is too wasteful. In such cases, it is better to arrange high beds by making sides from boards with your own hands. Their width should allow plants to be planted in two rows with a distance between them of about half a meter.
Convenient layout for narrow greenhouses - single-row beds along the walls and a double-row in the center
How to plant tomato seedlings in a greenhouse step by step
I will present popular schemes for planting tomato seedlings:
- Low-growing and early-ripening, developing into 2-3 stems. Checkerboard arrangement: between rows - 50-55 cm, between plants in one line - 35-40 cm.
- Determinate, standard. Between rows - 40-45 cm, between bushes of the same row - 20 cm.
- Gigantic. They are planted staggered according to the following pattern: between rows - 75-80 cm, between tomatoes of the same row - 55-60 cm.
I plan the transplant itself on a cool, cloudy day. I will present simple step-by-step instructions:
- I make holes 40 cm deep.
- I pour a warm (50-60 C) suspension of potassium permanganate. For 10 liters of water - 1 g of potassium permanganate. One well requires 1-1.5 liters of solution. An alternative is disinfection with Zaslon. You need 250 g of product per 10 liters of water. Consumption per well is 0.5 liters of solution.
- I plant the seedlings with a ball of earth directly into the soil, liquefied by irrigation. If tomatoes were grown in peat cups, I do not remove them.
- I plant low-growing plants straight, overgrown plants at a slight angle.
- I place the tomatoes with already formed inflorescences towards the greenhouse aisle so that they are not shaded by their neighbors.
- I cover each seedling with loose soil and compact it with my palms.
- Finally, you need to add mulch - last year's compost, straw, sawdust, mowed and dried grass.
Some gardeners leave a small hole near each tomato - this is convenient for economical root feeding.
Step-by-step instructions for landing
The process of planting tomato seedlings in a greenhouse is simple and not labor-intensive, but it must be carried out according to the rules and recommendations so that the plants grow and develop well, and in the future they can produce an excellent and high-quality harvest.
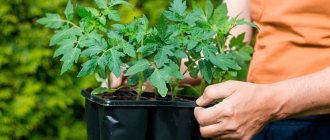
Before planting, the seedlings are prepared: 2-3 days before moving to the greenhouse, 2-3 lower leaves are removed. They should not be cut off at the stem itself, but small stumps should be left. This must be done in order to minimize the risk of developing diseases in the future.
Not overgrown seedlings
Tomato plants that are approximately 1.5 months old are excellent for planting in a polycarbonate greenhouse. They should be strong, with thick stems and 8-12 true dark green leaves and well-developed roots. The height of tomato plants should be approximately 30-35 cm, no more.
The sequence of actions when planting normal, not overgrown, tomato seedlings:
- To make the process of removing tomatoes from planting containers easier, the plants are well watered shortly before planting.
- Wells are prepared for seedlings, which are placed according to the selected pattern depending on the type of tomato (determinate or indeterminate).
- When planting, fertilizers (mineral or organic) are not applied if they were added during soil preparation.
- Water each hole well, and then plant one tomato in it strictly vertically.
- Planting tomatoes must be done carefully so as not to destroy the lump of earth in which the roots are located and not to accidentally break the stem.
- Each tomato plant is planted in prepared holes and buried 3 cm above the earthen coma. After some time, additional roots will grow on some of the stems located underground, which will only enhance the nutritional capacity of the tomatoes.
- The planting density of tomato seedlings is maintained as required for the selected variety.
- After placing all the plants in the holes, the seedlings are sprinkled with soil, which is compacted a little so that the roots of the seedlings are in better contact with the soil.
- For the first couple of days they are shaded so that they do not suffer from the sun. The material used for shading is then removed.
A week or two after planting tomato seedlings in the greenhouse, the ground around them must be mulched with straw or hay in a small layer of approximately 3-5 cm, so that the moisture is retained in the soil as long as possible and evaporates less. This allows you to reduce the frequency of watering and thus reduce the air humidity inside the polycarbonate greenhouse. This will help avoid the risk of developing late blight, which especially often appears on plants under conditions of high humidity and sudden temperature changes.
Stretched or overgrown seedlings
If it so happens that it was not possible to plant tomatoes in a polycarbonate greenhouse on time, and they stretched out, then such seedlings need to be planted a little differently.
Stretched or overgrown tomato plants are planted as follows:
- In greenhouse beds, make a groove about 5-7 cm deep along the entire length.
- Distribute the seedlings reclining across the bed to outline their location.
- If the tomatoes were grown in a pot, then the earthen ball is quite voluminous and in order not to squeeze the stem at the base of the seedlings, make an additional depression in the groove so that the earthen ball with roots fits there.
- Watering is carried out with warm water separated from chlorine at the rate of 3-4 liters per 1 plant.
- When the water is absorbed into the additional depression, an earthen ball with roots is placed in it, and the plant is placed lying at an angle of approximately 30°.
- The part of the stem on which the leaves were torn off is covered with soil.
- There is no need to tie up the tomato right away, as you can break the stem; it will gradually tend to the top.
Thus, it is possible to plant even very long tomatoes that have become very outgrown or stretched out.
When planting overgrown tomato seedlings, ensure compliance with the pattern and density of plant placement. After all the tomatoes have taken root, mulch the soil around them.
Caring for tomatoes after planting
After transplanting, I don’t touch the tomatoes for 5-6 days - I give them time to adapt to unusual conditions. After a week, I carefully loosen the soil around each bush to improve air access to the roots. Then you can begin periodic care.
How to properly water tomatoes in a greenhouse
I want to talk in detail about the features of watering tomatoes:
- This crop requires relatively moderate but frequent watering.
- After each watering, loosening and ventilation are required.
- For water procedures, use water heated under the sun. Pour it into buckets, barrels in the morning, and use it already warm for evening watering.
- It is best to water the plants manually using a hose (at low pressure) or a watering can.
- Tomatoes are watered only at the root. Even the smallest drops of water falling on the leaves can cause sunburn.
Let me present a schedule of water treatments:
- After transplantation, do not water the seedlings for 7-10 days. Otherwise, the development of the root system will be inhibited, and the green part will stretch out.
- Before the fruit starts to set, plants need frequent and abundant watering - once every 5-6 days. One bush needs at least 4-5 liters of water in one sitting. The soil should be well moistened to a depth of 15-20 cm.
- When the first tomatoes appear, watering is increased to once every 3-4 days. However, water consumption is reduced - 3-4 liters per bush is enough.
The fact that the plant is suffering from thirst can be easily understood by the curled upper leaves. And if there is an excess of moisture, even young tomatoes begin to burst.
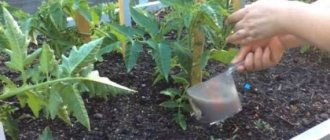
How to fertilize tomatoes in a greenhouse
Greenhouse tomatoes need 3-4 feedings during the summer season. I traditionally follow this schedule:
- 3 weeks after transplant. For 10 liters of water – 1 tbsp. a spoonful of nitrophoska, 0.5 liters of liquid cow manure. For each bush - 1 liter of solution.
- After 10 days. For 10 liters of water – 1 tbsp. spoon of superphosphate, 1 teaspoon of potassium sulfate. Approximate consumption: ½ bucket of suspension – per 1 m2.
- In 2 weeks. For 10 liters of water - 2 tbsp. spoons of ash, 1 tbsp. spoon of superphosphate. Consumption – 6-8 liters of fertilizer per 1 m2.
- When tomatoes begin to ripen. For 10 liters of water - 2 tbsp. spoons of superphosphate, 1 tbsp. spoon of potassium humate. Approximate consumption is ½ bucket of mixture per 1 m2.
Such complex fertilizing is sufficient for the harmonious development of the plant.
fertilizer for feeding tomatoes
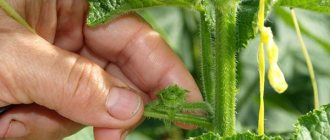
How to grow tomatoes in a greenhouse
As a rule, I carry out the first stepsoning before the seedlings are moved or in the first days after transplantation. I always leave a 2-3 cm “stump” in place of each stepson. This is necessary so that a new process does not begin to develop in its place.
I will present to you the most important rules for growing greenhouse tomatoes:
- Pinch the shoots with your nails and disinfect your hands after each contact with plants to avoid becoming a carrier of infections.
- Plan the procedure in the morning - at this time the stems break off more easily.
- The frequency of stepsoning is 1 time per week.
- After the tomatoes are filled, do not forget to pluck all the lower branches. This is necessary to improve air circulation and prevent fruit rotting.
If you have few seedlings, do not throw away the shoots. Dip their torn ends into water - after a few days the strongest specimens will take root. They can also be planted in a greenhouse and wait for a small harvest.
Ventilation of tomatoes
Gardeners who plant tomatoes in a greenhouse sometimes forget about an important matter - ventilation. The procedure is needed after each watering of the plant. Tomatoes do not tolerate high air humidity. In such unfavorable conditions, the risk of late blight and other fungal infections increases.
I stick to the following temperature regime:
- Initial period of development: day – 20-25 C, night – 16-18 C.
- Formation, ripening of fruits: day – 24-25 C, night – 17-18 C.
The air humidity level should remain stably within 60-65%. Ventilation is especially important when tomatoes are flowering. If condensation forms, the tomatoes will grow tasteless, sour and watery.
How to tie up tomatoes in a greenhouse
When planting seedlings, do not forget to install supports - trellises or pegs - next to each bush. If there are few plants, the latter will be more convenient - use wooden slats, iron rods, and scraps of thin plastic pipes. The peg should be 20-25 cm higher than the plant. For stability, it is driven into the ground at approximately the same distance. The support is installed near the stem, gartering is carried out as necessary.
If you grow tall tomatoes, it is best to install permanent trellises. This will also save space in the greenhouse: it will be possible to plant 3-4 plants per 1 m2. Strong stakes up to 2 m high are driven in between rows. Wire or strong rope is pulled between them every 35-40 cm. Growing tomatoes are passed between the supports, forming a kind of “braid”.
garter pins
Planting tomatoes
It would seem that it could be simpler: I made a hole, watered it with water, installed a bush in it and covered it with earth. However, something as simple as planting tomato seedlings in a greenhouse has its own tricks and nuances that will help you get an excellent result.
Preparing seedlings for transplantation
All gardeners know that the best age of seedlings for transplanting into the ground is 50 days. By this time, the plants have formed a good root system, and the first flower buds may even appear on them. What needs to be done to ensure that they tolerate the transplant normally? Let's give some tips:
- When growing on your own, seedlings must be hardened by taking them out for a short time during the day to a glassed-in balcony or ventilating the room.
- About a week before the tomatoes are planted in the greenhouse, they need to be sprayed with a solution of boric acid - one gram per liter of water. This treatment will preserve the buds and increase yield.
- The day before planting, remove cotyledon leaves from the plants, as well as those that have turned yellow and show signs of disease (see Tomato diseases: their varieties and how to deal with them). This is done so that the leaves do not remain underground, and the breakage points on the stem have time to dry out.
Removing the lower leaves
Attention! If the seedlings have overgrown or stretched out, remove the lower branches. Such plants are planted deeper and may end up in the ground.
- 20-30 minutes before planting, the seedlings need to be watered very generously.
If you do not have the opportunity to grow seedlings at home, you should buy them from trusted gardeners or nurseries.
Drop-off
Planting tomatoes in a greenhouse begins with preparing the holes. They are made in compliance with the following rules:
- The distance between the holes should be at least 50-60 cm so that as the plants grow they do not interfere with each other.
- The depth of the hole is 20-25 cm, no more, especially if planting is done in early spring. At greater depths, the soil may still be cold.
- Potassium, phosphorus and nitrogen fertilizers should be added to each hole (see Feeding tomatoes in a greenhouse, what fertilizers and when to use). They are dissolved in water, strictly following the instructions on the package, and poured generously into the soil.
Note! You should not add fresh manure to the ground before planting, as many gardeners usually do. Excess nitrogen will lead to the fact that instead of tomatoes you will get an excellent harvest of tops.
When the holes are ready, the seedlings are carefully removed from the seedling boxes or cups and placed not vertically, but slightly at an angle to the surface of the bed, and the roots are sprinkled with soil. Then water it again, fill the hole completely and lightly compact the soil around it.
In a couple of days the seedling will rise on its own
How to properly plant tomatoes in a greenhouse if the seedlings are too elongated or overgrown? In this case, not holes are made, but furrows are made at the top of the beds. Plants are placed almost horizontally in them, so that most of the stem is covered with soil. This method is doubly effective, since it allows the seedlings not to be buried in the soil, and new roots are formed on the buried stem, feeding the plant.
Newly formed roots
All this needs to be done in the evening or on a cloudy day, since excessive solar activity does not contribute to good survival of seedlings. It remains to be said that before planting tomatoes in the greenhouse, you need to prepare pegs for gartering them. They are installed next to each plant immediately during planting. If you do this later, you may damage the roots.
What difficulties may arise when growing tomatoes in a greenhouse?
Greenhouse tomatoes are sometimes overcome by illnesses and enemies. But both pests and diseases can be successfully resisted using preventive, “therapeutic” methods.
Pest control on tomatoes
Let me introduce you to the most harmful enemies of greenhouse tomatoes:
- Wireworms. To prevent the spread of pests, about a week before moving the tomatoes, build simple traps: make holes around the perimeter, into which you place and bury a “kebab” on a stick - pieces of raw vegetables. After a few days, check the bait and destroy the pests. Wireworms can be found and collected manually by deep digging of the soil. Prevention of pest occurrence - liming, application of mineral fertilizers. When the disease is prevalent, use the insecticide “Bazudin” - according to the instructions, mix the powder with the soil.
- Medvedka. Pest eggs can enter the greenhouse when the soil is replaced. At the initial stages, it can be effectively resisted with folk remedies: infusion of red pepper (150 g per 10 liters of water), vinegar water (2-3 tablespoons per 10 liters) - approximately 0.5 liters of liquid are poured into the pest's burrows. If the problem is serious, turn to insecticides - “Thunder”, “Medvetox”, “Grizzly”.
- Whitefly. Before the tomatoes begin to bloom, the butterfly is effectively combated with Sochva liquid smoke. If the whitefly has completely flooded the greenhouse, spray with a “Phosbecid” suspension - 10 ml per 10 liters of water. Treatment is done before or after sunset. To consolidate the result, spraying is repeated twice more with a break of 15-20 days.
- Caterpillars and cutworm butterflies. Traps - jars of fermenting kvass - are effective against flying specimens. The drink is diluted with water (1:3), a little yeast is added. The caterpillars are collected by hand, and the tomatoes are treated against them with an infusion of wormwood or potato tops. Of the special preparations, “Fitoverm” and “Agravertin” are effective.
I advise you to periodically inspect your plantings for pests. It is easier to destroy them in the initial stages with folk remedies than to use harmful insecticides.
fighting whiteflies in the garden
scoop butterfly
fighting mole crickets in the garden
Prevention of tomato diseases in the greenhouse
Let me introduce the common diseases of greenhouse tomatoes:
- Fomoz (brown rot). Diseases are countered by disinfecting the substrate before planting and avoiding fresh manure and nitrogen fertilizers. Infected stems and fruits are promptly picked off and destroyed. Plants are treated with “Barrier” or “Fundazol”.
- Gray rot. Prevention of the problem is to adhere to the watering schedule. If the disease has made itself felt, the tomatoes are fed with calcium nitrate - 40-50 g per 5 liters of water. You can add phosphorus-potassium fertilizer or a folk remedy - ash solution (250 g of ash per 10 liters of water).
- Apex rot. Prevention of disease - compliance with the correct temperature regime, watering schedule, timely application of calcium supplements.
- Fusarium. You can prevent the disease by carefully handling the seedlings (the disease develops when the roots are damaged), watering with preheated water, and warming up the greenhouse soil before moving the seedlings.
- Mosaic. It is better to dig up and destroy diseased bushes - if they are infected with the virus, they will no longer be productive. Disease prevention is to disinfect seeds before sowing in a 1% manganese solution. They also disinfect seedlings as they grow - 2-3 times with a break of 3 weeks. 1 g of potassium permanganate is diluted in 10 liters of water and used for irrigation.
rot on tomatoes in a greenhouse
Now you know inside and out how to grow healthy and productive tomatoes in a greenhouse. The very first important stage is propagation of seedlings. Don’t forget about preparing the greenhouse for moving seedlings and preventing diseases and pests. Remember that royal harvests are produced only by plants that are well cared for - watered on time and efficiently, fed, tied up and planted.
Greenhouse or greenhouse
Many people confuse the concepts of “greenhouse” and “greenhouse”. Their main difference is that in a greenhouse the conditions for good plant growth are created artificially.
Heaters are installed in them and the humidity level is regulated. In a greenhouse, everything happens naturally, without human intervention.
Top dressing
Seedlings are fed with special fertilizers immediately after the first leaves appear and 4-5 days before transplanting into a greenhouse.
If the plants have been picked, they are additionally fertilized immediately after the procedure and 2 weeks after that.
Immediately after planting in the greenhouse, the tomatoes are watered generously and left alone until the next watering is required, but not earlier than 3 days later.
Choosing a tomato variety
It is impossible to name any varieties that will be the best for growing in a greenhouse: each person has his own requirements. Some tomatoes of the Primadonna variety seem magnificent, others criticize them for the insufficient size of the fruit. Someone is growing the Bull's Heart variety, but it is difficult to sell and the entrepreneur will not mess with it. Therefore, the choice of a specific variety remains with the gardener.
It is desirable that the variety has the following qualities:
- High resistance to diseases. In a greenhouse, it is not always possible to control the humidity level, and if it is high, late blight will not be long in coming and will destroy most of the crop.
- High temperature resistance. Even in an unheated greenhouse, the temperature in summer can rise to 40 °C, and many varieties of tomatoes lose the ability to form ovaries after 30-35 °C.
- Resistance to light deficiency. The currently popular polycarbonate greenhouses absorb 13% of ultraviolet radiation, glass ones - 7%. For tomatoes, these losses are sensitive.
It is good if the selected variety is zoned for the growing region and is intended for indoor soil. This information can be found on the packaging.
To find out for yourself which tomato varieties are best to plant in a greenhouse, you need to take 10-15 species, grow them and compare the actual performance at the end of the season.
Types of polycarbonate greenhouses for tomatoes
The dimensions of the greenhouse are selected based on needs and capabilities. Most often, tomato bushes are planted according to a 50 x 50 cm pattern. From here you can calculate the required dimensions. Typically, three ridges are made in a greenhouse, two at the edges and one in the middle. The width of the bed is 60 cm, and the width of the passage between them is 70 cm. The height of the greenhouse is best made from 2.5 to 3 m. Its length depends on how many plants you will plant.
Before building a greenhouse, choose its location. It is best to place it on a hill so that water does not accumulate inside after snow or rain. There should be no trees nearby that could shade the greenhouse.
Then choose the type of greenhouse: will it be permanent or collapsible? For a permanent one, you will have to make a foundation. For small ones, which are covered with polyethylene, the foundation is made of strip timber. In winter, a concrete monolithic foundation is required, since glass is already used as a covering.
The frame can be made of metal profiles or wood. In the latter case, the tree must be impregnated with antiseptics against rotting and parasites. Depending on the frame, the coating is also selected. Summer greenhouses with a wooden frame are most often covered with film. Nowadays, polycarbonate has become a common material, for which a frame is made from pipes.
For low-growing varieties of tomatoes, small greenhouses with parameters suitable in the greenhouse category are suitable.
In general, there are many different types of greenhouses. They differ in appearance and type of manufacture.
You can make a greenhouse yourself or purchase a ready-made one. How to make it yourself from polycarbonate and drawings you will find here
Seedlings for the greenhouse
Tomatoes have a long growing season, and therefore in Russian conditions it is better to grow them using seedlings. If you continue planting indoors, you can get the harvest a month earlier, and this is a significant difference.
Preparing seeds for sowing
If the seeds have not been prepared before sale (this is noticeable by the unusual color of the seed), you need to do a little work. The standard list of activities is the same as when growing seedlings for open ground, but there is a little trick: you can speed up germination by bubbling.
At home it can be done according to the following scheme:
- Prepare a solution: 5% vermicompost and 0.5% molasses for 500 ml of water.
- Place tomato seeds in a gauze bag and immerse in the solution.
- Using an aquarium compressor, supply air to the liquid throughout the day.
This treatment destroys pathogenic bacteria on the surface of the seeds and initiates germination processes in them. As a result, there will be more friendly shoots, and the plants will become less sick.
The nuances of growing seedlings
It’s good if there are a lot of seeds, then you can sow the tomato densely, and after germination, remove unnecessary specimens: weak and overly elongated. As a result, young, strong bushes remain with the prospect of high yields.
You can pick tomatoes when one true leaf appears. Some gardeners place the plant not in containers, but in sewn bags made of agrofibre, designed for 1 liter of soil mixture. They are placed in trays so that water can be supplied to the plants from below. This method allows you to maintain the desired level of soil moisture, and therefore the plants feel better.
Seedlings may suffer from phosphorus deficiency. Visually it looks like this: the cotyledon leaves are directed upward at an acute angle, and the real leaves are pressed against each other. The problem is solved by feeding with preparations containing phosphorus. Yellowing of seedlings may indicate a chemical burn. It occurs when mineral fertilizers touch the roots.
It is important to do hardening - it increases the yield by about a third. To do this, a week before planting in the greenhouse, the seedlings are taken outside. First, it is protected from the sun, then the protection is removed. Under the influence of ultraviolet radiation, chlorophyll begins to be produced, due to which the plants become strong, the stem and leaves acquire a pleasant green color.
You can read more about growing tomato seedlings in this article.
Varieties and types of tomatoes for the greenhouse
What kind of tomatoes should I plant? You need to know that all varieties of culture are divided into two types: determinant and indeterminate.
The first includes tomatoes that grow to a certain size. This species is great for small greenhouses. The second category includes tomatoes, the growth of the main stem of which is not limited.
Let's look at the varieties of determinate tomatoes and determine which ones are best grown in a greenhouse:
- “Spring of the North” and “Doll” - sweet and large tomatoes, pink variety. They have dense flesh and tolerate transportation well. Not sensitive to diseases, adapt to adverse weather conditions.
- "Openwork". It reaches a height of 60-90 cm. It has a slightly flattened shape. The fruit is fleshy, with a dense skin. It is characterized by high yield and high taste, which is why the variety is so popular among gardeners. Disadvantages include difficulties in caring for the plant and a high need for special fertilizers.
- "Bourgeois." It tolerates lack of moisture well and has a high tolerance to fungal diseases and insects. Disadvantages include fragility of branches and low yield.
For indeterminate varieties, the following should be distinguished:
- "Abakan pink" - beautiful and sugary fruits. Among the advantages, early ripeness should be especially highlighted.
- “Watercolor” - elongated vegetables. Excellent for homemade preparations, they are unpretentious in nature. The weight of one tomato can reach 120 g.
- “Balcony Miracle” has a rich red color. It is valued not only among gardeners, but also among lovers of beautiful garden decorations.
- “King Orange” has a loose structure and ripens quickly in a greenhouse.
- "Bull's heart" is one of the most famous species. It has large red-pink fruits.
Methods of growing tomatoes
There are different ways to grow tomatoes - hydroponically, directly in the ground, in bags. On farms in the USSR, cultivation on straw bales and in ring crops was widely used. These methods deserve more detailed consideration.
Tomatoes on straw bales
Specially prepared compressed straw is an excellent place for growing tomatoes. Here the temperature required for the roots is constantly maintained, humidity is maintained, and the plants suffer less from rot. The disadvantages include the labor-intensive process and difficulty in finding material in some regions.
The soil is prepared in advance, humus and turf soil are mixed in equal proportions. The landing site is prepared as follows:
- The soil at the locations of the beds is disinfected with a weak solution of manganese or a plastic film is laid over the entire area.
- The bales can be stacked close to each other.
- Spill them with hot water.
- Sprinkle with mineral fertilizers (per 100 kg of straw): 1 kg of potassium nitrate and superphosphate, 0.5 kg of potassium sulfate, 1.3 kg of urea.
- Again, pour hot water over the entire surface.
- Spread 1 kg of lime per 100 kg of straw.
- Spray with water again.
After a week and a half, the temperature inside the bale will be approximately 35-38°C. Now you can make a small depression in the center, fill it with a mixture prepared in advance, with a layer of about 10 cm. The bed for growing tomatoes in a greenhouse is ready. It can also be used in unheated greenhouses.
According to the authors of the technology, the harvest in such conditions is obtained a week earlier and more abundant.
Tomatoes in ring culture
This method is based on the use of vessels without a bottom. These can be either specially purchased containers or bags made of polyethylene or agrofibre. Their diameter and height should be about 30 cm.
The soil mixture is prepared according to general principles, poured into rings (bags or pots) and compacted a little so that the mixture does not spill out. A depression is made in the center, where tomato seedlings are planted at the age of 30 days. Place the rings close to each other on a layer of crushed stone, slag or coarse sand.
Water the tomatoes by supplying water to the lower part of the vessels, in the area of the litter. With this agricultural technology, the lower roots provide the plant with water, while the upper roots supply more oxygen. With regular feeding, the plant develops well, and large yields can be obtained.
According to some data, when growing tomatoes in a greenhouse using the ring method, it is possible to obtain about 25 kg of fruit per square meter of beds.