Proper preservation of a greenhouse for the winter is the key to its long service life and good harvests. What and when should be done with this building so that it does not turn into a breeding ground for diseases and does not fall apart ahead of time?
First, you need to understand that you have to maintain the greenhouse every year, and it doesn’t matter what model you have. Both wooden, film-coated, and polycarbonate and heated greenhouses expect similar work from you, which you should not skip.
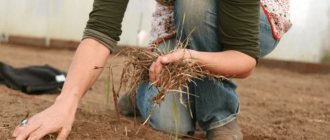
Before you begin seasonal cleaning of the greenhouse, remove all plant debris from the greenhouse. At low temperatures, plants will still not produce new flowers and ovaries, but they will interfere with you. In addition, repair everything that was assembled, remove supports, bush holders and laid paths or bed limiters.
Rinse and dry the irrigation system
When water freezes, it can break pipes and connections, which means that the irrigation system, if you have one, needs to be dried out for the winter. However, before you start blowing out the pipes, clean and disinfect them. This can be done using a solution of orthophosphoric acid or the drug Pekacid and its analogues. Fill the system with it and leave for 2-3 hours, then rinse with strong pressure with clean water and dry.
If there are barrels of water in the greenhouse in the summer, empty them and disinfect them with a similar product, and leave them empty for the winter. It is also advisable to remove and remove drip tapes from drip irrigation systems.
Prevention for structures
Before starting cleaning activities, the greenhouse must be disassembled, if the design allows. When assembled, poor quality processing is possible. Then you should wash all components of the greenhouse - frame, covering, fastenings.
Building elements made of polycarbonate, plastic, glass, as well as film material are washed with a soap solution. To carry out preventive disinfection, it will be enough to use a strong soap solution (a piece of laundry soap per 10 liters of water).
When processing, the characteristics of the material should be taken into account:
- Do not use a stiff brush or burlap cloth on polycarbonate surfaces. It is better to use pieces of soft fabric or a sponge.
- The film covering must be removed for the winter, otherwise by spring it will become unusable. Wash, dry and roll up to store until spring.
- Wash the metal frame, dry thoroughly with a piece of cloth and paint.
- The wooden reinforcement is whitewashed with slaked lime.
Advice!
With the arrival of frost, it is recommended to open the windows and doors in the greenhouse to reduce the load on the roof from snow, as well as to prevent the formation of icing on the surfaces of the structure, which occurs due to temperature differences.
Change or disinfect the soil
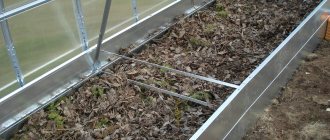
The soil in the greenhouse is actively exploited, accumulating the remains of fungicides, insecticides, fertilizers and salts. Because of this, within a few years it becomes unsuitable for growing plants and turns into a breeding ground for diseases and pests. The best solution would be to change the soil every 2-3 years. It is necessary to remove a layer 25-30 cm thick (on the bayonet of a shovel), and before this you need to remove the mulch, if any.
If it is impossible to replace the greenhouse soil, it will have to be revived. To begin, disinfect the soil with biological products that, in addition to suppressing microorganisms, heal the soil, for example, Fitosporin-M, Fitocid®-r, Baikal EM-5, Baktofit, Trichoderma Veride 471, etc. They are introduced into the ground two weeks before autumn frosts to a depth of 5-10 cm. In the spring, the treatment can be repeated. Then add 40-50 kg of compost or rotted manure to each square meter and carry out a deep two-level digging. Then water the soil with preparations that accelerate the decomposition and humification of plant residues.
For those who are not afraid to put in extra effort, building warm compost beds in the greenhouse is a good option. To do this, a layer of fresh manure 15-25 cm thick is added to the dug trenches, a layer of plant residues 25-30 cm thick is added on top, and at the end 20 cm of soil or ready-made compost is added. During the fall and early spring, the contents of the trenches will begin to decompose, and in the spring you will receive a ready-made warm ridge with fertile soil.
- Do-it-yourself warm beds - step-by-step instructions with video
Detailed and visual recommendations for creating warm beds in your garden.
If you cleared the greenhouse from planting at the beginning of September, you can improve the soil in it with the help of green manure. Plant oilseed radish, oats, mustard or other fast-growing, cold-resistant green manure, and just before the cold weather, mow the green mass and incorporate it into the soil.
- What green manures can be sown in the fall after harvesting?
We'll tell you how to improve the soil by planting green manure plants in the fall.
Why is it necessary to disinfect after tomatoes and cucumbers?
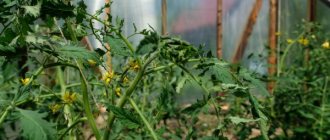
Due to lack of space, I have to combine planting cucumbers and tomatoes in the greenhouse. Since these two crops require completely different conditions, it is not always possible to meet the care needs of both plants. Because of this, tomatoes and cucumbers often get sick.
The most common diseases are late blight and powdery mildew. Both diseases are fungal in nature, spread quickly and are very dangerous, as they are difficult to treat and destroy most of the crop. Fungal spores can persist in a greenhouse for several seasons.
Frequent guests of pests are:
- green aphid;
- spider mite;
- onion thrips;
- whitefly;
- nematode.
Pests and their larvae hide in secluded corners - joints, crevices, top layer of soil. Many of them survive the winter safely, and in the spring they attack newly planted seedlings. I disinfect the greenhouse as soon as the entire crop is harvested and the beds are cleared of tops. I wash and disinfect the frame and polycarbonate covering, and treat the soil.
Fertilize
It is worth adding not only organic matter to the soil in the fall, but also complex mineral fertilizers. If your greenhouse remains covered all year round and is not exposed to rain and snow, you can apply potash and phosphorus fertilizers as early as September-October. They will gradually dissolve in moist soil, but will not be washed out of it and will be available to plants in the spring. On average, 40-60 g of superphosphate and 25-30 g of potassium salt or potassium sulfate are added per 1 sq.m of soil.
- What fertilizers to apply in the fall - types and dosage
Is it necessary to fertilize the soil with the onset of autumn and after the end of fruiting of country crops? Find out now!
Characteristics of polycarbonate coating
Greenhouse structures made of polycarbonate have gained popularity and are widely used in gardens and summer cottages. Currently, greenhouses made of polycarbonate are considered the best for growing early crops. They are characterized by the following advantages:
- They retain heat well and transmit light.
- The uniqueness of polycarbonate lies in its ability to scatter and repeatedly reflect sunlight in different directions.
- Thanks to the scattered rays, plantings in such greenhouses receive more light than in glass ones, in which the rays are not refracted and do not change their directions.
- The outer side of the polycarbonate is covered with a film that protects against harmful ultraviolet radiation.
- The material is very durable, resistant to adverse weather conditions and mechanical shocks.
Interesting!
The coating has very few disadvantages. Polycarbonate is susceptible to scratches and abrasions, due to which its light transmittance is lost. Due to changes in air temperature, the material contracts or expands, which complicates the installation of the structure.
Wash and disinfect frame and walls
To get rid of fungi, bacteria and wintering pests, the walls of the greenhouse must be thoroughly washed with a soapy solution, both inside and outside. It is worth adding copper or iron sulfate to the solution to make it even more effective.
Then you need to close the greenhouse and light a sulfur bomb inside, placed on a brick or other flat, hard, non-flammable surface. Although the bomb burns for several hours, you cannot enter the greenhouse for three days, so as not to inhale sulfur dioxide. After using the checker, the greenhouse must be thoroughly ventilated, washed again to remove soot, and then add preparations that help restore soil fertility (for example, Baikal EM1, Biocomplex BTU Soil Improver, etc.), because As a result of fumigation, many beneficial fungi and bacteria die along with diseases.
In greenhouses, the frame of which is made of unpainted metal profiles, sulfur bombs cannot be used, because this will lead to corrosion.
Wooden frame parts should be sprayed or painted with a 3% solution of copper or iron sulfate to protect them from rotting and pathogenic fungi. Particularly carefully, with the same solution, it is worth treating joints, crevices, cracks and other secluded places where pests willingly settle down for the winter.
Autumn processing of greenhouse beds
You need to start by cleaning the beds. In a greenhouse in the fall, the soil is cleared of plant residues. If there are even small fragments of tomato tops or roots, they need to be removed. Otherwise, they can cause infections in plants. Therefore, your task is to remove everything, even the mulch. The greenhouse is also freed from pins and supports. In the case of a film construction, you need to remove the film, which is washed, dried and folded for storage.
It is not recommended to put plant remains in compost, because in such conditions bacteria and pests can multiply in the area.
Ventilate the greenhouse
After disinfection, the greenhouse must be ventilated by opening the doors and vents wide. To prevent moisture from stagnating inside, it is advisable to leave the door open throughout the winter, and to prevent the frame from becoming warped, it can be removed completely.
You can completely remove the polycarbonate from the greenhouse and put it in a dry place for the winter.
By the way, some gardeners dismantle the ends of polycarbonate greenhouses for the cold season, and put them back together at the end of February or beginning of March, i.e. 3-4 weeks before the start of work in the greenhouse.
Why do you need to prepare a greenhouse for winter?
After harvesting, it is necessary not only to remove plant debris from the greenhouse, but also to carry out other measures. Before we tell you how to prepare a polycarbonate greenhouse with a double arc for winter, let's look at why this is necessary:
- The microclimate inside the greenhouse is favorable not only for plants, but also for pathogens that can remain in the soil from diseased plantings. To prevent infection of plants planted in spring, autumn treatment is carried out.
- Not only the soil can carry infections, but also the elements of the structure, on the surface of which pathogenic spores can continue to live for 1-2 years. Therefore, the greenhouse needs disinfection.
- Despite the high strength of polycarbonate, some manufacturers note that in winter it is necessary to use additional supports to strengthen the greenhouse.
- Vegetable crops gradually deplete the soil, even if you feed them regularly. For this reason, it is advisable to replace the top layer of soil in the fall, and completely change the soil every 4-5 years. The best option is to move the greenhouse to a new location (if possible).
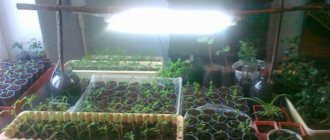
- Conducting preparations in the fall allows you to save time in the spring. The time saved can be devoted to preparing seedlings.
Soil neutralization
There are two ways to neutralize the soil from infected microflora and pest larvae - disinfection and replacement of the top layer of soil. It is not advisable to use chemical treatment. In a greenhouse structure, harmful substances are not washed out by precipitation as in open ground. The second method is acceptable, but more labor-intensive.
You can treat the soil with chemicals only in the autumn. When carrying out an event before planting seedlings, the roots and then the fruits will be saturated with harmful substances. If tomato bushes have been exposed to diseases, you should spray the soil:
- a solution of iron (2.5%) or copper (10%) sulfate;
- means "Fitosporin-M" (at soil temperatures above 10 degrees);
- Bordeaux mixture (10%).
The following drugs will help fight pest larvae: Fitoverm, Trichodermin, as well as a 4% solution of bleach (if the disease is caused by spider mites, the concentration should be 10%). With the second method of soil neutralization, a layer of approximately 15-20 cm is removed and with it the bulk of pest larvae, fungal spores and bacteria, as well as the roots and seeds of weeds. A mixture consisting of rotted manure and compost, peat, and sand is laid out in this place. A useful additive would be wood ash and leaves. Next, the earth is dug up along with a new layer, and then mulched with straw.
By listening to useful advice from summer residents on preparing a greenhouse for winter, you can learn a lot of new things. For example, you cannot plant tomatoes in the same bed every year; you should alternate crops.
When carrying out autumn cleaning, you cannot help but leave roots in the ground. They hide pathogenic bacteria that can easily overwinter and attack the plantings again next season.
If you make depressions in the ground over the area of the greenhouse and fill them with dry leaves or hay, and then sprinkle them with soil, the process of warming up the soil in early spring will speed up. The leaves will rot, resulting in heating and increasing the temperature of the nearby soil.