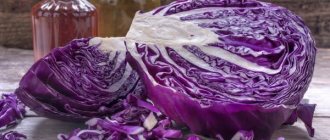
Before potatoes began to be grown everywhere in Russia, turnips were planted much more often. This culture was a second bread, and not an unusual food with a touch of exoticism. It was especially popular in cool and cold regions, since even there it could produce two harvests per season. Turnips were simply harvested in huge volumes for the winter - fortunately, the root crops are stored well and do not lose their nutrients until spring.
What turnip preparations can be prepared for the winter?
Of course, for our ancestors, the main way to prepare turnips for the winter was to store fresh root crops grown in the fall - spring ones were consumed immediately or processed. Nobody planted the crop in the summer - it quickly went into overdrive, otherwise it would have been possible to get three harvests in a year.
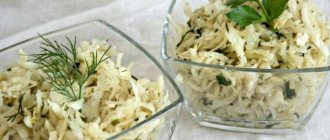
Fresh turnips are put into salads and cabbage soup, steamed, and made into hot dishes and side dishes for meat. Sweet dishes are prepared from it; the root vegetable is especially good with honey.
The turnips were also dried, salted and fermented. Today, the most popular way to prepare it for the winter is pickling. Turnips are rarely cooked alone, although they turn out quite tasty. It is usually included in various salads, where the root vegetable often acts as an additional ingredient rather than the main one. But in vain.
Pickled turnips are considered a delicacy in Korean. Jams, candied fruits, and even wine are made from root vegetables. Of course, these are not the products that are served on the table every day; they are intended to make the diet varied.
Pickled root vegetables can serve not only as a salad, but also as a snack, and if you spend some extra effort, as a main dish. Moreover, it will be tasty, healthy, and, unfortunately, unusual.
Features of storing workpieces
The traditional place for storing preparations for the winter is considered to be a cool, dry place where the temperature indicators are consistently at +4...+7°C. A cellar or basement is ideal for storing canned goods. The jars can also be placed in the refrigerator.
When storing preserved food, it should be protected from dampness, high humidity and prolonged exposure to direct sunlight. If the preparations are kept in unfavorable conditions, eating them is strictly prohibited.
Check out the best pickled turnip recipes.
Canned turnips are not only tasty, but also a very healthy product. It contains vitamins and minerals that help normalize the functioning of the digestive tract, cleanse the body of harmful toxins and substances, and successfully fight colds. In addition, this fruit is low-calorie, which allows it to be used in dietary nutrition and in the diet of those who want to lose a few extra pounds.
How to pickle turnips
One of the main methods of canning is pickling. It differs from pickling and fermentation by the dressing, which necessarily contains acid, which suppresses the vital activity of microorganisms that lead to spoilage of food.
It must include salt or sugar (honey). Spices, onions, garlic, and vegetable oil are used (or not) as additional components. All these ingredients also have the ability to preserve food, but the main preservative is still acid. Moreover, it is introduced immediately, and is not formed during the fermentation process, as with fermentation.
It is important to follow the recipe here. If you add less acid, it will not be possible to ensure the safety of the food; if you add more acid, it will be tasteless.
The following tips can be given to inexperienced housewives:
- For marinating, you should take high-quality products. It is better to do the preparations immediately after harvesting.
- If the recipe does not require pasteurization, jars and lids must first be sterilized.
- Particular attention should be paid to the dosage of vinegar - it comes in 6 and 9%, and there is also an essence, the strength of which reaches 70-80% (“glacial” acid - 100%). If you mix something up, the product will be inedible or will swell. Advice! If the recipe does not specify the concentration of vinegar, it should be discarded.
- The dosage of other acid - citric, tartaric or any other - should be left unchanged.
- The amount of salt, sugar or honey is not so critical, but it is better to stick to the recipe.
- Previously, only yellow tin lids coated with varnish were used for pickling. Now they can be very different, even reusable glass. But it’s still better to ask what types of workpieces each lid is intended for.
- The advice that is given at the end of almost every recipe - to turn the jars over and wrap until cool - is far from idle. This way you can detect a container that is not tightly closed, the lid of which allows air to pass through. And insulation is the final stage of preservation, allowing the products to warm up further. If you leave hot jars on the counter with their necks upside down until they cool, they may “puff up” or break the lids. Even if all the previous stages of marinating were performed correctly, and high-quality products were used.
- There are recipes for blanks that use nylon lids. They must be washed and doused with boiling water. Since capping with nylon lids usually does not provide for tightness, there is no need to turn the jars over, but wrapping them is a must.
Turnips for pickling are chosen whole, medium or small in size. Root crops should not be damaged, much less rotten.
They are thoroughly washed beforehand, even if the recipe requires removing the skin, and cooked immediately. Peeled, and especially chopped root vegetables should not be left even for a short time - deprived of the protection of the outer shell, they lose useful substances. First of all, essential oils, which are already in short supply in turnips, but the aroma of the final product, and, partly, the taste of the preparation, depends on them.
Comment! Sometimes it is necessary for the turnip to release its juice, for which it is placed in a container and sprinkled with salt or sugar - in this case, the recipe is followed.
Recipe for turnips marinated with beets
When turnips and beets are cooked together, the taste of both products changes significantly, and the color turns pink or red.
Ingredients:
- turnip – 0.5 kg;
- beets – 1 pc.;
- garlic – 4 cloves;
- salt – 1 tbsp. l. with a slide;
- vinegar (9%) – 2 tbsp. l.;
- bay leaf – 1 pc.;
- black peppercorns – 4 pcs.;
- red hot pepper - 0.5 medium sized pods;
- water – 200 ml.
You don’t have to put pepper at all, and take the size of the beets arbitrarily.
Preparation:
- The turnips are washed and peeled.
- Cut into half rings about 5 mm thick.
- Place in a deep bowl and fill with salted water overnight. Press down on top with something so that the pieces are completely immersed in the liquid.
- In the morning, rinse under running water and allow it to drain.
- The beets are washed and cleaned. Slice them the same way as turnips. If the beets are large, each circle is divided into several parts.
- Root vegetables are mixed and placed in small sterile jars. You can lay them in layers.
- Place 1 clove of garlic in each container. If the pieces are small or the owners like it spicy, more is possible.
- Prepare the marinade: first boil water with spices, then add vinegar and cook for another 5 minutes. Cool.
- Fill with marinade and cover with nylon lids.
- The workpiece should be stored in a cool place. You can eat it after a week, or save it for winter consumption.
Turnips marinated with apples
There are many recipes for turnips marinated with apples. This one is intended for storing “production waste” - small root crops that are a pity to throw away, and it is not clear what to do with them. But no one will definitely clean them, except perhaps as a punishment.
But you need good apples, with dense, crispy flesh.
Ingredients:
- small turnip – 1 kg;
- apples – 1 kg;
- water – 1 l;
- sugar – 1 glass;
- apple cider vinegar – 125 ml;
- salt – 2 tbsp. l.;
- cinnamon – 10 g.
Some people don’t like cinnamon at all; you can remove it from the recipe.
Preparation:
- The apples are rinsed, peeled, cut into quarters and cored.
- The turnips are thoroughly washed with a brush or a hard, clean cloth, the tail is shortened, and all petioles are completely removed.
- A marinade is prepared from the remaining products, and vinegar is poured in last, brought to a boil and cooled.
- Place the slices in a clean bowl and pour in the marinade.
- A load is placed on top.
- After 2 weeks, transfer to a cool storage room.
This preparation for the winter from turnips and apples is made in spacious containers - tubs, large saucepans made of food-grade stainless steel. If you have nowhere to store them, you can transfer them after 2 weeks into three-liter jars and close them with nylon (non-airtight) lids.
How to pickle turnips for the winter with honey and cloves
Despite the fact that this preparation contains a lot of honey, it is used as a snack, not a dessert.
Ingredients:
- turnip – 1 kg;
- water – 1 l;
- honey – 200 g;
- nutmeg – 1/4 tsp;
- cloves – 3 buds;
- apple cider vinegar – 120 ml.
Alternatively, you can replace the nutmeg and cloves with a large head of garlic - the taste will be completely different.
Preparation:
- The turnips are washed, peeled, and cut into slices about 0.5 cm thick.
- Place in sterile jars.
- If the preparation is made with garlic, it is placed at the bottom.
- Boil water, add nutmeg and cloves (if using the option with spices and not garlic). Honey is injected. As soon as the marinade boils again, add vinegar.
- The root vegetable is poured with hot marinade, sealed with nylon lids, insulated, and left overnight.
Instant pickled turnips
A simple and reliable recipe for making pickled turnips quickly and tasty. The main thing is that it takes little time, and the end result is an excellent snack.
Ingredients:
- turnip – 1 kg;
- water – 700 ml;
- honey – 150 g;
- salt – 2 tbsp. l.;
- apple cider vinegar – 100 ml.
If you wish, you can add garlic directly to the jar or cloves when preparing the marinade - as you like.
Preparation:
- Small root vegetables are washed well and the tail is shortened. Large ones are cut into slices.
- Place in sterile jars.
- When preparing the marinade, first boil water, adding salt and cloves, then honey, and when the water begins to boil, add vinegar.
- Fill the turnips, close the jars with nylon lids and wrap them warmly.
Winter recipes
Turnips retain their properties when preserved - this is an undoubted advantage. It is frozen, made into a salad from the leaves, and salted along with vegetables. And in winter, healthy homemade canned food will be ready for the table.
Top articles: Onions for the winter
How to freeze turnips at home
Pre-selected root vegetables are washed and then soaked briefly to remove any remaining soil. Size matters - small and medium-sized turnips are more suitable for freezing. Next, they are peeled and cut into cubes of 1.5-2 centimeters. Before placing in the cold, the turnips are blanched: immersed in boiling water for 1-2 minutes.
Next, the cubes are cooled, excess liquid is removed, and then frozen in food containers or vacuum bags. This way, not only root vegetables are preserved, but also turnip greens.
Pickled with carrots
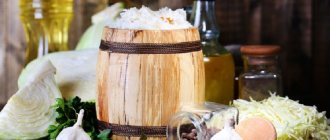
A good way to prepare a vitamin “concentrate”, enhancing the effect by adding carrots. The most delicious vegetables are obtained in wooden barrels or tubs, but enameled (stainless) pans are also suitable. You will need:
- turnips and carrots in equal proportions;
- salt (necessarily without iodine) – 2 cups;
- clean water – 10 liters.
To add spice to the dish, add red hot pepper (not too much). First, prepare the brine: add salt into water preheated to a boil, bring until completely dissolved, and cool. Turnips are not peeled, cut into layers or into 4 parts, placed in a bowl in layers, interspersed with carrots.
The resulting “pie” is poured with brine so that it completely covers the vegetables, and pressed down on top with a weight. After a month and a half, the product is ready. All that remains is to wash and peel it, and then serve it to the table.
Salted with herbs
A simple recipe for making delicious salted turnips. Root vegetables are washed, stems and tops are removed, and peeled. Cut into slices, place in layers in jars or pans, sprinkle with salt, caraway seeds and any herbs (parsley, dill). At the end, boiled cold water is poured in so that it covers the last layer, covered with clean cabbage leaves and pressed down with pressure. After 14 days, the pickling is ready.
Marinated with honey and apples
A common way to prepare delicious homemade preserves. It will require:
- Pure cold water – 1 liter.
- Honey – 200 grams.
- Ground cinnamon – 10 grams.
- Salt – 50 grams.
- Sugar – 200 grams.
- Apple bite – 120 milliliters.
The ratio of apples and turnips is chosen arbitrarily, the main thing is to take smaller fruits. Add all the ingredients of the marinade to the water and bring to a boil, stirring. Vinegar is added to the marinade that has cooled to room temperature, and the fruits previously placed in jars are poured with this mixture. Press down with pressure and hold until fully cooked.
Pickled with beets
Beets are needed for coloring turnips, so you will need a little of it. Root vegetables are cut into slices from top to bottom, leaving about 1 centimeter at the base. Then soak overnight in water. The beets are cut into slices and placed together with the turnips in jars.
For the marinade take:
- 4 cloves of garlic;
- 250 milliliters of vinegar;
- 2 teaspoons table rock salt;
- half a liter of water.
The solution is prepared by gradually bringing to a boil, but without adding vinegar. Then the marinade is removed from the stove and allowed to cool. Pour in vinegar and fill the jars with the finished mixture. The product is ready in 3 days.
Preserved in honey and vinegar
Small, strong turnips are washed, but not cleaned; they are left on a towel. Next, prepare the preservation solution:
- 1 liter of water;
- 1 glass of honey;
- 2 tablespoons salt;
- half a glass of apple cider vinegar;
- cloves (3-4 cloves);
- a tablespoon of ground nutmeg.
Mix all this, bring to a boil over low heat, and cool. Turnips placed in jars are poured with a solution. Store in a cool, dark place.
Salad with carrots
A popular recipe for preparing salad for the winter. For 450 grams of turnips you will need:
- 1 onion;
- 150 grams of carrots;
- 2 cloves of garlic;
- a pinch of greens (dill or parsley);
- 4 allspice peas;
- 1 bay leaf.
Peeled root vegetables are cut into cubes and lightly boiled in boiling water. The marinade is prepared from 9% vinegar (1 tablespoon), sugar and salt (2 tablespoons each). Finely chop the greens, onion and garlic, add to the turnips and carrots, and mix. Spices, sugar, salt, vinegar are placed at the bottom of the jar, then vegetables and poured with boiling water. Sterilized lettuce is covered with a lid and stored like regular preserves.
Spicy pickled turnip
The spicy appetizer is prepared simply: when fermenting, add 3-4 pods of red hot pepper to the turnips. The root vegetable does not need to be peeled and stemmed, just washed. Whole turnips or cut into 4 pieces are placed in layers in a suitable container, sprinkled with salt, and filled with water (with the top on). At the end, add pepper and press down with a weight. After a month and a half, the spicy snack is ready.
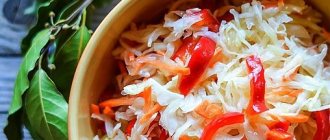
Recipe for turnip salad with bell peppers and herbs for the winter
You can also preserve turnips for the winter as part of salads; they go well with other vegetables. In winter, you can open the jar and serve immediately. To do this you need to take:
- turnip – 1 kg;
- carrots – 1 kg;
- sweet pepper – 0.5 kg;
- onion – 0.5 kg;
- garlic - at least 4 cloves;
- celery and parsley - 1 bunch each.
Every housewife puts the last ingredient in turnip and carrot salad for the winter according to her taste, but only in the direction of increase. Without garlic at all, the preparation will turn out too bland, and will not be suitable for dietary nutrition - after all, the composition contains vinegar.
Preparation:
- Root vegetables are washed, peeled, cut into strips or grated on a coarse grater.
- Sweet peppers and onions are cut into thin half rings.
- The greens are washed well, the stalks are removed and chopped.
- Combine ingredients and mix.
- Measure the volume of the resulting mass. It’s convenient to do this using a liter mug - it’s quite inconvenient to first push a mixture of vegetables into the jar and then take it back out.
- For each liter of salad add 2 tsp. salt and sugar, 2 tbsp. l. vinegar. Mix thoroughly.
- Cover the dish with a lid or cling film and let it brew for 30 minutes. During this time, stir the vegetables several times so that they are evenly saturated with vinegar, salt, sugar, and release a little juice.
- First place a bay leaf at the bottom of clean half-liter jars, and lay the salad on top.
- Sterilize for 25-30 minutes.
- The jars are rolled up, turned over, and wrapped until completely cool.
Culinary secrets
Before you move on to choosing a recipe for pickling radishes for the winter, we suggest you remember a few important rules for canning vegetables.
- Early varieties of vegetables are stored worse than mid-season and late varieties. This also applies to radishes. For the winter, it is better to pickle varieties that ripen in summer rather than in spring. You can choose radishes Charriet, Zlata, Red Giant and many others. Give preference to dense radishes, without voids and watery pulp.
- Before pickling, radishes need to be washed and the ends cut off, and all unattractive places removed.
- Small radishes can be pickled whole for the winter. Medium-sized fruits are usually cut into 2-4 slices. A large vegetable can be preserved by cutting it into thin slices. For a Korean salad, you can chop the fruit into strips.
- Radishes are pickled in two ways: with and without sterilization. In the first case, jars for the preparation must be chosen of the same size; containers with a volume of 0.5 liters are best suited for this purpose. They need to be washed with baking soda and allowed to dry. It is not necessary to sterilize empty jars, since they will undergo this procedure along with the snack. If canning is carried out without sterilizing the workpiece, then the jars under it must not only be washed, but also sterilized, and the lids boiled.
- Canned food intended for long-term storage is closed with metal lids, since plastic ones do not provide the proper degree of tightness. The lids can be rolled up with a special key or used with screws - there is no fundamental difference. The choice depends on the configuration of the cans.
- To cool, canned food is usually left upside down, wrapped in something warm. Then you will notice in time if they are not sealed tightly, and at the same time provide additional sterilization to the canned food.
Canned radishes are stored in a cool place or even at room temperature. If the preparations were made correctly, they will not deteriorate until spring and will give you a piece of summer warmth in the cold.
How to pickle turnips for the winter
Salting turnips is very simple. In winter, it can be washed, soaked, and used for preparing salads, cabbage soup, and side dishes.
Ingredients:
- turnip – 1 kg;
- salt – 0.5 kg.
Preparation:
- Root vegetables are washed well, peeled, and cut into not too thick slices of the same size.
- At the bottom of a clean dish, preferably a stainless pan, pour a layer of salt, then lay out a little turnip. And so on until the pieces of root vegetables run out. The last layer should be made of salt. There may not be enough spices - after all, in this recipe everything is done “by eye”. They just fill it up as much as needed.
- Cover with a cabbage leaf and apply pressure.
- Add cold boiled water on top so that it covers the root vegetable pieces completely.
The container should stand in a cool place for two weeks. Then you can arrange the pieces tightly into jars and fill them with the same brine.
Spicy pickled turnip
Lovers of everything hot and spicy will appreciate this preparation. Prepare a strong brine from water and salt. While it cools, peel and cut the carrots into several pieces. There is no need to peel turnips; Just wash it well with a brush. Chop the chili pepper into small strips. Place the vegetables in the pan in layers. Pour salt water on top and install the press. For 45 days, everything will be infused in a dark and cool place. From time to time we pierce the contents with a wooden stick.
Turnips, salted for the winter with herbs
If turnips are salted with herbs, they can also be used to prepare various dishes. You just need to take into account that an outsider will add to your own smell of herbs. Absorbs the aroma of greens and turnips.
The herbs are washed, allowed to drain, and dried to remove excess moisture. Remove the petioles and chop. Then mixed with salt. Everything else is as in the previous recipe.
Possible failures and ways to eliminate them
The biggest problem that a housewife may encounter when preparing pickled turnips is the mustiness of the finished dish. Most often, this situation occurs when a large amount of waste products of microorganisms accumulates. To avoid this problem, it is necessary to remove accumulated gases once a day. To do this, you need to shake the container with vegetables, and also use a wooden stick to slightly push the pieces of turnip apart.
Important! Don't leave a jar of vegetables open. To avoid excessive penetration of air or stray insects, it is recommended to cover it with two layers of gauze.
Another problem can be adding too much salt or spices. It is believed that the solution comes through experience. After several cooking cycles, each housewife will know the exact amount of additives needed to obtain the ideal taste.
How to pickle turnips with caraway seeds according to an old recipe
The two previous recipes are versions of the old one, with caraway seeds. One is simplified, in the other the seeds are replaced with greens. These recipes are used much more often than the original, since the smell of cumin is very similar to anise, and not everyone likes it.
Here everything is done the same way as when preparing turnips with salt. Simply add 1/2 cup of cumin seeds to the ingredients. You shouldn’t put more - the aroma will be killer anyway.
How to dry turnips for the winter
Of course, it is best to dry turnips in a special dryer or Russian oven. But you can do this in a regular oven, however, you will have to spend the whole day, or extend the operation over several days.
- The turnips are washed, peeled, and chopped into slices no thicker than 5 mm.
- Pour boiling water over, drain in a colander, cool under running cold water, and blot with a kitchen towel. No need to cook! And keep it in boiling water too!
- Place in one layer on a baking sheet.
- Place in the oven preheated to 55-60° C.
- The door must be open for the first 15 minutes.
- Stir the slices from time to time, otherwise they will dry unevenly.
This will take about 10 hours. Dry turnip pieces should bend but not break. They will significantly lose volume as they lose liquid. If it is not possible to devote the whole day to drying turnips, this is done in several stages, but then you will have to spend more time. At the same time, turn off the oven, leaving the sheet with root vegetables there.
Dried turnips can be eaten like chips, although only for those with good teeth. Usually it is soaked overnight and added to first courses, stewed, baked.
Unusual recipe for turnip jam
Many people don’t even try to make turnip jam, since most recipes begin with soaking the root vegetable for several days, first in cold water and then in hot water. Or vice versa. Supposedly to take away the bitterness. Sorry, but only the skin of this root vegetable is bitter; it should not be confused with radish. So it’s enough to peel the turnips.
Ingredients:
- turnip – 1 kg;
- honey – 0.5 kg;
- water – 200 ml;
- cardamom boxes – 8 pcs.;
- star anise – 6 pcs.;
- allspice – 5 peas;
- pink pepper – 3 peas;
- cloves – 3 pcs.;
- cinnamon (sticks) – 2 pcs.
Preparation:
- They wash and peel the turnips.
- Cut into beautiful slices and dry.
- Cardamom seeds are husked from the pods.
- Place the container in which the jam will be prepared on the fire, add all the spices there, and heat until a spicy smell appears.
- Add honey and dissolve it over low heat.
Important! Do not bring honey to a boil! - Add turnips and mix. When the jam boils, reduce the heat to low.
- Cover with a lid.
- The foam is removed as it appears.
- Boil until the turnips are soft. This takes on average 90-120 minutes.
- Place the jam in sterile jars and cover with nylon or screw caps.
- Store in the refrigerator.
Comment! The most delicious jam is made from young turnips.
Selection and preparation of ingredients
Before you start preparing turnip salads, you should choose high-quality raw materials. Tasty and healthy preparations are made from a white or green root vegetable with juicy and crispy, slightly sweet, without bitterness pulp.
Before cooking, the tops of the fruit are removed, then they are thoroughly washed and cleaned, and the tail and top are cut off. Be sure to remove the skin in a thin layer.
Important! It is necessary to choose fruits with a solid structure, without damage, rot or spoiled areas.
How to make candied fruits from turnips
It is important to make candied turnips correctly. Otherwise, they may become moldy right in the refrigerator, or taste, to put it mildly, “not very good.” It is often advised to make candied turnips in honey by transferring (pouring) them into a jar along with the liquid and skipping the drying step. It will be delicious. But calling such preparations candied fruits is wrong.
Ingredients:
- turnip – 1 kg;
- sugar – 1 kg;
- citric acid – 3 g;
- vanillin - sachet.
Preparation:
- Turnips are washed and cleaned.
- First, circles about 2 cm thick are cut, and they are then divided into thin plates.
- Blanch in boiling water for 5 minutes, immediately cool under running cold water. If you simply pour the slices into a large container, the liquid will heat up and the thermal processes will not be stopped, and you will not get candied fruit.
- Sprinkle with sugar, stir, and leave for at least 10 hours.
- When the turnips release their juice, place the dish on the fire and cook until the syrup thickens and the slices become transparent. If you prepare candied fruits with honey in this way, it is impossible to determine this moment.
- Add vanillin and citric acid and cook for another 10-15 minutes.
- Place the turnips in a colander, preferably one with large holes. Leave for 60-90 minutes to allow the maximum amount of syrup to drain.
- Place candied fruits on a sieve in one layer and dry for 24 hours at room temperature.
- Roll turnip slices in sugar and dry for another week.
- Store in jars closed with nylon lids.
Methods and terms of storing fresh turnips
To extend the shelf life of the root vegetable, it is placed in special conditions under which it feels acceptable and retains its beneficial qualities.
In the cellar
Happy owners of a cellar can extend the storage of turnips to 5-6 months. In the underground in winter, the temperature is kept within the range of about 1-3 degrees, the humidity is no more than 90-95% (in glazed unheated balconies and basements of apartment buildings similar wintering conditions are possible).
There are several ways to winterize root crops:
- Place in a single layer on wire racks. Turnips are covered with spruce branches to protect them from rodents.
- Place in cardboard or wooden boxes. Pour 2-3 cm of sand onto the bottom and lay out a layer of vegetables so that they do not touch each other. Cover with sand and add root vegetables again. The top layer should be sandy and completely cover the crop.
- Place in tarred barrels. The bottom layer is made of peat chips, followed by turnips and sprinkled with peat.
When storing in a cellar, there are a number of conditions that must be taken into account when placing the crop. Contact proximity is fraught with the spread of rotting if at least one root crop is exposed to it. It is necessary to lay out the harvest, taking into account the fact that periodically you will have to sort through and inspect the vegetables in order to discard spoiled fruits. In severe winters, the bed is covered with old blankets to prevent freezing.
In a refrigerator
Early and late varieties of turnips are stored in the refrigerator. Regardless of the variety and ripening time, turnips will last up to 1 month at a temperature of 1-2 degrees.
Before placing the fruits in the vegetable compartment, they are washed, dried and wrapped in protective material:
- cling film;
- plastic bag;
- newspaper or paper.
This packaging method will prevent the spread of rot throughout the entire crop, even if one of the roots begins to deteriorate.
Periodically, the fruits are checked for integrity and questionable specimens are removed from the general container.
In the freezer
In severely frozen conditions, the root vegetable remains suitable for consumption until spring after harvest. The fruits are prepared as follows:
- Wash and peel.
- Cut into cubes or bars 1-2 cm.
- Place the cubes in boiling water for 4-5 minutes.
- Transfer the blanched pieces into ice water.
- Place on a sieve and leave to drain.
- Pack in bags and place in the freezer.
Original turnip wine recipe
Frankly speaking, the wine will turn out to be truly original, as they say, “for everyone.” So the first portion should be made small.
Ingredients:
- turnip juice – 1.2 l;
- sugar – 1.2 kg;
- vodka - glass.
Preparation:
- Extract juice from turnips in any convenient way.
- Mix with vodka and sugar.
- Place a glove pierced on one finger into a container under a water seal.
- Place in a warm place for fermentation. It will last about a week.
- Seal the bottle and place it in a cool place for further fermentation.
- After 3 months bottle.
Turnip wine will not work if the temperature during fermentation was less than 20° C. Or when little sugar was added. The last point needs to be taken carefully, because in stores now they often sell not kilogram packages, but containing 800 or 900 g. And a glass with a capacity of 250 g contains 160 g of sugar.