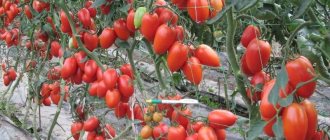
Tomato F1 Opera. Photo:
The development of any plant is determined to a large extent by the state of the root system. The easiest way to enhance the development of the root system is to stimulate the development of adventitious roots. To increase the root system of tall tomatoes, 2-3 lower leaves are removed from the main stem and the seedlings are planted obliquely at an angle of 45°. Only the root ball is covered with soil, and the stem section is covered after 12-14 days, when the plants have taken root well.
Tomatoes graft well, and some skilled gardeners have successfully used growing tomatoes on two or more roots. This grafting method allows you to combine two or more plants into a single organism, increase the area and uniformity of plant nutrition, which has a beneficial effect on productivity. Of course, this is not such a simple way to increase productivity, but those who like to experiment should try it.
Description of the method
The method of growing tomatoes with 2 roots helps solve a number of problems. In this way, you can give greater vitality to those seedlings that did not have enough light, and therefore they grew thin, long and weak (read about methods of growing seedlings and rules for caring for them here). Or there are too many seedlings, and using this method you can use all the young plants, planting them in a relatively small area.
The essence of this method is to combine two plants into a single organism, which will have a beneficial effect on the condition of the tomato bush and its productivity, because two root systems will feed one above-ground part.
Advantages and disadvantages of the method
Growing tomato seedlings between 2-4 plants is called ablation. The point of the procedure is to obtain a strong tomato with powerful roots. Due to the increased feeding area, the vegetable crop not only grows quickly, but also tolerates interruptions in watering and fertilizing more easily.
Gardeners who used this method of cultivation appreciated the benefits of ablation:
- the tomato is actively increasing its above-ground mass;
- plant immunity and stress resistance increases;
- fruit yield increases by a third;
- tomatoes become larger and ripen faster.
It makes sense to use ablactation on tall tomatoes so that the increase in yield is noticeable. For growing with two roots, weak seedlings are often taken, which with standard agricultural technology will not give a significant harvest.
The disadvantage of the procedure is its complexity. It is difficult for an inexperienced gardener who does not know how to graft to decide to carry out splicing.
With a large number of tomato seedlings, grafting will take a lot of time. This growing method is used in small farms where several dozen plants are planted.
Advantages and disadvantages
This method of growing tomatoes has several advantages:
- helps increase productivity by 30 - 40%;
- promotes acceleration of fruit filling and ripening;
- increases the size of the fruit (you can learn about the difficulties and features of growing large tomatoes here);
- improves the resistance of tomatoes to various diseases;
- extends the growing season.
There are significantly fewer disadvantages: the main ones are the significant time investment of the vegetable grower and the presence of certain skills in plant grafting. If ablation is carried out on seedlings, then due to the fragility of the stems, a large amount of planting material can be spoiled.
Ablation is one of the grafting methods, in which nearby shoots are fused into a single whole. Rootstock is the plant that is grafted; scion - a part that is grafted onto the rootstock to give it new properties.
Caring for grafted seedlings
Active fruiting and large fruits are achieved not only by ablation, but also by high-quality plant care. Grafted seedlings develop faster due to the doubled root system, so care must be appropriate:
- Where the stepsons get closer, the leaves are removed. This allows for improved ventilation of the tomato vines.
- A few leaves are left on the rootstocks to improve fruiting.
- Shoots in the leaf axils are removed.
- Plants that have reached 170-180 cm are pinched.
Spliced seedlings are watered with warm rainwater at the root, rather than sprayed with water. For better results, dig plastic bottles with the bottom cut off next to the bush.
Preparatory work
Harness
Experienced gardeners use strips of non-woven material 0.5 mm wide as strapping. If there is no such material, then it can be replaced with gauze strips, clothespins for fixing the orchid peduncle, soft foil, just linen rope or twine. Some vegetable growers use stretch film or electrical tape, but they have opponents who believe that a greenhouse effect occurs under the film, promoting the formation of rudimentary roots at the grafting site.
Suitable varieties
It is better to subject low-growing varieties of tomatoes (Astrakhansky, Zagadka, Raja, Khlebosolny and others) to ablation: the heavy stems of indeterminate varieties may break at the point of splicing.
also grow tomatoes of different varieties, one of which has excellent taste (Gina, Appetizing, Waterfall, Family, Abundant, Aphrodite and others), and the other is resistant to diseases (Alaska, Firebird, Bohemia, Blitz, Sensei and others ).
Seed preparation
Before sowing, seeds are pre-soaked in a 1% solution of potassium permanganate, in a solution of aloe juice (1:1 with water), in a solution of Fitosporin. This will allow the seeds to strengthen the immune system, become more resistant to diseases, and produce a bountiful harvest later.
Read more about how to treat tomato seeds before sowing in a separate article.
Necessary equipment
Planting seedlings will require a large number of seedling containers. For these purposes, you can use milk cartons, cut plastic bottles, flower pots with a diameter of 11 - 12 cm, etc. For ablation you will also need a sharp blade, cotton wool, and salicylic alcohol.
How is splicing carried out?
The grafting is carried out in cloudy weather or in the afternoon, so that after the procedure the tomatoes recover from stress in the twilight. For this purpose, you can shade the grafted plants with lutrasil or tulle.
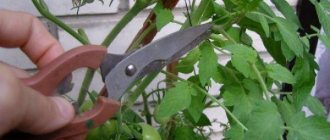
To work, you will need a blade or a thin stationery knife. The blade of the instrument is wiped with a swab soaked in vodka. To connect the stems and secure them in this position, use a narrow bandage, a strip of cotton fabric, or a thick woolen thread.
How to plant tomatoes step by step:
From the tomato bushes growing nearby, choose the one that will serve as a scion and the one that will act as a rootstock.
The above-ground part of the rootstock is removed after the shoots have fused, so a seedling with a damaged crown can act in this capacity. Using a blade, carefully make zigzag cuts on the stems, resembling a “tongue”. This “tongue” looks up on the rootstock, and down on the scion.
The skin at the junction of the tomatoes is removed from the stem. The depth of the cut is no more than 2 mm, it is important not to break the delicate stem of the tomato. The cuts on the two stems are combined by inserting the “tongues” into each other. The graft is fixed with a piece of cloth or thread. The stems need to be tied tightly, but not too tightly. Plant sap should circulate freely throughout the plant.
The grafted tomatoes are watered and placed in semi-darkness for several days to allow growth to proceed undisturbed. Some gardeners build a small greenhouse over the plants so as not to dry out the leaves.
Planting and ablation
Basic Rules
You can grow tomatoes that have already been planted in open ground, but it is better to carry out ablation while planting the seedlings.- Some gardeners who follow the lunar calendar carry out such manipulations only during the waxing moon.
- The time for vaccination is evening; it is even better to carry out such a procedure in cloudy weather.
- The fragility of seedlings can be reduced by refraining from watering for several days before ablation.
- The grafting site should be 10–12 cm from the soil.
- As the stems grow and thicken, the binding should be gradually loosened.
Deadlines
Tomato seeds should be sown in mid-February - early March. After 2 - 3 weeks, the seedlings are picked (you can find out how to grow tomato seedlings from seeds without picking at home here). A month before planting seedlings in open ground (approximately in the middle - end of April), ablactification is carried out. Splicing usually occurs within 10 – 15 days.
How to grow tomatoes with double roots: step-by-step instructions
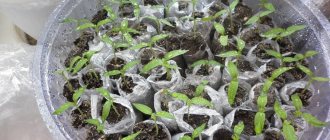
- Sowing and growing tomato seedlings is done in the usual way.
- After the appearance of the second true leaf on the seedlings, the tomatoes should be planted in separate containers. Plants are planted in pairs at an angle to each other at a distance of 2–3 cm.
- When the tomato stems reach a thickness of 4 - 5 mm, you can begin the ablation process. First, you should wipe your hands and tools with a cotton swab dipped in salicylic alcohol.
- On each plant, carefully use a blade to cut off the skin (about 1.5 - 2 cm) in the place where the splicing will take place.
- Next, the blade makes cuts at an angle of 45 degrees in those places from which the skin was removed. On the rootstock, the cut is made from top to bottom, and on the scion, from bottom to top. The depth of the cut is 1/3 of each stem, its length is 6 - 7 mm.
- The cuts should be crossed, hooking one after the other.
- The place of crossing must be tightly secured with a tie, connecting the two plants together.
- After the tomatoes have grown together, the rootstock must be removed by cutting it with a blade a little higher from the grafting site.
- The cut site is again fixed with a bandage, which can be removed after the plant has completely grown stronger (in about a week).
How is splicing carried out?
The grafting is carried out in cloudy weather or in the afternoon, so that after the procedure the tomatoes recover from stress in the twilight. For this purpose, you can shade the grafted plants with lutrasil or tulle.
To work, you will need a blade or a thin stationery knife. The blade of the instrument is wiped with a swab soaked in vodka. To connect the stems and secure them in this position, use a narrow bandage, a strip of cotton fabric, or a thick woolen thread.
How to plant tomatoes step by step:
From the tomato bushes growing nearby, choose the one that will serve as a scion and the one that will act as a rootstock.
The above-ground part of the rootstock is removed after the shoots have fused, so a seedling with a damaged crown can act in this capacity.
Using a blade, carefully make zigzag cuts on the stems, resembling a “tongue”. This “tongue” looks up on the rootstock, and down on the scion.
The skin at the junction of the tomatoes is removed from the stem. The depth of the cut is no more than 2 mm, it is important not to break the delicate stem of the tomato.
The cuts on the two stems are combined by inserting the “tongues” into each other. The graft is fixed with a piece of cloth or thread. The stems need to be tied tightly, but not too tightly. Plant sap should circulate freely throughout the plant.
The grafted tomatoes are watered and placed in semi-darkness for several days to allow growth to proceed undisturbed. Some gardeners build a small greenhouse over the plants so as not to dry out the leaves.
Care instructions
Immediately after grafting, seedlings should be shaded for 4 to 5 days. The temperature during splicing must be maintained within the range of +20C – +22C. You can put plastic bags on the grafted tomatoes for 2 days to create favorable greenhouse conditions. Watering is done with warm water at the root as the soil dries out. The grafted plant is transplanted into open ground or a greenhouse, and 1–2 lower leaves are removed (we talked about the nuances of growing tomatoes in open ground here).
When planting, both root systems need to be slightly stretched in different directions, thereby increasing the feeding area. Caring for it is the same as for a regular tomato. Be sure to tie the bush to a peg: in order not to damage the splice site, the stem is tied twice - above and below the grafting site. Also, do not forget about feeding: it is better to do it once every 10 days. Both organic and inorganic fertilizers can be applied.
Caring for grafted seedlings
Active fruiting and large fruits are achieved not only by ablation, but also by high-quality plant care. Grafted seedlings develop faster due to the doubled root system, so care must be appropriate:
- Where the stepsons get closer, the leaves are removed. This allows for improved ventilation of the tomato vines.
- A few leaves are left on the rootstocks to improve fruiting.
- Shoots in the leaf axils are removed.
- Plants that have reached 170-180 cm are pinched.
Spliced seedlings are watered with warm rainwater at the root, rather than sprayed with water. For better results, dig plastic bottles with the bottom cut off next to the bush.
What result should you expect?
Successful fusion can be determined visually: the stem of one of the plants will gradually thicken, become stronger and stronger due to the additional influx of juice from the other plant.
Reference. Some experimental gardeners grow tomatoes with peppers or potatoes in a similar way. You can also experiment by grafting shoots of different varieties of tomatoes onto each other, for example, with pink (Pink Honey, De Barao, Abakan Pink, etc.) and yellow fruits (Honey Spas, Persimmon, Orange, etc.).
Grafting tomatoes in one row in the garden
To increase the yield, you can try using the same method to grow the stepsons of neighboring plants of the same variety.
If you want to grow tomatoes in one stem, then above the grafting site remove both tops of the stepsons, and if in two stems, then pinch off the top of the unnecessary stepson (rootstock). In places where the grafted shoots come together, remove several leaves. This will allow the plants to be better ventilated. On the rootstock (when forming grafted tomatoes into two stems) or on both cut stepsons (into one stem), for better plant development, leave several leaves, and one of them must be located above the grafting site. Remove all emerging shoots in the leaf axils in a timely manner.
Using ablation, tomatoes can be grown together with peppers or potatoes. Or, as an interesting experiment, sow tomatoes of different varieties (for example, with yellow and pink fruits) in one container and grow them together. This way you will not only increase your productivity, but also get unusual tomato bushes with colorful fruits.
Common Mistakes
- It is advisable to carry out grafting with young plants: their stem is still round in shape, but as it grows it becomes flat, and then the plants will not grow together.
- The shoots will not be grafted onto each other even if the tying was not done tightly.
The method of growing a tomato on 2 roots requires some effort from the vegetable grower. But if the grafting is carried out correctly, the results will exceed all expectations: there will be enough tomatoes for the table, for harvesting, and for all relatives and friends.
Growing any vegetable crop in a region with a harsh climate is a very difficult task. Therefore, you need to put in a lot of effort and time to achieve high yields. On our Internet portal you will find detailed information about planting tomatoes in Siberia and the Urals, and also find out whether peppers and cucumbers can be planted next to tomatoes.
We form tomato and eggplant bushes.
How to form tomatoes in a greenhouse?
To ensure that growing tomatoes in protected soil does not give negative results, you need to follow several rules. These recommendations are aimed at how to properly form a tomato bush in a greenhouse. All actions should be aimed at forming 5-6 clusters of fruits on the plant. This is done using pinching. Because forming a tomato bush means removing the shoots.
Rules for planting tomato bushes:
- start pruning the plants as soon as they begin to grow vigorously,
- the stepsons are removed, leaving a small stump.
Several methods are used to carry out activities aimed at the formation of a tomato bush.
- On one stem.
In this technique, it is necessary to remove all the stepsons from the main stem so as to leave 5-6 clusters with fruits on it. You need to leave a few leaves behind the tassels with future fruits. This is necessary for proper circulation of juice in the stems of the plant.
- On two stems.
This method indicates that you need to leave a stepson that will grow under the first raceme with flowers. All other stepsons are removed so that 4 fruit clusters remain on the stem. The stepson is formed so that 3 clusters with fruits are formed on it.
- On three stems.
By analogy with the second method, you need to leave two stepsons, which will each have 2 clusters with fruits. The main stem will receive a load of 3 fruit clusters.
An ideal tomato bush consists of 5-6 clusters of fruits and about three dozen leaves. Such a plant will allow all nutrients to be directed to the growth and ripening of tomatoes.
To reduce the number of leaves on a plant, you need to gradually remove them. It's better to have a few sheets a week. Otherwise, the tomatoes will become stressed and grow slower.
How to grow tomatoes in a greenhouse.
In order to get high yields from growing large tomatoes in a greenhouse, you need to correctly form the stem of the tomato bush.
Tomato bushes need to be formed into only 1 stem - the main stem goes up, and it is also tied up. The leaves of the plant are also on the main stem, and then flower tassels will grow on it, which then turn into fruit tassels. And there should not be a single stepson (additional stem). It’s especially scary when the stepsons come out of the ground, next to the main stem. These are wild stepchildren and need to be removed. Therefore, after forming a tomato bush, you should have a stem, leaves and subsequently flower clusters on it. Nothing else.
Formation of a low-growing tomato bush: Low-growing tomato varieties do not require pinching or pruning. Tall tomatoes of indeterminate and hybrid varieties are prone to rapid growth. It is the low-growing tomato varieties that are recommended for growing in greenhouses for more efficient use of the area of protected soil.
How to shape eggplants in a greenhouse?
Demanding and delicate eggplants require special conditions for full growth:
- a fairly high temperature that remains constant;
- extended daylight hours;
- regular application of nutrients due to the shallow root system;
- good and timely watering;
- constant humidity, which is achieved by mulching the rows;
- and the obligatory formation of the plant.
The plant is left with only one stem if it is weak or there is not enough space in the greenhouse. In this case, you need to leave one strong shoot, which must be tied to a wire or stick. The ovaries that the plant produces need to be thinned out, and the tops of the shoots with fruits must be pinched. All newly appeared shoots and buds are immediately removed.
A strong plant with sufficient space in the greenhouse is given the opportunity to grow into several branches, and this will be the correct formation of an eggplant bush.
In order to grow a compact eggplant bush with well-developed side shoots, it is necessary to remove the top of the main stem. It is best to do this when the plant has grown to about 25-30 cm. Bushes with pinched tops begin to branch quickly. Of all the shoots that appear, it is most reasonable to leave only the 4-5 upper branches (stepchildren) and remove the rest. A harvest will form on the shoots left behind. At the same time, 16-20 fruits are left on the eggplant plants. The plant does not need to be pinched, but excess shoots must be removed.
Removed stepsons can be placed in a compost heap at the dacha or used to mulch the soil in berry beds or under fruit and berry bushes; black currants will especially appreciate this.
Formation of an eggplant pepper bush in Kuban.
superda4nik.ru
Grafting tomatoes: how, when and why they do it
It has long been known that although a tomato is tasty, its yield is low and it is difficult to grow them. Such tomatoes have poor resistance to diseases and unfavorable growth conditions. In Europe and America, they solve this problem by using disease-resistant disease-resistant tomatoes, their tasty neighbor.
Tomato grafting should be carried out when the rootstock has 3–4 true leaves, and the scion has 1–2. To do this, tomatoes are sown with a difference of 5–7 days.
The tomato rootstock and scion should have the same diameter at the cut site. The rootstock is cut at a height of 2 cm from the ground,
Special silicone staples are used to connect the rootstock and scion.
About the benefits of vaccination
- get sick less often;
- adapt to weather changes faster;
- more productive.
The method of merging 2 tomato bushes solves the problem of low-quality, elongated seedlings. From 2 weak plants, 1 tomato bush with a powerful root system is obtained by ablation.
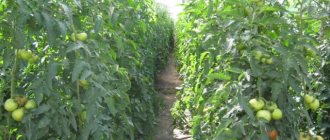
Grafting makes sense if there are a lot of seedlings. Weaker plants can be used to increase the productivity of valuable tomato varieties. Splicing is often used in greenhouses. A tomato bush with 2 roots bears fruit longer, and in the second half of August it suffers less from changes in night and day temperatures.
Timing of vaccination
The operation is carried out after transplanting the seedlings to a permanent place, if grafting is forced. Her reasons:
- elongated seedlings;
- excess planting material.
At least 10 days must pass from the time of transplantation. Tomato seedlings must take root in a new place and begin to grow. The main requirements for the plant at the time of grafting: trunk thickness of at least 40 mm, height 25 cm and above.
Grafting tomato seedlings
For what purpose are tomatoes planted 2 bushes per hole?
Placing planting material in pairs on a bed allows you to get a larger amount of harvest from one meter of soil. In addition, if, when planting tomatoes, two seedlings per hole, seedlings with different periods of fruit ripening are taken, then the harvest can be obtained much longer.
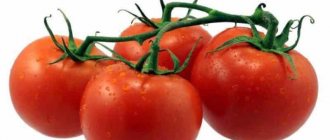
Tomatoes
For hot and arid regions, planting 2 tomatoes per hole allows you not only to save space and increase the yield, but also to keep the tomato bushes from drying out under the scorching rays of the sun. Indeed, tomatoes standing nearby create a life-saving shade. In the southern regions, tomato bushes are planted in deep beds. In this case, pairs of bushes are placed slightly obliquely on opposite sides of the groove. This planting method makes it easier to water the plants and provides access to them.
In the gardens of rural settlements, where neighboring plots are very close, the spread of harmful insects occurs very quickly. In the event that a pest suddenly appears on the site, with the bushes arranged in pairs, there is hope that at least one of the two sprouts will remain intact. Of course, if the owner of the site promptly takes measures aimed at combating insects, the situation will not be left to chance.
Gardeners plant two bushes so that after the adaptation period of the seedlings and, as a result of their partial death, a sufficient number of tomatoes remain in the beds.
How to plant tomatoes 2 per hole
It is standard practice to plant seedlings one plant per hole. It is believed that with this planting technique, tomato bushes receive the maximum amount of nutrients. Indeed, this is true if we are talking about a vegetable garden with ideal conditions for cultivated plants. In reality, tomatoes are attacked by harmful insects throughout the season, and in the southern regions they burn out under the scorching rays of the sun.
In particularly hot and dry regions, it has long been customary to plant 2 tomatoes in one hole. This method of planting seedlings allows plants to protect each other from the rays of the scorching sun.
Tomato
How to prepare a hole
Preparing a place for planting two tomatoes in one hole is no different from usual. A bed for tomatoes is made where they grew the year before:
- parsley;
- dill;
- carrot;
- onion.
In autumn, ash and organic fertilizers are added to the soil. After this, the area is carefully dug up. Fertilizers should not be allowed to remain on the surface; they must be covered with a layer of soil.
The holes for tomato seedlings are placed in one line or in a checkerboard pattern. The holes are given an oval shape, one spaced 40-50 cm from the other.
In arid regions, a deep, long bed in the form of a trench is prepared for tomatoes. Its depth ranges from 15 to 25 cm, and its width from 30 to 40 cm.
Hole
It is recommended to pour several liters of boiling water into the hole shortly before planting the seedlings. This measure will destroy the larvae of harmful insects. Then mineral fertilizers are placed at the bottom of the hole. They are sprinkled with a thin layer of soil. After this, tomatoes are planted 2 per hole.
Important! It is recommended to prepare holes for seedlings several days before planting the plants in the garden. The prepared holes must be filled with water. The next day, you need to watch carefully; passages and burrows of underground pests may appear in the wet soil. Insect poison should be placed in each hole. Only after this can you start planting tomatoes.
Planting scheme for tomato bushes
Planting tomatoes with two roots per hole involves placing seedlings in pairs in one recess (hole). Plants are placed on opposite sides of the hole (groove), opposite each other or slightly obliquely. To grow both bushes healthy, you need to have at least 20 cm between them. You can plant the plants in a checkerboard pattern.
The seedlings are placed sideways in the holes, pointing the top to the north and the root to the south. Then the root part is sprinkled with earth. If the seedlings have a thin long stem, they should be buried 5-10 cm into the ground. Some vegetable growers prefer to lay out sprouts with the roots facing each other. For a double type of planting, you will have to harvest twice as many seedlings.
Planting scheme
In hot climates, a weaker sprout is planted next to a strong shoot. It grows weaker and develops worse compared to its neighbor, but at the same time it creates the required amount of shade that protects the crop from caking in the sun. Excess water and fertilizers are not spent on it, since nutrients are constantly added to the hole and watering is carried out. A weak plant is unlikely to produce a good harvest, but it will contribute to better pollination and protect its neighbor from the heat.
In greenhouses where there is very little free space, this method of growing tomatoes allows you to get more yield per 1 square meter. meters of usable area. In greenhouse conditions, you can grow two different varieties of tomatoes by planting them in one hole. You can plant tall tomato bushes in the garden bed, and low varieties with different fruiting periods at their feet. To do this, you need to make holes strictly in a line, and place tall tomatoes on the back wall of the holes, and low ones on the opposite side directly in front of them.
Paired planting of tall tomatoes
If there are no difficulties with low-growing varieties of tomatoes, then the possibility of planting tall tomatoes with 2 plants together raises many controversial and contradictory opinions.
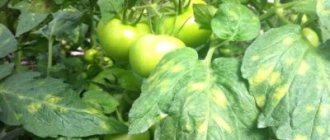
Tomato
Tall tomatoes are grown only on supports, these can be pegs or trellises. If two tall plants are planted in one hole, then you need to create a support for both of them or tie the stems to a single peg standing between them. Caring for such tomatoes is no more difficult than with a single arrangement of bushes. Beds with paired bushes are watered and fed in the same way, weeds are removed from them and the soil is loosened.
Difficulties begin to arise only at the stage of bush formation. It is much easier to cope with plants growing in open beds; in greenhouses the situation is more complicated.
Some gardeners advise leaving only one central stem for paired bushes. In fact, you can leave two main trunks for each plant. If you leave only one central trunk, then the plant actively rushes upward and occupies the entire height in the greenhouse.
Important! Pruning of stepchildren and excess leaves of double tomato bushes must be done in a timely manner, otherwise the side branches will form dense tangled thickets.
Since fertilizers are regularly applied to each hole, fears that there will not be enough nutrients for a couple of nearby bushes are completely unfounded.