Today I want to share my experience on how to plant peppers in open ground, sweet and bitter, which I grow mainly as seedlings, because this method has great advantages. But even in this simple matter there are pitfalls, and that is why I will share my experience. I’ll tell you how to prepare the seeds, plot, soil and seedlings. I’ll also tell you about my rules for caring for peppers after planting in open ground: watering, loosening, fertilizing. And if you follow these recommendations, you will grow peppers with a great harvest. But this is our goal, isn’t it?
Why do I plant peppers in open ground with seedlings?
Peppers are one of my favorite vegetables. Sweet is suitable for vitamin salads, delicious side dishes, stuffing, and preservation. Bitter - to add piquancy to your favorite dishes: soups, meat, stews, pies.
Gardeners are confused by the fact that pepper is a southern heat-loving crop. But I prove from my own experience that it is possible to grow it and reap an excellent harvest in Russian conditions. The main thing is to properly care for the plant from the very first days. There is nothing wrong with planting in open land. The main thing is to prepare the plant for harsh conditions and insulate the ridge.
In order to have time to harvest peppers at the end of summer, they are planted either in a greenhouse or as seedlings in open ground. This is a short-day crop: if the sun shines less than 12 hours a day, the pepper begins to bear fruit earlier and produces a better harvest.
Further events
After planting, the plants are covered with newspapers or a thin white non-woven fabric for several days to protect them from the bright sun. Care is as follows:
- you need to water evenly, often, lightly, with exceptionally warm water;
- so as not to disturb the roots by weeding or loosening, it is recommended to mulch the soil or cover it with non-woven material;
- remove the crown bud (inhibitor);
- the crop is usually planted with flowers or ovaries, nitrogen may be present in the first fertilizing carried out after resumption of growth (after 10-14 days), then emphasis is placed on potassium and calcium;
- All tall varieties need shaping and staking;
- plants that produce cuboid or prism-shaped, thick-walled fruits such as Dutch hybrids, take stepson at any bush habitus;
- cone-shaped bell peppers need moderate shaping only when growing tall;
- carry out preventive treatments.
Pepper is a fastidious crop, especially in open ground, where it suffers from the vagaries of the weather. But there will be nothing difficult in planting, growing and caring for if you know agricultural technology and fulfill all the requirements.
When to plant peppers in open ground
There are no clear planting dates for peppers in the agronomic literature:
- Sowing for seedlings: February 15 – March 15. For residents of the southern regions, the period shifts to early February - early March.
- Transplantation into an open bed: on the 60-90th day of seedling life.
Based on personal experience, many gardeners plant pepper seedlings at the end of March and transport them to the site by the end of June. I consider this method risky: the seeds often take a long time to germinate - they can “sit out” until the end of April. At this rate, by the end of May they are completely unprepared to move.
By region
I will give approximate dates for sowing peppers for seedlings in Russian regions:
- Southern. Beginning of February - beginning of March.
- Middle lane. Mid-second half of March.
- Northern. Second half of March - early April.
Planting seedlings in open ridges:
- Southern regions. End of April - mid-May.
- Middle lane. Second half of May - early June.
- Northern latitudes. First half of June.
These dates are approximate. Every year they shift depending on spring - early and late.
According to the lunar calendar
I will list the important dates of 2022 for gardeners who follow the lunar calendar:
- Planting pepper seedlings. February: 15-16, 28. March: 1, 8-9, 12.
- Transplantation into greenhouses. May: 8, 12-18.
- Planting in open ground. May: 12-18. June: 13.
I advise you to focus not only on lunar cycles, but also on the long-term forecast of weather forecasters.
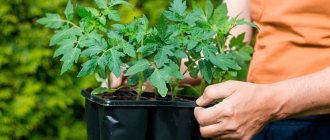
Carefully removing seedlings from containers
Peppers have a very delicate root system that reacts painfully to damage. It is for this reason that it is better to grow plants without picking, immediately planting the seeds in individual containers.
On the eve of transplanting into the ground, the seedlings are watered so that the soil forms a single lump and does not crumble. It’s even better if the peppers were planted in peat pots. In this case, there is no need to free the roots. You just need to slightly tear the peat shell, then it will dissolve itself in the ground, becoming additional food for the plants.
When transplanting, seedlings are taken out of plastic cups, trying not to destroy the earthen ball around the roots, and transferred to the prepared hole. Careful planting will allow plants to quickly adapt to a permanent location and develop normally in the future. If the roots are damaged, the plant will be sick and fruiting will be delayed.
Seed selection
First of all, I recommend deciding for what purpose the peppers are needed:
- Use fresh. Large-fruited, thick-walled varieties: Gladiator, Gift of Moldova, Winnie the Pooh, California Miracle.
- Conservation. “Siberian”, small-fruited varieties: Ermak, Victoria, Kupets.
Here is a brief description of common varieties:
- Ermak. Early ripening variety: in warm regions, two harvests can be harvested per season from one bush. Characterized by relatively large fruits - up to 200-250 g
- Medal. Early ripening peppers with “extended” fruiting. Such plantings will bloom and bear fruit all summer. The fruits are bright red, with thick walls, weighing 150-200 g
- Gladiator. Mid-season variety bred by Dutch breeders. Peppers are rich yellow in color, with thick flesh. Fruit weight can reach up to 300-400 g
- Yova. Early ripening domestic variety: 90-100 days pass from the appearance of the first shoots to the ripening of the fruits. A productive crop that produces juicy fruits weighing up to 250 g. Yova is an unpretentious variety that grows well on a heavy substrate.
- California miracle. Early ripening peppers producing large, thick-walled fruits weighing up to 400 g
- Victoria. Medium-early small-fruited variety. Peppers are thin-walled, ribbed, weighing 100-130 g
- Black Cardinal. An Italian unique variety - the fruits are distinguished by their bright purple color.
I recommend planting 1-3 varieties at a time, and don’t forget to try new varieties.
Optimal temperature for growing tomatoes.
Based on experiments conducted by various institutes involved in growing tomatoes, the following data can be derived on the optimal temperature for growing tomato seedlings.
- For tomato sprouting, the temperature should be: 20-22 degrees.
- 5-7 days after germination, the temperature at night should be: 8-12 degrees
- 5-7 days after germination, the temperature during the day should be: 8-12 degrees
- 7 days after germination, temperature on a sunny day: 20-26 degrees
- 7 days after germination, temperature on a cloudy day: 18-20 degrees
- 7 days after germination, temperature on a sunny day: 10-12 degrees
After 7 days, tomatoes need warmth
The difference in temperature due to illumination is caused by different rates of vital processes in tomatoes.
The temperatures obtained were tested by me in practice. I planted 2 acres of seedlings at different temperatures and got a larger amount of early harvest and overall harvest. Next I will give the data that I measured.
Temperature from 18 to 25 degrees around the clock:
- Height of tomato seedlings when planting: 33 cm.
- Stem thickness: 0.40 cm.
- Harvest on June 10, 48 kilograms.
- Total harvest: I collected 550 kilograms.
When maintaining 25 degrees during the day and 8 to 12 degrees at night:
- Height of tomato seedlings when planted: 21.2 cm.
- Stem thickness: 0.91 cm.
- Harvest on June 10, 70 kilograms.
- Total harvest: I collected 670 kilograms.
As you can see, the temperature regime for tomatoes is not so simple, but you can follow in the footsteps of more experienced gardeners when growing tomatoes.
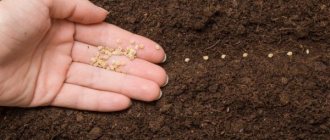
Preparing seeds for sowing
Options for preparing seed material differ in terms of its shelf life:
- Up to 3-4 years. Seeds for seedlings can be sown dry. But to be safe, I soak them in warm water (about 50 C) for 24 hours.
- More than 4 years. Before planting, the seeds are soaked for a day in a solution of heteroauxin and a growth stimulant drug (Epina, Zircon, Ovary, Bud, Energen). With this preparation, germination rate increases from 60-70% to 90%.
soaking pepper in a growth stimulator
The next stage is germination:
- The seed material is wrapped in damp paper, cloth: napkin, toilet paper, rags.
- The resulting “envelope” with seeds is placed in a plastic bag, inflated with air, and tied tightly.
- The “parachute” is placed on a board or tray, which is taken to a warm place - to the kitchen stove, radiator.
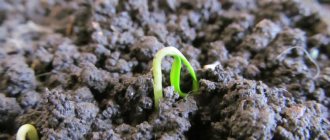
Sprouts appear on the 2-3rd day. The hatched seeds are sown in 0.5 cm of moist soil. The most suitable substrate is peat. You can purchase soil for pepper seedlings at the garden center. It’s easy to “prepare” the soil composition yourself:
- 2 parts humus;
- 1 part garden soil;
- 1 part sand;
- 1 tbsp. spoon of ash per 1 kg of mixture.
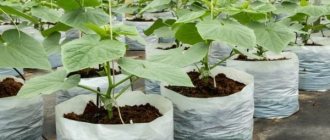
Peppers are sensitive to transplanting and picking, so seedlings are grown in “permanent” cups until they are moved to the garden bed. The most successful are peat tablets. When transplanting, the seedling does not need to be removed from the bowl, injuring its roots. An alternative is plastic containers for sour cream, cottage cheese, yogurt with a diameter of at least 10 cm. It is not a pity to cut such a cup when replanting the plant.
containers for seedlings
With high-quality preparation, seedlings appear the very next day after sowing. Here are some recommendations for caring for seedlings:
- Optimal air temperature: 25-28 C. When it decreases, plant development slows down.
- Watering - as the soil dries out, only with warm water (about 30 C).
- The air in the room should not be dry - spray the plantings with a spray bottle.
- Protect fragile seedlings from temperature changes and drafts.
- The ideal location is the brightest window sill in the house.
If you sowed seedlings in February, they need additional lighting - artificial daylight from 7.00 to 21.00. 1-2 weeks before moving to a permanent place, young seedlings begin to harden - they are taken out to the balcony, gradually extending the time spent in the fresh air. But it is important to ensure that the temperature does not fall below 13 C.
pepper seedlings
Collection and storage
Pepper has two types of ripeness - technical and biological (or physiological). At the stage of technical maturity, all peppers are usually green in color - from dark green to greenish-whitish. If the peppers on the bush are yellow, red, orange, purple or brown, then we can say that they are already at the stage of biological maturity, which means that the fruits removed from the bush must be used immediately - canned or eaten, since they are stored such peppers last a very short period of time.
Fruits collected in a state of technical maturity in suitable conditions can be stored for up to two months. The time difference between technical and biological ripeness is 20-30 days. The readiness of the pepper for harvesting is determined by the sound of the fruit cracking when you lightly press it. And one more guideline: peppers are harvested around the same time as eggplants and tomatoes.
Usually the first fruits are collected in early or mid-August, and peppers continue to be collected until frost. That is, ripe fruits are picked selectively every 5-7 days. To store the pepper better, it is cut off along with the stalk. During the growing season, three to five collections are carried out. Before the onset of frost, all the fruits are removed from the bushes, and their further ripening takes place indoors, after sorting by size and degree of ripeness.
Before storing the fruit, the stalk of the fruit is cut off, leaving a length of only 1-1.5 cm. Only healthy, thick-walled fruits that have no mechanical damage are suitable for storage. Thin-walled varieties are stored in the refrigerator. Varieties with juicy walls can be kept in plastic bags with a thickness of at least 120 microns; it is advisable that they have a membrane with perforations on the side wall. Peppers are stored better if each fruit is wrapped in paper. You can store peppers in baskets, shallow boxes on 1-2 rows or on shelves in the basement at a temperature of 8-10 ºC and an air humidity of 80-90%.
Since pepper quickly absorbs odors, make sure that nothing in your basement is molding or decomposing. Storing peppers in the right conditions allows them to stay fresh for one and a half to two months. You can store sweet peppers for a month in the refrigerator at a temperature of 9-10 ºC. Many housewives prefer, after washing the fruits and removing the seeds, stack the peppers one inside the other and store them in the freezer all winter, so that at any time they can prepare their favorite dishes from them or add a slice or two to borscht or salad.
Those fruits that are not suitable for storage can be processed. They make excellent marinades, aromatic winter salads, and borscht dressing.
Site selection and soil preparation
When planning plantings, leave the most illuminated, sun-exposed area of the garden for peppers. It is important that it is thoroughly protected from strong winds. I try to plant peppers along the south wall of my house. If there is no such protection, build it yourself: install a fence, plant strong “windproof” plants around the perimeter of the pepper bed.
Successful predecessors for this culture:
- all varieties of cabbage;
- pumpkin: zucchini, cucumbers;
- legumes;
- root vegetables: carrots, beets, turnips, radishes, daikon, radish.
Unsuccessful predecessors and neighbors are nightshades: tomatoes, potatoes, eggplants. It is not recommended to plan to plant a crop on the site of last year's pepper bed. The danger is that common diseases and pests of nightshade plants will be inherited by the seedlings.
growing bell peppers in open ground
The main requirements for the soil: breathability, high fertility, ability to retain moisture. I have been planning to prepare the site since the fall:
- I clear the ridge of previous “inhabitants”, weeds.
- I apply mineral fertilizers: 30-50 g of superphosphate per 1 m2 of plot.
- Scatter wood ash: 50-80 g per 1 m2.
- I add organic matter: 5-10 kg of humus per 1 m2 of land.
- I dig up the area using the bayonet of a shovel.
During the autumn preparation of the beds, I do not use fresh manure due to the threat of an excess of nitrogen. This is fraught with inhibition of the formation of ovaries and the ripening of peppers.
With such preparation in the spring, it is enough to thoroughly loosen the area and apply fertilizing (per 1 m2):
- Phosphate compounds: 30-40 g
- Nitrogen preparations: 20-30 g
- Potash fertilizers: 30-40 g
Additionally, you can disinfect the soil 5-7 days before planting seedlings: 1 tbsp. spoon of copper sulfate per 10 liters of water.
fertilizers for feeding peppers
How to choose a place to plant peppers?
There are many difficulties when choosing a site for replanting.
Important things to consider:
- Culture's love for warmth and light.
- Location where there is least wind.
Therefore, in your garden, choose the most illuminated place for peppers and tomatoes. But it is very important to protect each bush from gusts of wind. The trunk of peppers is quite delicate, so it will have to be tied up as it grows. Plus protect with screens, fences or tall other crops from free wind blowing.
It is also not recommended to plant peppers in one place all the time. Change its location with other crops annually.
Planting peppers: step-by-step instructions
Peppers are planted in greenhouses from mid-April. If the soil in the greenhouse is still frozen, turn on the heater and pour boiling water over the ridge. Black covering material helps to accumulate heat.
Depending on the region, heat-loving crops are planted in open ground from mid-May. Be sure to make sure there is no threat of frost. However, such early plantings should still be covered with “non-fabric” at night. If you do not have the opportunity to clean up and cover with covering material, I recommend planting the crop in the first ten days of June.
For peppers, I try to make “warm” high beds - using boards I raise them by 25-30 cm. This plant is subject to cross-pollination, so it is not advisable to place several varieties next to each other. Divide them with tall plantings - corn, tomatoes, sunflowers.
I will give a simple algorithm for transplanting young peppers, which I have been using for several years:
- Before planting, I water the seedlings generously.
- For transplanting, I choose a windless, warm, cloudy day - I carry out the work in the morning. If it is not possible to wait for the right weather, I plan the procedure for the second half of the day.
- I make holes according to the standard pattern of 70 x 30 cm. The hole should be slightly deeper than the height of the pot with seedlings.
- I water the dug holes generously with warmed water: 1-2 liters for each. I wait until the moisture is completely absorbed into the soil.
- I take a peat tablet with a plant and carefully move it into the hole. If the pepper grew in a cup, remember the walls of the container and gently tap the bottom. Carefully pull out the seedling by the base of the stem along with the earthen lump.
- Peppers are planted vertically, slightly deeper - this provides an incentive for the development of adventitious and lateral roots.
In conclusion, all that remains is to sprinkle the earthen ball with local soil and compact the substrate a little with your hands.
Planting scheme
The distance at which peppers should be planted will depend on the variety.
Information on optimal plant placement is provided on the certified seed package, but there is also a standard layout that can be followed. In a row, plants are placed 40-50 cm apart from each other, and 60-70 cm of space is left between rows. According to this scheme, you can plant bushes of normal height and large-fruited ones. For low-growing varieties of the crop, the planting scheme for pepper seedlings may be different. They can be placed more densely (30 cm in a row by 40-50 cm in row spacing). This distance is sufficient for varieties with medium-sized fruits. Another benefit of close planting is that the pepper leaves can better protect the fruit from sunburn. Its disadvantages: it is difficult to water and loosen, process bushes and collect fruits.
Care after planting peppers
The optimal temperature for the development of transplanted peppers is 20-25 C. If it drops below, it inhibits the development of plants. Peppers take a long time to take root and get sick. When the temperature drops to 13-15 C, the plantings are covered with “non-fabric”. If purple inclusions appear on the leaves or stem, the plant is frozen.
To protect peppers from spring cold snaps, resourceful gardeners build “tents” from scrap materials: mesh, bars, cardboard, burlap. Heat-loving plantings require protection at night. In the morning the “tent” is dismantled.
Another option is a temporary greenhouse on arcs. The latter are driven into the ground, dense polyethylene and a special covering material are pulled over them. Two more folk methods are used to warm plants:
- Smoke. A fire pit is set up next to the plantings and materials are lit that provide thick smoke. This “smoking” helps the peppers survive the cold.
- Sprinkling. A special installation is used that systematically sprays warm water. Microscopic suspensions of liquid create a comfortable warm background around the peppers.
Peppers are very fragile when planted. Strong winds can cause them to bend or break. Therefore, seedlings are tied to pegs at the base, the thick part of the stem. I use linen, cotton scraps or old nylon tights. There is no need to tighten the shoots excessively so as not to disrupt the flow of cell juices.
Loosening
The root system of peppers needs a constant supply of air. Therefore, it is necessary to promptly break up the dense earth’s crust on the ridge after heavy rains and watering. I use a small hand hoe to loosen the soil to a depth of no more than 5 cm around the stem. Be careful: peppers tend to have shallow roots.
In addition to loosening, periodic weeding of the ridge is important. Hilling up of plantings is carried out as necessary - it is important to prevent exposure of the root mass.
Watering
To water the peppers, use only warm water: pour it into buckets in the morning and place them in a sunny place on a fine day. By evening, the liquid in the container will warm up evenly. If possible, replace the water from the pump or garden tank with rain water.
watering peppers in open ground
Watering is carried out taking into account simple recommendations:
- Before flowering begins. In cool weather - 1 watering per week, in hot weather - 2. For 1 m2 of ridge you need 12 liters of water.
- During flowering and fruit ripening. The frequency of watering increases to 2-3 per week. The consumption rate increases to 14 liters per 1 m2.
The optimal water temperature for peppers is 23-25 C.
Top dressing
This crop does not have enough nutrition added to the soil when preparing the bed. The first feeding after transplantation is with the appearance of new leaves. For 1 liter of water: 1 g of potassium compound, 3 g of superphosphate, 0.5 g of ammonium nitrate. A second fertilizer with the same dosage 2 weeks later. If the plant develops slowly, it is allowed to exceed the fertilizing norm.
Pests and diseases
Readers often ask questions about what ails peppers. Most often, sweet peppers are affected by diseases such as verticillium (wilt), bronzing (spotted wilt), phytoplasmosis, fusarium, late blight, apical and gray rot, and blackleg.
- Secrets of growing cabbage - how to calculate sowing dates and how to obtain an environmentally friendly product?
Verticillium is a fungal disease that exists in three forms: brown, green and dwarf, each of which manifests itself in its own way. Since the destruction of pathogens by pesticides on vegetable plants is undesirable, only preventive measures remain: the destruction of all plant residues in the fall and the cultivation of varieties resistant to verticillium.
Phytoplasmosis, or stolbur, is manifested by the fact that the roots of the plant begin to rot, dwarfism develops, the fruits grow small, thin-walled and tasteless, the leaves curl, harden and turn yellow, and as a result the pepper dries out. They carry the disease of leafhoppers. The fight against phytoplasmosis is carried out by treating peppers with Acara at the time of planting and three weeks after it - spraying the vegetable at this stage of development will not cause harm. In addition, it is necessary to regularly loosen the soil on the site and remove weeds.
Fusarium is a fungal disease that causes peppers to turn yellow: the leaves acquire a poisonous yellow color. Diseased specimens are destroyed, and the remaining plants are carefully looked after: watered moderately in the morning, and weeds are not allowed to appear on the site. Keep in mind that next year it is better not to grow pepper in a site infected with fusarium.
Late blight is a common fungal disease that affects peppers and tomatoes. Symptoms of phytosporosis are the formation of hard spots on the fruits that trap the pulp. They destroy pathogens with the drugs Oksikhom, Zaslon, Barrier, but only before the pepper begins to bloom. By the way: hybrid varieties are much less susceptible to disease.
Blackleg affects the root part of the stem of pepper seedlings as a result of too dense sowing and keeping the soil and air at high humidity. Over time, the stem softens and the seedling dies. To avoid the disease of seedlings with blackleg, you should sow the seeds spaciously, pick the seedlings in time and monitor the humidity level in the greenhouse. If you find diseased seedlings, immediately remove them, dry and loosen the soil in which the seedlings grow, and sprinkle it with wood ash. At this stage of plant development, it is permissible to spray seedlings with Zaslona solution in the ratio: 3 caps of the drug per 1 liter of water.
Blossom rot occurs on the plant, oddly enough, in case of lack of moisture and appears as shiny or black deep spots on the fruit. Sometimes the cause of the disease can be excess nitrogen and calcium in the soil. Infected plants are burned, and the rest are sprayed with calcium nitrate.
Gray rot can affect every plant at any stage of development with putrefactive spots and a gray coating of mold. Its appearance is usually provoked by rainy weather. Affected fruits and parts of the plant must be removed, and the bushes in the area must be sprayed with fungicides, if it is not too late.
Signs of bronze wilt, or spotted wilt, appear as brown spots on leaves that take on a bronze or purple hue. These necrotic spots are located mainly along the main vein of the leaves. As a result of the development of the disease, the top of the plant dies, the fruits in the stalk area become covered with green, brown or pale yellow ring spots. To save the harvest, ripe fruits are picked off and the soil is no longer watered. The fungus is destroyed by Fundazol, however, before treating the pepper with a fungicide, weigh again all the pros and cons of such spraying.
Pests that plague peppers include aphids, spider mites, wireworms and slugs. You can help protect the plant from slugs by scattering nut shells, ground hot pepper or mustard powder over the area. You can also place bowls of dark beer here and there, to which shellfish will crawl from all over the area. And do not forget to loosen the soil between rows to a depth of 4-5 cm in the heat.
The larvae of the click beetle, or wireworms, remain in the soil for five years and gnaw on plant roots. To get rid of wireworms, in the fall the soil on the site is dug up, and in the spring, before planting peppers, several baits are placed on the site by burying pieces of sweet root vegetables in the ground and marking these places for yourself. Click beetle larvae will definitely crawl towards these baits. Every two to three days the baits are dug up, the larvae are collected and destroyed.
Spider mites infest plants in dry conditions; they settle on the underside of leaves and suck out the cell sap from them. If you don’t know how to treat peppers against ticks without resorting to insecticides, we offer you a recipe for a solution that is non-toxic to the human body: mix a tablespoon of liquid soap or dishwashing detergent with a glass of finely chopped onion or garlic, as well as chopped dandelion leaves in 10 liters of water, let it brew and spray the pepper with this mixture at any stage of its development.
Get rid of aphids with wood ash or tobacco dust infused in 10 liters of hot water in the amount of one glass. You can also, if necessary, use a treatment of pepper with a solution of quickly decomposing insecticides such as Karbofos or Keltan at the rate of one tablespoon of the drug per 10 liters of water.
What difficulties may arise when growing peppers?
The main difficulty that you may encounter when growing is diseases and pests that are characteristic of all nightshades:
- "Blackleg". The disease affects seedlings and leads to the death of the young plant. To prevent it, seeds must be disinfected before sowing. During pepper growth, it is important to avoid waterlogging and monitor the optimal temperature conditions.
- Withering. The development of the disease is indicated by the shedding of leaves, a brown tint of the tops, the main stem, and individual vessels. The disease affects already mature plantings.
Pathogens are bacteria, fungi and viruses that live in the soil, inherited from their predecessors, and introduced into the substrate with organic fertilizer. Methods of counteraction and prevention are simple:
- Purchasing quality seeds, disinfection before sowing.
- Following the rules of crop rotation.
- Timely control of pests and weeds.
- Destruction of the diseased plant.
Effective treatment is the use of fungicides. Be sure to follow the instructions for the drug so as not to harm the seedlings and to protect yourself.
Peppers suffer from “traditional” garden pests - aphids, slugs, and mites. Chemicals are used last. Pests can be easily controlled using traditional methods:
- Aphid. For a bucket (10 l) of warm water - 200-250 g of wood ash. The liquid is mixed until smooth. Damaged leaves are irrigated with the composition using a sprayer or broom.
- Spider mites. For a bucket (10 l) of water: finely chopped garlic or onion - 200 g, chopped dandelion tops - 200 g. To increase the effectiveness of the solution, add 30-40 g of laundry soap shavings (or the same amount of liquid). The components are mixed until homogeneous. The mixture is infused for at least 24 hours, after which the affected plantings are sprayed with it.
- Slugs. You can resist the pest by regular loosening and using straw mulch. If slugs have already “attacked” the peppers, they are collected by hand, and the surface of the soil around the plant is dusted with red pepper or dry mustard (1 teaspoon per 1 m2 of area).
slugs in the garden
aphids in the garden
Following these simple tips is enough to get a tasty, rich harvest. I would like to note that all procedures, from sowing seeds for seedlings to treating pests, must be carried out in a timely manner and with high quality. Only in this case will the plants thank you with delicious peppers.
Growing technology
Between rows you need to maintain an interval of up to 60 cm, between holes - up to 50 cm. It is imperative that the depth corresponds to the root neck of the tail. It should be located at the surface level of the ground. Fertilizers mixed with phosphorus, potassium, nitrogen (1 tablespoon each) and soil should be placed in the holes. Removing sprouts from pots must be done extremely carefully so as not to harm their root system. After removal, the seedlings must be lowered into a hole in the ground.
The voids should be filled with soil and the hole should be watered generously. As soon as it completely absorbs water, it needs to be covered with earth. To protect seedlings from night frosts, it is recommended to mulch the soil around the seedlings. Peat can be used for a protective layer.
If hot and sweet peppers are grown at the same time in a summer cottage, you must ensure that they are not located next to each other. Otherwise, it will not be possible to avoid cross-pollination.
You can protect your sprouts from pests in a fairly simple way. Near the pepper you just need to plant border marigolds, basil, and calendula. But coriander and parsley are great for attracting pollinating insects.
Related article:
Features of growing vegetable crops (cabbage, peppers, cucumbers)
Types and varieties of pepper
It was already mentioned above that vegetable peppers are divided into bitter and sweet. Sweet peppers have the following varieties:
- bell pepper;
- cone-shaped vegetable pepper;
- bell-shaped vegetable pepper;
- tomato-shaped vegetable pepper;
- cylindrical vegetable pepper.
Also, all varieties of sweet peppers are divided into varieties for cultivation in a greenhouse, for open ground and for containers (they are grown on a windowsill or balcony, and the bushes regularly bear fruit).
Varieties are also divided according to ripening time:
- early ripening varieties ripen in 80–100 days (varieties - Zdorovye, Dobrynya Nikitich, Belosnezhka, Lastochka; hybrids - Atlantic, Orange Miracle, Montero, Cardinal, Denis);
- the average ripening period reaches maturity in 115–130 days (varieties - Prometheus, Ilya Muromets, Korenovsky, Belozerka; hybrids - Maxim and Vitamin);
- late-ripening varieties ripen in 140 days or longer (the Zolotaya Medal variety and the Nochka hybrid are popular).
It should be remembered that seeds collected from the fruits of hybrid varieties are not able to retain the varietal characteristics of the parent plant. That is why seeds of hybrid varieties must be purchased annually. The advantage of hybrids is that they are high-yielding, have very large and tasty fruits, and are highly resistant to diseases.
All varieties are also divided according to the shape and size of the fruit, and this must be taken into account when choosing seed. The fact is that thick-walled large fruits, the shape of which is spherical or oval, are well suited for stuffing, while for preparing salads it is recommended to use thin-walled varieties with not very large peppers. Fruits are divided according to their shape into cuboid, oval, cylindrical, elongated, cone-shaped and spherical. There are also peppers with a lumpy or smooth surface.
The varieties are also distinguished by the color of the peppers at the stage of biological maturation:
- red peppers in varieties - Alyosha Popovich, Red Elephant, Lastochka, Ilya Muromets, Winnie the Pooh and hybrids - Zarya, Latino and Red Baron;
- yellow peppers in varieties - Katyusha, Yellow Bouquet, as well as hybrids - Raisa, Isabella, Indalo.
It is also interesting to know that the Maxim hybrid has purple fruits when technically ripe, and dark red when biologically ripe. The Cardinal hybrid has purple peppers; in the Bonus variety, the fruits can be colored in various shades from dark red to ivory; The hybrid Chanterelle and the Apricot favorite variety have rich orange fruits.
The most popular varieties:
Fat Baron
This early variety has cube-shaped fruits of red color and sweet taste. They weigh about 0.3 kg. The height of the spherical bush is from 0.5 to 0.6 m; it can grow 8 or 9 fruits.
Red shovel
The height of the bush is about 0.7 m, they can grow up to 15 sweet red peppers, they weigh about 150 grams, and their wall thickness is about 0.8 cm.
California miracle
This mid-early variety has been known for a very long time; it ripens in about 75 days from the moment the seedlings are transplanted into open soil. The bush reaches a height of 0.8 m. The thick-walled fruits are red in color and weigh about 250 grams.
Yellow bell
This variety is the earliest ripening and highly disease resistant of all; it ripens in only 65–70 days. The bushes reach a height of 0.7–0.8 m, golden-yellow cuboid-shaped peppers can reach 12 centimeters in height and in diameter, the wall thickness is from 0.8 to 1 cm.
Hybrid series Star of the East
The weight of thick-walled fruits is 150–350 grams, most of the varieties are early ripening. The fruits can be red-white, chocolate, white or golden in color.
Tevere
Medium ripening hybrid. The yellow, sweet fruits are thick-walled and weigh about 0.3 kg.
THE MOST SUCCESSFUL VARIETIES OF SWEET PEPPERS!
Watch this video on YouTube