When to plant
The timing of planting tomato seedlings in open ground depends on the growing region and weather conditions. Typically the procedure is carried out:
- In the middle zone (Moscow region) from May 15 to June 5.
- In the Urals and Siberia from May 25 to June 15.
- In the southern regions from April 20 to May 10.
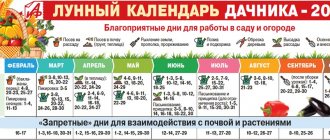
Favorable dates for planting tomatoes are chosen according to the Lunar calendar, which you will find on our website: Lunar sowing calendar.
Advice! The soil should warm up by 20 centimeters to at least +10-12 degrees, but best of all to +13-15 degrees.
When planting seedlings under film or other covering material, the procedure can be carried out 7 days earlier than the specified date.
Important! The risk of return spring frosts should be avoided. If the soil temperature drops to 0... + 2 degrees, the seedlings will freeze and die.
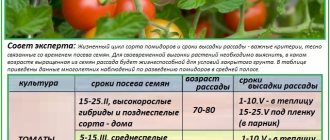
Depending on the timing of ripening, the age of seedlings before planting can be:
- for early varieties - 40-50 days;
- for medium-sized ones - 50-70 days;
- for later ones - 70-80 days.
In the lunar calendar, which is published in our article, you can find out favorable days for planting tomato seedlings in open ground.
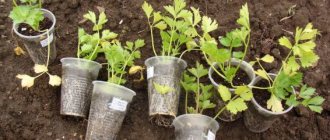
Hardening off the plant
Before planting tomatoes in the ground, it is necessary to harden off the fragile plant. This procedure allows the culture to get used to the external environment - after adaptation, it takes root well. The leaves and stems of a hardened plant contain sugar, and this is a sign of the development of a good root system. The plant will be strong.
During hardening, a layer of epidermis is formed, which protects the stems and leaves from damage. To get maximum results from hardening, it is necessary to take into account the time of its implementation. This will affect the plant’s ability to thrive in open ground.
If you grow seedlings yourself, then you need to harden the tomatoes in stages. Initially, you need to take the container with seedlings into a room with shelter, where the temperature is lower than usual. The container should not stay there for long. Then the walking time can be increased. After this, the seedlings can be left outside (for several hours). It must be a sunny day.
When tomato seedlings are purchased ready-made, the procedure for planting in open beds needs to be postponed a little. It is best to leave the plant overnight in an unheated room if the temperature outside is above zero. It is allowed to take seedlings into the greenhouse. During the daytime, the plant needs fresh air, so the room should be ventilated.
The start of the hardening procedure should occur on days in which the air has warmed up to 11-12°C. At the initial stages, seedlings can stay in the fresh air for up to 4 hours, then they are brought to a warmer and more comfortable place. On the second day, you need to leave the plant in the air for 6 hours, then for the whole day. After 4 days, tomatoes are planted in open ground. Gardeners should take into account that the minimum permissible hardening period is 3 days. The longer the hardening is carried out, the more vitality the seedlings will gain.
How to determine the readiness of seedlings?
The readiness of seedlings for planting is determined visually.
The bushes should have strong stems 20-35 cm high with 6-8 true leaves and even 1 flower raceme is allowed.
When properly grown, the distance between the leaves should be about 5 cm. If it is larger, it means the plant is weak and you will not be able to get a good harvest from it or you will have to choose the right fertilizers.
What to put in the hole when planting
Sometimes when planting tomatoes, it is necessary to pour fertilizer into the bottom of the hole to support the seedlings for the first time after planting. You can use both organic matter (chicken droppings, rotted manure, ash) and mineral compounds (Azophoska, Superphosphate, Urea).
More information about what can be put in a planting hole is presented in our article “What to put in a hole when planting tomatoes, what tomatoes like.”
Site selection
The site is selected in the fall after all harvesting work has been completed. The main thing to consider is the basic rules:
Important! Tomatoes are not planted in the same bed for 3 years in a row.
- The site should be in a sunny place, without fences or buildings nearby that will shade the ridge in the summer.
- Tomatoes grow well on any soil, but it is best to choose black soil and fertile loose loams. Sandy soil is poor, so it needs to be fertilized often. But the root system of a plant in loose sandy soil breathes well and is saturated with oxygen, and is also less likely to rot. Clay soil is nutritious, but very dense, so roots will not develop well. To such soil you need to add peat, crushed bark, coarse sand, vermicompost, turf and leaf soil, vermiculite, perlite.
- The acidity of the soil should be neutral or weak (pH 6.2-7).
Neighborhood of tomatoes with other plantings
It is also necessary to consider the compatibility of cultures with each other.
Important! Tomatoes grow well next to spinach, beans, carrots, radishes, asparagus, onions, radishes, lettuce, beets, zucchini, garlic, cabbage, pumpkin, celery, parsley, basil, marigolds, mint, sage, calendula.
- Basil is considered the best neighbor, as it protects against pests and improves the taste of tomatoes.
- Garlic and radish protect against spider mites and late blight. It is better to plant them on the sides of the tomato beds.
- Onions protect against flea beetles.
- Asparagus fights nematodes, which are very fond of tomatoes.
- Gooseberries and bird cherry protect against cutworms, moths and sawflies.
- The beans will become a barrier from the wind. But they should not be too tall, as tomatoes do not grow well in the shade.
- Tomatoes contain saponin, so any planting near them will grow more intensively.
The bad neighbors of tomatoes are:
- Potatoes, peppers and eggplants - as they are nightshades, just like tomatoes. They are susceptible to the same diseases.
- Fennel and dill take all nutrients from the soil.
- The corn is too tall and creates shade and also attracts the same pests as tomatoes.
- Turnips, grapes, sorrel and quinoa have a negative effect on the development of tomatoes.
Read more about the rules of crop rotation in the article: Table of crop rotation in the garden...
Soil preparation
The soil is prepared in the fall. It is fertilized with organic matter and mineral fertilizers.
From organic matter, gardeners most often use rotted manure. Apply 4-5 kg per 1m2.
Among mineral fertilizers containing phosphorus and potassium, superphosphate is used - 60-80 g/m2 and potassium sulfate - 20-25 g/m2.
Important! The amount of fertilizing and fertilizer may vary. Some people like organic matter, others like nutritional supplements with minerals.
In the spring, 5-7 days before planting seedlings in open ground, the ground is dug up and the remaining weeds are removed.
2 days before the procedure, water the soil with a hot solution of copper sulfate or potassium permanganate to kill all pests and fungal spores.
During planting, add (one or more nutritional components) to the holes:
- superphosphate (phosphorus) – 1 teaspoon;
- crushed shells (calcium) - 3 tbsp. spoons;
- compost - 3 tbsp. spoons;
- ash (potassium-phosphorus fertilizer) – 0.5-1 cup;
- vermicompost – 1 glass.
Advice! Most often, superphosphate and ash are added.
How to protect young tomato plantings from return frosts
If cold temperatures are expected at night and in the morning, and tomato seedlings have already been planted, then use temporary shelters until stable positive temperatures arrive (spunbond, lutrasil, etc.).
If the planted tomato seedlings are frozen, cut the stems and leaves to healthy tissue, and the remaining ones are sprayed with warm solutions of low concentration, iodine, and Zircon. This technique (if the roots are not damaged) stimulates growth processes well, and if the early harvest is lost, the overall yield will be quite high.
Spraying with anti-stress solutions "Epin" and "Zircon" can be repeated several times after 8-10 days. After 3-4 days, you need to fertilize with urea, “Kemira”) and after 5-7 days, repeat fertilizing with full fertilizer (nitrophoska or any other), but very carefully and in low doses.
If the freezing of the above-ground mass is insignificant (the leaves do not turn black, but seem to have withered), watering the leaves through a shallow diffuser with slightly warm water (literally at room temperature) has a positive effect. This technique promotes the gradual thawing of a slightly frozen bush.
Tomatoes die when the temperature drops from +3...+1°C to -1°C. To protect plants from prolonged cold spells, they are heated with smoky fires, and the bushes are covered with straw and dry sawdust. For small plantings, the bushes are covered with cardboard boxes, plastic containers or covering material.
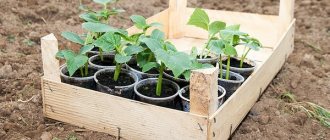
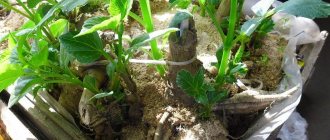
Preparing seedlings
The seedlings must be prepared in the procedure. In 10-14 days they begin to harden it to adapt to open ground. Containers with seedlings are left in a colder room, for example, on a balcony or veranda. The main thing is that the plants should not be exposed to direct rays of the sun so that the leaves do not get burned. Choose a place in the shade or artificially shade it.
On the first day, the seedlings are taken out for 1-2 hours, the time is increased every day. On day 8, the tomatoes should be left in the air all day, and at night they should be brought indoors.
The day before planting, the seedlings are watered to make it easier to remove them from the container without damaging the root system. It is also recommended to spray with Epin to reduce plant stress.
How to properly plant tomatoes for seedlings: step-by-step instructions
The timing of planting tomato seeds for seedlings without picking is late (late spring). In this case, they are sown in separate containers, each seed in its own peat or plastic cup.
If you plan to plant seedlings, then all the seeds are sown in one common container with soil in February. At the same time, be sure to mark the rows with different varieties so as not to get confused in the future. The harvest with both methods is obtained simultaneously, since in the first case the seeds are sown later.
Sowing in a common container
- A small layer of drainage is poured into the prepared and disinfected box. This can be either fine gravel, expanded clay or broken ceramic shards. The selected soil is poured over the drainage layer and watered well until completely soaked. It is advisable to fill containers 2-3 days before the intended sowing.
- In the disinfected soil, grooves are made at a distance of 3 cm and a depth of up to 1 cm.
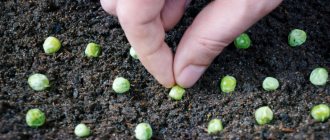
- The sprouted seeds are placed in the recesses, keeping a distance of 1–2 cm between them.
- The seeds are sprinkled with a layer of soil up to 1 cm on top.
- Cover with glass or plastic wrap and place the container in a warm place. Until the first seedling loops appear, lighting does not matter.
In separate containers (without picking)
Those who do not like to pick up seedlings like to sow in separate cups. They must have drainage holes.
At what distance to plant tomatoes?
Tomatoes love sunlight, so they plant tomatoes in open ground at the following distance from each other:
- Low-growing varieties - the interval between bushes is 30-40 cm, the row spacing is 50-60 cm.
- Low-growing standard ones - the interval between the bushes is 20 cm, the row spacing is 30-35 cm.
- Tall - the interval between bushes is 50 cm, the row spacing is 70-80 cm.
The beds are arranged according to the following schemes:
- Private is the simplest. Tomatoes are planted in a row with a certain distance opposite each other and between the rows.
- Checkerboard - the bed consists of 2 rows on which tomatoes are planted in a checkerboard pattern.
- Ribbon-nesting - the bed consists of 2 rows where the plants are located next to each other.
- A popular scheme according to Mitlider is narrow beds 45 cm wide, with a row spacing of 90-100 cm.
Answers to frequently asked questions
When can you plant tomatoes?
We focus on 2 points: the condition of the seedling (not lower than 20 cm, 10-12 leaves) and the weather (+20, no danger of frost).
Is it possible to plant overgrown seedlings?
Quite. It can be placed in a regular bed in a spiral (if there are few “overgrowths”) or placed almost horizontally in an enlarged hole (if there are a lot of “overgrowths”).
Do I need to feed tomatoes after planting?
Not necessary. Place azofoska or a pinch of ash at the bottom of the hole. If the seedlings do not take root well, spray them with a growth stimulator. Fertilizing will be effective no earlier than after 10 days.
Planting tomato seedlings: step-by-step instructions
Important! The procedure is carried out on a cloudy day or in the late afternoon so that the air temperature is not too high and the sun does not burn the leaves of the seedlings.
- Holes are made in the garden bed 15-30 cm deep (for the length of the roots).
- Fertilizer is added to the holes and 3-4 liters of water are poured.
- The bushes are rolled into the holes one by one.
- You can plant vertically with a slight depth, since you cannot place the root system of tomatoes too deep so as not to provoke rotting. The deeper, the worse the earth warms up and the less moisture and air enters.
- It is recommended to deepen overgrown seedlings to the cotyledons or the first two leaves, which are first removed. Seedlings are planted lying down.
- To plant lying down, furrows are dug and overgrown plants with a lump of earth are placed in them at an angle of 30 degrees. The stem must first be cleared of leaves. The top is directed north, then the bush will rise towards the sun. The stem and root are covered with soil. With this planting, the bushes become squat and stocky. Adventitious roots will form on the stem underground. Thanks to a powerful root system, the stems will become thicker and the leaves will become larger.
Important! When buried, fruiting will begin 1-2 weeks later, since the plants first grow roots on the buried stem.
- During normal planting, seedlings are planted vertically to the level where they were in the seedling container. The holes are covered with earth and watered with warm water.
- The top soil is mulched with dry straw, sawdust or hay.
- Overgrown and tall tomatoes must be tied to a support. This can be done immediately or as the plant grows.
Watch the video! Planting tomato seedlings in open ground
How to plant tomato seedlings in open ground
Proper planting of tomatoes allows the crop to quickly adapt to new conditions, bloom earlier and produce its first fruits. Everything matters - from the age of the seedlings and soil preparation to the distance between the bushes.
It is recommended to observe crop rotation at each site. It is correct not to place tomatoes in a garden bed where other nightshade crops previously grew. They should not even be nearby to prevent the exchange of pests and diseases.
But the reality is that most gardeners and farmers have no choice but to plant tomatoes in their original place, or in close proximity to potatoes, peppers, and eggplants. Therefore, soil improvement must be carried out regularly.
Expert opinion
Maria Nikolaevna
Experienced vegetable grower. 40 years of experience. Graduated from Michurinsk State Agrarian University (MICHGAU)
Ask a Question
The best predecessors for tomatoes are onions, cucumbers or cabbage. The ideal ones are green manure.
Site preparation
To grow tomatoes, choose a sunny, well-ventilated place, but protected from strong gusts. Tomatoes prefer a loose, permeable substrate with a neutral or slightly acidic reaction. On heavy soils they grow poorly and often get sick. Constantly soaking the soil is the fastest and most reliable way to ruin seedlings.
It is good if the soil preparation is carried out in the fall. When adding organic matter for planting, you need to take into account that it must be completely rotted. Tomatoes do not tolerate fresh manure.
Acidic soils are improved with lime or dolomite flour. The latter additionally saturates the substrate with the phosphorus that tomatoes need so much. By the beginning of the growing season, dolomite will just begin to decompose and enter an easily digestible phase.
The area is dug up using a shovel, stones and weed roots are removed. Organic matter, peat, and long-acting complex fertilizers are added.
The rationing of additional components depends on the fertility and composition of the soil. You can focus on the following average doses (sq. m):
- humus – 7 kg;
- lime – 0.5 kg;
- superphosphate – 40 g.
If installing arcs or other temporary shelters over tomato bushes is not a problem for the owners, soil warming can be accelerated. It is covered with black non-woven fabric, and cellophane is placed on top to prevent moisture evaporation.
Tomato planting scheme
The scheme for planting tomatoes in open ground depends on the variety, the method of cultivating the bed and the wishes of the owners. Caring for tomatoes should be convenient.
Low growing varieties
Usually, super-determinate or standard early-ripening varieties are planted in open ground. They will quickly yield the harvest, and if the timing of sowing the seeds is observed, they will have time to get rid of late blight. In this place you can plant green manure, greens, onions, green beans or daikon.
Convenient placement of low-growing tomatoes that do not require pinching - using the two-line method. Draw stripes at a distance of 20 cm, holes - every 40 cm, in row spacing - about a meter.
It may seem to novice gardeners that there is a lot of empty space, but soon the bushes will grow. They will be well ventilated, which will reduce the risk of disease.
Medium and tall tomatoes
The placement of determinate and indeterminate varieties or hybrids is carried out according to the scheme recommended by the manufacturer. It can only be changed in the direction of increasing the distance between the bushes.
Tall tomatoes in open ground grow in one stem and must be tied up. That is why many gardeners refuse to grow them in garden beds and only plant them in greenhouses.
Meanwhile, it is not at all difficult to dig a support every 2-3 meters and secure a strong wire on top. Considering that in small areas crop rotation is still not observed, it will stand for several seasons.
And the advantages of growing tall tomatoes in open ground in the absence of a greenhouse are many:
- Space saving. To get a harvest from tall tomatoes in the garden, they are led into one stem.
- Tied pyramidal bushes, from which the stepsons and leaves under the tassels that have begun to fill are regularly removed, are well ventilated. This significantly reduces the risk of developing diseases.
- Long-term fruiting.
- Easy care. When growing a tomato in 1 stem, soil cultivation and harvesting are significantly simplified.
You need to plant tall varieties in the same way as in a greenhouse:
- between rows 80-90 cm;
- holes every 45-50 cm.
Some gardeners are accustomed to working while kneeling or sitting on a low stool. They should make row spacing so that it is convenient to care for the tomatoes, and the bushes on the opposite side are not injured.
Well preparation
To plant normally developing seedlings, holes are dug of such a size that the root and part of the stem can comfortably fit there. There should be space left at the bottom for starting fertilizers, and at the side for adding fertilizer.
Overgrown tomatoes need to be replanted with a significant depth of the trunk. First you should choose a method (there are several), and then decide on the depth and width of the hole.
When planting, add 4 tablespoons of a mixture consisting of equal parts to each root:
- complex fertilizer containing nitrogen, potassium, phosphorus;
- lime or dolomite flour is a source of calcium, and the latter gradually releases phosphorus during decomposition;
- tobacco dust - it protects tomatoes from many pests and reduces the likelihood of a number of diseases;
- dry mustard powder - the component complements the previous one, which is especially important in the absence of crop rotation.
The homemade “cocktail” is mixed well with the soil. A layer of clean fertile soil is made on top. This way the root will not get burned upon contact with fertilizers, but will be pulled down.
Fill the hole completely with water. Allow the liquid to be absorbed. Now you can plant tomatoes.
Planting process
The readiness of seedlings for transplanting into the ground is determined by its age:
- for early standard and super-determinate varieties and hybrids this is 40-50 days after emergence;
- determinant varieties of medium and late ripening are planted at the age of 55-60 days;
- indeterminate ones need 60-65 days from the appearance of the first loops.
Before planting, tomatoes are not watered for 1-3 days (depending on conditions) so that the leaves wilt a little and the stems become soft - this way there is less chance of breaking the trunk. But you can’t overdry the lump either - even abundant watering won’t be able to wet it the first time, and no one will tear up the soil and check it.
Regardless of the planting method, the cotyledon leaves are removed from the tomatoes. If the trunk is going to be buried, it is recommended to determine in advance how much and tear off the plates that are expected to be below ground level.
You can perform the operation immediately before landing, but it is better to do it a few days before. The wound surface will heal and the risk of infection will be minimized. In addition, this will save time.
Planting normal seedlings
Strong, low seedlings obtained thanks to proper care:
- Take it out of the container, trying not to disturb the earthen lump.
- Place it in the center of the hole.
- Cover with substrate, compacting it during planting. This will prevent the formation of voids, provide better adhesion of the root to the ground, and speed up the survival rate of the tomatoes.
- Water generously.
- Mulch the surface under the bush with dry peat, soil, or spread non-woven material.
Planting overgrown tomatoes
For what reason the seedlings stretched out does not matter. But you need to plant it a little differently, with depth. It is important not to forget what variety the gardener is dealing with and not to bury the place where the first flower cluster will form:
- superdeterminate – 6-7 leaves;
- determinant – 8-9;
- indeterminate – 10-12.
Modern selection tries to make varieties and hybrids bloom as early as possible. Therefore, the first fruit cluster may form 1-2 leaves lower than is commonly believed. When planting, it is recommended to focus not only on established rules, but also to study the varietal description. It would be a shame if the largest tomatoes were lost.
To plant overgrown tomatoes, digging a very deep hole in order to place the stem vertically does not make sense and requires a lot of labor. It's better to use one of the following methods:
- Landing lying down. Dig an elongated, inclined hole. The tomato root is placed in the lower part of the hole, the stem is laid on the soil. Cover with substrate so that the top remains on the surface. You don’t even need to tie it up - the shoot stretches towards the light and will soon straighten out on its own. Watered.
- Spiral fit. The hole is dug shallow but wide. The earthen ball is installed vertically in the center. The trunk is wrapped in a wide spiral, gradually adding substrate. Lightly compact and moisten the soil abundantly.
Planting in a spiral is not possible if the tomato was watered the day before and the stem did not have time to wilt a little. It will be too fragile and will definitely break.
Planting tall varieties
It is with tall varieties that dense planting is possible in open ground. They are led into one trunk. They are planted as super-determinates, only the rows are arranged in such a way that it is easy to tie them up.
If there is no trellis, at the same time as planting tomatoes, a support is dug in next to each bush. Without it, there is no point in growing tall varieties - the stem will fall to the ground or break.
Care after disembarkation
Caring for tomato plantings consists of the following procedures:
- regular watering;
- mulching (optional);
- loosening and removing weeds;
- fertilizer;
- bush formation;
- stepsoning;
- garter in a support or trellis;
- protection from diseases and pests.
Watering
It is not necessary to water them for the first 1-2 weeks after planting tomatoes in the garden. During this time, the seedlings will take root in the new place. Next, water the tomatoes every week at the rate of 3-4 liters of water per 1 bush. During drought, watering is increased.
Important! Water is applied exclusively at the roots so that the plants do not get sick.
After watering, the beds are loosened and weeds are removed.
Top dressing
A few weeks after planting the seedlings, fertilizers are applied.
First fertilizing - after 15-20 days, nitrogen fertilizing is applied. For example, nettle infusion (200 ml per bush). You can also prepare solutions:
- dilute 1 tbsp in 1 bucket of water. a spoonful of nitrophoska and 0.5 liters of mullein. Mullein can be replaced with 1 tbsp. spoon of Ideal fertilizer. 500 ml of product is used for 1 bush.
- Gardeners consider ammonia solution to be the most effective. Dilute 2 tbsp in 10 liters of water. spoons of 10% alcohol. For 1 bush there is 1 liter.
Second feeding - fertilize with potassium fertilizers at the beginning of flowering and budding.
- Ash solution. Dissolve 1 liter jar of ash in 1 bucket of water.
- Potassium humate solution (Bio Humate). Dissolve 20 ml of product in 1 bucket of water.
- Water 1 liter per bush.
Third feeding - potassium fertilizers are used to fertilize tomatoes during fruiting.
Important! Before fertilizing, water the tomatoes well with warm water so as not to burn the root system.
Foliar feeding. To stimulate the appearance of ovaries, foliar feeding of tomatoes is used:
- Boric acid solution. For 1 bucket of hot water 10 g of product. After cooling, spraying is carried out.
- Preparations Tomaton or Ovary. Spraying is carried out during the 1st or 2nd feeding.
Shaping: pinching and trimming
Medium- and tall-growing tomatoes form stepchildren over time. They are useless, since the bushes waste energy on them, and they themselves weaken and slow down their growth. Therefore, it is recommended to remove tomato shoots every week.
More information about pinching is written in the article: How to properly pinion tomatoes in a greenhouse: diagram of bush formation, care features, photos and videos
How to care for tomatoes after transplanting
Proper care will help plants quickly adapt to a new place, and will also provide a generous and tasty harvest. As care after transplanting tomatoes into open ground, watering, loosening, weeding, fertilizing, pinching, pruning, tying, and pest and disease control should be performed.
Watering
It is not recommended to water after transplantation for about 7-10 days. And then it is necessary to water approximately once every 7 days. If it is hot and dry outside, then watering should be done more often!
When watering tomatoes, the following rules should be observed:
- The recommended watering rate is 3-5 liters of water for each bush.
- It is better to do this in the first half of the day, and if the weather is hot, then it is better in the morning.
- After each watering, it is recommended to remove weeds and loosen.
- To optimize soil moisture levels, cover the bed with mulch material (for example, sawdust, compost, straw).
- It is also a good idea to water between the rows, this way you can definitely avoid erosion of the roots.
Important! Watering can only be done at the root; drops should not be allowed to fall on the foliage of the plant! This crop cannot be irrigated, because various diseases can be provoked, and sprinkling can also cause leaf burns and tissue damage.
Feeding and fertilizing
Tomato fertilizers help achieve a more luxurious and abundant harvest. Root feeding of tomatoes is carried out in the following order:
- The first feeding should be done ten days after the event. As a fertilizer, you can use a solution of Nitrophoska (15 ml) and mullein (0.5 liters) , mixed with ten liters of water . Fertilizers should be applied in the following proportions - 500 milliliters per bush.
- The second feeding is carried out 20 days after the first application of fertilizers. For feeding, you can use a mixture containing the following ingredients - a teaspoon of potassium sulfate, a tablespoon of superphosphate, 400 grams of chicken manure , the components are mixed with ten liters of water . One liter of fertilizer is applied per plant.
- The third feeding is carried out two weeks after the 2nd feeding. To prepare the fertilizer, potassium humate (15 ml), nitrophoska (15 grams), 10 liters of water are , and when watering, 5 liters of the substance are added per square meter. Also, after 14 days, it is recommended to add a solution of superphosphate , which can be done like this - a tablespoon of the substance is mixed with 10 liters of water, one bucket is poured per square meter of bed.
Important! Before fertilizing, it is imperative to water the plants abundantly with plain, clean water. If you don't do this, you can burn the roots.
In addition to the root fertilizing described above, foliar fertilizing can also be done. During one harvest season, you can do about three to four fertilizing, but this can only be done in the evening and in dry weather. You can prepare fertilizer for such feeding as follows: one gram of potassium permanganate, 15 grams of urea, 10 liters of water.
Video: fertilizing option to increase yield.
Formation (stepping, pruning)
Stepchildren are unnecessary side shoots that form in the axils of the leaves. They do not perform any useful functions, they only take away the plant’s resources, because of this, the bush’s growth and fruiting slow down, and the plant becomes weaker. Stepsoning, accordingly, is the process of eliminating stepchildren.
The photo shows the stepson of a tomato:
It is recommended to plant tomatoes every week . If they appear, they need to be removed as soon as possible. Only your thumb and forefinger can be used for removal. When pinching, it is necessary to leave a stump about one centimeter in size (this will help prevent the appearance of a new useless shoot).
Trimming the lower leaves located close to the ground must be done so that the plant receives a normal supply of air and light from below and is well ventilated. Thanks to this, you can avoid unpleasant diseases. It is recommended to prune at the moment when the fruits begin to fill.
The procedure is carried out using pruning shears or a knife. You should also remove foliage no higher than the first bunch of tomatoes.
Garter
The garter has a number of significant advantages, for example, after it it becomes more convenient to water the plants, treat them against diseases and pests, plant them, and harvest them. In addition to convenience, it should be noted that thanks to the garter, the bushes are better ventilated, receive more sunlight, reduce the risk of developing diseases, and also reduce the load on the main stem of the trunk - damage to it due to heavy vegetables is eliminated.
Video: features of tomato garter.
Prevention and control of diseases and pests
Mostly, plant diseases occur due to high humidity. To avoid the development of diseases and pests, you should adhere to the following recommendations:
- It is necessary to carry out moderate watering, avoiding waterlogging;
- The greenhouse or greenhouse should be regularly ventilated;
- It is recommended to mulch the beds;
- It is necessary to promptly treat plants at the first signs of diseases and pests.
We can say that the hardest part is already behind us! There is very little left until the tasty and healthy fruits ripen. And you, dear gardeners and gardeners, need to provide the seedlings with proper and complete care and then the harvest will not disappoint you.