Digging and storing gladioli: timing, technology.
Popular among gardeners, gladiolus or “skewer” comes from sunny Africa. The flowers are colorful and attract the attention of lovers of beauty, because otherwise they would not have conquered almost the entire globe with their beauty.
A flower with long sword-shaped leaves and a tall straight stem reminiscent of a gladiator's sword. The flower is ideal for a man's bouquet. The number of varieties (more than 5 thousand) reflects the love for this bright conqueror of hearts.
When to dig up gladioli in the fall for the winter after flowering in the Urals and central Russia?
- It only takes 40-45 days after flowering for a gladiolus tuber to gain strength and again please the gardener with its beautiful flowers next year. These days are counted after cutting the inflorescences. Gladioli remain in the garden for the specified period. At this time, nutrients accumulate and remain in the corm.
- For flower growers who are just starting to grow gladioli and do not have enough experience, following this simple rule will help preserve expensive varieties. If you leave gladioli with inflorescences in the rows until the frost itself, and only then start quickly digging them up for storage, then you can forget about a flower garden with beautifully blooming tall and slender gladioli.
It only takes 40-45 days after flowering for a gladiolus tuber to gain strength and please the gardener again with its beautiful flowers next year.
- The corms that gained strength along with the peduncle have no chance of sprouting the next year. Local climatic conditions also dictate the time for preparing gladioli for harvesting. It's better to do this in August.
- In some regions, persistent cold may begin in early October. In such areas, gladioli need to be harvested in late September.
- As for central Russia, here the timing of digging up gladioli is somewhat shifted: it is better to dig up gladioli in the second ten days of October.
When should you start cutting off inflorescences? And what to do with gladioli that have not fully bloomed?
- You need to subtract 40-45 days from the date on which the corms are planned to be harvested.
- If this is the middle zone, then the flower arrows are cut off at the beginning of autumn - in September. Then you can start digging up gladioli after October 10.
- And if the timing can be shifted depending on climatic conditions, then the rule for harvesting gladioli after 40 days after cutting the peduncles remains unchanged. Keeping the corms to ripen in the ground during this period should become a law for the grower that cannot be violated!
In central Russia, it is better to dig up gladioli in the second ten days of October.
We reveal the secrets of digging up gladioli by experienced collectors.
- The dark-colored varieties (burgundy, purple, lavender-blue) are dug up first. This is due to the early period of loss of natural immunity to fungal diseases.
- It is better to start harvesting early and middle varieties first. After them, late varieties are dug up. For the latter, the ripening period of the corm after cutting the peduncle increases by another 10 days and is not 40, as mentioned above, but at least 50 days.
- If the corms are young and not flowering, they will need more time to ripen. This means that they should be dug up after all other corms have been removed. As a rule, such plants are in every collector’s flower garden, because large children acquire new varieties. Their flower arrow appears only in the last days of August.
- To see what kind of inflorescence a gladiolus has or to check the correct variety, collectors use this simple method: the flower arrow is broken off, but only the first bud remains on the plant alone. The gladiolus will bloom and the arrow will be completely removed.
Dark-colored varieties (burgundy, purple, lavender-blue) are dug first
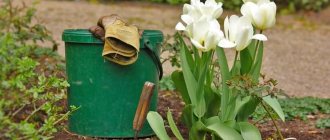
An impressive collection of gladioli requires large-scale, labor-intensive and responsible work to harvest the corms. One day will not be enough for this. It is necessary to prepare in advance: free a few days from other matters, arm yourself with boxes and containers, take care of labels with the names of varieties.
- Gladioli are not afraid of the first autumn frosts and light cold (0-2 degrees). However, as temperatures drop, leaf damage occurs.
- Severe freezing leads to the fact that the process of nutrient synthesis slows down and the plant needs to be dug up immediately. Corms in the ground will not die from frost. But when the temperature drops to -5−7 degrees, it is better to cover the bed with mulch.
It is necessary to set aside a day or two for digging up gladioli long before the onset of persistent cold weather
. Features of cleaning:
- It is better to dig up corms in dry weather, when it is not cold outside. But if time is lost, gladioli are dug up no matter what the weather is like outside. The main thing is to preserve valuable varieties. Therefore, neither rain nor snow should become a hindrance.
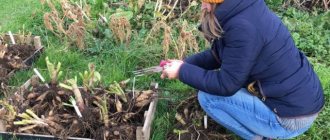
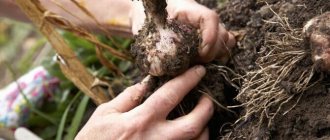
- A piece of film is spread next to the bed. A shovel is lowered under the corm and carefully dug up. Excess soil is shaken off above the film (so that the children do not “scatter” around the garden bed). Next you need to cut off the stem. This is done with pruning shears. But it is not cut off to the very edge, but a stump 1-2 cm high is left.
- If the corm is old, it is better to remove it immediately. Her children are left for reproduction. If there are gladioli grown from children, then their roots are shortened and completely cut off during planting in the soil.
It is better to dig up corms in dry weather, when it is not cold outside.
- Dig up does not mean saving the corms. To do this, you will also need to process the planting material. Potassium permanganate or one of the fungicides is diluted and the corms are thoroughly washed. During this process, you can remove a few of the top scales from the corms if they come off easily on their own.
- The varieties are placed in separate boxes. Dry in a warm room (25−30 °C, but not lower than 20 °C) for two weeks.
- After this period, the corms are transferred to a room where the temperature is maintained at 20−22°C and dried for 1 month.
- It is better to store gladioli in linen bags until next spring. Regular cardboard boxes are also used for this purpose. The optimal temperature is 5−10 °C. A dry non-residential utility room or cellar is suitable for storing gladioli. Corms will overwinter well in the refrigerator on the bottom shelf.
- Corms are periodically inspected so that diseased ones can be removed in time. Damp or moldy gladioli are dried in a warm place for 2-3 days. After drying, the corms are again put into the refrigerator for further storage.
Features of the plant and indications for digging up bulbs
When deciding whether to remove the bulbs from the ground for the winter, it is worth starting from the prevailing climatic conditions. In particular, in the southern regions in the cold months the temperature remains mostly at zero; digging up gladioli in the fall is not relevant here. During the period of frost, it is advisable to cover the plantings with a protective material, for example, agrospan or film.
In the middle and northern latitudes, harsh and long winters are expected; the autumn preparation of gladioli, in addition to digging, consists of protecting them from disease and freezing. It must be remembered that in the north the plant is planted quite late, in some cases the bulbs do not reach maturity. The harvesting period for fennel in mid-latitudes is the end of September; frosts begin by these days.
How to properly dig up gladioli: timing and digging technology
- Harvesting corms whose flower stalks were not cut off, and therefore there was no ripening period, can lead to the fact that the gladiolus simply does not sprout the next year.
- It is necessary to set aside a day or two for digging up gladioli long before the onset of persistent cold weather.
- To prevent the children from remaining in the ground, it is better to harvest the corms in warm, dry weather. If the children remain, they can germinate within 3 years. They need to be dug up immediately, otherwise pure-grade gladioli plantings will become clogged.
- If you did not have time to remove the gladioli in time, and the deadlines are already running out, then this must be done even in bad weather: during rain or snow.
- The stem of a dug-up corm should be cut off using a pruner, but not to the very edge, but leaving a stump 0.5-1 cm high. In this way, you can reduce the likelihood of damage to planting material by thrips.
- To prevent the spread of various diseases, the old mother corm is removed immediately. For adult corms, the roots are additionally trimmed. This significantly reduces the drying time of planting material. If the corms are grown from children, then their roots can only be shortened.
- The dug up corms are inspected. If any of them are sick or damaged by disease, they should be burned immediately.
How to properly dig up gladioli: timing and digging technology
How to cull corms
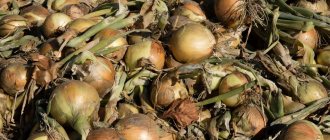
Below in the photo we see a fully matured corm.
Signs of maturity of the gladiolus corm:
- Full-blooded root scales; the baby is “dressed” in scales.
- The scales of the baby are dense and dark.
- The baby is easily, without effort, separated from the corm.
During the growing season, one peduncle grows from the corm, and one young (replacement) corm with children is formed. Beginners often worry that they won't be able to figure out where the babies are and how to get them off.
Mariska Member of FORUMHOUSE
The children are impossible not to notice. Association: a large river mother mussel with a bunch of baby mussels clinging to the shell.
It happens that not one bud awakens in the corm, but two or three. In this case, two or three peduncles will grow and two or three replacement corms will form. In the spring, inspect each corm again, and if you notice that there is not one sprout, but two or three, leave the strongest one and break off the rest.
On average, corms of one gladiolus replacing each other live 3-4 years; Every year the corm becomes flatter, and its productivity and immunity decrease. It is because of this that old bulbs are discarded and burned, but unscrupulous sellers willingly slip them to newcomers. Unfortunately, it will not be possible to obtain a good, flowering plant from such a corm. When buying, look carefully, here are the signs of an old onion:
- it is flat;
- she has a wide bottom.
Otherwise, there may be such a sad picture - it looks like there is a flowerbed full of gladioli, but you still won’t get any flowers.
Valucha Member of FORUMHOUSE
This year I have a problem with gladioli - none of them bloom fully, all the buds turn yellow and wither.
We also do not take into storage children whose shells have burst or their corms are damaged.
What to do with gladioli bulbs after digging, do you need to wash gladioli?
So, the process of harvesting the corms is over. We begin to prepare planting material for storage.
- First of all, it is necessary to wash the corms from adhering soil to prevent diseases. We do this under running water. If there is potassium permanganate in the house, then we treat the corms in a weak solution of potassium permanganate. We take 5-10 g of the drug per 10 liters of water. In the absence of potassium permanganate, we use any fungicide. Leave the corms in the solution for 20-25 minutes.
- After the specified time has passed, place the corms on a dry cloth or paper towel in a warm place for 2-3 weeks. The optimal temperature for drying is 25-23 degrees. The corms should be dried at a temperature of 20 - 25 degrees for a little more than a month.
- In order for the corms to dry evenly, it is recommended to turn them over 2 times during the day.
- If the corms do not dry out well, then bacterial or fungal diseases can develop on them, as a result of which the planting material dies. In order for gladioli to bloom together next year, it is better to dry them out during preparation for long-term storage.
What to do with gladioli bulbs after digging, do you need to wash gladioli
Rules and storage options
Seed material can be provided with decent conditions even in a city apartment. Flowers can be placed in a hallway or vestibule; in this case, each bulb should be wrapped in paper and placed in a plastic bag with a large number of holes.
If there is a glazed loggia, the tubers are laid out in boxes (certainly in one layer) and the latter are placed at a certain height from the floor. On days with severe frosts, the boxes are moved into the room and placed closer to the balcony door. When deciding how to store gladioli after digging in very cramped conditions, you can dry them and winter them directly on the windowsill. It is necessary to inspect the material from time to time in order to quickly get rid of diseased specimens that can adversely affect healthy samples.
The tubers can be placed in the refrigerator container intended for vegetables. They are wrapped one by one in newspaper, forming several layers. In this case, you should always monitor the humidity level in the refrigerator, if the “twists” are covered with mold, the tubers are dried, the newspaper is replaced with fresh one, this procedure is repeated monthly.
The optimal place to place seed material would be a basement or cellar. In such rooms there is a stable level of humidity combined with optimal coolness, which minimizes the loss of tubers. The bulbs are laid out in a single layer in ventilated boxes; the latter can be stacked on top of each other. The result is high-quality air exchange without loss of usable space.
Experienced gardeners caution against placing boxes of vegetables and fruits next to gladioli bulbs, as they can produce excess moisture. Under such conditions, the risk of mold growth increases. If the tubers are still infected with it, it is necessary to quickly sort them out, dry them completely, and disinfect the boxes.
How to properly store gladioli bulbs in winter?
- Dried corms in canvas bags or cardboard boxes are laid out in a cool, dry place. Humidity should not exceed 70%, otherwise the corms will sprout root tubercles and sprouts will begin to appear.
- Only high-quality planting material can be stored until spring planting. If the corms show signs of disease or areas affected by fungi, then such gladioli are discarded.
To preserve valuable varieties of gladioli, damaged areas (if they are small) should be cut out. Incisions are made down to healthy tissue. The cut is treated with ordinary brilliant green.
How to store gladioli
Where to store gladioli:
- in the refrigerator (can be stored for 2 years)
- on the floor in a cardboard box, away from the battery (you need to make holes in the box for ventilation)
- on the balcony
- next to the window
- near the doors
- in a locked block of the landing (the corms must be well dried, otherwise they may rot in the cold)
- in the corridor on the landing
How long to store corms?
- Damp corms must be dried and constantly sorted in order to identify rotten ones in time.
- When the corms begin to sprout (usually in midwinter), they need to be provided with adequate light. However, planting material should not be exposed to direct sunlight. Corms with regrown green or reddish shoots can be stored until spring planting.
Corms with regrown green or reddish shoots can be stored until spring planting.
How to protect tubers from diseases and pests
Thrips and other harmful microorganisms cause serious damage to gladiolus tubers. Thrips penetrate under the husk and drink all the juice from the flower bulb. After this, the gladiolus corm dies. Regular garlic and the special disinfectant Zineb help save gladiolus planting material from pests and diseases.
Garlic is placed in boxes where the corms will lie until spring, along with planting material. Use chopped slices. During each check of the condition of the flower bulbs, the dried pieces of garlic are replaced with fresh ones. When pests are already present, the bulbs are treated with Zineb. They are immersed in its solution for half an hour, then dried well for 2-3 days. The room where planting material dries must be well ventilated. After drying, the corms are again stored.
Is it necessary to dig up gladioli bulbs for the winter, what will happen if you don’t dig them up?
- Negative temperatures are detrimental to gladioli. Therefore, without digging up the corms, gladioli cannot be saved until the next spring planting.
- The planting material must also be properly dried. An important stage in the technology of growing gladioli is the method of storing this crop. The quality of corms is affected by the timeliness of harvesting and how the planting material was stored during the winter period.
Skewer tiled
Preparation for storage
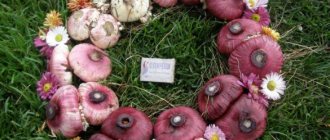
Gladiolus variety "Countess"
Gladioli, of which there are about 280 species and 5,000 varieties, bloom from July to September. Among them there are both very early and late ones. Flowering time varies depending on the growing region, species and variety. In some garden plots, several species grow at once and delight the eye with the duration of flowering. Amateur gardeners plant them in such a way that as soon as some fade, others immediately bloom. It's gratifying when this splendor continues all summer.
Care must be taken when choosing cleaning times. After cutting a flower with opened inflorescences, you will have to wait 1-1.5 months - the period after which the plant goes to rest. For flowers that have bloomed naturally, remaining in flower beds and flower beds, a couple more weeks are added to this period. The main thing here is to comply with the condition: do not overexpose it.
In September, the amount of precipitation that falls can adversely affect the health of tubers. There comes a period of vulnerability. The plant, which gave its strength to the riot of color, is exhausted, physiologically and energetically weakened and needs care and peace. A flower, like a woman in labor after giving birth, needs to restore her strength in order to give healthy offspring with the advent of the new season, because the mission of a flower is to delight the world with its splendor.
The bulbs must be intact when digging.
Preparation for storing gladioli bulbs includes a number of mandatory steps:
After maintaining the specified period, carefully, trying not to damage the bulbs, dig up the gladioli, stepping back from the center of the stem by 10-15 cm. It is better to use a pitchfork.
After digging, carefully shake off the tubers from the remaining soil, and cut off the stems “at the root” with pruners. Some gardeners advise leaving small “stumps” up to 5 cm in size - no more, since fading foliage acts as a source of infection .
Separate the children. Mature babies are dark brown in color and are barely visible against the background of the soil. Once detached, they often remain in the soil, which is not desirable. Subsequent crop rotation clogs the soil.
We dry at room temperature, in the attic, closet, maintaining the specified environmental parameters: room temperature not higher than 20 C, humidity up to 60, the room is well ventilated.
We send only healthy bulbs for storage
Carefully inspect the dried bulbs after digging for damage and possible diseases. Treat damaged specimens with brilliant green or soak for 20-30 minutes in a solution of potassium permanganate. Healthy and dried tubers can not be subjected to such execution, but can be immediately sent to a well-deserved rest.
Growing seedlings
If you have time and desire, you can always grow seedlings from children. What does this give?
- Quickly obtain a full-fledged bulb in the same season.
- The ability to use all planting material without losing children (even the tiniest ones).
Closer to spring, small babies may dry out. To avoid this, you can store them in the refrigerator, or you can plant them in prepared containers with soil and grow seedlings.
It is recommended to plant the baby in separate cups, pots, cassettes, since the roots of gladioli are fragile and can be damaged during transplantation. Planting separately helps prevent plant death.
The timing of planting depends on the region, since it is necessary to take into account the time of possible planting of gladioli on the ridges. Typically, seedlings should be 30-45 days old, so when planting at the end of May, seedlings are planted in mid- or late-April.
IMPORTANT! Gladioli seedlings need to be provided with optimal temperature conditions (so that the seedlings do not get too hot), as well as good lighting. The best temperature is +15ºС, since in such conditions a powerful root system is formed, and the seedlings do not stretch.
Watering seedlings is best done through a tray, this eliminates the risk of flooding the plants. A week before planting, it is recommended to harden the gladioli by taking the seedlings outdoors. The stay time at first is no more than 30 minutes, then the duration of such “walks” is increased.
Rules for propagation of gladioli
Propagation of gladioli by children is becoming increasingly popular. The method is one of the most effective. It allows you not only to obtain plants of unusual beauty, but also to preserve the variety. As a result, it will be possible to rejuvenate the flowerbed.
First of all, the kidneys need to be prepared. Then they should be planted in the soil mixture for germination. This will take no more than a week. It is necessary to ensure the temperature within 25 degrees. After sprouts appear, the tubers need to be transplanted into the ground.
Wintering in the basement
The tubers in the basement tolerate the hibernation period well. There is constant air temperature and humidity, which is favorable for storing planting material. The corms are also placed “with sprouts up and roots down” in layers in thick cardboard boxes or wooden boxes and placed on shelves away from vegetables that cause evaporation.
Unpeeled garlic cloves placed between the rows help protect planting material from infection.
It is important to inspect the planting material from time to time and discard damaged tubers. Small “sores” can be treated with brilliant green or a solution of potassium permanganate, and then put back into storage.
Advice: When choosing a place and storage conditions, carefully select the material. Although gladiolus can bloom safely for up to 10 years, its viability decreases over the years, and its susceptibility to disease increases. Gardeners should take this aspect into account and try to give way to the younger generation.
It is recommended to choose young, round tubers with a small bottom diameter for storage and subsequent planting.
What are children for?
Many gardeners do not realize that children can be used to propagate gladioli. The bulbs quickly age and die. If you don’t grow new ones, the variety will soon be lost.
Children perform 3 functions:
- help preserve and update the plant collection;
- you can easily increase the number of flowers grown;
- it will be possible to adapt some varieties for cultivation in a certain area;
- Gladiolus bulbs will be healthy if they are obtained from children.
What to do in the fall?
Autumn activities with gladioli babies come down to digging them up (together with adult corms), sorting, and drying. The covering scales are not removed from the children; this will need to be done in the spring, before planting.
Note that if the corm has not yet matured a little, then the baby may have a light gray color and be firmly attached to the “parent”. This is convenient for digging, since the baby will not get lost in the ground. Fully matured tubers have brown scales, and they have often already separated from the mother bulb. Selecting them is more difficult, since they are similar to soil and can get lost. Therefore, you need to look through the bed very carefully, without leaving individual children there.
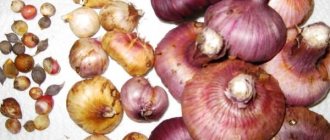
Description of the children
Babies are small tubers that can be seen at the base of an adult bulb. They can be of different sizes. Even if the kidney is small, it should not be thrown away either.
On average, tubers range in size from 4 to 7 mm. They have a dry and dense shell, which acts as protection from adverse conditions.
It is important that children, unlike bulbs, are perfectly stored in winter. To do this, it is necessary to provide appropriate conditions. If all activities are carried out correctly, the germination rate of tubers reaches 100%.