How to prepare a greenhouse?
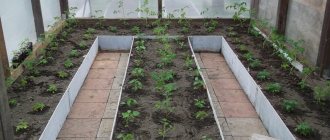
Heated greenhouse for winter growing vegetables
We will not dwell in detail on the fact that only glazed or polycarbonate greenhouses with an additional lighting and heating system are suitable for growing tomatoes in winter. (See Polycarbonate greenhouses)
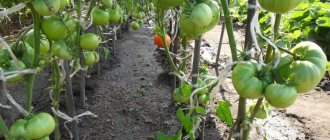
Let's take a closer look at how to prepare a greenhouse with your own hands in the fall in order to grow tomatoes in the winter.
So, first of all:
- If necessary, repair work is carried out and greenhouses are glazed.
- Cleans from various contaminants.
- Heating, lighting and plumbing systems are checked and brought into working order.
- If any vegetable crops have already been grown in the greenhouse, then it is imperative to disinfect both the soil and all metal and wooden surfaces.
- Dig the soil to a depth of at least 20 cm , adding 1-2 buckets of compost for each m2. In addition to organic fertilizers, the following mineral fertilizers are applied 1m2
- potassium magnesium -50g;
- double superphosphate -50g;
- potassium chloride - 30g;
- copper sulfate - 5g;
- ferrous sulfate – 5g.
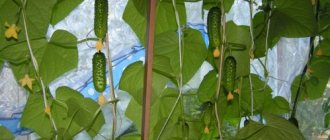
Important: if cucumbers were grown in a greenhouse, you should not add compost. Instead, it is better to add 1 bucket per 1 m2 of crushed sphagnum peat or sawdust.
- A couple of days before planting the seedlings in the greenhouse, you need to generously shed the soil to a depth of 10-20 cm, and then cover it with a transparent film.
If the greenhouse is prepared, then it is necessary to decide on the varieties that are planned for growing tomatoes in the greenhouse in winter. (See: How to Harvest a Good Harvest)
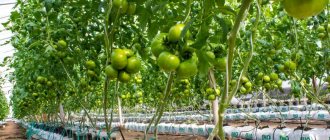
How to grow tomatoes in a greenhouse all year round: care features to increase yield
It is quite possible to grow tomatoes all year round!
To do this, you need to equip a heated greenhouse and find time to care for the plants. To get the first harvest for the New Year holidays, you need to sow seeds to obtain seedlings in September or October. At this time, you will have to make maximum use of additional lighting , because there will be very little natural light.
When sowing seeds in November, the main development of the bushes will occur in January and February, and the first fruits will be closer to spring. But the photoperiod will begin to increase, allowing you to reduce the cost of artificial supplementary lighting.
Which varieties to choose?
It should be remembered that not all hybrids and varieties of tomatoes are suitable for growing in winter greenhouses. From the huge number of varieties on the market, you need to choose those that can tolerate a lack of light, are resistant to various infectious diseases, and also have good taste and produce a bountiful harvest.
Experts recommend such proven and disease-resistant varieties as:
- "Vnukovsky"
- "Moscow Autumn";
- "Carlson"
- "Martin";
- "Sobeto";
- "Revermoon";
- "Solveig".
How much can you earn from growing tomatoes?
Grown tomatoes can be sold to wholesale resellers or organized independent trade in the market. Another option is sales through vegetable kiosks and retail stores near your home. The largest turnover is provided by suppliers of retail chains. However, such partners also have disadvantages. Large chains are interested in very large quantities, and they also offer the lowest price. It is much more profitable to cooperate with catering. By concluding a permanent agreement with a chain of restaurants, cafes or canteens, you can ensure a constant sales channel at very competitive prices.
To receive a stable income, you need to constantly look for new ways to implement it. Join vegetable cooperatives that sell products through online stores, organize the sale of goods based on pre-orders. Don’t forget about advertising; in the future it is possible to register your own trademark.
Growing tomatoes is a very promising business. To avoid mistakes, it is important to calculate everything long before the start of the project and increase production gradually. Look for new ways to sell, consider options for your own retail sales or processing of tomatoes. This approach will help to significantly increase profits and profitably occupy its niche in the agricultural market.
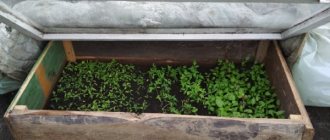
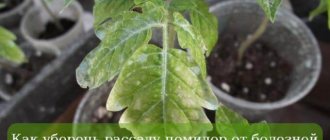
Preparing seedlings
Tomato seedlings ready for transplanting
In order to grow tomatoes in a greenhouse in winter, seedlings begin to be grown in the fall: in the second half of September and until the beginning of November.
If you plan to plant seedlings in a permanent place before January, then they are watered with warm water and kept at an air temperature of +20+220C and a humidity of 65-70% .
In the event that the seedlings will be planted in the greenhouse only in January, then here are instructions on how to preserve them:
- After 5 and 6 true leaves appear on the tomato plants, the temperature in the greenhouse is lowered to +6+70C, and the humidity level is reduced to 60-65%.
- Two weeks before transplanting tomato seedlings into greenhouse soil, water with warm water and also increase the temperature in the greenhouse to +20+230C.
Advice: it is advisable to increase the temperature in the greenhouse gradually, so as not to cause a temperature shock in the seedlings, due to which it can stop its growth and development.
- Be sure to fertilize the seedlings with complex mineral fertilizers.
Planting scheme
Before you start planting, you need to select only healthy seedlings, without various defects and damage, at the age of 50-60 days .
Plant the seedlings in holes on a flat surface using a cord stretched across the greenhouse and a marker.
As a rule, when growing tomatoes in a greenhouse in winter, a two-line strip planting scheme is used. With this planting scheme, there are 3-4 plants per 1m2.
A distance of 90-100cm is maintained between the tapes. and between the rows in each tape is 50-60cm . They try to maintain a distance of 40-50cm between plants in a row.
The seedlings are planted vertically and buried into the soil along the cotyledon. After all the plants have been planted, they are tied with twine, under 3-4 leaves , or under the first brush, to a wire stretched along the rows of tomatoes.
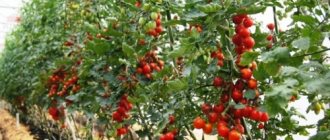
Tomatoes tied with twine
Then the soil between the rows is loosened and leveled. As the tomatoes grow, the tops of the plants are twisted around the twine, not forgetting to remove the emerging stepsons (see Steps of tomatoes, why is this necessary?). The formation of tall (indeterminate) plants is carried out in one stem.
Forming tomatoes into one or two stems
Determinate and semi-determinate varieties are usually formed into two stems, leaving a shoot located under the first inflorescence. About a month before the end of the growing season, pinch off the tops of all shoots of all plants, leaving 1-2 leaves above each inflorescence.
Advice: plants belonging to tall varieties of tomatoes are given the opportunity to grow up to 2 m and form 8-10 clusters, after which they must pinch off the apical point of growth.
Plant care
Tomatoes grown in a greenhouse develop optimally at an air temperature of +22+250C and a soil temperature of +18+200C.
Plants should be watered as the soil dries out with warm water, the temperature of which should be close to the temperature of the soil. As a rule, watering is carried out in the first half of the day. You should not allow the soil to dry out excessively, as its price can be very high: stunting of growth, diseases of both the bushes themselves and the fruits, dropping of flowers and ovaries.
Throughout the tomato growing season, the soil between the rows is periodically loosened, and fertile soil is added under the plants.
From the time the fruits begin to ripen on the bushes, 2-3 leaves per week are removed above the first cluster, starting with the yellowed ones and then the green ones. Thanks to such actions, the illumination of plants in the lower tier and air exchange improve, in addition, the fruits are less susceptible to various viral and fungal diseases (see Tomato diseases: their varieties and how to deal with them).
Important: when removing leaves, remember that there should always be 15-16 healthy leaves on the plant. You can see how this is done in industrial greenhouses in the photo below.
Tomatoes with lower leaves removed
To obtain a good harvest of high-quality fruits, plants need to receive the optimal amount of nutrients throughout the growing season.
Every two weeks, plants are fertilized with mineral fertilizers, since tomatoes can only be grown in a greenhouse in winter on well-fertilized soil with constant addition of additional nutrition.
Before flowering, the concentration of mineral fertilizers dissolved in water should be no higher than 0.5-0.7%, and during the period of fruit set and active fruiting - from 0.9 to 1% .
At the stage of flower formation, tomatoes are fed with the following mineral fertilizers dissolved in 10 liters of water:
- superphosphate – 40g;
- potassium salt – 15g;
- ammonium nitrate – 15g.
The resulting working solution is consumed at the rate of 10 liters for every 1 m2.
During flowering and fruit set, the dose of fertilizer increases by 1.5-2 times.
When growing tomatoes in a greenhouse in winter, to enhance plant photosynthesis, the air in the greenhouse is enriched with carbon dioxide. To do this, tanks filled with an aqueous solution of mullein are installed in the greenhouse.
Tomatoes love ventilation and not very high air humidity. It is especially important to ventilate greenhouses and greenhouses during flowering. Plants need to be watered moderately, as with abundant and excessive watering, the fruits become watery in texture and sour in taste.
Before flowering, tomatoes are watered once every 5-7 days, at the rate of 5-6 liters of warm and settled water per 1 m2. During flowering and fruit formation, watering should be increased to 15 liters per 1 m2.
How to start your own greenhouse business so as not to get into trouble and not go into the red
Have you decided to turn your favorite hobby into a business and start growing cucumbers and tomatoes for sale? An excellent and very profitable idea! But only on the condition that you build the right greenhouse, purchase the right seeds and take into account many other nuances.
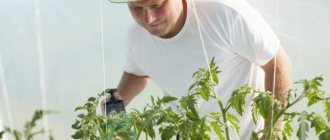
An expert shares with readers of Ogorod.ru how a novice farmer can understand all the intricacies of industrially growing vegetables in a greenhouse and all the pitfalls of this difficult task.
Vladislav Shabanov is an agronomist with 20 years of experience, the head of a greenhouse complex at one of the largest agricultural enterprises in Belarus.
Starting your own business is never easy, especially if you have absolutely no experience. But if you approach the issue seriously, take into account all the nuances and calculate all the risks, the first experience will not be sad.
Vladislav, let's start with the main question: what is more profitable for a private owner to grow for sale - cucumbers or tomatoes?
There is no clear answer to this question. Each culture has its own disadvantages and its significant advantages. Tomatoes, for example, give more gross output (in one revolution from 1 sq.m. you can harvest up to 25 kg of tomatoes and up to 14-16 kg of cucumbers). Plus, at the beginning of the season, the purchase price for tomatoes is higher, and the harvested crop is stored longer. If you didn’t sell something today, the fruits can easily lie for up to 14 days. Cucumbers are a perishable commodity that quickly withers, but they begin to bear fruit earlier than tomatoes. If you do not have a refrigeration unit, you can keep the crop in marketable form for a maximum of 2 days. Then the fruits lose turgor, begin to turn yellow, etc.
But, on the other hand, cucumbers can be picked early in the morning and immediately taken to the market. In order not to slow down the growth of the next bunches, you will have to pick the tomatoes when they are barely pink, then let them sit for several days until they turn red and only then sell them.
As you can see, the choice is not at all obvious. And, in principle, you can try to grow both one and another crop - the greenhouses and equipment for them will still be the same.
In its homeland, the tomato is a perennial plant. Is it possible for a farmer to take advantage of this feature and grow bushes for, say, 2-3 years? Will this be beneficial?
In the middle zone this is economically unjustified. In winter, plants require additional lighting with special sodium lamps with a power of 400 to 700 W. But natural solar activity, of course, is much greater than any, even the most powerful lamp. Therefore, the harvest in winter is much lower, and the costs of growing it are very high.
In addition to the huge electricity bill, you will also need to add heating costs
It will also be unprofitable to use a greenhouse for one rotation of plants. If selling grown products is your main income, I recommend making two turnovers per season: spring-summer and summer-autumn. For the first rotation, tomato seeds will need to be sown in mid-February, and cucumber seeds at the end of February. For the second rotation: tomato seeds - in mid-June and cucumber seeds - in early July.
Moreover, you can grow one crop or alternate them:
- first and second turns – cucumbers;
- the first turn is cucumbers, the second is tomatoes;
- the first and second turns are tomatoes.
What growing technology would you recommend to a beginner?
This, again, is a matter of preferences and capabilities of each individual farmer. Those who have limited funds often choose soil. This technology will cost the least, because... you will not need to purchase mats and install an expensive drip irrigation system. However, it is unlikely that it will be possible to obtain a very high yield on the soil.
Growing using low-volume technology (in mats with mineral wool or an organic substrate - high-moor peat or coconut substrate), despite all its complexity and cost, has obvious advantages. Firstly, this is a significant increase in yield. Secondly, cleanliness and order in the greenhouse.
The farmers I consulted started by growing cucumbers in the ground. They harvested 5-6 kg of crops per 1 sq.m. and had a constant headache - where to put the waste soil and where to get good soil for planting new seedlings. When they finally decided to switch to low-volume technology, the problem of disposing of several tons of land immediately disappeared, and the cucumber yield increased to 14 kg per 1 sq.m.
What does low-volume growing technology mean - is it the same as hydroponics?
Not really. Hydroponics is the growing of plants in mineral wool cubes in such a way that their entire root system is in water (nutrient solution). Low-volume growing technology means that the roots of plants are not in water, but in a substrate (mineral or organic) in a small volume.
Growing tomatoes and cucumbers in hydroponics or using low-volume technology does not accept any amateur activity. Here you need to adhere very strictly to technology and follow the advice of experts. Plants need to be watered regularly (3 times a day), doses and compositions of fertilizers specially selected and calculated for your specific conditions are applied, tying, pinching, pinching and harvesting are carried out in a timely manner, the required temperature and humidity are maintained, etc. Failure to fulfill or untimely fulfillment of at least one point entails loss of harvest and, as a consequence, huge losses.
If we compare mineral wool and coconut substrate - which is better?
In terms of yield, both substrates are practically the same. But the price for them confuses many farmers. A good coconut substrate costs almost 2 times more than mineral wool.
It turns out that mineral wool is more profitable. But this is only at first glance. Mineral wool, for example, can only be used for 1 year, while coconut substrate lasts for 4 years. Moreover, the productivity of the latter will remain at a high level throughout this time:
- 1st year of using coconut substrate - the yield is the same as when grown on mineral wool;
- 2nd year of use – the yield is higher than with mineral wool;
- 3rd year of use - the yield is lower than in the second year, but higher than in the first;
- 4th year of use - the yield is the same as in the first year.
Another point is recycling. Essentially, mineral wool is basalt (volcanic rock). There is nothing so terrible about it; it can be processed in special factories. Abroad, waste mineral wool is used as a component of asphalt concrete pavements. We don't have such technologies yet. Greenhouse plants simply store tons of waste substrate, not knowing what to do with it next, because... It costs a lot of money to take it to a landfill. Spent coconut substrate is a valuable organic fertilizer containing all the nutrients plants need. After use, we simply scatter it on the field, and dispose of the plastic bags in which it was packed as regular recyclables.
If we compare manure with spent coconut substrate, then 10 kg of the latter in nutritional value is equal to approximately 1 ton of manure.
Now many different companies have begun to appear on the market that offer coconut substrate at a lower price. You shouldn’t blindly rush into such offers, because... Often the packages contain a low-quality product. As our experiments have shown, the best coconut substrate is the one that has a three-layer structure (the bottom layer is “chips,” the middle layer is medium-sized coconut fiber, the top layer is shredded coconut fiber). In such conditions, roots grow best and plants produce the greatest yield.
Many traditionally believe that cucumbers and tomatoes grown in small quantities are dummies, which contain very few vitamins and minerals and, on top of that, nitrates are off the charts. But the ground ones, which were fed exclusively with organic matter, are a completely different matter, completely beneficial... What can you say about this?
In greenhouse plants, the dose of fertilizers is clearly regulated by agronomists and special programs, i.e. The plant does not receive more than what is objectively needed for normal growth and development. Firstly, because an excess of minerals (especially nitrogen) leads to an increase in the nitrate content in fruits, which is why the products will not be able to pass sanitary control. Secondly, because on the scale of greenhouse farming, even a slight excess of the dose of fertilizer results in large additional costs.
By the way, domestic greenhouse plants carry out tests for the content of nitrates, radionuclides and pesticides in specialized state laboratories every 10 days.
Also, once a year, products are checked for the content of harmful substances and heavy minerals (more often this is not required, since if the growing technology is followed, they are absent from the fruits)
And those gardeners who grow cucumbers and tomatoes in the ground should remember that nitrogen (excess of which leads to the accumulation of nitrates in fruits) is a very mobile element that is easily absorbed by plants and is constantly renewed in the soil thanks to microorganisms. Even when growing vegetables without the use of chemical fertilizers, spraying and feeding them with organic matter and all kinds of infusions and decoctions, you cannot be sure that you are getting an environmentally friendly harvest, free of nitrates, because Nitrogen is found in any organic matter and it is very easy to overdo it. Any summer resident who generously fertilizes his beds with manure and compost will have nitrates in his produce going through the roof.
What varieties/hybrids would you recommend a novice farmer choose?
In greenhouse farms (it doesn’t matter whether cucumber or tomato) varieties are not grown at all. And that's why:
- they are very unstable (some bushes can produce a good harvest, while others can produce very little);
- the fruits on the bushes of varietal plants are heterogeneous in shape and size (which means there will be a lot of substandard);
- varieties are less resistant to unfavorable conditions and more susceptible to diseases than hybrids.
The varieties can be planted by private owners for their own needs, to be eaten from the bush and rolled up. For those who grow cucumbers and tomatoes for sale, I advise you to choose exclusively modern, highly productive hybrids.
When choosing a hybrid for your greenhouse, talk to colleagues in your area, ask what they grow, try the crop if possible, talk to experts. Select and plant several items. Under no circumstances should you start a business by growing just one hybrid! If something goes wrong (it turns out to be too capricious, low-yielding, tasteless, the plant does not like your conditions, etc.), you will lose the whole season. First, I advise you to try to grow several different hybrids, see how they behave, what kind of harvest they will produce, how much their fruits will appeal to customers, and only then settle on some options.
If you can afford to build expensive high greenhouses, you have a large family, all members of which are ready to get involved in the work and immerse themselves in mastering the intricacies of greenhouse farming, choose foreign hybrids (Dutch, German, Polish, etc.). Despite their demanding growing conditions and the high cost of seeds, you can get the largest amount of production from such plants. If you have a low greenhouse and you are going to grow crops in the ground, it is better to opt for domestic hybrids. They are less demanding on growing conditions and will forgive you certain mistakes in agricultural technology, but, however, they will also produce a smaller harvest.
For those who are planning to grow cucumbers , I recommend choosing parthenocarpic hybrids that do not require pollination. They always produce consistently high yields and have a low percentage of non-standard products (usually no more than 5% of the total harvest).
For those who are just starting to grow tomatoes , I advise you to first practice on determinate hybrids, which grow on their own. They are less demanding in care and yield faster (70-80 days after germination). There are also semi-determinate hybrids, but they need to be formed correctly, otherwise they may end up at the knee level. The optimal height for such tomatoes is at the chest level of a person of average height.
To obtain a good harvest of tomatoes in a greenhouse, pollinating insects are needed.
Bumblebees perform the role of pollinators best. For a greenhouse with an area of 20-25 acres you will need 2 hives. The first is placed at the beginning of flowering of the lowest cluster, the second - after 4 weeks.
One bumblebee hive will cost you approximately 65 euros
Over the years of work, in our greenhouses we have tested many different hybrids of domestic and foreign selection in variety trials. For our growing technology (in small volumes on an organic substrate), the Dutch hybrids turned out to be the best in terms of yield, taste and keeping quality. Although I repeat, it is not easy to grow them, and greenhouses for these plants need high, at least 4.5 m at the ridge.
By the way, about the greenhouse: what should it be like?
For a working family consisting of three to four adults, the best option would be a greenhouse with an area of 20-25 acres. This is an area that can be physically handled and made a good profit. But you need to be prepared for the fact that you will have to work hard all season – from early morning until late evening.
On the sides in its lowest part, the greenhouse should be at least 2.2 m high, and better - 2.3-2.4 m, at the ridge - 4-4.5 m. This allows you to create an optimal angle of inclination of the roof, so that in winter from the snow load did not tear the film or, even worse, did not collapse the entire structure.
It is not necessary to install a very long greenhouse. A 40-meter length is quite enough. And the optimal width is 11 m. I’ll explain why. If you make rows across the greenhouse, in the middle you will have a passage 1 m wide (this is the technological area where you will walk, place boxes with the harvest, etc.), and to the right or left of it there will be rows 10 m wide every. This will make it easy for you to lay the mats without having to cut anything. Also, in such a greenhouse the optimal proportions of the height of the roof and walls will be observed, which will minimize the snow load.
A width of 12 m is already the ceiling. It is not worth making it wider for a given roof height, otherwise in winter your greenhouse may simply collapse under the weight of snow, or you will have to spend a lot on additional rafters, which will significantly increase the cost of construction.
In the middle zone, the rows of plantings should be directed from north to south - with this arrangement, the sun illuminates all parts of the plants during the day, and they do not shade each other. And how to install a greenhouse is a matter for the owner. Build it from north to south - place the rows in the same direction, build from west to east - make short rows across the greenhouse. It doesn’t matter how the greenhouse is built, the most important thing is how the rows of plants will be arranged in it.
Many summer residents and novice farmers think that the more plants, the better - the larger the harvest per 1 sq.m. they can harvest. No! It has long been calculated and proven that the optimal amount, in terms of comfort for plants, their health and the amount of harvest collected from them, is 2.5 (maximum 3) plants per 1 sq.m. If, say, you have a greenhouse with an area of 20 acres, a maximum of 6,000 bushes should be planted in it.
Polycarbonate, glass or film – which coating should you prefer?
The best covering for greenhouses is still glass. It transmits sunlight better than polycarbonate and film, which is very important in the middle zone. But this material breaks easily, is expensive and very bulky, which will entail additional costs for strengthening the greenhouse frame. This option is not suitable for everyone. As an alternative, I can recommend stretching a multi-year light-stabilized film over the roof (it has a yellowish or green-blue tint), and finishing the side walls and ends with polycarbonate. Moreover, it is not necessary to buy thick sheets; you can get by with “five” and even “four”.
And don't forget about the windows. They must be in the greenhouse. Place them at the ends near the roof and on the sides in a checkerboard pattern.
What is better – one large greenhouse or two smaller ones?
Better - one large room, divided into two functional areas: the greenhouse itself, in which crops are grown, and a small utility room for growing seedlings. This room (breeding ground) must be equipped with lamps for supplementary lighting (we, for example, use high-pressure sodium lamps with a power of 600 W) and heating equipment.
To properly install the lamps, you need to get a lux meter. To grow seedlings, the illumination at any point where the plants will be located must be at least 8000 Lux, i.e. lamps should be located so that there are no unlit areas. Moreover, you need to measure lighting at night and preferably under heavy cloud cover. This is done simply: turn on all the lamps and start moving them back and forth, measuring the level of illumination with a lux meter.
If the lighting in the greenhouse is insufficient, the plants will stretch out and grow weakened, which is why they will not be able to produce a high yield in the future.
It is also necessary that the nursery always has a constant temperature. Even at the stage of building a greenhouse, be sure to think about what and how you will heat it.
What about heat guns and fan heaters? Or is it better to use the proven old-fashioned method – a potbelly stove?
Heat guns are expensive. It is better not to use them at all, because... they burn a lot of oxygen. If there are people in the greenhouse while the devices are operating, they may simply get burned. Fan heaters are the same, they burn oxygen and consume a lot of electricity. Water heating is also very expensive.
Stove heating is the best and most budget option. If finances allow, it is best to install a gas or solid fuel boiler. Well, if not, install a stove-stove. This is the cheapest, but also the most labor-intensive option, because... The firewood in it burns out very quickly, and you will have to add it every 1.5-2 hours if it’s -10-20°C outside.
To heat 6 acres, you will need 5 such stoves, welded from 200-liter metal barrels, each of which must have its own chimney. It is best to place the stoves in the center of the greenhouse, right under the ridge. It is better to make chimneys “lying”; first they are directed along the walls and only then taken outside - this way the greenhouse will warm up better. But be prepared for the fact that you will need a lot of firewood. A farmer I know uses about 500 cubic meters of firewood for a greenhouse with an area of about 30 acres during the winter-spring period.
Be sure to provide a place to store firewood near the greenhouse
In addition to stoves, it is advisable to also acquire fans that will disperse warm air throughout the room. And don't forget to buy several thermometers to monitor the temperature in the greenhouse. They will need to be hung in the coldest places.
Another important point that should not be forgotten when building a greenhouse is the irrigation system. Is it possible to save money on it and get by with the most budget option?
If you are going to grow cucumbers or tomatoes in the ground, you can get by with even the simplest belt systems. But for low-volume technology, a “real” drip irrigation system is already required, which is not cheap. To give you an idea, 1 complete dripper will cost about $1, not to mention the fact that you will also need to purchase a 16 mm hose, filters, pumps, cubic water storage tanks, etc.
The most expensive thing about starting a greenhouse business specializing in small volumes is installing an irrigation system. Therefore, it is better not to engage in amateur activities, but to turn to professionals
A properly designed and installed system should deliver the same amount of liquid to each plant no matter how close or far from the main hose it is. The condition of the plants and the amount of harvest they can produce directly depends on this.
Remember the rule: for normal growth and fruiting, the soil (substrate) in the root zone should always be slightly moist. As soon as the soil dries out, the plant experiences stress.
And one more important point that beginners often miss: when watering plants, huge volumes of water are consumed. To make it clear: in a greenhouse with an area of 25 acres, on days with peak solar activity, 12 tons of water are consumed per day. If you pay for such volumes of water at the meter, then you will simply go down the drain. My advice: drill a well.
What other nuances should a novice farmer take into account?
Everything that we talked about above and what will be discussed in the following articles will not make sense if you do not take care in advance about how you will sell the crop. After all, growing and harvesting is only half the battle; it is important to think about to whom, where and for how much you will sell it.
Selling grown products in bulk to resellers is very cheap and unprofitable. The best option is to take care of a place on the market and hire a seller who will give away the proceeds daily. You can also take your products to stores - they usually offer a more or less reasonable price. Small private shops do not take a lot of products, but, as a rule, pay immediately, while large chain stores usually take large quantities, but you can wait several months for your money.
You also need to think in advance about what you will use to deliver and where you will store the goods. With a successful choice of hybrids and following the technology, 1 ton of crop can be harvested per day from a greenhouse of 25 acres. Where to put such a quantity of products? Obviously, you won’t be able to stuff all this into the trunk of your sedan or even a station wagon. At a minimum, you will have to get a small trailer with an awning.
You also need to equip some kind of cool room for storing the ripening/unsold crop - a barn, garage, etc.
In addition, do not forget to test the water for the content of mineral salts (and when growing in small volumes, also for carbonates). When growing in the ground, you will also need to analyze the soil for the main nutrients (nitrogen, phosphorus, potassium, calcium, magnesium). All this is necessary in order to calculate the required dose of fertilizers, thanks to which the plants will develop correctly, but nitrates and other elements hazardous to health will not accumulate in the fruits. Fertilizer doses are calculated in millimoles (mmol). And if you are not fluent in molecular chemistry, then it is better to seek help from a specialist.
As you can see, the desire to become a farmer and the availability of start-up capital are not always enough. To ensure that your dreams of a big harvest and growing profits do not remain just dreams, you need to think through everything carefully and listen to the advice of experts.
The editors of Ogorod.ru would like to thank Vladislav Shabanov for his assistance in preparing the material. And we advise everyone who is interested in the topic of growing cucumbers and tomatoes for sale to follow our publications on the website. Ahead of you is a lot of useful information about growing seedlings, technologies for growing cucumbers and tomatoes in soil and in small volumes, tips on pinching and pinching plants, ways to combat diseases and pests in greenhouses without the use of “chemicals”.
Preparing seeds and growing seedlings
Before you start sowing seeds, they must be carefully prepared. To achieve this, a number of activities are carried out:
- Selection (culling) of seeds.
- Disinfection of planting material.
- Pre-sowing hardening of seeds.
Selection (culling) of seeds
In order to select the strongest seeds for further planting, culling is carried out (for more details, see What varieties of tomatoes to choose for a greenhouse).
The very first stage of selection will be visual. The seeds are poured onto a clean sheet of paper or a fine sieve, and broken, weak and small ones are manually selected. Large and medium-sized seeds are left.
However, such seeds cannot always boast of good germination. To select empty, loose seeds, they are soaked in a saline solution.
To do this, dilute about 2 tbsp. spoons, with a small slide, of table salt in 1 liter of water at room temperature. After the salt “disperses,” the seeds are immersed in the solution and left in it for 5-7 minutes. The seeds will be divided into two groups: those sunk to the bottom and those floating on the surface. Those seeds that float are discarded and thrown away. The seeds that are at the bottom are taken out of the solution and washed. After which they are placed on clean paper and dried.
Disinfection of planting material
To disinfect tomato seeds, use a 1% solution of potassium permanganate (ordinary potassium permanganate). The prepared seeds are immersed in this solution for half an hour, after which they are washed with running water and dried.
Preparation of potassium permanganate solution for disinfection
Tip: in order to activate growth processes and also increase productivity, the seeds are soaked in an infused solution of wood ash. To obtain such a solution, infuse 2-3 tbsp. spoons of stove wood ash in 1 liter of warm water. Then the shift is dipped into it for 6-8 hours, and then, after taking it out, it is dried.
Pre-sowing seed hardening
Before sowing tomato seeds, in order to increase the yield and speed of fruit ripening, as well as the plants’ resistance to cold, pre-sowing hardening of the seeds is carried out.
This procedure involves alternating exposure to positive and low temperatures. The prepared seeds are placed in a bag made of natural fabric and moistened, after which they are left at normal room temperature for 12 hours. For the next 12 hours, the seeds are placed on the top shelf of the refrigerator, where the temperature is kept at 0+30 C. So the seeds are moved until they begin to hatch (germinate). Typically, seeds begin to germinate within 10-15 days.
Landing
Small containers can be used as containers for growing tomatoes: either one common container or individual containers. They must be filled with prepared soil mixture, moistened and seeds placed in it at intervals of 1–2 cm. The planting depth should be no more than 20 mm, otherwise the germination process will take a long time. On top of the seeds you need to pour another layer of substrate, but a thinner one.
After planting is completed, the container should be covered with a transparent lid or film to create a greenhouse effect. To prevent condensation from accumulating in the resulting mini-greenhouses, holes can be made in the lid or film in advance. If there are no holes, then it is necessary to ventilate the containers periodically. By the way, cups or peat tablets can serve as an alternative to plastic containers when planting.
Sowing seeds and caring for seedlings
Sowing tomato seeds
There are a number of rules that should be followed when sowing tomato seeds:
- sowing is carried out approximately two months before transplanting tomatoes into the greenhouse. You should not increase this period, since the seedlings outgrow and stretch, and the plants are more difficult to adapt to new conditions;
- tomato seeds are sown to a depth of no more than 15 mm;
- The distance between the rows should be from 5 to 7 cm, and between the seeds themselves about 1 cm.
If everything is done correctly, then at a temperature of +190 C + 250 C, the first shoots appear on days 3-5.
Advice: to obtain stronger, “stockier” seedlings, after the first shoots have appeared, the boxes with seeds should be placed for a week in a bright but cool room, the temperature in which will be +100 C + 150 C.
Further care for seedlings includes loosening the soil, airing and thoroughly watering the tomatoes once every seven days.
10-14 days after the sprouts appear, the seedlings must be planted into individual pots or containers.
Picking up seedlings
Let's figure out how to plant tomato seedlings. First of all, prepare everything you need:
- tomato seedlings in which the first two true leaves have already formed;
- spatula (replaced with a disposable plastic teaspoon);
- special soil for tomatoes or pre-prepared soil mixture;
- potassium permanganate (potassium permanganate);
- warm, settled water;
- small watering can.
So, here are the step-by-step instructions:
- As soon as the tomato seedlings have their first two true leaves, it needs to be pruned. Diving at a later date, according to biologist research, leads to longer adaptation and poor survival of plants. The photo below shows a tomato in the phase of its first two true leaves.
Tomato in the phase of two true leaves
- A few hours before transplanting the seedlings, you need to thoroughly flush the container with the plants with warm and settled water. It should saturate the soil well, which in the future will make it easy to remove tomato seedlings from the ground.
- You can prepare individual containers and containers in advance, fill them with the same soil in which the seeds were sown, and spill with a weak, pink solution of potassium permanganate. By the time of transplantation, all the soil should warm up to room temperature - +200 C.
- Carefully, trying not to damage the side roots of the tomatoes, remove the plants from the container. It is best to do this with a small spatula, or use a small plastic spoon. Do not pull out seedlings under any circumstances, as this can destroy them!
- Take a close look and remove all weak and poorly developed seedlings.
- For each full-fledged seedling, it is necessary to pinch off the lowest tip of the main root. You can pinch off the root tip with your fingernails.
- Tomato seedlings should be planted in a hole 5-6 cm deep. The root should fit completely into it and should not be bent under any circumstances. If the root is not removed, slightly deepen the hole. The first, cotyledon leaves should be located above the surface of the ground. After the seedling is transplanted, the soil around it must be compacted.
- Each transplanted tomato seedling must be well watered so that there are no voids in the root area. You can water the seedlings only with warm and settled water.
- After transplanting the plants, it is best to put them on a shaded windowsill and keep them there (see also Mini greenhouse on a windowsill for growing seedlings) for about a week, watering as the soil dries, but not very often - once or twice a week. After the seedlings adapt to the new conditions and “come to their senses,” they can be moved to a sunny place.
At the end of the first month of cultivation and immediately before planting in the greenhouse, fertilizing is carried out. (See: Feeding tomatoes in a greenhouse) To do this, dissolve 30 g of wood ash, 10 g of ammonium nitrate and 25 g of superphosphate . For seedlings, it is better to use superphosphate in the form of an extract, to obtain which superphosphate is infused in water for 24 hours.
Temperature in the greenhouse: modes, methods of regulation and stabilization
The temperature of the air and soil in a greenhouse is very important for growing any crop, and therefore it is necessary to know exactly not only its limits for berries, vegetables or herbs, but also methods for adjusting the “local climate”.
Temperature is one of the decisive factors influencing many processes in plant life: crop growth, absorption of moisture and useful elements, quality and quantity of the crop, time of harvest, the possibility of diseases, etc. Therefore, every summer resident should know the temperature conditions for those crops that are grown on his site in greenhouse conditions, as well as know ways to raise or lower the temperature in the greenhouse when necessary.
Soil preparation
Answering the question of how to properly grow tomatoes in a greenhouse, it should be noted the important role of proper soil preparation and the application of fertilizers to it.
Fertilizers should be selected based on the type of soil in your greenhouse or greenhouse. If peat predominates in the beds, then it is necessary to add a bucket of sawdust or humus, as well as ½ bucket of coarse river sand per 1 m2. In loamy soils, humus or sawdust is added to improve, at the rate of 1 bucket per 1 m2. (See What fertilize tomatoes)
In addition, for every 1 m2 add 1 glass of wood ash, 1 tbsp. a spoonful of superphosphate and potassium sulfate, 1 teaspoon of urea. After which the soil is dug up.
Then the prepared beds are spilled with warm water and tightly covered with clean film for several days.
Immediately before planting seedlings, form holes and spill them with an aqueous 1% solution of potassium permanganate. To prepare it, you need to dilute 1 g of potassium permanganate in 10 liters of hot water, the temperature of which is +500 C + 600 C. Each well is spilled with 1-1.5 liters of the resulting solution .
Tomatoes for the “lazy”
Where to start planting tomatoes? With the right variety - the pros answer. Whatever one may say, the conditions for growing vegetables at home and in the garden beds are still different: temperature, pollination, light and many other factors. Science and breeders do not stand still: demand creates supply. On store shelves there are dozens of varieties of tomatoes with different parameters: fruit color, shape, ripening time. The abundance of assortment makes your eyes wide open. Standard, ampelous, determinant - these terms cause, to put it mildly, slight bewilderment among “newly-minted” gardeners. How not to get lost among indoor tomatoes and choose what suits you? A short guide to the most popular varieties from our expert.
— For a home greenhouse, for example, low-growing dwarf varieties are suitable. Tomato roots need room. The advantage of such “indoor” species is that they are unpretentious and are able to survive in cramped conditions. Therefore, they will tolerate compacted planting without any problems. Their unconditional advantage is very early and friendly maturation. But don't expect a rich harvest from these plants.
Keep in mind that the height of low-growing varieties, as a rule, reaches 30-70 cm. But with excess nutrition (especially with one-sided nitrogen nutrition), even such tomatoes can grow more than a meter.
Standard grade is another item that can be seen on the packaging. Simply put, these are plants with a strong, low stem and a compact crown. They don't have to be tied up or pinched. These tomatoes are unpretentious: the roots are located close to the surface and absorb nutrients and moisture well. Standard varieties are suitable for those who do not want to mess with plants. By the way, they are called “tomatoes for the lazy.”
Hanging (or hanging) tomatoes are also popular. They are bred for hanging pots or flowerpots. They are distinguished by flexible, flowing shoots. Such bushes also perform an aesthetic function. They look like flowers, but instead of buds there are real fragrant tomatoes.
But if you see the name “indeterminate” variety on the packaging, you should know that these are tall tomatoes that are usually planted in greenhouses. They are not suitable for a windowsill - there will not be enough space for the plants.
- If there is space on the balcony, you can sow almost all varieties - low-growing and tall. If the conditions are cramped, it is better to focus on miniature bushes. For example:
“Room surprise” - gardeners dubbed it a super early variety. The first tomatoes begin to turn red already on the 75th day after emergence. The height of the bush is up to 50 cm. The yield is one of the highest among indoor varieties - up to 3 kg per bush. This variety is popular even among those who first decided to grow tomatoes indoors.
“Balcony Bonsai” is an early ripening variety that is unpretentious to light. Ripens in 85 days. But the yield is not the highest - 0.5 kg, although the fruits are tasty and sweet.
“Balcony miracle” is a standard plant about half a meter high. Refers to the lack of light with “understanding”. The tomatoes are round, red, weighing 70-100 g. This variety begins to bear fruit 85-90 days after germination. Each bush can produce up to 2 kg of harvest.
“Pinocchio” is a potted tomato variety that is grown outdoors in summer and in the window in winter. The bushes are very small - 30 cm, with small tomatoes - 20 g. From one plant you can collect 1-1.5 kg of fruit.
"Little Red Riding Hood" is an early ripening variety. No more than 90 days pass from the emergence of seedlings to the ripening of the fruit. The plant does not require the removal of stepsons and is resistant to temperature swings. The color of tomatoes is red. Bush height - 40-60 cm.
You can also pay attention to “Garden Pearl” (ampel variety), “Golden Bunch”, “Citizen F1”. In any case, before purchasing, read the instructions carefully.
ON A NOTE! A tomato can bear fruit for up to 5 years, but the plant produces the richest harvest in the first 2 years .
Planting seedlings in closed ground
Many gardeners and gardeners think about when to plant seedlings in closed ground, so as to grow tomatoes in a greenhouse in order to get the first fruits earlier.
It is important to remember that tomatoes are a very heat-loving crop. In the middle zone, planting in a greenhouse or greenhouse is usually carried out in mid-May. But it is better to focus on the temperature in the greenhouse, as well as the condition of the seedlings.
It is best to plant tomato seedlings at the time when the buds are “filled” on the first flower cluster. You can also plant non-flowering seedlings, but in this case the harvest will be later.
What is more significant is what temperature is maintained in your greenhouse, since tomatoes need to be grown in a greenhouse at an average temperature of +180 C + 200 C. This average temperature value indicates that night temperatures can drop to +80 C + 100 C, and during the day, rise to +300 C.
If you have already planted tomato seedlings, but there is a sharp cold snap or cloudy weather, then it is necessary to artificially maintain the desired temperature in the greenhouse. The price of the issue is your future harvest.
Many gardeners, before planting seedlings, make additional insulation in greenhouses by attaching additional sheets of non-woven covering material, or two layers of dense polyethylene film along the walls and ceiling.
Important: if you are insulating a greenhouse or greenhouse with plastic film, you need to make a gap of at least 3 cm between the layers.
Here are some instructions for planting tomato seedlings:
- tomato seedlings are planted at the age of 60-65 days;
- the soil in the greenhouse or greenhouse must be well fertilized and watered;
- Depending on the width of the greenhouse, the number of rows is made. The distance between rows is usually kept at 30-40 cm. The distance between tomato bushes should be at least 25 cm.
- Depending on how the tomato bushes are formed, into one or several stems, the planting density depends. Since it is correct to grow tomatoes in a greenhouse at the rate of 8-10 bushes per 1 m2 when forming into one stem, or 4-6 plants per m2 when forming into several stems.
- After transplanting the seedlings to a permanent place, it must be watered every other day. Water for irrigation should be settled and warm, with a temperature equal to or close to the soil temperature, since tomatoes can be grown in a greenhouse or hothouse if this condition is met.
Materials and equipment for greenhouse construction
In order to build a reliable greenhouse that will function at any time of the year and bring you a good harvest, you need to:
- prepare a place for a greenhouse;
- build a frame (metal or wood, but today plastic structures are also used) and secure the base (regular film, glass, modern polycarbonates, etc.);
- prepare the soil;
- make a heating, ventilation and watering system;
- provide additional lighting during the cold season.
Each of the listed points has its own nuances, which are associated with the individual characteristics of your future greenhouse.
Growing in a greenhouse
For planting in greenhouses, seedlings grown at home are also taken, since it is not possible to grow tomatoes in a greenhouse without seedlings in the conditions of the middle zone.
By the time tomato seedlings are planted in greenhouses, daytime temperatures should not be lower than +220 C + 260 C, and night temperatures should not fall below +100 C.
Seedlings aged 60-65 days are planted at the rate of 8 plants per 1 m2, in two rows. In order to get an earlier harvest, seedlings are planted more densely, leaving a distance of 15-20 cm between plants, and 40 cm between rows. With this method of planting, the bushes are formed into one stem, pinched above the second flower cluster. To obtain such an early harvest, only early ripening varieties such as “Nevsky”, “Moskvich”, “Tambovsky Harvest 340”, “Sever” are suitable.
Just like in a greenhouse, you need to prepare the soil in a greenhouse, since growing tomatoes in greenhouses requires a lot of fertilizer. Before digging, add 70-80 g of ammonium nitrate, 50 g of potassium fertilizer (without chlorine) and 150 g of superphosphate, based on the area of the frame.
Temperature conditions for growing
The influence of temperature on growing tomatoes:
- below 0.5°C - tomatoes die immediately;
- below 5°C - tomatoes are damaged and then lost;
- 15°C - vegetables begin to grow, but require a further increase in temperature;
- below 15°C - minerals are not absorbed so quickly and efficiently, roots develop slowly, access to water becomes difficult, and they take root less well;
- 10°C - roots stop absorbing nutrients from the soil and stop growing;
- from 25°C to 30°C are comfortable conditions for the development of culture.
The optimal daytime temperature in a greenhouse for tomatoes is considered to be from 21°C to 23°C, and at night - from 17°C to 18°C. For tomatoes, this is the best climate they can withstand. They better absorb minerals, moisture, and nutrients from the soil, which has a positive effect on the quality of the fruit.
An important factor is air humidity.
If it becomes cooler after planting the seedlings, the greenhouse is additionally heated artificially.
Picking pots
Grown seedlings with formed, strong leaves need to be picked. It is necessary to pay special attention to the container prepared for picking. The seedlings will grow in it throughout the season. For dwarf varieties of tomatoes, its volume should not be more than 2 liters. Medium-sized varieties will require about 4 liters of volume. Ampelous plants should be grown in pots with a volume of at least 5 liters. Before picking, drainage material must be placed at the bottom of the container.