Variety
First things first, you need to choose the right variety. Here, the climatic conditions of the area, the presence and size of the greenhouse, and even the amount of free time play an important role (some types of tomatoes do not require much care). In addition, some varieties are more suitable for fresh consumption, while others are more suitable for canning. And this is not to mention the variety of colors and shapes of fruits!
When choosing seeds, our article on tomato varieties will help you take into account the height of the bush, the recommended type of soil, the color, shape and taste of the fruit.
Seed selection
The success of growing tomatoes depends on how well the variety is chosen. Preference is given to early and mid-ripening species.
Table 1. Comparative characteristics of low-growing and tall tomato varieties.
Gina (Dutch selection)
Experienced gardeners advise growing tall bushes, as they save space and produce a larger harvest. Thus, up to 10 fruit clusters are formed on one stem. In addition, on low-growing varieties, the fruits ripen at the same time, while tall ones can bear fruit until autumn.
You can learn more about early varieties of tomatoes for growing in open ground by reading a specialized article on our portal.
Prices for tomato seeds
Sowing time
To calculate when to plant tomatoes, you can subtract the ripening time from the desired harvest date. For example, if fresh fruits are needed by July 15, and the description of the variety states that the harvest can be harvested 100 days from the first shoots, then we count 105 days (5 are set aside for seed germination) and get March 31.
To calculate days, it is convenient to use an online calculator.
But at the same time, you should definitely take into account the recommended sowing date for each variety, indicated on the seed packet. It is worth shifting the due date only slightly, because... recommendations are made taking into account daylight hours. At the same time, it is important to purchase seeds adapted to a specific area, so that the date of planting in the ground calculated by the agricultural company does not fall on the first drop outside the window.
How to protect tomato seedlings from diseases
No matter how you grow seedlings, they can get sick and therefore it is important to protect young plants from such a scourge. There are different diseases - fungal, viral, bacterial, non-infectious. There can be many reasons - diseased seeds, soil pests, improper care, lack of mineral fertilizers or their improper use and other reasons.
How to recognize a particular disease and how to treat it is a separate and large topic; today we will talk not about the diseases themselves, but about their prevention. Although they were already mentioned in the article, in conclusion I decided to repeat them.
To grow strong and healthy tomato seedlings at home you need:
- carry out pre-sowing seed treatment;
- plant seedlings in high-quality, disinfected soil;
- avoid overcrowding of seedlings by following the planting pattern;
- observe the temperature regime, monitor the lighting of plants and watering;
- discard sick and weak plants;
- carry out the procedure of hardening seedlings.
Growing tomato seedlings yourself is, of course, troublesome, but exciting. Add desire and patience to all the above recommendations and you will succeed, and as a reward you will have an excellent harvest of your favorite vegetables in the summer.
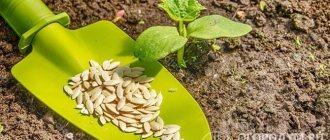
Preparing seeds for planting
The purchased seed must be prepared for planting. The seeds are checked for germination, disinfected (if the manufacturer has already done this, the corresponding inscription is on the packaging), soaked and hardened.
Tomatoes are disinfected in a 1% solution of potassium permanganate (1 mg per liter of water) for 15 minutes. And a 3% solution of hydrogen peroxide, if you immerse the seeds in it for 20 minutes, will help not only disinfect them, but also speed up germination. It is also easy and effective to treat the seed with Fitosporin. 0.5 tsp The powder is dissolved in 100 g of water, 2 drops of paste in 0.5 cups, and the finished solution does not need to be diluted. Soaking time – 2 hours.
Soak the tomatoes for about 12 hours. This time is enough for swelling. If you decide to do without hardening, the procedure can be extended for a few more hours until the first sprouts appear. The seed material is immersed in water, potato or aloe juice, or in solutions of special preparations: “Epin”, “Zircon”, “Fitosporin”, etc.
For hardening, swollen but not hatched seeds are freed from excess moisture and placed in a refrigerator with a temperature set from 0 to -3. After 20 hours, they are transferred to a room (at 20 degrees) for 5-6 hours, then the procedure is repeated. Hardening lasts 5-6 days.
When to pick tomatoes
Tomato seedlings can be plucked as soon as the first two leaves appear on the seedlings. It’s not possible before, because the root system is still weak. Late picking of seedlings can cause tomatoes to take root poorly and be susceptible to diseases. There are a number of signs indicating that tomatoes need to be picked:
- The tomatoes have reached the required age. Such seedlings have a developed root system to withstand picking.
- Tomatoes are planted too densely. The optimal distance between seedlings is 5 cm. When planted densely, the plants interfere with each other and do not receive the required amount of nutrients and moisture.
- Plants are stretched. If they have too thin stems and a small number of leaves, then picking helps to save the situation. This usually happens when there is a lack of light.
- The seedlings have a depressed appearance. In cramped conditions, it lacks natural light, moisture and nutrients. These plants have too thin stems.
- Signs of illness appear. The most dangerous disease for tomato seedlings is blackleg. Its spread slows down the development of seedlings, resulting in the death of tomatoes.
Sowing seeds for seedlings
You can sow tomatoes in seedling boxes or cassettes, snails or peat tablets. We have already done a more detailed review of containers for seedlings. Containers must be clean. It is advisable to treat last year's containers with potassium permanganate or copper sulfate.
If there is enough space in the house, tomatoes can be immediately planted in individual pots, then picking will not retard their growth. But most often, the seeds are placed in common containers and then planted in separate pots, so that by the time they are transplanted into the ground they do not injure the plant again.
It is important to choose good soil for seedlings. Tomatoes love loose soil, so you need to add peat and sand to the soil. The recommended pH for tomatoes is 6.5. You can check the acidity of the soil by watering a small layer of 9% vinegar on a glass surface. Acidic soil will not show itself in any way, neutral soil will hiss a little, and alkaline soil will emit a strong hissing sound.
In addition to the ready-made soil mixture, you can create soil for growing seedlings yourself. Here are some “recipes”:
- 1 part prepared soil + 1 part earth;
- 12 parts peat + 3 parts earth + 1 part mullein;
- 2 parts humus + 1 part earth + 1 part sand;
- 1 part humus + 1 part earth + 1 part rotted sawdust + 1 part peat + ⅓ part ash.
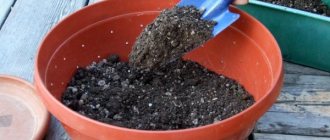
Garden soil must be disinfected by calcination or bactericidal preparations, such as “Fitosporin”, “Barrier”, “Planriz”, etc. You can also use ready-made soil mixtures made specifically for tomatoes. To avoid stagnation of water in the box, it is worth providing a drainage system. To do this, expanded clay, small pebbles or pebbles are poured onto the bottom of the container in a layer of at least 2 cm.
The prepared soil is poured into a container for planting, compacted and watered. After some time, the ground will settle and it will be possible to sow.
In the box, 5 cm is left between the seeds, and in the cassette, one seed is placed in each cell. Sprinkle the seeds with a thin layer of dry, loose soil, and then cover with film or a bag until sprouts appear.
During seed germination, it is necessary to maintain the room temperature at 23-25 degrees, and after germination it is advisable to reduce it to 18-22. If the thermometer drops below +10 degrees, the plants may die.
Tomatoes are photophilous: they need sunlight (or artificial) lighting 12-15 hours a day. It is not recommended to exceed this time, because... Plants should rest in the dark for at least 5 hours.
At the stage of the appearance of two cotyledon leaves, if the number of seeds allows, the healthiest seedlings can be selected. They should shed their seed coat in time and be medium in height.
Until the first true leaf, it is important to prevent the soil from drying out by moistening the soil with a spray bottle. Under no circumstances should you pour on the leaves, because... this threatens the plant with disease. Yes, and adult tomatoes should be watered only at the root.
How to grow tomato seedlings at home with picking
Experienced gardeners already know all the intricacies of this difficult task. If you are at the beginning of your journey, then before you start growing, you need to find out in more detail what the success of the event depends on. Seeds in a beautiful package with a tempting description of the variety are far from a 100% guarantee of success. Although the choice of seeds is an important factor.
Light, temperature, soil, water and fertilizing are the most important things for growing seedlings.
It is believed that by the time of transplanting into the ground, tomato seedlings should look like this:
- height - 25-35 cm;
- stem thickness - 8-10 mm;
- real leaves - 7-10 pcs.;
- The first flower cluster is formed.
Temperature and light conditions for seedlings
Important factors for obtaining plants with such parameters are lighting and temperature conditions.
Immediately after sowing the seeds, the room should be warm, about 23-25 degrees, so that seedlings appear faster. As soon as the tomatoes begin to grow, for their normal development it is better to keep the room temperature at 18-22 degrees Celsius.
If the temperature in your room is higher, then it can be reduced by ventilation, but we must remember that young shoots are afraid of drafts.
Changes in one direction or another can have a negative impact on development:
- at temperatures above 25 degrees, the above-ground part of the shoots becomes thinner, the plants become thin and fragile. Leaves may turn yellow and fall off.
- at temperatures below 16 degrees, the growth of green mass slows down, but the root system actively develops.
- the lowest permissible temperature is 10 degrees Celsius, at which development stops, but the plants do not die. At lower temperatures they may die.
Another important factor is lighting. Tomatoes need 12-15 hours of daylight. The best option is if the windows in your house face south or southwest. But during the period when growing seedlings begins, the duration of daylight hours is too short and sometimes even the correct location of windows does not help.
When there is a lack of light in plants, the process of photosynthesis slows down, the stems begin to stretch, and elongated internodes appear on them. Elongated plants become weaker and more difficult to transport and plant in the ground.
Artificial lighting is a great way to maintain optimal light conditions.
But there is no need to overdo it in this matter either. Tomatoes need an overnight rest, which should be at least 5 hours. Therefore, round-the-clock lighting, as gardeners sometimes do, is not needed. During night rest, plants process what they accumulated during daylight hours. And if they are not allowed to rest, then over time a nutritional deficiency may begin.
Now the retail chain offers a variety of devices and lamps to organize lighting. It seems that it is quite difficult and expensive to arrange this in an apartment. Or maybe you shouldn’t get carried away with newfangled means. I suggest watching a video in which an experienced gardener offers a simple and inexpensive way to illuminate seedlings.
Preparing soil for growing tomato seedlings without a greenhouse
For active growth and development of the root system, young plants require fertile soil enriched with useful substances.
Many people harvest soil from their garden in the fall, but it is not recommended to use it in its pure form, as it is considered too “rough” for seedlings. Therefore, you can prepare the soil yourself by enriching the garden soil, or buy ready-made ones.
For example, look at several options for preparing an earthen mixture:
Humus and mullein can be replaced with purchased vermicompost. Vermiculite, perlite or coconut shavings can be used as a baking powder instead of sand.
When purchasing a ready-made mixture, you need to pay attention to the type of soil. There is a universal one, which is suitable for any plants, and there is a special one, designed for specific crops. Special soil is preferable, since it is prepared taking into account those components that are necessary for this type of plant.
But manufacturers are different, so when choosing, pay attention to some points:
- it is better to purchase soil from specialized stores and trusted manufacturers;
- if you do not have any preferences, then never buy products without a label;
- look at the composition, it should consist of several components, such as soil, peat, vermiculite, sand or other baking powder, mineral fertilizer, it is good if the composition includes vermicompost.
- the soil should be loose, slightly moist, but still flowable, non-sticky, without large lumps (if you come across small lumps, roots, fibers, sand, perlite particles, this is normal), there should be no smell of mold.
For example, look at what soil mixtures are available for sale and their composition.
The acidity of the soil is important and it should be close to neutral pH (6.5-6.7), since tomatoes do not develop well in an acidic environment. You can check it with a special device, litmus paper or using 9% table vinegar. You need to pour vinegar over the soil, pouring it onto the glass surface:
- alkaline soil will give strong foaming;
- neutral - weak;
- nothing will happen to acidic soil.
Soil acidity can be reduced using auxiliary substances:
- wood ash (1 tbsp per 1 kg of soil);
- chalk, dolomite flour or fluffed lime (2-3 tbsp per bucket of soil);
It is better to disinfect even high-quality soil before use. This helps clean the mixture from pathogenic bacteria, insect eggs, and protects against blackleg, a disease that often affects seedlings.
Known methods include steaming, freezing, and treatment with a manganese solution. But experts believe that such methods make the soil sterile and kill not only harmful, but also beneficial substances.
A simple and modern method is treatment with drugs that consist of beneficial bacterial cultures, suppress diseases, and increase plant immunity. Most often, Fitosporin is used, as well as drugs such as Planriz, Barrier, Extrasol and other fungicides. Before use, you should carefully study the instructions.
Sowing tomato seeds for seedlings in the ground (video with Oktyabrina Ganichkina)
Before sowing, it is necessary to select seeds, discard the bad ones, do pre-sowing treatment in order to disinfect the seeds and ultimately obtain strong, healthy seedlings.
Tomatoes love picking; this makes additional lateral roots develop better. This is a little stress for the plants and they stop their growth for some time, so the seedlings do not stretch as much as without picking.
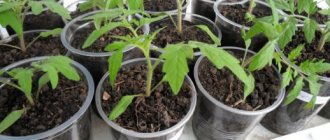
If you plant tomatoes as seedlings with picking, then at the initial stage you do not need a deep container for planting. They use different containers, this can be a common container or separate cassettes (plastic cups) for each seed.
Whatever dish you choose, the main thing is that it can be filled with soil at least 5 centimeters thick. If you plant in a common container, the distance between the seeds should be 1.5-2 cm. Watch the video for more details.
Cover the planted seeds with a plastic lid or cover with cellophane and place in a warm place. If you plant different varieties, do not forget to label the containers with seeds indicating the name of the variety and the date of sowing, for subsequent control.
There is an opinion that melt water stimulates growth and experienced gardeners suggest covering them with snow immediately after sowing the seeds. Then put it in a cool place, and as soon as the snow melts, transfer it to a warm place.
Snail for planting seeds (step by step instructions)
Gardeners and gardeners come up with different ways to plant plants, and one of them is snail sowing. This method has become very popular because of its simplicity, it is convenient for those who do not have much space for seedlings, and the root system is not damaged during transplantation (unfold the snail and take out the plant).
What you will need:
- underlay for laminate of any color, 2 mm thick
- priming
- tape or rubber band for money
- container in which you will install the snail
- cellophane
How to do:
- Using a sharp knife, cut a strip 10 cm wide from the roll of substrate. The length can be any, depending on how many seeds you will plant.
- Place the tape on a flat surface, unwind a small part, moving 5 cm from the edge, pour 1-2 cm thick soil. Determine where you will have the top and bottom of the snail. You need to retreat 2 cm from the top and place the seeds in a row at a distance of 2 cm from each other.
- Once you fill this piece of tape, carefully so that the soil does not spill out, roll it into a roll. Next, we unwind the tape again and continue filling the snail until the seeds run out. Secure the structure with tape or rubber band.
- Place vertically in a plastic container with a small amount of water, without mixing up the bottom and top. Using a spray bottle, spray the top of the snail with water, cover with film and place in a warm place. When the sprouts appear, remove the film and care for it as for ordinary seedlings.
If you plant different varieties of tomatoes in one snail, you need to separate them with something, for example, with plastic knives, writing the name of the variety with a marker.
Video on how to plant tomato seeds in toilet paper
If you liked the method of planting in a snail, but there is no opportunity to purchase a substrate for the laminate, then gardeners are also resourceful here. Watch the video with detailed instructions.
How to care for tomato seedlings before picking
If you did everything correctly, then literally in a few days the first shoots will begin to appear. It is important not to miss this moment and as soon as the loops appear, you need to remove the film or remove the lid and place the seedlings in a bright but cooler place.
If you have organized lighting, then with the appearance of loops you need to provide round-the-clock lighting for 3-4 days, this will speed up their germination. Then switch to 12-15 hour illumination with a night rest break.
When the loops rise, at this stage you can select strong plants. It is believed that if the seed coat does not immediately come off the sprout, it means the plant is weak and it is recommended to remove it. High-quality sprouts should all be the same size; if some are very different (higher or lower), then they are also recommended to be removed. If you have a valuable variety and a limited amount of seeds, then such selection may not be done.
Watering is important for plants, but it should be moderate. Until the first true leaf appears, you need to monitor the soil; if it begins to dry out, then it should be slightly moistened with a spray bottle. After the true leaf appears, watering is carried out once a week. The leaves are still very tender, so try not to get water on them.
Watering, fertilizing, hardening of tomato seedlings after picking
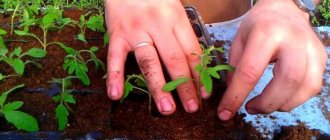
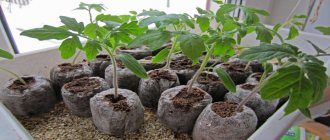
Another important point for both plants and gardeners is picking seedlings. It is usually started 10-12 days after emergence and when there are 2-3 true leaves. At this stage, plants are also sorted and the strongest specimens are replanted.
The day before picking, you need to water the plants well to make it easier to remove the sprouts from the ground without damaging the weak roots.
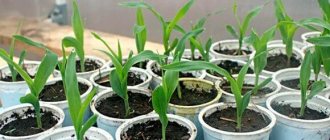
Using a knife or spatula, carefully remove the sprout from the container and transplant it into another container of larger volume, deepening the tomato to the level of the cotyledons to form additional roots. Deep boxes for seedlings, plastic glasses with a capacity of 0.5 liters, cut-off milk and juice boxes or plastic bottles are used as containers.
In order for the plants to take root well, it is important that when planting there is no air gap between the soil and the roots, so when planting, you need to squeeze the soil well around the sprout.
After picking, water the tomatoes and leave to rest for a day in a cool place, only then send them under lighting. After 5 days, it is necessary to carry out the first fertilizing for the development of the root system.
To do this, prepare a solution a day before: 1 tbsp. l. superphosphate, pour 0.5 liters of boiling water, after a day add 1 tbsp. l. potassium sulfate. The seedlings are first watered and then fertilized at the rate of 2 tbsp. l. for 1 root.
You can use other complex fertilizers, the main thing is that they contain a high phosphorus content. This element is very important precisely at the early stage of plant development. It promotes root growth, earlier flowering, fruiting and increases the sugar content of fruits.
The next feeding is carried out after 10-14 days with complex fertilizers for seedlings. If the plants begin to stretch, then you need to choose a fertilizer with a low nitrogen content.
If, on the contrary, you see signs of nitrogen deficiency - small, yellowed leaves that may fall off, then feed with a high nitrogen content. But don’t get carried away with such fertilizers; from an excess of this element, the plants begin to fatten, and this significantly shifts the timing of fruiting.
If there is a lack of nitrogen, fertilizing with ammonia has worked well. Ammonia not only acts as a fertilizer, it protects seedlings from pests and pathogenic bacteria.
Prepare the solution as follows: dissolve 1-2 tsp in 1 liter of water. 10% ammonia solution. After watering, add 2 tbsp of solution. l. to the root.
Another fertilizing with complex fertilizers is recommended 10-12 days before planting the plants in the ground.
Excessive watering is another factor that causes tomato seedlings to become stretched, weakened, and may begin to hurt. Experts say that tomatoes tolerate soil drying out more easily than waterlogging.
Basic rules of watering:
- tomatoes do not like chlorine, so the water should be kept at room temperature;
- water the crop only at the roots, since wet leaves can burn in the bright sun;
- Tomatoes need to be watered little and rarely. The need for watering can be determined by the plants when their leaves droop slightly.
Hardening off seedlings is another important element of care and is needed in order to adapt them to the conditions in which they will have to grow in open ground (temperature changes, winds, rains).
You can start already with the appearance of the first true leaves. But since during this period plants need warmth to grow, hardening consists of keeping them briefly under an open window, thereby slightly reducing the temperature, the main thing is that there are no drafts.
The main hardening procedure begins 2 weeks before planting seedlings and involves keeping the plants at lower temperatures for some time. If possible, then take them outside; if you live in an apartment, then onto the balcony.
You need to start with short periods of time (2 hours a day), gradually increasing. If the seedlings tolerate the daytime drop in temperature well, then you can try leaving it for a short time in the evening, also gradually increasing it. Before planting, leave the tomato seedlings outside for 3 days, provided the weather is good.
It is important to monitor the plants at this time and not make mistakes:
- avoid drafts, do not leave in the rain or strong wind;
- if the plants suddenly droop, immediately bring them into the house;
- shade, protecting from ultraviolet rays;
- water only after bringing it into the house.
Picking
On the 10-12th day after the emergence of seedlings, picking is carried out - transplanting the plants into individual containers. This is necessary for better development of the root system. Seedlings with two to three true leaves are allowed for picking. With a large supply of seedlings, you can again select the strongest specimens.
The day before the operation, the seedlings are well watered so that a good earthen ball is formed. Remove the lump using a knife, spatula or fork and place it in a new container, deepening it down to the cotyledon leaves to form additional roots. Suitable containers include juice boxes, glasses of at least 0.5 liters, milk cartons, etc.
Hello, dear friends!
Let's continue the tomato theme. After reading the previous article, I hope you learned something new about tomatoes, the variety of varieties of this wonderful plant, how to prepare tomato seeds and the timing of their planting, and caring for seedlings.
In this article we will discuss how to grow an excellent tomato crop in our summer cottages, provided that the plants are planted in open ground.
So, the topic of our article today is growing tomatoes in open ground.
Top dressing
After picking, the seedlings are allowed to rest for a day in a cool place without additional lighting. On the 5th day, the plants are fed with complex fertilizer with a high phosphorus content.
After another 10 days, fertilizer is applied to the seedlings. If the plants are too elongated, you need to understand why this happened. There are several main reasons:
- room temperature is too high;
- excessive watering;
- lack of light;
- excess nitrogen in fertilizer or soil.
In the latter case, you need to select a fertilizer with a low nitrogen content.
If, on the contrary, there is not enough nitrogen (the leaves turn yellow and fall off), its deficiency must be urgently replenished. For this, fertilizing with nitrogen-containing fertilizer or ammonia is suitable (1 teaspoon of 10% ammonia is dissolved in 1 liter of water, 2 tablespoons are poured under each root).
Let's start landing
First of all, you need to thoroughly moisten the soil in pots or boxes with seedlings. This will help you easily remove them from the seed container and prevent accidental damage to the root system.
Prepared holes for growing tomatoes in open ground should have a depth of 10-15 cm.
We water them (a bucket of water for 8-10 holes) and apply mineral fertilizers mixed with humus (proportion 1x3).
- Turn the container with the seedlings over, wrap your middle and index fingers around the tomato stem and remove it from the container.
- Tear off the leaves of the seedlings, leaving only 2-3 leaves on top (this will stimulate root growth).
- Place the plant with a ball of root soil vertically in the hole and sprinkle with compost. In this case, the tomato stem should remain open. Only the roots or soil pot are placed in the ground.
- Press the soil firmly around the plant and cover the compost with dry soil.
- After planting, mulch the soil (cut, slightly wilted grass, sawdust, straw or newspaper leaves are suitable for this). The mulch layer should be about 10 cm high.
When planting tomatoes in the ground is finished, we will leave them alone for 8-10 days. During this period, the plants take root and become accustomed to the new location.
There is no need to water them yet. But you need to be prepared for frost. To do this, immediately after planting, we will cover our young tomatoes with transparent film.
It will remain until the threat of frost disappears (for the middle zone this usually happens by June 5-10). You can make holes in the film with a diameter of 10 cm. This will reduce the risk of late blight infection.
After 10 days, we water the seedlings and at the same time plant a new one in place of the dead one. The first hilling when growing tomatoes in open ground can be done two weeks after planting the seedlings.
In the future, we will hill up the plants as they grow.
Landing in the ground
It is important for a gardener to know what time to plant tomatoes in the ground. To do this, you need to focus not only on the recommendations of the seed manufacturer, but also on the weather forecast (frosts should end).
The bush is also preparing to move to the garden bed and throws out flower brushes. You need to wait two weeks from the appearance of the first brush to planting.
If the plant is actively developing, and the weather does not allow replanting, the first cluster can be torn off, thereby gaining an additional week for preparation.
If the vagaries of the weather happen regularly, it is better to plant the tomatoes immediately in larger pots (from 1 liter), otherwise they will not have enough nutrients for further growth, and they will get sick.
It is recommended to replant in cool, cloudy weather. If the heat lasts, the plants are moved to the garden bed in the evening so that they have time to move away overnight.
Before planting in the ground, the plants are hardened: they are taken outside, increasing the residence time by five minutes every day.
You can watch the video for more details on the technology of transplanting and preparing beds.
Choosing a place for a tomato bed
The area for tomatoes should be sunny, without drafts. The bed is not planned in lowlands, since high humidity harms the plant. The yield largely depends on what crops were previously grown in the garden. It is advisable not to plant seedlings in areas where nightshades were previously grown. If old roots of eggplant or potatoes remain in the ground, then there is a high probability of pathogens and pests of tomatoes being found in it.
Attention! You cannot make tomato beds in the same place for several years in a row.
The best predecessors of tomatoes are:
- beans, peas, soybeans and other legumes;
- beets, carrots, radishes, radishes.
It would be a good idea to have a strawberry bed next to the tomato plant.
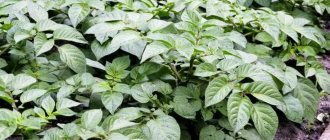
Caring for tomatoes after planting in a permanent place
Further care for tomatoes consists of timely watering, fertilizing, staking and pinching.
In warm weather, plants need only water once a week. In hot weather, the interval is halved. It is advisable to use warm water and pour it under the root. Wet soil must be loosened to increase the oxygen content in the soil.
Tomatoes are fed at least three times, depending on soil fertility. For better results, alternate mineral and organic fertilizers. At this stage, tomatoes require phosphorus and potassium from minerals, and magnesium from microelements.
Among the organic ones, a solution of bird droppings is used (1.5 kg per 10 liters of water, up to 1 liter for each bush), compost (in the form of mulch) and an infusion of cut herbs (for example, nettles), diluted with water in a ratio of 1:10.
In order for the tomato stem to withstand a bountiful harvest, the plant must be tied up in a timely manner. Usually the bush is attached to a support before or immediately after planting in the ground. The rope is secured with a figure eight, i.e. twist between the support and the bush to avoid injury to the stem. As it grows, it is additionally tied at the top.
In the greenhouse, you can secure the tomato with a rope stretched from the ceiling.
Some gardeners use a trellis.
Stepchildren are the lateral branches that grow in the leaf axils of the plant (i.e., not on the main stem). If these additional growths are not removed, you will end up with a fluffy green bush with a minimal amount of fruit. To get a good harvest, stepsons need to be regularly plucked off as soon as they are discovered. The fewer stepsons there are, the less the plant is injured.
Remove all stepsons below the flower brush. Of those lying above, you can leave 1 or 2 to form a bush with 2 or 3 stems.
Here is a video in which an experienced gardener summarizes information about growing tomato seedlings and gives valuable advice.
Features of growing in greenhouses
Tomatoes in a greenhouse
Although greenhouse conditions differ from open ground, the growing processes are quite similar.
Tomato seedlings are planted in a greenhouse in the first half of May. The beds are prepared 7-10 days before planting. The soil requirements are the same as for growing in open ground. Watering, pinching, spraying, and fertilizing are carried out with the same regularity.
Greenhouse tomatoes are tied up when the bushes are already strong. For this, trellises are most often used.
Important points to consider when growing tomatoes in a greenhouse:
- The greenhouse should be ventilated from time to time by opening the side and top windows.
- In sunny weather, tomatoes need to be artificially pollinated.
- When the stem thickens and green mass grows, watering and fertilizing must be stopped for 7-10 days, and the bushes should be fertilized with superphosphate (3 tablespoons per 10 liters of water). This will help slow down the growth of the plant and continue fruit formation.
- If the tomatoes are tied only on the lower cluster, you should quickly harvest the crop from it and water the plant. Then the fruits will begin to form on the second and subsequent branches
The pride of a true summer resident
Tomato is an unpretentious, but very responsive plant. All of the above actions help to significantly increase crop yields and obtain a large number of aromatic fruits. But the main thing is not to overdo it in care. Everything is good in moderation!
Planting tomato seedlings according to the Lunar calendar in 2022
Followers of planting according to the Lunar calendar need to remember that it is best to sow seeds on the Waxing Moon, these are the most favorable days. For the central region and the Volga region, the periods of the waxing moon occur on the following days:
- 1-9, January 26 – February 8,
- February 24 – March 8,
- March 25 – April 7,
- April 24 – May 6.
In the Volga-Vyatka region, seedlings can be planted on the windowsill on March 7-10, 15, 16.
In the Urals, Siberia and in the northern regions, favorable days are April 6, 7, 11, 12, 17, 18.
But on the New Moon and Full Moon you should not do any planting at all.
The most favorable days for sowing tomatoes:
- February 6-9, 11, 12, 14,
- March 7-10, 15, 16,
- April 6, 7, 15-18.
- May 2, 3, 8, 9, 15-18.
Unfavorable days:
- February 8, 9, 21, 22, 26, 27,
- 7, 8, 19-21, 25, 26 March,
- 3, 4, 15-17, 20-22, 30 April,
- May 1, 13, 14, 18, 21, 27-29,
- 9-11, 14-16, 24, 25 June.
The best time to transplant seedlings to a permanent place is May 2-3, 8-9, 15-18.
How to sow seeds in rolls (diapers)
This is the easiest and most convenient way to grow seedlings. I grew tomatoes this way last year and really liked this method. It is compact, fast, saves space, and does not require soil for sowing seeds.
You will need:
- Food plastic bags measuring 24x31 cm, since they are folded in half in the packaging, the resulting size is 12x31 cm, which is what you need;
- Regular white or gray toilet paper;
- Water at room temperature, it is better if it is without chlorine (settled water).
Place a food bag on a towel without unrolling it completely; lay several layers of toilet paper on it.
Place the top layer along the top edge of the bag, the second layer along the bottom edge. Place the top layer again along the top edge. Spray the paper with a syringe or spray bottle.
Then we lay out the seeds on damp paper, retreating 1 cm from the top edge and placing them at a distance of 1.5-2 cm from each other.
We roll the roll from right to left, trying to keep the top and bottom edges even. We sign the roll of seeds with a marker, indicate what was planted and the variety, as well as the date of sowing.
Pour 1 cm of water into the bottom of a transparent container or jar. Place a roll there, with the top edge with the seeds on top.
Now we take another bag and simply cover the container with the rolls with it. Place in a warm place with a temperature of +25-28ºС. As soon as you see the loops of the seedlings, remove the top bag and move the seedlings to a bright, warm place. There is no need to add water at first, as at first there is water at the bottom of the container. When the first leaves appear and the roots reach the water, then it will be necessary to add water to the container.