0
(0)
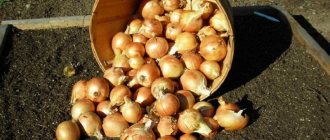
The yield of dill depends on many factors: variety, soil, weather conditions, care. Dill is grown primarily as an independent crop. It is not demanding on growing conditions. Usually 15-30 grams of seeds are sown per 1 square meter. When planting dill as an independent crop, the duration of its growing season is 55-60 days. Productivity – 1-1.5 kg/sq. m. In the article we will tell you what the yield of dill is in open ground, a greenhouse, 1 square meter, 1 hectare and various varieties (Alligator, Amazon, etc.)
Growing a rich harvest of dill in a greenhouse
Dill is a cold-resistant plant, so it can easily tolerate light frosts and low temperatures. Seeds can begin to germinate at a temperature of +3 degrees, but in this case germination may take a month. Dill seeds germinate slowly due to their high essential oil content. Therefore, in order for the seedlings to emerge quickly and smoothly, it is necessary to carry out pre-sowing treatment. The optimal temperature for plant growth is +15-20 degrees. It should also be taken into account that dill is a light- and moisture-loving crop.
You can increase the yield of dill using different methods.
Dill is undemanding to the soil - fertilizers applied when preparing the substrate are sufficient. However, an excellent harvest comes only on moisture-intensive fertile substrates. If the soil is too dry, the yield will decrease, the dill will quickly begin to form a stem with an umbrella and will lose its marketable value.
Preparing dill seeds for sowing
Most often, one of two methods of pre-sowing seed preparation is used:
Bubbling involves soaking dill seeds in water, which is constantly saturated with oxygen. To saturate plant seeds with oxygen, amateur gardeners use an aquarium compressor. Soaking continues for 18-20 hours. The water temperature should be about 20 degrees. During the process, some seeds are pecked, which forces them to be sown immediately after this procedure is completed.
Preparing and sowing dill seeds.
Another way is to carry out the usual soaking in plain water for a period of two to three days. At the same time, every 6-7 hours it is necessary to replace the water with fresh water. Dill seeds are sown in soil that is generously moistened beforehand.
Advantages of growing dill in a greenhouse
- Dill can be grown in a heated greenhouse all year round. In unheated conditions, the growth period is extended by several months.
- When using biofuel and roofing felt insulation, you can significantly save on electricity.
- Dill is very productive - it can be sown every two months. Then fresh herbs will be on your table all year round.
- Dill grown in a greenhouse is not inferior in taste to greens collected in the garden.
- Dill is unpretentious, it does not require constant fertilizing, frequent watering, or pest control.
- This crop is planted next to vegetables, saving space.
Business costs
- Construction and equipment of a greenhouse. Everything will depend on your starting capital; you can build a greenhouse yourself or purchase a ready-made one;
- Purchase of seed material. Dill and parsley seeds are inexpensive. In the future, you can collect seeds and no longer spend money on purchasing them, continuing to grow greens;
- Purchase of fertilizers. To get a good harvest, you need to take care of proper fertilization and protection of plants from pests.
Growing dill hydroponically
If you are serious about this issue, then at the initial stage, growing dill hydroponically will require you to make certain investments in materials and equipment. Namely:
- container for nutrient solution;
- pump equipped with a timer;
- valve and hose system;
- flow pipes with recesses for cups;
- a heating device equipped with a thermal relay to maintain the solution temperature in the range of 24-28 degrees;
- cups with a grid on the bottom and a substrate (straw, moss, expanded clay, etc.);
- sprouted seeds.
Growing dill in hydroponics
The seeds should be placed in cups - a nutrient solution is added to them from time to time. Due to the fact that the liquid is flowing, it is aerated, enriched with oxygen, and does not mold or stagnate. And what is very important: the substrate remains moistened all the time.
When growing dill hydroponically, you need to take into account some of its features:
- Dill is light-loving, so in winter you can’t do without additional lighting.
- Dill practically does not get sick and is not spoiled by pests. But if you over-moisten the substrate, mold may appear on it. If contamination is suspected, the seeds should be immediately pickled in a weak solution of potassium permanganate.
- Dill will be ready for harvest in all pots at the same time, so you need to make a time shift of 5-10 days when planting - in this case, the harvest time will be extended, and planting new seeds will begin before the last harvest has ripened.
Advantages of the hydroponics method
- Dill grows faster than in soil, so the yield is much higher;
- The roots get enough nutrients and oxygen, and they never dry out.
- The plant does not need to be watered every day.
- Soil-borne plant diseases and the likelihood of being spoiled by pests are excluded, so there is no need to use pesticides.
- When replanting, you do not need to buy new soil, so the growing process is cheaper.
- The substrate, unlike soil, does not accumulate harmful substances, and the plant receives only useful elements.
Equipment
If you plan to grow greens on a production scale, you need to equip the greenhouse with everything necessary for comfortable ripening of the crop during the cold season.
As noted earlier, growing parsley and dill for sale in winter is much more profitable than in summer; the price is much higher, and there is little competition.
In order to preserve the green harvest, it is necessary to equip the greenhouse with a climate control system, install heating devices, and provide proper lighting and watering.
Differences in dill varieties
Since dill is unpretentious, does not require special care and can grow anywhere, many vegetable growers often do not pay attention to varietal differences. And dill seeds are sown indiscriminately. This is a disastrous approach in which there is no expectation of a good harvest. However, the varieties differ from each other in color, rosette shape, degree of leaf dissection, and width. The length of the shape of the leaf segments.
The most obvious sign that everyone can identify is the beginning of stem formation when grown during long days. This sign is very important - it determines whether there will be a high harvest of dill or seeds ripening on umbrellas. According to stem formation, dill varieties are divided into three groups: early, middle, late time of the onset of stem formation.
- The varieties of the first group include the zoned varieties Grenader, Dalniy, Zontik, Gribovsky. For these varieties in the Moscow region, the time from germination to stem formation is 35-40 days. Immediately after commercial ripeness occurs, plants of this group begin to flower and form 4-6 leaves, and in dry, hot weather, ripening occurs even faster. Therefore, these varieties will not produce a large amount of greenery throughout the season. Unless you can get enough umbrellas and seeds from them for canning. Due to the early ripening of these varieties in the Moscow region, the seeds of these varieties have time to ripen, fall off, and next year in early spring they germinate and produce their first greens.
Dill – Gribovsky variety - In mid-ripening varieties of the second group, stem formation begins later than in early ones, by 5-10 days, so the number of leaves that is formed is 6-10. As a result, the harvest is more abundant. Varieties of the second group: Kibray, Umbrella, Lesnogorodsky, Richelieu, Kibray, Borey, Uzory. In addition to greens, they manage to form umbrellas and seeds in waxy ripeness - they are used as a seasoning.
- Late-ripening varieties belong to the third group. They have a more leafy rosette, which has more than 10 leaves, and accordingly give an even greater harvest, thanks to a longer ripening period - 65-70 days. Varieties of this group: Amazon, Alligator, Salyut, Buyan. Varieties of this group are used for continuous production of greens without reseeding. However, these varieties are grown using a different technology.
Costs and profits
Basic costs of starting a business and expenses by season:
- Registration - 50-60 US dollars;
- Seeds - up to $5 for three crops;
- Containers (45 pieces) - $190;
- Water - 20 US dollars;
- Fertilizer - $30.
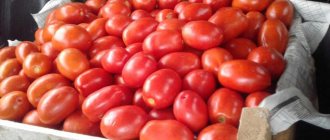
A total of $300 will be required. The average wholesale price of fresh fennel is $1-1.2 dollars per kilogram. Seasonal revenue will be $800-850, and net profit will be $500-550.
To grow fennel at home as a business and generate good income, find reliable distribution channels in advance, otherwise the product will spoil while waiting for buyers.
Productivity of different varieties of dill
Different varieties differ not only in terms of sowing and ripening, but also in yield.
| Variety name | Characteristic |
| Alligator | Medium late variety. Ripening time is 42-45 days. Harvesting method: cut off the rosette or collect 2-3 leaves from the plant. Type of bush dill. The rosette is raised and vigorous. Large bluish-green leaf, strongly dissected. The petiole is thick and long. For greens, the marketable yield is 10 t/ha. |
| Amazon | The variety is mid-season. It is grown in open ground, greenhouses for herbs and spices. Designed for repeated cleaning. It is removed by breaking off 3-4 large leaves from each plant. Cleaning lasts 15-30 days. Ripening period is 44-50 days. The rosette is raised, the leaf segments are dense, short, flattened-filamentous, green with a bluish tint. Leaf yield 1.4-4.1 kg/sq. m, umbrellas for spices - 2.9-6.7 kg/sq. m. |
| Grenadier | Early ripening. Ripening time is 38-42 days. It is grown in open and closed ground for herbs and spices. The rosette is raised, its height is 20-25 cm. The length of 10-12 formed leaves is 15-20 cm. The green leaves are strongly dissected, large, highly aromatic, and have excellent taste. Resistant to diseases. When harvested for greens, the weight of the plant is 30-40 g. The yield of greens is 1.8 kg/sq. m. |
| Diamond | Late ripening. The ripening period is 42-45 days, for spices – 120-140. Raised rosette of leaves. Its height is 29 cm. 21 leaves are formed on the plant. From one plant the weight of greenery is 30-150 g. The leaf length is 30-32 cm. Large leaves are bluish-green, heavily dissected. It is highly aromatic. The average yield of greens is 170-175 c/ha, for spices – 220-410 c/ha. |
| Frost | Mid-late variety. It is grown in greenhouses and open ground, in flow-through culture. A raised rosette of leaves 23 cm high. On one plant, 15-17 leaves are formed, the length of which is 28 cm. They are strongly dissected, large, bluish-green. The weight of greens per plant is 30-40 g. Highly aromatic. The variety is grown for herbs and spices. The average yield is 1.7-2.5 kg/sq. m. |
| Gribovsky | The variety is mid-season. The ripening period of dill for greens is 30-38 days, for spices – 95-108. The socket is standing. The leaves are green and large. Productivity 1.8-2.2 kg/sq. m – for greens, 3.5 kg/sq.m – for spices. High aroma. |
Dill “Grenadier” is intended for growing for greens
How to sow dill correctly
The soil in which dill is sown does not require special types of fertilizing in the form of mineral or organic fertilizers. Watering the furrows with plain water is quite sufficient (if the sowing is pre-winter, you don’t even need to water). After this, seeds are sown in the furrows and sprinkled with dry soil. Sowing is done to a depth of 1-2 cm (depending on the type of soil). It is recommended to sow greens in the form of beds - this will make caring for the plants easier.
The row spacing should be:
- if dill is grown for greens - 15 cm;
- if dill is grown for seeds - 20-30 cm.
Growing dill with maximum efficiency
Traditionally, agricultural technology for growing dill for greens is aimed at using early-ripening varieties that quickly begin to flower. Their maximum shelf life is only two weeks. For conveyor delivery of the product, repeated sowings are carried out with a break of 10-12 days and the completed harvesting of dill is carried out when the plants reach parameters that are suitable for sale.
Hence the focus on reducing production costs and increasing productivity: reducing ripening time, increasing the density of dill greens per unit area. To get the maximum yield of late-ripening varieties of dill, you need to reduce the crops to 2-3 kg/ha - this makes it possible to create ideal conditions for growth and a large feeding area for the plants.
Tip #2. If dill plants are spaced more sparingly, they will be quickly overwhelmed by weeds already at the beginning of growth, since during this period dill grows slowly.
To prevent this from happening, it is necessary to treat the dill crops with the herbicide Roundal 1-2 days before emergence. The care and feeding of the plant and soil plays an important role in the yield level. The use of late-ripening varieties of dill makes it possible to:
- Use seeds sparingly by reducing the number of repeated sowings and reducing the seeding rate.
- Get the best harvest of dill - 30-50 t/ha, and the harvest is of better quality, since the aromaticity of the plants increases with age.
Dill "bed" on the windowsill
If you don’t have a plot of land, growing dill, as well as any other vitamin product, can be organized right on the windowsill. Of course, it is not necessary to do this in the summer, because at this time the markets are literally overwhelmed with inexpensive fresh herbs, but you can try growing dill in the winter. Moreover, this is by no means more difficult than growing dill in the garden. To succeed you will need:
- Containers (these can be either small wooden boxes or ordinary flower pots with drainage holes that will allow excess water to drain out. The bottom of the container should be lined with pieces of broken brick or expanded clay, which will act as drainage);
- Nutritious soil (you can buy it for growing dill on a windowsill in winter). In this case, you need to pay attention that it must contain vermicompost, or you can prepare the fertilizer yourself by mixing 2 parts of coconut fiber and 1 part of vermicompost, or the top fertile layer of soil with humus and peat;
- Good lighting (nothing will work without it), and to ensure it in an apartment, containers with plants need to be regularly turned towards the outside of the window, or think about a special fluorescent lamp if we are talking about growing from December to March. Such a lamp should be placed at a height of 50-60 centimeters above the crops and turned on every morning for 5-6 hours. Of course, if the “beds” with dill are located somewhere in the back of the room, or the housewife decided to organize the process of growing dill in the basement, then lighting will be needed for 15 hours or even more;
- Moderate soil and air humidity (when the first shoots appear, the cover from the containers must be removed so that young and tender plants adapt to the environment). The first stage of adaptation should last no more than half an hour. But on each subsequent day it needs to be increased. After 10-12 days, the film can be removed completely;
- Optimal temperature (when growing dill, the temperature on the windowsill should not exceed +17 +19˚С) if it turns out that the temperature is elevated, you will have to increase daylight hours and water the plants more abundantly. If this is not done, the plants will either be very elongated or die completely;
- Fertilizing - this procedure should be done once every 2-3 weeks, using complex mineral fertilizers, if ordinary soil was used for sowing. If dill was grown on a windowsill from seeds in winter in a fertile substrate, then fertilizing can be omitted for the entire season, because any greenery does not tolerate excess fertilizer, and accordingly, their excessive application can be harmful. In this case, watering should be regular, but moderate.
To sow seeds correctly, clean and disinfected containers need to be filled with substrate (don’t forget about drainage) so that its even layer is 3-4 centimeters below the edge of the container (this is necessary for normal watering). Next, the substrate is abundantly watered with water at room temperature, which is preliminarily settled for several days. After the soil has absorbed moisture, you can begin sowing. You can sow:
- In rows (depth 1-1.5 centimeters);
- Sprinkle the seeds in a chaotic manner over the surface of the “bed”.
When the seeds are in the ground, they need to be covered with a layer of substrate (a layer of 1-2 centimeters will be sufficient) and lightly compacted. Do not forget that when growing dill from seeds on a windowsill, in order to speed up germination, it is better to soak the seed material, as when growing it in open ground, and dry it a little. And when sowing is completed, cover the containers with film. With this technology, the first shoots will appear within a week, and 100 percent similarity can be observed 10-12 days after sowing. By the way, for those who plan to grow dill and parsley on the windowsill, you should know that parsley takes a little longer to germinate than dill and the emergence of seedlings of this crop can be expected in 14 - 18 days.
Useful tips for growing dill
- The greenhouse must be equipped with a heating system. When selecting the type of heating, you need to take into account weather conditions, the number of sunny days in the region of residence, financial capabilities, and the area of closed ground.
- You should study the rules of planting and caring for different crops. Dill also has its own characteristics when grown. Read also the article: → “How to grow dill on a windowsill.”
- When planning to grow dill for the first time, purchase only high-quality seeds. Powerful, strong plants will become the basis of your seed fund for growing greens in the greenhouse in the future.
- It is worth planting several types of greenery at once. You need to select plants that require similar growing temperatures and humidity levels. During cultivation, you will decide which crops are best to grow.
- Crops need to be regularly inspected and shoots affected by the disease must be removed.
- Perhaps the first harvest will not be too rich. We need to find out the reasons for this.
Dill (fragrant, garden) contains many vitamins
Harvesting
Growing dill is, as they say, only half the battle. After all, since fresh dill is a product that quickly deteriorates, it is very important to collect it correctly. That is, it is necessary to establish a collection procedure so that small volumes of green mass can be quickly sold. To do this, you need to divide the greenhouse into several separate compartments, where the crops will ripen alternately at intervals of several days. Thus, the harvest can be harvested for several days without losing quality. But this is not enough. To reduce the risk of loss of collected products, you also need to establish a clear sales system.
Properly caring for dill
Dill greens should be harvested when 30-40 days have passed after sowing. There are two ways to harvest:
- Selective, when only large plants are collected.
- Solid, in which all the greens are collected.
Plants with a height of 5 cm are the most valuable in nutritional terms. Proper care of greenery is timely watering of the beds and fertilizing the soil with nitrogen fertilizers.
If for some reason harvesting is delayed, dill grows up to 20 cm in height. If this happens, it is necessary to immediately remove all the greens from the beds and process them, because otherwise you will notice the formation of inflorescences and the dill losing its taste.
Typically, gardeners leave a few plants sown in spring for canning and pickling vegetables in the summer, or collecting seeds in the fall.
It is recommended to harvest dill early in the day (before lunch). Then you should place the greens in the refrigerator or a dry, dark place. After harvesting, dill can be sown in the same area. You can do three sowings in one place per season.
Grow service
In 2016, Alexey Sadov stopped packaging. At that time, the business had already existed for 9 years. For almost 6 years, the entrepreneur combined this activity with farming and supplied all the grown greens to large retail chains, but decided to abandon this cooperation. “Pyaterochka could only offer distant addresses, for example, stores in the Pskov region. But it was not profitable for us to transport products far. Another retailer, TD “Intertorg” (owns the “Narodnaya 7Ya SemYA” chain), began buying greens in bulk and packaging them themselves,” explains Sadov. According to the businessman, companies also began to give preference to large suppliers who brought them “whole truckloads of greens.”
Growing stages
Pre-winter sowing of dill in a greenhouse requires its preparation. After summer use, it is necessary to wash the walls and frame to eliminate possible sources of infection - they may contain pathogens of fungal diseases. If sowing will be done in beds, then dig up the soil using a spade and add fertilizer; if in boxes, then prepare the soil mixture.
Soil preparation
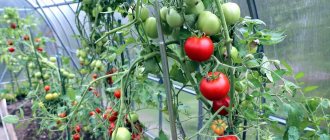
It is believed that dill is undemanding to the composition of the soil, but the best quality crop is harvested on fertile sandy and loamy soils with a pH of about 6.5. On acidic and alkaline soils, the color of the foliage changes, the stem becomes thinner, and taste is lost, so you need to take into account what crop was previously cultivated in the greenhouse. The best predecessors are tomatoes and cucumbers.
The soil mixture for filling in containers can be prepared from garden or turf soil, adding peat, sand (3:1:1) and fertilizers (20 g urea + 15 g potassium salt). Before laying, pour a layer of drainage from 6 to 10 cm thick. When digging the ridges, add:
- humus – 1/3 bucket/1m²;
- nitrophoska – 1 tbsp. l./1 m²;
- urea – 20 g/1 m²;
- potassium sulfate – 15 g/1 m²;
- complex fertilizer, for example, Kemira.
On a note!
A large amount of organic matter increases the nitrogen content in the soil, which affects the taste and aroma of dill and leads to thickening of the stem. Adding ash to the soil causes the greenery to change color.
Seed treatment
The preparation of seed material begins with the rejection of low-quality seed - pour the seeds into a glass of water and remove the floating ones. The rest are wrapped in damp cotton cloth, placed in a warm place and regularly moistened, preventing them from drying out. After the sprouts appear, the seeds are kept for disinfection in a pink solution of manganese for 2.5-3 hours, washed in warm water, dried on a cloth - it is inconvenient to sow raw seeds.