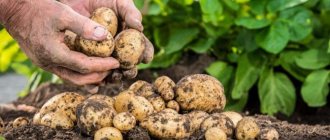
Traditional way of growing potatoes
In addition to the conservative, traditional method of cultivating root crops, new methods of growing potatoes are used.
But many gardeners believe that the usual option has been worked out and brings a good harvest. However, this method has two significant drawbacks:
- When hilling between rows, part of the rhizomes are broken and cut down.
- Sunlight does not penetrate between the rows. Therefore, diseases develop, bushes become weak, fruits are small, and pests appear.
Therefore, for high-quality cultivation of potatoes, it is better to resort to new scientific approaches to cultivating this vegetable.
Crop rotation - preferred potato predecessors
For decades, scientific institutes have been studying the potato crop rotation system, and this problem still remains relevant. By correctly alternating crops before and after potatoes, you can significantly reduce the infestation of pests and diseases. Each gardener is able to choose his own crop rotation system depending on the climate, area of the plot, and soil type.
Potato crop rotation table:
| Followers | Predecessors |
| Cabbage of any ripening period | Patisson, zucchini, pumpkin, cucumber, legumes, carrots |
| Table beet | Patisson, zucchini, pumpkin, cucumber, greens, spices |
| Cucumber, zucchini, pumpkin | Onions, white and cauliflower, garlic, legumes, corn |
| Squash | Onions, white and cauliflower, garlic, legumes, corn |
| Tomato | White and cauliflower cabbage, cucumber, zucchini, carrots, squash, greens, pumpkin |
| Onion garlic | Cauliflower, cucumber, zucchini, squash, legumes, pumpkin |
| Potato | Cauliflower, cucumber, zucchini, onion, pumpkin, garlic, squash, legumes |
| Legumes | White and cauliflower cabbage, cucumber, zucchini, onion, squash, garlic, pumpkin |
| Greens (lettuce, spinach, celery) | Cauliflower, cucumber, zucchini, onion, squash, garlic, pumpkin |
| Carrot | White and cauliflower cabbage, cucumber, zucchini, squash, greens, pumpkin, spices |
| Eggplant, pepper | Cauliflower, cucumber, zucchini, onion, squash, legumes, pumpkin, greens, garlic, carrots |
| Spices (basil, mint, coriander) | Cauliflower, cucumber, zucchini, onion, squash, legumes, garlic, pumpkin |
Growing potatoes from seeds
Despite the selection of planting material, the tubers degenerate and viruses, bacteria, fungi and diseases accumulate in them. They also deteriorate in taste. The situation can be corrected by planting the plant with seeds. This approach has a number of advantages:
- More economical and reliable than using tubers, since they can “slip” simple, low-quality material.
- It is easy and simple to store seeds , since seed bags take up little space.
- grown in this way are not infected with diseases and fungi . It tolerates unfavorable environmental conditions better.
- High yield.
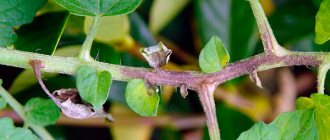
We have all seen such “berries” on potatoes.
When planting potatoes with seeds, it is important to consider the following nuances:
- The root system of the seedlings is underdeveloped and delicate , so it should be grown in loose soil, preferably on sawdust.
- Sprouts can become very elongated when there is a lack of light.
- To prevent diseases, it is imperative to use special biological products .
- You need to be very careful when planting seedlings in the ground..
You need to cultivate potatoes with seeds as follows:
- Potato seeds can be bought ready-made or prepared yourself in the fall from the formed berries.
- Grow seedlings in a greenhouse.
- Pre-soak the seeds for a couple of days. Sowing begins at the end of March. It is better to plant more seeds, since germination is low.
- Shoots appear a couple of weeks after sowing. Boxes with seedlings should be in a warm, dark place.
- After a couple of leaves appear, the seedlings are transplanted into separate pots with peat.
- You can plant it in open ground at the end of May or beginning of June, when the weather is warm. It is advisable to supplement each hole with fertilizer. Plants are planted at a distance of 10-15 cm from each other.
As a result of cultivating the root crop, up to 1 kg of crop can be harvested from one bush.
Harvest and storage
When to dig up potatoes? Experienced gardeners have their own signs and “secrets,” since everything comes with experience. But one thing is for sure: if the potato tops turn yellow and dry out, harvest time is approaching.
Green stems and leaves supply the plant tubers with nutrients produced during photosynthesis. When the tops dry out, the process does not occur; the tubers begin to grow a skin, preparing for wintering.
This usually happens from mid-August, and it is at this time that potato harvesting begins in most regions. The exact timing depends on the variety, weather, climate, and agricultural technology of the crop.
ON A NOTE! In late varieties, the tops can remain green for a long time, so it is necessary to take into account the ripening time of the variety.
For digging, choose a clear day, having first removed the tops from the bushes. There are no uniform recommendations here either: some cut the stems, others leave them, so everyone acts at their own discretion.
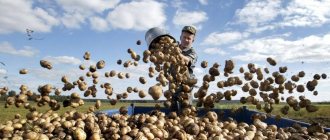
They also prepare pitchforks or shovels, buckets, baskets, and boxes for the harvest. Potato bushes are carefully dug up, remembering that the tubers lie unevenly, so you must try not to pick up or cut the potatoes. The tubers, cleared of soil, are placed in containers and taken away on film or tarpaulin to dry. It is advisable to dry the potatoes in the sun so that the ultraviolet light “fries” fungi and possible infections on the tubers.
Next, sorting is carried out, identifying potatoes into groups:
- for food;
- for animal feed (if required);
- for seeds (usually medium-sized potatoes, leveled, beautiful, without damage or deformation, are chosen for planting material).
After drying in air, the tubers are treated with biological preparations, then dried again and only then stored.
Some gardeners, remembering that potatoes should be stored well dried, keep them for a long time on the veranda or under sheds. Rays of light falling on the tubers contribute to the accumulation of the dangerous substance solanine in the tubers, and such potatoes are unsuitable for eating. Therefore, it is best to dry the potatoes on beds, then in the dark, and then put them into storage.
Cellars, basements, and subfloors are used as storage facilities. The room should be dry, with temperatures optimal for storing vegetables (from +2ºC to +4 ºC). Ventilation must be provided, the cellar must be disinfected in advance, chests, bins or boxes for tubers must be prepared.
Temperature, as well as humidity, must be stable. When the temperature drops in winter, the hole in the cellar or basement is additionally insulated so that the potatoes do not freeze. The room should be dark, artificial lighting should be turned on for a short time (during inspections of stocks, removal of potatoes).
IMPORTANT! It is necessary to provide protection for the storage facility from all kinds of rodents, as well as slugs.
Potatoes are stored in boxes, in bulk, in nets. Any container must have holes for ventilation; when stored in bulk, the layer of potatoes should not exceed a meter and a half. It is convenient to place boxes on shelves, but be sure to leave a gap between the walls of the container and the walls of the storage itself.
Urban residents who do not have cellars or basements have more difficulties with storing potatoes. Usually in such cases, special chests are built for storing vegetables on balconies or loggias.
The large box is insulated (using film or polystyrene foam), and additionally sheathed with boards. It is advisable to store tubers in such chests in mesh bags, and not in bulk.
Potatoes that have been selected as seed potatoes are stored separately from other tubers. The main task is to keep these tubers in “full health” until spring in order to use healthy and complete seed material for planting.
Potato tubers in storage are periodically inspected. If signs of rot, dampness, or deformation appear, such potatoes should be removed immediately to prevent contamination of other healthy tubers.
ON A NOTE! Many summer residents have recently washed their potatoes before storing them. The main thing to remember is that when washing you must not damage the skin on the tubers, and also dry the potatoes well after the water procedure.
Potatoes are stored well if they are sprinkled with wood ash in boxes. In any case, the tubers must be completely dry and without signs of rot.
Growing potatoes in bags
This technology for growing potatoes is suitable for those gardeners who have a small plot and no space to plant vegetables. The method is very simple. A nutrient mixture is poured into large plastic bags: humus, soil, manure and compost. They are hung in a warm, ventilated place. Then cuts are made along the perimeter of the entire bag into which the sprouted root crops are planted. Harvesting is easy - just shake out the tubers.
Potatoes grown in bags take up very little space on the plot.
Today you can buy ready-made bags for growing potatoes, here are several options:
Planting potatoes according to Mittleider
An agronomist from the USA, Mittleider, developed his planting system over many years. He tried to take into account all the nuances: if you place the vegetable too close, due to a lack of sun, the tubers will turn out small. If rare, then very large.
He calculated the ideal parameters: make beds 45 cm wide and 9 m long. The row spacing should be from 0.9 to 1 m. The holes are dug in a checkerboard pattern at a distance of 30 cm. It is important to water and fertilize only the holes, and nothing between the rows should not hit.
The advantages of this technology include:
- high productivity and product quality;
- no need to hill up;
- absence of weeds in the paths between the rows;
- It’s convenient to care for bushes while sitting between the beds.
But, if the site is located in the shade or lowland, then this technology will not work.
Video on how to plant potatoes using the Mittleider method
When is the best time to plant potatoes?
The main factor determining the timing of planting potatoes in a particular region is weather and climatic conditions, as well as the group of varieties to which a given variety belongs.
In central Russia and the Volga region, potatoes are usually planted in the first ten days of May. In the Northern and Northwestern regions - at the junction of spring and summer. In the Urals and Far East - on the 20th of May. In Siberia - at the very beginning of June. In the Black Sea region, Crimea, and North Caucasus - in the first half of April.
The time of planting in the ground depends not only on the climate in the region, but also on the potato variety
Potato tubers are quite sensitive to soil temperature. If planted too early, their development slows down, seedlings appear late, and even potatoes planted a week or two later are ahead of them. Productivity decreases significantly, by an average of 15–20%.
At the same time, predicted frosts are not an obstacle to planting. Tubers tolerate air temperatures down to -5ºС. Cold weather is dangerous only for seedlings that have reached a height of 3–5 cm.
Early potatoes are planted first, ripening in 55–60 days. This is done no earlier than the soil at a depth of 7–8 cm warms up to 8ºС. Folk signs will help you determine whether the time has come - bird cherry trees begin to bloom, buds bloom on birch trees (the leaves reach approximately the size of a penny), and dandelions appear.
Bird cherry blossoms mean that the soil has warmed up enough to plant potatoes.
Another way to check is to take a lump of earth from a depth of 10–12 cm and throw it on the ground. If it only deforms, the soil is still frozen. And when it breaks up into several fragments, the soil is ready for planting. If it crumbles into small crumbs, the substrate is already drying up and needs to be planted immediately. The soil thaws faster if you clear the bed of snow in early spring, sprinkle it with humus or peat chips and cover it with black polyethylene.
Before planting potatoes, be sure to check the soil temperature.
Mid-early varieties are planted in early May. The harvest can be harvested in 65–80 days. But they are, as a rule, not very popular among gardeners. Such potatoes are practically not stored; they are characterized by low starch content and lack of a pronounced taste.
Mid-ripening varieties (ripening period 80–85 days) are planted in the last ten days of May. Gardeners value them for their high yields and good drought resistance.
The deadline for planting mid-late varieties (95–110 days) is mid-June. Otherwise, in a temperate climate, the harvest may not wait until the first frost. Late potatoes are planted at about the same time. Its undoubted advantages are shelf life, transportability and very good immunity.
In addition, many gardeners rely on the lunar calendar, which annually indicates the most favorable and unfavorable days for planting a particular crop. In 2022, it is recommended to plant potatoes:
- in May - 1, 15, 16, 21, 22, 23, 26, 27, 28, 31;
- in June - 1, 18, 19, 23, 24, 28, 29.
It’s better to refrain from doing this:
- in May - 5th, 19th;
- in June - 3rd, 17th.
Of course, you cannot follow these recommendations blindly, without taking into account the weather on each specific day.
There are other signs that many gardeners follow. For example, it is not recommended to plant potatoes during Palm Week - such tubers often rot. On Good Friday and Maundy Thursday, any planting work is prohibited. Potatoes planted on Wednesday or Saturday have very low shelf life.
Method of growing potatoes under straw
Planting potatoes under straw was developed by agronomist Rytov. The whole concept is that the tubers are not buried in the ground, but placed in a dug hole and covered with straw. The depth of the hole should be 20 cm. It is advisable to use slightly damp straw, this will promote rapid growth. This method requires less effort when planting plants. The straw is sprinkled with earth on top. This method is similar to growing potatoes using the Kartelev method, we will talk about it below.
The result is a large and clean harvest. The technology has its advantages:
- Easy to clean.
- If planted on heavy soil, you do not need to dig up the soil first.
- The embedded straw after harvesting improves the structure of the soil and loosens it.
- Prevents the appearance of weeds.
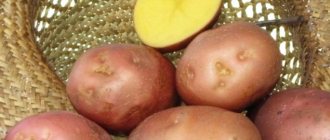
Potato harvest grown under straw
Site preparation
Potatoes are grown without seedlings, so only the soil in the garden is prepared.
The culture loves light, nutritious soils. An excellent option is black soil. Heavy soil is diluted with sand. Solanaceae love slightly acidic soils. In soil with high acidity, the crop will also grow, but the yield will decrease and the likelihood of pest damage will be higher. If the acidity is low, add ash or dry lime (1 tbsp per 1 m2).
Selecting a location
Potato is a light-loving plant . Well-lit areas of the garden are suitable for it. Groundwater in the selected location should not be too close to the surface.
No nightshade crops should be grown in the potato bed for the past 2 years. Good predecessors: melons, legumes, greens, cabbage, carrots.
The rules of proper plant juxtaposition are observed on the site. Other nightshades are not planted nearby to avoid damage by diseases and pests.
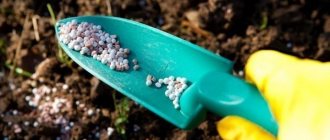
Fertilizer application
In the fall, the beds are dug up and cleared of weeds. Add 6 kg of humus or cow manure to the soil for every 1 m2. Additionally, the collected plant remains are cleaned of roots and seeds, the remaining parts are crushed and buried in the ground.
In the spring, the soil is dug up again and cleared of weeds. Ash (1 tbsp per 1 m2), superphosphate (25 g per 1 m2) and urea (15 g per 1 m2) are added to the ground. All fertilizers are mixed with the soil.
Important! The beds are watered with a hot solution prepared from 1 bucket of water and 1 tbsp. l. copper sulfate.
A handful of ash is poured into each potato hole. Some vegetable growers use long-acting granular mineral fertilizers.
Growing potatoes using the Kizima method
Agrotechnologist Galina Kizima suggests planting the root crops not in holes, but leaving them in the garden bed, simply covering them with straw and weeds picked in the summer. At the same time, you should not touch the sprouts. There is no need to water either.
An important feature is the preparation of tubers. They should be washed in potassium permanganate or Fitosporin, dried and germinated in a cardboard box in a warm place. To protect the tubers from mice and other pests, they need to be kept in the light for a couple of weeks until a greenish color appears.
Plant vegetables as follows:
- Tubers with sprouts of 4-5 cm are considered ready for planting.
- First, prepare the soil. To do this, weeds and straw are laid, holes are made in it and darkening is made for future plants.
- The distance between rows should be half a meter. The gap between the holes is 25-30 cm. The width of the bed will be up to 1 m.
- Small tubers are planted several at a time to get a bountiful harvest. And the big ones are cut. Treat the cut with ash to prevent infection by bacteria and fungus.
You need to hill up the beds with the help of weeds and fallen leaves, that is, add them instead of loosening the soil. You can insulate the rake's crops with newspapers, hay or plain paper.
Leave it in the garden bed, covering it with straw and weeds.
Video: Galina Kizima – Planting under straw
Chinese way of planting potatoes
According to the Chinese method, you need to dig holes 0.5 m deep and about 0.7 m in diameter. First, 5 cm of manure is poured, then the same amount of dug earth mixed with humus is poured. Only after this are three sprouted tubers planted in one hole. As soon as the sprouts appear, they are covered with soil and watered abundantly. As the plant grows, add more soil, do this 3-4 times.
As a result, it turns out that root crops are formed along the entire length of the sprinkled stem.
Watering and fertilizing
Fertilizers are applied until the end of the tuber formation process, that is, no later than mid-to-late July, depending on the ripening time of a particular variety. It is more convenient to carry out root feeding before hilling. To do this, first the soil is loosened so that nutrients can freely penetrate the soil.
A mullein solution is used as an organic fertilizer: 1 liter of manure/10 liters (bucket) of water. The solution is infused for 24 hours and watered between the rows. Among agrochemicals, you can choose fertilizing with urea: 15 ml of urea/10 l of water. The solution is watered on the bushes along the stem circle at the rate of 0.5 l/1 bush.
After hilling, the method of foliar feeding is used. For spraying, prepare a superphosphate solution (100 g/10 l/10 m²). Phosphorus is responsible for the accumulation of sugars and starch in tubers and increases productivity.
Any fertilizing is combined with watering. After fertilizing, the plants are watered abundantly so as not to burn the roots and facilitate the absorption of nutrients by the rhizome.
Dutch method of growing potatoes
Many famous potato varieties are grown in Holland. They have developed their own method of cultivating vegetables. It consists of the following nuances:
- For planting, choose only high-quality and healthy tubers.
- Root crops can be planted in the same place only once every three years. At other times, crops are grown there.
- The soil must be fertilized.
- Control weeds and pests with special chemicals.
The land is prepared at the end of autumn. During plowing, manure, potassium salts, superphosphates are added to it, and phosphate fertilizers are also added to heavy soil. And in the spring, additional urea is added.
Planting is planned in such a way that the ridges are in a straight north-south direction. This will ensure uniform illumination of the potatoes throughout the daylight hours.
- A furrow 5-7 cm deep is formed on the treated soil.
- Potatoes are placed in the recess at intervals of about 30 cm.
- After this, the soil surface is leveled and the potatoes are covered with soil.
- The distance between the rows is left at 50-70 cm.
- 10-15 days after the appearance of the first shoots, they hill up. In this case, a ridge is formed in the form of a trapezoid (a triangle with a cut off top). The upper base of the trapezoid should be 15-20 cm, and the lower one from 50 to 70.
- During the entire growth of potatoes, weeds are removed.
Water the plants three times a season: before flowering, during and 10 days after flowering. It is also important to spray against weeds and the Colorado potato beetle. Before harvesting, the tops are mowed and the tubers are left in the ground for a couple of weeks. This makes the potato skin coarser and less susceptible to damage when digging it up.
Potato processing - the basis of the Dutch method of growing potatoes
Potato care
Let's look at how to properly care for potatoes. To do this, follow basic agrotechnical practices:
- Loosening. Before the first shoots appear, this is done 2-3 times to ensure normal air exchange. Further loosening is carried out after watering.
- Weeding. In beds with young plants, weeds are constantly removed. When the bushes grow, they will cope with them on their own.
- Hilling. This is a mandatory stage in growing potatoes, allowing you to get a rich harvest. The soil is raised 6 cm 3 times per season. The bushes are first earthed when they reach 15 cm, then 2-3 weeks before the buds appear and as the potatoes grow to 20–25 cm in height.
- Watering. In dry summers, plantings are moistened once every 2 weeks. Up to 3 liters of water are consumed per bush. During the rainy season, watering is not necessary.
Mulch the soil when planting or in the fall.
Diseases and pests
Basic preventive measures:
- compliance with crop rotation rules;
- treatment of the crop after cold weather with antifungal agents (“Fitosporin”, a light pink solution of potassium permanganate);
- disinfection of soil, planting material and garden tools;
- compliance with the watering regime;
- timely application of fertilizers.
Potatoes are susceptible to a number of diseases. The most common ones are:
- Late blight. Hard or gray spots appear on the tubers and spread throughout the plant. The leaves wither and turn black.
- Potato cancer. Discoloration and swelling on the tubers and the ground part of the bush are characteristic. Later, dark growths form.
- Dry spotting . The greenery becomes covered with dark brown spots, which soon dry out. Holes appear in the leaves.
- Alternaria blight. The tubers are covered with round, depressed spots, and the leaves are covered with black formations.
- Infectious wilts. This is a group of diseases in which the above-ground part of the bush withers. Brown or brown spots appear on the tubers.
Fungicides are used against the fungal diseases listed. Viral infections have no cure.
Important! It is more difficult to cure potatoes than other plants, since the disease affects tubers that are in the ground.
Insects also harm the crop:
- Colorado beetles. They eat potato greens. Remove pests manually. Sprinkling the leaves with ash or special preparations (“Barrier”) helps.
- Wireworms. These are the larvae of click beetles that eat tubers. For prevention, water the soil with boiling water before planting vegetables, creating a slightly acidic environment.
- Cicadas. They look like aphids and feed on the juice of potato leaves. Dry brown spots form in places of damage. Chemical agents are used against insects (for example, “Karate Zeon”).
- Potato flea beetles . Adults attack greenery, and larvae attack the root system. This leads to wilting of the bush. To control pests, plantings are sprayed with 0.2% phosphamide.
Potatoes under agrofibre
In this case, you will be able to harvest the harvest earlier than usual.
The essence of the method is that the plantings and potatoes are covered with white agrofibre. In this way, the sprouted sprouts are protected from frost, the soil retains heat longer and all this leads to faster development of the bush. To prevent the agrofibre from blowing away, the edges of the fiber are either buried. or pressed down with stones or water bottles.
In the second option, black, non-woven material is used. It is spread on fertilized and plowed soil, cuts and small depressions are made. Tubers are planted in them and sprinkled with soil.
The advantages of the method of planting potatoes under agrofibre are as follows:
- The harvest will not freeze.
- The number of weeds is reduced.
- Potatoes grow a month earlier than usual.
Optimal temperature and humidity
The optimal climate for the crop is moderately cool, without sudden changes. Potatoes are sensitive to frost and heat. In the warmest months, the suitable temperature should not be less than +20 °C.
Agronomists have developed a lot of potato varieties with tuber ripening periods ranging from 60 to 170 days, so it is possible to choose the appropriate one for each region. Plants begin to germinate at a temperature of +4°C. If it drops to -2°C, then partial or complete loss of tubers and bushes occurs.
If the average daily temperature rises to +26°C, the tubers undergo necrosis, become lethargic and plant development stops.
The optimal humidity is 70-80%. Lack of moisture leads to decreased yield and spoilage of tubers. Excess water can result in loose skin.
Planting potatoes using the Kartelev method
The main feature of the method is fertilization, mulching and soil protection, which increases productivity.
In late autumn, mown grass is poured onto the ground and allowed to rest for a couple of days, then collected in stacks and left to overwinter in a dark and dry place. This will be an excellent fertilizer for next year. Mown grass is replaced with straw, hay, and fallen leaves. Organic fertilizer can contain dandelions, sedge, clover and others.
One type of mulch is straw
The agronomist claims that there is no need to care for the crops, since they take moisture from rainwater, and the use of the Baikal E1 growth agent protects the plants from diseases.
The technology offers several options:
- Zero. There is no need to fertilize, mulch or dig. The beds are marked with a stretched rope. Simply use a hoe to make a small depression and lay down the planting material. Then the ground is leveled with a rake, and then regular hilling is carried out.
- With manure and trenches. Also in the previous version, a rope is pulled, along the length of which holes are dug. Before planting, manure is poured into them.
- With mulch. The area is mulched and divided into even beds. Potatoes are planted in this layer, and manure is sprinkled on top.
- With fertilization. During the preparation of the holes, fertilizers are added to them.
- With mulch and trenches. When preparing the site, the soil is formed from layers of soil, mulch and manure.
Video: Theory of beds using the Kartelev method
Selection and preparation of planting material
Following folk wisdom, you need to plant potatoes as soon as the bird cherry blossoms. We need to have time to prepare everything for planting. Once every four years, it is recommended to update this vegetable by changing it to a new variety.
Seed material is purchased a month before they plan to plant it. Experienced agronomists advise buying it in specialized stores and sales exhibitions. It costs more than in the markets, but the risk of acquiring diseases and infections along with tubers is much less. Elite potatoes are considered the best; they are bought in stores. Its price is rather high and they take it for breeding next year. The “children” of the elite are called potatoes of the first reproduction.
The harvest obtained from its tubers is suitable for both food and seeds. After the elite, it is recommended to change the variety after 5-6 years and here’s why. Tubers of the third, fourth (and so on) reproduction are subject to disease and spoilage. The more generations that separate elite potatoes from reproductive ones, the greater the latter’s risk of contracting all kinds of infections.
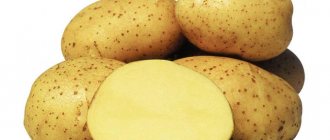
When purchasing, pay attention to the eyes—a large number of them promises high yield. Buy potatoes unsprouted, otherwise the sprouts will break during transportation. Rot and damage are also not acceptable.
When purchasing, the resistance of varieties to diseases and pests is assessed. High immunity from diseases in the following varieties:
- nematode: Sante, early Zhukovsky, Odyssey, Amadeus;
- late blight: Lina, Temp, Nikulinsky, Luck;
- scab: Destkoselsky, Bryansk novelty;
- cancer diseases: Gatchina, Lukyanovsky, Andretta.
The varieties Lasunka, Ogonyok, Garnet, and Crystal are steadfast against the Colorado potato beetle.
Growing potatoes using the Zamyatkin method
Planting material is germinated in bags in which sugar was stored. Under these conditions, the sprouts are strong and the tubers retain moisture.
Planting is carried out in the spring, as soon as the temperature becomes stable. The beds are made wide with a distance between them of up to 1.5 m. Tubers should be planted in a checkerboard pattern.
After the sprouts emerge, earth and manure are poured into the middle of the bush. The bush turns out to be voluminous and covers the entire garden bed. Plus, during flowering, all the buds break off, this allows you to increase the yield by a quarter.
According to Gülich (potatoes in barrels or tires)
With this method of planting potatoes, a multi-tiered bush is formed by growing it in a high container without a bottom with constant addition of soil. Such containers are usually plastic or metal barrels with the bottom removed, or simply old car tires stacked on top of each other. You can additionally drill holes in the walls of the container to better ventilate the contents and prevent water stagnation.
Next, according to the principle of the bag method, the container is placed vertically, a 20 cm layer of compost and soil mixture is poured onto the bottom and several tubers are laid out in a circle or in a checkerboard pattern. They sprinkle the tubers with soil and continue to do this regularly once the new shoots reach a height of 2-3 cm. Caring for potatoes in a barrel consists of watering and fertilizing (after all, all the nutrients from the soil are used to form tubers).
Some gardeners, in the process of adding soil, manage, trying not to disturb the lower tubers, to lay out another layer or two of potatoes in the barrel to obtain a larger harvest.
Pros:
- the method is ideal for a small area;
- the tubers do not rot;
- Such potatoes are not afraid of pests and do not need weeding.
Minuses:
- not suitable for large volumes of plantings, because Requires a lot of containers.
Planting potatoes according to Gordeev
According to the Gordeevs’ method, you need to prepare the land in late autumn - dig it up with manure or compost. You can also leave hay and grass in the summer and plow everything up before winter. And in the spring, nitroammophoska is added to the soil and loosened a little with a rake.
The location for planting potatoes must be changed every year. It is advisable to grow it after grains.
You need to prepare the material in early spring, germinating sprouts on tubers. To disinfect them from diseases and fungi, you need to soak them in special preparations.
It is advisable to water the soil before planting. The beds are made with an interval of 70-80 cm. For planting, trenches are dug into which the vegetables are lowered. The distance between them should be up to 40-50 cm. They are covered on top with earth mixed with ash and compost. After the first hilling, the beds are mulched with hay.
Features of agricultural technology
At first glance, growing potatoes is not a difficult task, and many people, even from childhood, together with their parents, if they didn’t plant them, then dug potatoes in the fall. But to get good harvests, you need to know all the intricacies of agricultural technology, and apply theoretical knowledge in practice. Without taking into account the requirements of this crop for light, soil type, fertilizers, and watering, you can be left without your favorite potatoes.
Soil preparation
Favorite potato soil types are podzolic, sandy loam, medium loamy, with good aeration. It is not recommended to select areas with clayey and heavy loamy soils, clogged with wireworms or wheatgrass for cultivation.
It is necessary to observe crop rotation, since when a vegetable is grown in one place every year, it begins to get sick more often and reduces productivity. It is advisable to return the culture to its original place no earlier than after three to four years.
ON A NOTE! Potatoes grow well after peas, corn, pumpkins, and cucumbers.
The acidity level of the soil should be neutral; if the soil is acidic, then dolomite flour or fluff lime is added in the fall or spring. You can replace them with regular wood ash.
In the fall, the area is plowed after first removing the weed roots from the soil. Fertilizers are applied: humus, compost, fresh manure, as well as phosphorus and potassium fertilizers. Potatoes love organic matter, but fresh manure can only be applied in the fall. It is also advisable to add superphosphate in the fall, then by spring it will be in a form easily digestible by plants.
Good results are achieved by sowing green manure in autumn, which disinfects the soil and also serves as an excellent fertilizer for potatoes. Early-sown green manure can be embedded in the soil already during autumn plowing; if the sowing was late, then the plants go away before winter and are embedded in the soil already during the spring cultivation of the site.
In the spring, the gardener has a lot of troubles; he needs to harrow the area for potatoes, apply fertilizers (if this was not done during autumn plowing), and dig up the ridges.
Preparation of planting material
Any seed material needs to be prepared: germinated, treated with various compounds to stimulate germination and growth.
For processing you can use:
- composition with copper sulfate (teaspoon per 3 liters of water);
- drugs Maxim, Aktara (excellent protection against various pests);
- preparations Mikon (with zinc, manganese, boron, molybdenum), Poteytin - accelerate the development of eyes on tubers;
- wood ash.
ON A NOTE! The composition with copper sulfate is made in any non-metallic container (wooden, glass).
Tubers are sprouted using various methods; experienced summer residents have their own “secrets” and technologies. The usual method is to germinate in boxes in the light without direct sunlight. Potatoes must be removed from the cellar in advance (about four to three weeks), ensuring a temperature of +18ºC...+12 ºC. The temperature decrease is done gradually so that the potatoes adapt and harden.
You can germinate potatoes in boxes with peat or sawdust, or “dry” them in a dry attic or in a spacious pantry, after spreading a tarpaulin or film.
Timing and depth of planting
Planting dates are largely determined by the climatic characteristics of the region. Potatoes are planted in warm soil, and it is very important to choose the right time: not to be late, but not to rush. It is recommended to plant when the soil warms up to +8 ºC; trees can serve as a guide.
According to the folk calendar, the time for planting potatoes is the period when the buds on the birch tree begin to bloom. You can’t fool plants, they react very sensitively to all weather changes, so you can quite “trust” the white-trunked beauties.
IMPORTANT! The correct choice of timing for planting potato tubers followed by proper care will increase the yield by up to 10%.
How to plant potatoes? And here there are no uniform requirements, since some grow in ridges, others are accustomed to planting potatoes in holes on leveled ridges, and still others dig trenches.
The “flat” type of planting is the most common, but it is not suitable for low-lying areas or areas with changes in relief. For the North-West, Siberia, and the Urals, planting potatoes in ridges is common. This makes it possible to protect the vegetable from the threat of possible frosts and provide the tubers with additional warmth (the earth warms up better in the ridges).
You can make furrows the entire width of the bed, you can dig a hole for each tuber - each gardener decides for himself what is more convenient for him.
The distance between the tubers should be at least 30 cm, between the rows (furrows) - up to 70-80 cm. Place the potatoes with the sprouts up, carefully sprinkling them with earth. If the soil is dry, the ridges are watered first; if the soils are wet, no watering is required.
ON A NOTE! When planting, tubers can be dipped in ash.
How to plant tubers deeply? The type of soil is also taken into account here, since on loam a depth of up to 6 cm will be sufficient, on lighter soils - up to 10 cm. Deep planting is not recommended, as this delays the emergence of seedlings.
Growing potatoes using the Gülich method
This method of growing potatoes has existed for more than 100 years. The main feature is the large space for each bush. But this is not very suitable for ordinary gardeners. Although one bush can produce about 15-16 kg.
The growing order is as follows:
- The entire plot is divided into equal parts measuring 1 by 1 m.
- A small trench is made from manure in the center.
- Soil is poured inside it, into which the tuber is planted upside down.
- The sprouts are sprinkled as they grow.
For a bountiful harvest, you need to regularly water the bush and fertilize it. Ash, manure, compost or water mixed with bird droppings will do.
Basic rules for growing potatoes
Gardeners often do not pay attention to the agricultural technology of growing potatoes. As a result, they have a meager, cracked potato harvest (we discussed why potatoes crack in the ground here).
Any innovative methods of growing potatoes are based on several basic rules. These include:
- Careful selection of planting material . It all starts with quality tubers. For planting, it is necessary to select large, healthy seeds. They should not be affected by fungi or have a strange color or smell.
- Crop rotation accounting . It is not advisable to plant potatoes in the same soil. It is necessary to swap it with cucumbers, tomatoes, carrots, and peas.
- Special soil preparation for planting . The soil is prepared in the fall by adding fertilizers. But you can feed already planted bushes with ash, manure or chicken droppings.
- Compliance with agricultural planting techniques . You should not plant tubers too often. Mature bushes will simply cling to each other. Cover the tubers with 5-8 cm of soil, make holes at a distance of 10-15 cm, and leave 50-70 cm between rows.
- Proper care of root crops during the growing period . It is important to water potatoes on time, especially when they bloom. Periodically hill up and loosen the soil. In order for the soil to retain moisture longer, it is advisable to mulch it with straw. And spray against aphids, moths and other pests.
Following these simple rules will help you get a much better and more abundant harvest than usual.