Straw is a wonderful material that is popular among gardeners and summer residents.
There are several ways to use it, some of which we described, in particular, covering and mulching.
The advantages of this raw material are mainly explained by the hollow structure of the stem, due to which it absorbs and retains moisture, while simultaneously providing air access to the plant.
The straw remaining after harvesting or threshing is an excellent fertilizer, which, when used correctly:
- fills the soil with nutrients;
- improves its regeneration process;
- increases the fertility of the site;
- creates the most comfortable conditions for plant development.
All this can and should be used when growing potatoes, because the use of straw eliminates the need for:
- regular weeding;
- application of fertilizers;
- frequent watering.
Next, we will tell you why this happens and how to properly plant and grow potatoes under straw or hay, and at the end of the article we will provide a video clip on this topic.
How does straw affect the soil?
The influence of straw on the soil is based on those processes that occur annually in the wild, which means they are as balanced as possible, so an increase in fruiting occurs without deteriorating the quality of the fruit .
This is very difficult to achieve when using fertilizers, because an increase in nitrogen in the soil not only improves fruiting, but leads to the filling of fruits with nitrates, after which they are no longer suitable as food for people.
Straw leads to an increase in fertility without increasing the nitrate content, which is achieved by excellent soil balance and other factors.
The basis of straw consists of carbohydrates such as:
- cellulose;
- lignin
Once in a humid environment, they become food for humus-forming microorganisms, and humification, that is, transformation into humus, consists of many processes in which a huge number of participants are involved.
Humification is a very long process, which is always associated with other soil regeneration processes , that is:
- destruction of plant or animal remains;
- restoration of the amount of humic substances;
- improving soil structure;
- replenishment of spent microelements.
Humus formation
Various microorganisms and worms are involved in the transformation of organic matter into humic acids, and only the latter, by eating dead plant remains, produce ready-made vermicompost; the rest are already participants in a complex food chain .
In this chain, the waste products of some microorganisms become food for others, making the humus they produce more balanced and nutritious than that produced by worms.
In any case, once in the soil, the straw will gradually turn into humus, which will make the soil on the site more fruitful.
Improvement of structure
Worms feeding on dead organic matter loosen the soil, which increases its ability to pass water.
In addition, the lignin contained in straw is not processed by worms , so even after bacteria and other participants in the humification process have absorbed most of the cellulose, lignin tubes remain in the ground.
These tubes rot for several years; while in the ground, they perform the same function as sand, that is, they pass and absorb water. And the higher the soil moisture, the more nutrients the roots of plants, including potato roots, will receive, which means the more abundant the harvest will be.
Replenishment of microelements
Humic acids alone are not enough for the normal development of root crops, because they require various minerals, therefore, the longer the soil is used for growing plants, the less of these substances it contains.
Straw contains almost the entire periodic table, therefore it effectively compensates for the lack of microelements , which means that root crops will receive them in sufficient volume, thanks to which they will develop properly.
Effect of mulch
Above we talked about how straw introduced into it affects the soil, but mulch is laid on top. In fact, the expression “growing potatoes under straw” came from her, that is, mulching the plants, covering them with threshing waste.
When the soil around plants is covered with straw, the following happens::
- moisture loss caused by the capture of water molecules from the surface of the earth by passing air flow is reduced;
- the daily temperature difference decreases;
- the growth of weeds that cannot break through the mulch layer is suppressed;
- the process of crust formation on the surface of the earth stops, thereby eliminating the need for loosening;
- the need for hilling disappears, because the straw lying on the ground effectively serves as an additional layer of soil, that is, it stores and then gradually releases water, and also reduces the daily temperature difference and protects the tubers from light, which increases the yield of each bush.
History of application of the method
Growing potatoes is a very labor-intensive process, consisting of one and a half dozen mandatory operations. If we consider that planting is done by people after their day jobs or by older citizens, then their desire to simplify the methods of planting and care is quite understandable.
On the Internet and in specialized magazines, you can often find various methods of growing potatoes, supposedly less labor-intensive and guaranteeing high yields. But since it is one of the main foodstuffs, people simply do not dare experiment with planting it.
However, you can try to grow potatoes in just one bed, not in the ground, but under straw. Of course, this technology is not designed for use on an industrial scale. It was invented to facilitate work on a small plot of land.
This method was not invented in the depths of potato growing institutes. Growing potatoes in straw was a common activity about 150 years ago, when peasants had no difficulty in acquiring straw. After all, every peasant grew his own grain crops.
Currently, the return to planting potatoes for hay belongs to representatives of the so-called “natural farming”, that is, people who have abandoned not only chemical fertilizers and protective equipment, but also from digging up the earth with a shovel.
Growing methods step by step
There are two ways to plant potatoes under straw:
- the first implies that straw is used only for mulching, and soil restoration occurs through the application of various fertilizers;
- the second involves not only laying straw on top, but also using this material to restore the soil and increase crop yields.
We recommend using the second method, which, unlike the first, completely eliminates the risk of increasing nitrates in the fruits, and such tubers are very dangerous to health, so they should not be eaten.
In addition, the second method greatly facilitates the entire growing process, because:
- no need to weed or pull out weeds;
- the frequency of watering is reduced;
- the need for hilling disappears;
- productivity increases;
- plant immunity improves.
This difference is due to the fact that no fertilizers or even repeated digging of the site can replace the process of natural soil regeneration, but if you speed up this process by adding straw and combine it with digging, the soil fertility will increase several times. Therefore, proper cultivation of potatoes under straw begins not with planting new seed, but with harvesting the old crop.
Such cultivation can be divided into several stages :
- autumn soil preparation;
- spring soil preparation;
- planting seed material;
- application of mineral fertilizers;
- first mulching;
- second mulching;
- intermediate mulching;
- harvesting.
Autumn soil preparation
If you plan to plant potatoes in the same place where they grew, then immediately after harvesting, sow the area with green manure , that is:
- cereals;
- legumes;
- mustard;
- oily radish.
You can plant just one plant, but it is better to use them all, mixing them throughout the area. As soon as the green mass gains strength, trample it and dig up the area, then mulch it with partially rotted straw.
We described these processes in detail in articles:
- Mulching with straw.
- Is it possible to cover plants with straw for the winter?
If you have ready-made humus, then pour it before mulching, cover it with partially rotted material on top and water it generously. The use of biodestructors gives good results, because they accelerate the conversion of cellulose into humic acids and increase the efficiency of the soil regeneration process.
If you plan to plant potatoes in an area previously occupied by other crops, cover it with humus and mulch with straw. If the site has been fallow for a year, then it does not require any preparation , because the land has rested and is in optimal condition.
Spring training
In warm regions, spring soil preparation comes down to digging trenches and placing humus from manure and straw, or any other material, in them. In cold regions, soil heating is required , which will allow seed to be planted 2–3 weeks earlier.
To do this, either dig trenches approximately 80 cm deep for every 2 rows of potatoes, or dig a pit of the same depth, and beds and row spacing are formed after adding heating material and insulating soil.
Having prepared a hole or trench, fill it with straw and trample it thoroughly to make a pillow 40 cm thick. Ideally, under the weight of a person, it should sag no more than 1–2 cm. If possible, it is advisable to increase the thickness of the pillow to one meter, this will increase the heating efficiency, but it cannot be made thinner than 40 cm, otherwise it will not warm the soil above it.
Then
water the heating material generously with warm water with biodestructors dissolved in it , for example:
- The drug Baikal EM-1.
- The drug Biocomplex-BTU.
- Urea.
- Yeast.
Immediately after watering and adding biodestructors, cover the heating material with a layer of earth 30–40 cm thick and after 2–3 days plant the seed material.
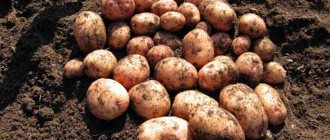
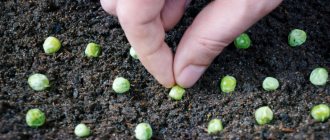
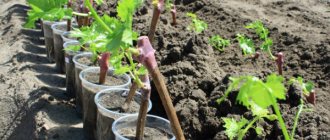
Planting seed material
Gardeners still cannot agree on what is better to plant - whole potatoes or pieces, so you will have to choose a solution yourself.
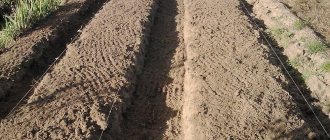
Before planting, make furrows 10 cm deep, into which pour a 5 cm thick layer of humus; if this is not done, the yield will be worse. Place the furrows from north to south , so the plants will get more solar heat and light.
Some gardeners first form high beds that rise 5–10 cm above the row spacing, and then form furrows in them.
To grow under straw, deep furrows are not required, the main thing is that the potato is at least slightly covered with soil, and new tubers will form at the junction of soil and straw, so the optimal distance between the top of the tuber and the straw is 1–3 cm.
Application of mineral fertilizers
Among gardeners who grow potatoes, there is ongoing debate about when to apply mineral fertilizers, that is, ash. Some recommend sprinkling it at the bottom of the furrow, while others advise sprinkling it on top of the soil or mulch.
We recommend focusing on autumn preparation - if you mulched the area in winter with partially rotted straw, then it is advisable to apply the ash both into the furrow, where it will reduce the slightly increased acidity of the soil, and sprinkle it on top of the mulch. If you did not mulch the area in the winter, then there is not much difference where exactly you add the ash, the effect will still be the same.
First mulching
Immediately after planting the seed material, cover the beds and row spacing with straw, with the layer thickness on the beds being 20 cm and on row spacing 10–15 cm .
Use only fresh (not rotted or discolored) straw that has been stored in ventilated, dry places for no more than a year.
The best material is with an average straw length of 20 cm; it is quite flexible and pliable, and due to its relatively long length it will not be blown away by the wind. Do not compact the mulch, but rather loosen it a little with your fingers; this will not spoil the thermal insulation properties of the material, but will make it easier for potato seedlings to germinate.
In most cases, the entrances will successfully break through the mulch, but sometimes they lack the strength to do so. In such cases, the surface of the mulch rises slightly above the emerging greenery .
When you see a characteristic raised area through which a sprout has not emerged for a couple of days, carefully dig it out, providing access to the sun, then carefully spread the mulch so that it tightly covers the soil and the young stem.
Second mulching
When the stem rises 15–20 cm above the mulch, instead of hilling, cover the entire area with another layer of mulch 10 cm thick. Use the same material as for the first mulching, that is, last year’s normally preserved straw with a light yellow to golden color.
Do not press it to the ground to compact it, but lay it in 5cm thick bunches, pressing them together.
Such beds can be watered either from a watering can or by drip irrigation. Depending on the weather and the properties of the soil, watering is required 2-8 times a month, although if there was a snowy winter, and then after the snow melted there were heavy rains, then you can do without watering until the heat starts.
Intermediate mulching
In addition to the first and second mulching, intermediate ones are also necessary, during which the optimal thickness of the protective layer is restored.
The need for this arises due to :
- exposure to wind, which blows away some of the straws;
- the natural process of pressing the lower straws, caused by the softness of the straw due to high humidity, as well as natural decay.
This mulching is carried out once every 3-4 weeks.
Harvesting
Before harvesting, all mulch is removed from the site and placed in a compost heap or pit; until complete rotting, the material is unsuitable for use on the site. Then most of the tubers are collected from the surface of the soil, and the remains are dug up , after which the area is leveled and green manure is planted.
Preparing tubers for planting
High-quality planting material significantly increases the quantity and quality of the harvest. It is very important to carry out preparatory work before planting potatoes under straw. The first step is to sort the tubers: separate whole potatoes from damaged ones.
Advice! For planting under straw, it is best to use medium-sized tubers, like a chicken egg. In the absence of such, you can divide large potatoes in half.
A few days before planting, it is advisable to expose the tuber crops to the sun to warm them up - this ensures earlier germination. To get an early harvest, it is worth warming up the seed potatoes for 3-4 weeks. If you put the tubers in boxes and sprinkle them with sawdust and peat and leave them in a warm place, then after 3 weeks they will be ideal planting material. To protect potatoes from microorganisms and various pests, before planting, you need to sprinkle the tubers with wood ash.
Increased yield and protection
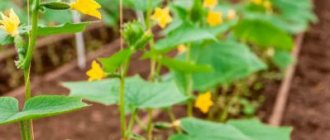
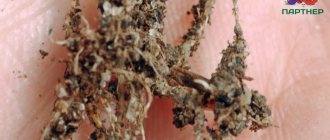
The best way to increase productivity and protect potato beds is to plant green manure directly in the beds. White mustard and various legumes are well suited ; they not only balance the chemical composition of the soil, but also drive away wireworms, which pose a serious threat to tubers.
Planting lettuce also gives good results. Green manure can be planted either instead of every fifth or tenth potato bush, then they will protect the area around them from pests and improve the soil throughout the entire area.
Tips for caring for crops
To care for the crop, it is enough to promptly hill up the sprouted bushes with straw and hay. Every 10-14 days, mulch is placed on the tops, leaving 5 cm of the tops in the sun. When the potatoes reach 45 cm, they are generously sprinkled with dry grass.
Watering is carried out only three times per season: during planting and flowering, after the buds fall off. To prevent the tubers from cracking and baking during drought or extreme heat, the soil is moistened every week.
Note! Potatoes under cover do not require fertilizing; the tubers only need fertilizer from the lower layers of decomposing straw.