- Updated: June 11, 2019
The main task of any gardener when cultivating tomatoes is to get a healthy plant with strong roots. But this is not available to every amateur vegetable grower. This requires certain experience and knowledge. But the matter is not limited to just seedlings. Proper care of plants and the implementation of measures for the competent organization of the territory on which the plants are located are required.
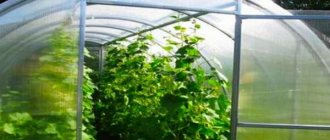
Cucumbers and tomatoes in the same greenhouse - is it possible to combine them?
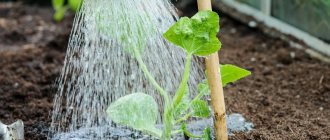
Agronomists do not recommend planting these two crops in the same greenhouse, since it is very difficult to choose the optimal microclimate for them. The fact is that cucumbers are grown in a humid environment (more than 70%), while tomatoes, on the contrary, require drier air. If tomatoes have excess moisture, they may get late blight. Cucumbers, with insufficient watering, are easily infected with spider mites, which can be destructive for the entire crop.
The issue of ventilation of the greenhouse is also very relevant. Tomatoes require constant air movement for normal pollination. Cucumbers, on the other hand, absolutely cannot tolerate drafts.
However, if there is no alternative, tomatoes and cucumbers can be planted in the same greenhouse. But in order to successfully grow these vegetables, you need to properly separate them from each other. There are many ways to make the right barrier:
- place beds at different ends of the greenhouse;
- plant other crops between the rows of cucumbers and tomatoes - eggplants, peppers, etc.;
- make partitions from cellophane or polycarbonate.
The pros and cons of co-growing
So, let's start with the negative aspects of such a tandem:
- High probability of disease occurrence and risk of loss of the entire crop.
- Additional physical and financial costs for creating and maintaining different microclimates.
- The need to plant other, unplanned crops to separate tomatoes and cucumbers.
- Re-equipment of the greenhouse for these vegetables - creation of additional windows and partitions.
Now the positive aspects of growing cucumbers and tomatoes together:
- The ability to grow both species on a small plot of land (if it is not possible to expand the area allocated for greenhouses).
- The optimal temperature for the growth of both crops is approximately the same - about 23 - 26ᵒC, which means that additional efforts will not be required to create different temperature zones.
As you can see, you can plant cucumbers and tomatoes in the same greenhouse together, but the advantages of this idea are much less than the disadvantages.
Planting cucumbers and tomatoes together has both negative and positive sides. The choice is yours.
Combination conditions
If, nevertheless, there is a need to plant cucumbers and tomatoes in the same greenhouse, then a number of conditions must be met that will allow you to get a harvest from both crops:
- Try to create two different microclimates.
- Ensure proper division of beds.
- Select varieties that are most compatible with care.
- For small greenhouse volumes, place the cucumbers in such a way that they do not cast a shadow on the tomatoes.
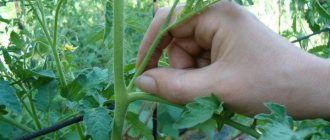
- Help the tomatoes to pollinate manually - shake the branches with flowers a little.
Mittlider greenhouse
It should be immediately noted that this method of planting is designed for open ground or a special greenhouse, the design of which differs from the traditional one. Unlike the arched structure, in Dr. Mittlider’s greenhouse the side walls are in a vertical plane and are higher in height than a person’s height (190-200 cm).
The roof structure is gable with a slight slope. In this case, one slope has a larger angle of inclination, and the second has a smaller one. As a result, one slope is adjacent to the ridge, and the second ends below. This difference forms a vertical plane, which is covered with translucent material with ventilation holes.
Related article:
How to arrange warm beds at the dacha
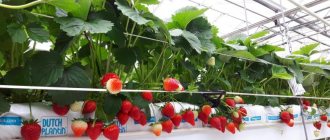
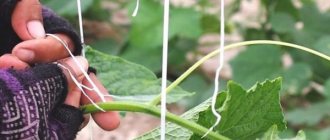
The undeniable advantages of this design include ventilation without the formation of drafts. As a result, crops do not experience carbon starvation, hot air does not accumulate in the upper part of the structure, and condensation does not form on walls and plants. The second advantage is the possibility of gartering tall crops to a height of up to 2 m. For example, cucumbers, tomatoes, peppers.
According to the Mittlider planting technology, such a greenhouse should be located only from north to south, regardless of the crops grown. The beds have a standard width of 45 cm, and the paths - 90 cm. Based on these parameters, the width of the structure should consist of the sum of the width of all beds and passages, of which there will always be one less. For example, for 3 beds of 45 cm each and, accordingly, 2 passes of 90 cm each, the width will be 315 cm.
The width of the beds in a 3x6 greenhouse does not change, and the paths will have to be reduced to 82-83 cm. This will not significantly affect the yield, but it is still better to follow the rules and initially calculate the required width of the greenhouse.
The configuration of the Mittlider ridges also has its own characteristics. The central part of the ridge, 30-35 cm wide, has an earthen edge 8-10 cm high along the perimeter, and the landing plane should be in the same horizon as the plane of the paths. Plants are planted along the edge of the planting plane of the ridge on one side - for tall crops, root crops, and on the other side - for greens (dill, parsley, etc.).
Related article:
5 quick and easy window racks for growing seedlings
Proper division of greenhouse space for joint cultivation
One of the most successful options for planting two incompatible types of vegetables in one space is considered to be dividing it into three parts:
- The northern part is given over to cucumbers; they tolerate the cold quite well, they can be placed closer to the exit from the greenhouse.
- The center of the greenhouse is given over to tomatoes. It is advisable to equip this area with vents to avoid air stagnation and provide the plant with regular ventilation. Despite the fact that tomatoes are heat-loving vegetables, do not forget that temperatures above 30ᵒC are detrimental to their inflorescences.
- In the hottest part of the greenhouse you can plant peppers, eggplants, melons and other vegetables that grow in similar conditions.
Another, much more successful way of combining vegetables is a permanent greenhouse, the design of which initially provides for sectors with different microclimates.
When growing cucumbers and tomatoes in the same greenhouse, you must adhere to the rules for placing these two vegetable plants.
A similar effect can also be achieved by dividing the greenhouse into compartments with temporary polyethylene curtains or by constructing fixed polycarbonate partitions.
Many experienced gardeners consider such zoning to be ineffective because:
- these are additional financial costs;
- although small, there is a loss of usable area;
- there is a need to create additional ventilation windows;
- there is a high risk of air stagnation in remote areas of the greenhouse;
- There are no possibilities for through ventilation with such planning.
Advice! To avoid all the negative aspects, it is recommended to completely rebuild the greenhouse - dividing it into rooms with individual entrances. This option will be the best, as it will allow high-quality ventilation of the premises, without the risk of “chilling” other vegetables.
What determines the timing of planting seedlings?
It is impossible to name any universal terms. For each crop and for each locality, there really are their own formulas for how to successfully calculate the day so that you can then have time with the harvest for sale, pickling or a holiday. And the weather is changeable, not to mention the fact that last year you could plant in open ground in May, but this year the snow has not yet melted everywhere.
But basically the determining factors are:
- The readiness of the greenhouse, namely the temperature of the air and soil, which directly depends on the material of the structure and the ability to heat it.
- The quality of the preparatory work, namely warming up the ground, installing warm beds and internal structures “a greenhouse within a greenhouse.”
- The manufacturer's recommendations specifically for each individual variety whose seeds you purchased.
- Traditions of the area, namely the experience of other owners of structures who have been planting seedlings for several years now.
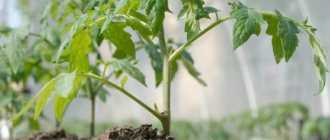
- The readiness of the plants themselves is determined by external signs and the presence of true leaves.
- The cold resistance of varieties, which indicates how well the plants can preserve their roots during the night cold and not die.
If you have a polycarbonate greenhouse, we can congratulate you: it is in it that you can plant sprouts earlier than other places, like film greenhouses and especially open ground. And all because in such a design there are no cracks, and therefore there is no draft, and the air temperature is always noticeably higher.
As for the general recommendations for planting individual varieties, treat them exactly as general. The average temperature in the hospital is the same. Therefore, let's look separately at each type of variety and the conditions for its cultivation.
For example, already in mid-spring you can plant in an unheated greenhouse:
- Various salads
- Radish
- Chinese cabbage
- Mustard
- turnip
- Parsley
- Dill
For the northern regions of the country and the Urals, the most favorable time for landing is the second and third ten days of May. By the way, there is a fairly true folk superstition - if frogs start singing on the river, there will be no more frost.
Each vegetable has its own growing conditions. So, no matter how sunny and warm the place your greenhouse is located, there are certain requirements for it.
And the lunar calendar is also quite popular:
Technology. Best crop layouts
Despite the fact that planting cucumbers and tomatoes together is risky and difficult, such a tandem is quite possible. If you place the seedlings, adhering to a strict scheme, you can provide decent living conditions for both crops.
One of the most common technologies for joint planting of these vegetables involves the following planting scheme: cucumbers are planted in the far part of the greenhouse, opposite the exit and fenced with film. Using a longitudinal incision, an entrance is made in the septum. Thus, a separate zone with its own microclimate is obtained. To ensure the required level of humidity, water tanks must be placed in this room. The soil in which the vegetable grows remains open.
In this case, it is better to plant the tomatoes as close as possible to the exit from the greenhouse in order to provide them with a constant flow of fresh air. The soil in which the tomato is planted must be mulched. When it is necessary to water, the mulch is moved away, water is added and returned to its place.
Attention! It is imperative to control soil moisture and ensure that water from cucumbers does not flood the tomato beds. If necessary, create an additional barrier for this!
Monitoring humidity levels and temperatures will be much easier if you place hygrometers and thermometers in both parts of the greenhouse.
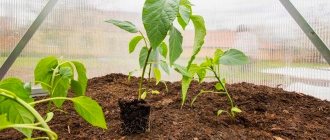
If the greenhouse area does not allow the construction of partitions, then cucumbers and tomatoes are divided using other crops. Pepper is best suited for this.
If it is not possible to separate these two vegetable crops with a film or a partition, then it is quite possible to plant another crop between them, for example, bell pepper.
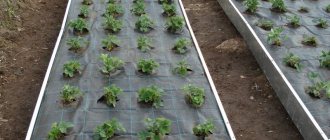
Also, the arrangement of seedlings in the garden bed plays an important role. It is recommended to plant tomatoes in a checkerboard pattern, at a distance of 40 to 60 cm, depending on the variety. This ensures high-quality ventilation and effective distribution of heat and water within the row. The depth of the hole should be such that there is at least 3 cm between the soil and the leaves.
Cucumbers can be arranged in one or two rows. The optimal gap between seedlings is 25-30 cm. The plant is planted in an earthen ball protruding above the soil by at least 2 cm.
Important! If you bury cucumbers, they will quickly begin to rot and die on the vine!
Common mistakes
Errors include:
- Summer residents like to plant as many seedlings as possible in the greenhouse. This cannot be allowed. Dense planting will lead to diseases and small harvests. As the plantings grow, they will shade each other and compete for nutrients.
- Excessive watering is also detrimental to cucumbers. When watering, control the moisture level in the soil. Otherwise, stagnation of water will lead to diseases.
- The mistake of a vegetable grower who believes that any fertilizer is good for vegetables. No. Different fertilizers are provided for tomatoes and cucumbers. If the cucumber loves nitrogen, then the tomato prefers phosphorus and potassium.
- When buying seeds, gardeners often do not care about the variety. When cucumbers and tomatoes are adjacent, first of all, pay attention to the variety. In addition to disease resistance, a self-pollinating variety is selected.
How to grow cucumbers with tomatoes. Varieties most suitable for neighborhood
It is possible to achieve the highest possible yields while simultaneously growing cucumbers and tomatoes if you select plant varieties that are compatible with each other.
For such experiments, it is necessary to select tomatoes intended for growing in conditions of high humidity. Also, these varieties should have immunity to late blight. These include the following types of tomatoes:
- Dubrava, oak tree.
- Dwarf.
- Tsar Peter.
- Lark.
- La La Fa.
Cucumbers, in turn, should easily tolerate dry climates. Best suited for growing together:
- Baby crane.
- Masha.
- Benefit.
- Pasadena.
- Thumb Boy.
It is very important to take a responsible approach to the selection of varieties that you plan to combine. Otherwise, you may completely lose your harvest.
Important! Diseases that cause plant rotting are easily transmitted from one species to another. If you miss the onset of the disease and do not stop it in time, you can suffer colossal losses!
When to plant cabbage seedlings
| Culture | sowing time | disembarkation date | seedling age | harvest time |
| Early ripening white cabbage, Cauliflower, Red cabbage | March 1-20 | May 1-20 | 50-60 days | second half of June |
| Mid-season cabbage, Kohlrabi, Broccoli, Brussels sprouts, Savoy | April 10-20 | May 20-30 | 35-40 days | mid-August - early September |
| White cabbage late ripening, Red cabbage | April 10-20 | May 20-30 | 35-40 days | second half of September - early October |
| Cabbage | April 10-20 | May 20-30 | 30-40 days | September 20-30 |
| Chinese cabbage (Pak Choi) | April 20-30 | May 20-30 | 35-40 days | Mid September and later |
How to grow cabbage seedlings in a greenhouse in the garden
I will share my experience of how I grow cabbage, mid-season and late varieties. In the last week of April, I dig up a square meter of soil in my garden in an outdoor greenhouse. I harrow the soil and cut grooves 1-1.5 cm deep.
I sow cabbage in the resulting grooves, the distance between the seeds is 2 cm and the grooves are 5 cm. Be careful, if the cabbage is planted deep, it will not sprout well. Then I level the furrows and water them. Watering a couple of times a week so that the soil is saturated with moisture; when watering, make sure that there is no erosion of the soil.
With this method of growing cabbage, I don’t need additional space at home for seedling boxes, I don’t need to harden off the cabbage on purpose - I open the greenhouse doors for the day, and the seedlings grow immediately in the garden.
To help cabbage take root better, place the seedlings in the hole before the first pair of true leaves.
Early and mid-ripening cabbage are used for summer salads and preparing dishes from fresh cabbage. For winter preparations and long-term storage, late-ripening cabbage is used.
Cabbage will be especially tasty and crispy if harvested after the first autumn frost. When cabbage is hit by frost, the bitterness goes away.
A little life hack: to make harvesting easier, saw the stalk at the base of the head of cabbage with a hacksaw. Leave the stalk itself in the garden; it will rot over the winter.
How to achieve a good harvest when growing together
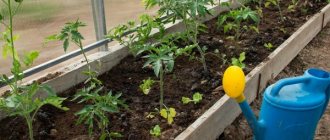
Before you start planting, the beds for cucumbers and tomatoes need to be carefully prepared.
Every gardener knows that to ensure high harvest rates, one of the decisive factors is soil preparation. This process must begin a month before planting, and in some cases, even in the winter. The earth is fluffed up (to saturate it with oxygen) and enriched with organic fertilizers - humus.
- As compost decomposes, it warms the earth, which is why such beds are called “warm”. They are ideal for planting cucumbers.
- To protect future crops from all kinds of diseases, the soil is disinfected with a weak solution of potassium permanganate.
- The holes are dug in advance, filled with minerals and fertilizers, and allowed to brew so that excess moisture is absorbed.
- Only after this, plants are planted in them.
Attention! Seedlings should not be placed in soil that is too wet, as they may grow deeper and rot!
Making the best beds in a 3 by 6 greenhouse
It's time to look at the step-by-step instructions for arranging beds in a greenhouse. It is important to ensure maximum efficiency and create the best conditions for plants.
You will need fertile soil. The soil is prepared specially or purchased ready-made. In addition, you need to stock up on boards, sawdust or straw. You will also need manure as the main fertilizing layer. We act according to the algorithm.
Step 1. First, a trench is dug at the site of the bed.
First you need to dig a trench
Step 2. Then you need to install a fence - formwork made of wooden boards.
Options for fastening boards in wooden fences for beds and flower beds
An example of a wooden fence for garden beds
Step 3. Then pour out a layer of straw or sawdust. Its thickness should be 10-15 cm.
Step 4. Then comes the turn of manure. You need to take manure, which is already beginning to rot. The layer is made compacted. Height – 20 cm.
Use manure that has already begun to rot
Step 5. The created pillow is poured with boiling water to soak the manure and the bottom layer. After this, the beds should be left alone for two days.
The beds are filled with manure, now they need to be watered with boiling water
Step 6. Next, you can add a layer of fertile soil and peat. It should have a height of 30 cm.
The beds are covered with a 30-centimeter layer of soil
Peat prices
peat
You can make multi-layer fertilizer using chicken manure and a decomposition stimulator. When decay is intense, maximum thermal energy is released. This is precisely what is necessary for better growth of planted crops. You can leave organic fertilizer under the black film for a week so that it warms up well, and then pour out the soil and plant the plants.
Organic fertilizer can be covered with black film for a week (pictured is a mini-greenhouse)
To protect seedlings from rodents, you can line the bottom layer with a special mesh. Also, sometimes instead of sawdust, rotten boards, bark and stumps are placed down. Manure can be replaced with grass humus. Everything must be compacted well and poured with boiling water; be sure to let these layers “simmer” before filling in the soil.
How to make beds in a polycarbonate greenhouse
To find out how to properly make beds in a polycarbonate greenhouse, as well as which beds are generally suitable, read this article! We also recommend reading about the watering hose.
Even marshy, rocky or sandy soil can provide good conditions for growing various crops. Simply install the boxes and fill them with fertile soil. The boxes are warmer and protect against pests. The height of the box is approximately 40 cm.
Example of an alternative: growing tomatoes in buckets
Plants in buckets are easy to care for
Top dressing
This is also a factor affecting productivity. The soil must not be depleted. During the growth period, tomatoes and cucumbers need to be fed at least 4 times. Moreover, this procedure is indicated for tomatoes 3 weeks after planting. It is better to use mineral fertilizers.
Cucumbers are fed two weeks after planting in the ground. Organic fertilizers are ideal for them - chicken droppings, liquid manure.
Attention! When applying fertilizers, the dosage must be strictly observed. Too much feeding can completely stop the growth process.
To successfully grow tomatoes and cucumbers in one greenhouse, you need to take into account the experience of your predecessors and strictly follow the rules:
- Find the possibility of dividing the greenhouse into sectors for each vegetable.
- Select the most compatible varieties.
- Maintain a distance between seedlings and do not thicken the crops.
- Ensure proper watering, avoid overwatering and underwatering.
- Feed vegetables regularly.
- The number of plants should be related to the size of the greenhouse.
- Take timely measures to form shoots and remove dried leaves.
With careful planning and preparation for planting, as well as further proper care of these vegetable crops, you will be guaranteed a good harvest.
So, plant tomatoes and cucumbers together - why not? This experience can be not only interesting, but also very successful. Follow the recommendations of more experienced gardeners, and do not neglect their advice. Read the works in which this technique is explained by scientists - agronomists, and note the nuances. A competent approach to business is 50% of success. Good luck and rich harvests!
Layout
The most common design has become a greenhouse measuring 3 by 6 m in a rectangular format. This structure is popular not only due to its compactness and efficient use of space, but also due to the simplicity of its design. In it, the ridges are usually located lengthwise. To ensure maximum sunlight, you need to position the greenhouse correctly.
Based on the height of the crops, the structure is located along a parallel (east-west) or along a meridian (north-south). For low-growing plants, the most successful option is east-west. This way they will be illuminated by direct sunlight penetrating through the southern side of the translucent fence throughout the day. The location is also suitable for low-growing plants on the south side and tall plants on the north.
When growing tall plants, this arrangement of beds in a 6x3 greenhouse is not suitable, since crops planted on the south side will shade those growing on the north. When planning a greenhouse from north to south, natural lighting will be alternating. Until noon, the eastern ridges will be illuminated by direct rays, and the western ones by diffused light. In the afternoon, on the contrary, the sun will illuminate the western side of the structure.
When planning a greenhouse, the light-loving nature of the crops is also taken into account, so the first option (east-west) can be used for growing tall, light-loving plants on the south side and crops that need to be shaded on the north side. Video tips for planning beds in a 3x6 greenhouse