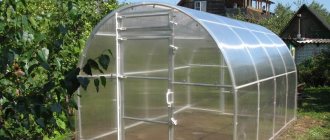
Strengthening methods
There are several methods to make a structure stronger and more reliable, spending a minimum of effort and money.
It never hurts to additionally strengthen even the most durable structures. But before this, an inspection should be carried out to detect “weak” spots. This may be the manifestation of corrosion on metal elements or the formation of mold on wooden parts. In addition, other defects can be detected.
To avoid destruction of the frame, it is necessary to clean its surfaces from time to time, as well as treat them with special compounds. The affected areas of the structures must be cleaned with fine-grained sandpaper and then covered with:
- antiseptic;
- varnish;
- anti-corrosion agent.
In addition to protective measures, there are some instructions on how to strengthen the greenhouse.
Autumn processing of greenhouse beds
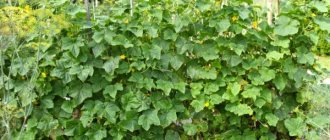
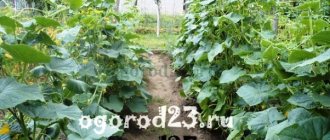
It all starts with cleaning. On a dry, not rainy, windless day, go to the greenhouse and remove all plant debris from it.
Plant residues in the greenhouse
The first stage is general cleaning
There are not many issues with clearing the beds of annual crops - you simply remove the old plants, and, if possible, all their parts, underground and aboveground. The same applies to the remains of fruits and vegetables - in short, everything that interferes with the cleanliness of the beds must be removed.
Advice! Even if the plants in the greenhouse were not sick, were not affected by pests, and you did not treat them with chemicals, do not send the collected plant debris to the compost pit and do not leave it on the site. There are two ways to dispose of plant waste - burning or burying it off-site. If your gardening association provides organized waste collection, you can send the waste there.
Cleaning up debris within the greenhouse
In addition to annual plants, perennials are sometimes located in the greenhouse. Weed perennials are dealt with in the same way as with the remains of cultivated plants - they are uprooted and disposed of. Cultivated perennials - for example, garden strawberries - are subject to careful inspection to remove rotten, dried, damaged specimens. They are also removed along with the roots, and in the spring new ones are planted in their place.
The second stage - removing the soil
This is the most time-consuming task of all that you face in the process of autumn processing of the greenhouse. But it must be done, and done well. If annual vegetables, flowers or other useful plants are grown (and in most cases this is the case - greenhouses are installed for this purpose), the top layer of soil must be removed annually. This is an immutable rule that underlies the future harvest.
The layer of removed soil is at least 15 cm. There should be no difficulty with where to put this soil - it can be taken out to open ridges, sprinkled on flower beds, under trees, in alpine hills. Only before this it is advisable to disinfect the removed soil.
Soil replacement
The question is more complicated - what to put in the greenhouse instead of the removed soil. In a short period you need to create a new fertile layer. This is not easy to do, since beneficial microorganisms have a limited period of time - before the onset of frost - to begin processing the new soil. Therefore, the soil must be ideal.
There are two ways to replenish greenhouse beds with soil:
- import from outside (purchase);
- independent preparation (composition of various components in accordance with the necessary requirements).
The first way is simpler, but has pitfalls. It is the purchased soil that does not guarantee the presence of all the necessary components. Moreover, contrary to promises, unscrupulous sellers may bring you soil that was previously removed from other greenhouses. It will look loose, dark, humus, fertile, but pouring it into a greenhouse is the same as not removing your waste soil, or even worse. New soil means new bacteria in addition to those already present on your site.
The top layer of soil in the greenhouse needs to be replaced
There is only one way out - to prepare the soil yourself.
Table No. 1. What kind of soil should be used to replace it in a greenhouse?
| Soil parameter | Description |
| Correct structure | The soil should have a structure that does not require loosening after each watering. In this case, the soil fractions should not be small, resembling dust, which when mixed with water produces dirt, and not large, through which water passes like through a sieve. |
| High nutritional value | The soil must contain all the nutrients that plants need for full development. It should be rich in humus, that is, it should allow plants to quickly grow a high-quality and powerful root system, which, as we know, is impossible without its (humus) help. |
| No mineral salts | Yes, the initial soil in the greenhouse should be without mineral fertilizers. The nutritional value of the soil does not mean enriching it with minerals, which will destroy the young shoot instead of providing it with nutrition. The sprout is unable to absorb mineral elements, it's like feeding a newborn baby fried potatoes. The necessary mineral fertilizers will be applied later - in the spring, after planting the seedlings. |
| Moisture capacity | The soil must accept moisture and retain it, this is especially true for heated stationary greenhouses. |
| Neutral pH | This is important - the content of acidic salts and alkali must be balanced. |
| Disinfection | Pathogens should not survive in this soil by spring. This can lead to the death of the entire seedling or subsequent diseases of the seedlings. Only thoroughly disinfected soil can guarantee the absence of bacteria. |
Liming acidic soil
As for the composition of the soil, it is classic and includes:
- raised peat;
- river or lake sand;
- compost or humus.
And then the soil is designed to stop the effects of harmful substances, converting them, if not into useful ones, then at least neutral ones that do not harm plants. Humic acids help the soil in this, which makes it fertile and meets all the parameters of good soil. Manure, droppings turned into humus, processed by insects - this is a simplified scheme for replenishing the soil with such valuable and necessary humus. In this scheme there is no place for mineral compounds, which are probably contained in purchased soils.
But if you don’t have time to wait for beneficial microorganisms to create a fertile layer, you can use humic acids. The soil prepared for replacement is treated with Flora-S according to the instructions. After this, all that remains is to disinfect the soil. But for this it is not at all necessary to pour boiling water, urea into it and poison it with potassium permanganate. Bacillus subtilis, which is contained in the Fitop-Flora-S preparation, will cope with the task much more effectively and with benefit for the soil.
Fertilizers "Flora-S" and "Fitop-Flora-S"
Advice! Whatever type of vegetables you grow in a greenhouse, every five years you need to completely replace the soil in it (not superficially, as every year) to a depth of 35 cm. There is another option - in the fifth year, move the entire greenhouse to a new location.
Prices for humus
humus
The third stage – disinfection
While the soil treated with humic acids is “ripening,” it is necessary to disinfect the greenhouse. All means are good here, but the most commonly used are treatment with urea or other disinfectants and fumigation with sulfur. The second method is good because it can be used to disinfect not only the soil layer remaining in the greenhouse, but also the entire structure from the inside.
Fumigation is considered one of the best and most common methods of greenhouse disinfection
Important warning! Greenhouses that have a metal frame as the basis of their structure cannot be fumigated with sulfur.
Table No. 2. Methods for disinfecting a greenhouse.
| Disinfection method | Description |
| Using urea | An aqueous solution is prepared from the substance. The proportions are as follows: 50 g of urea per 10 liters of water. The water is cold, the urea should dissolve completely. The resulting solution is thoroughly watered over the entire area of soil in the greenhouse, not only reclaimed beds, but also walkways, paths, and row spacing. |
| Fumigation with sulfur | The old-fashioned method is 50 g of sulfur per m² of greenhouse working area. Add kerosene to the sulfur (the proportions are arbitrary), close all the windows in the greenhouse and plug the cracks. Light the sulfur and kerosene on fire and immediately leave the greenhouse, closing the door tightly. The effective temperature for this procedure is +12°C. The modern method of sulfur disinfection involves the use of a smoke sulfur bomb. But it works faster - 6 hours is enough (versus 48 of the “sulfur-kerosene” method). The precautions are the same: respirator, goggles, gloves, retreat after setting fire as quickly as possible. |
| Disinfectant solutions | You can use: - formaldehyde liquid composition 2.5%; - copper sulfate in a solution of 0.75%; - slaked lime with water, diluted to 10%; - creolin solution 2% concentration. |
Video - How to disinfect a greenhouse
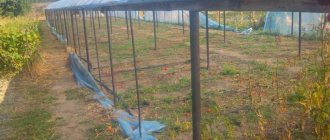
Duplicate arcs
Using special devices, it is necessary to bend arcs that repeat the configuration of the main structural elements; naturally, they will turn out to have a smaller radius.
They can be made from reinforcement, metal profiles or pipes. Then weld them to the load-bearing arches using jumpers made of the same material.
Often, reinforcement is made with additional arches of the same radius as the structure itself, placing them side by side at approximately a meter distance.
Installation instructions
If the location for the greenhouse has already been chosen, all the frame elements are made by hand or purchased ready-made and brought to the site, you can begin installation. You need to start by preparing the site. At the selected location with prepared soil, it is recommended to mark a site of the required size. This is done using wooden pegs and rope. Next, the site is leveled, the turf and protruding mounds and mounds are removed. It is advisable to check the horizontality using a construction spirit level. There should be no height differences of more than 5 cm. Particular attention is paid to a half-meter strip along the perimeter. The rest can be straightened out later.
To determine the outer edge of the trench, measure 30 cm from the marked line and draw a line with a shovel or pin on the ground. We dig a trench 30 cm wide and depth, which depends on the length of the greenhouse legs. We calculate so that the bottom frame of the frame rises 10 cm above the ground. If we are going to install the greenhouse on a beam, then the depth and width of the trench depends on the size of the beam. The bottom of the trench needs to be compacted a little and checked for horizontalness so that the frame does not warp later.
Now is the time to start protecting the greenhouse from weeds and pests. To do this, you need to line the outer wall of the trench with some hard material, for example, slate or roofing felt. They say that in 3-4 years the wheatgrass will overcome such an obstacle. So, if the greenhouse remains in the same place, the protection will have to be updated.
Supports
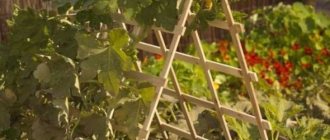
The simplest and most common method of strengthening a greenhouse is supporting the frame with durable materials (timber, boards, pipes, etc.).
Supports in the greenhouse can be in two versions:
- Along the base elements, longitudinal supports are installed to support the roof.
- Strengthening the transverse arches with supports.
Many additionally strengthen the roof ridge with vertical supports. You can see visual examples in the photo of how you can strengthen a greenhouse.
Replacing cladding material
Before strengthening the frame, you need to pay attention to the condition of the polycarbonate sheets and their thickness.
Budget options are often equipped with polymer material four millimeters thick. Which is not suitable for long-term use. Polycarbonate panels should be used in thickness:
- for walls - 6mm;
- for a gable roof - 8mm.
Film and glass
It is recommended to remove the film for the winter. She may not be able to withstand the weight of the snow, which will fall on her like a thick blanket in winter. The material must be washed with laundry soap dissolved in hot water. Then the film is rinsed, wiped with a solution of copper sulfate (5%) and hung out to dry in the sun.
When there is no water left on the surfaces of the film, the material is rolled up. They are packaged in sealed bags and stored in the house.
If the greenhouse has non-removable panels (cellular polycarbonate) and glass that cannot be disassembled, they are washed inside and outside with a window squeegee. In corners, in places of heavy dirt, you will have to work with a hard sponge. The gaps between the frames are cleaned with a wedge wrapped in cotton fabric. In the glass processing process, a solution of laundry soap is used. You can use dishwashing detergent diluted in water.
Then the glass surfaces are rinsed with clean water and additionally treated with a solution of bleach (4%).
Polycarbonate cannot be cleaned with alkaline compounds or chlorine-based products. Also, do not wash surfaces with a metal sponge or a stiff brush. Even a scrap of burlap will not work for these purposes. You should also not use washing powder, glass or dishwashing liquid. Polycarbonate is cleaned with water under pressure and then wiped with a strong concentration of potassium permanganate solution. To wipe off heavy stains, use a flannel cloth soaked in soap suds.
Features of strengthening
You should remember the period when you need to take on strengthening the structure. The supports must be installed before the onset of cold weather, before the soil is completely frozen.
The biggest problem is caused by temperature changes, which cause soil heaving. This can cause the reinforcement supports to be pushed out and cause internal damage to the greenhouse.
Strengthening the frame is only a small part of the work; first you need to take care of the foundation of the structure. In order for the greenhouse to stand firmly in its place, despite strong gusts of wind, it is worth building a strip foundation under it. This will help avoid many problems in the future.
During operation, any foundation can crack. In this case, it is necessary to urgently correct the situation. Often the problem is resolved in the following way:
- identify the exact location of the crack;
- dig the foundation in this place;
- fill the crack with a special solution.
You have to dig very carefully to prevent the crack from going further.
What does strength depend on?
As has already become clear from the above, the roof can collapse due to a weak foundation. Manufacturers often save on the cross-section of galvanized profiles. At the same time, their products become cheaper and more accessible, but their quality drops noticeably. You can solve this problem in the following ways:
- dismantle the building for the winter;
- periodically remove snow from the roof of the finished structure;
- install special supports (although this does not guarantee the integrity of the building);
- buy a model with a reinforced frame;
- strengthen the base yourself by constructing it from wood or profile.
The planned repair of a structure and its strengthening, of course, begins with an inspection of the structure, including all the little things. First of all, polycarbonate is carefully inspected . Particular attention is paid to all its cracks, dents, and swellings. Cloudiness can also be a cause for concern. In addition, the entire building is checked for tilt or distortion. It is best to use a level for this purpose.
If no damage is observed, the walls of the greenhouse can simply be washed inside and out, disinfected and, if necessary, partially replaced with soil. Well, if damage is still found, the greenhouse will need to be strengthened.
Frame problems
Often simple wooden frames of greenhouses are installed on sites. Many are secured to the ground using L-shaped brackets. They are bent reinforcement bars with dimensions:
- diameter - 0.95cm;
- pressing side - about 20cm;
- the side driven into the soil is 45 cm.
Most problems with a structure do not happen instantly. For example, the tilt of the entire structure occurs gradually. But when metal parts suddenly bend or boards break, you need to react immediately:
- straighten the metal as smoothly as possible;
- put together the boards using overlays.
To avoid repeated damage, the repaired areas must be reinforced with additional supports. If it is possible to completely replace the problematic part, it is better to do so. But this should be done in favorable weather.
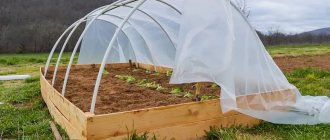
How to secure a greenhouse from the wind. How to cover and secure the film on a greenhouse
Instructions for attaching the film to the frame:
- Do not cut out the rolls before starting work. Throw the roll over the arc.
- Stretch the fabric so that there is room for fastenings on both sides (20-25 cm). Cut the desired piece.
- Repeat the steps, covering the empty spaces on the frame with an overlap.
- Place the strips on the surface. Use tape to glue the parts together.
- Lay and secure to the frame.
- Now cut out the end parts with a margin. They also need to be fixed.
- Cut out blanks for windows and doors and attach.
Advice! In order for the tape to reliably fasten the parts together, a degreaser must be applied to the gluing areas.
The service life of the arc greenhouse depends on how correctly the film is attached. If his skeleton is made of a metal pipe, you need to put a piece of plastic pipe or an old hose on it.
The illustration for the article is taken from open sources
You can stretch white fabric over the profile. In this way, it will be possible to protect the polyethylene from overheating in places where it comes into contact with the metal surface.
As a rule, summer residents secure the canvas with a strong fishing line or cord. The thread is fixed in the corner at the bottom of one side of the greenhouse. Then, under tension, it is lifted upward from one edge to the other (zigzag).
Exactly the same manipulations must be performed inside the structure. The film should be between the stretched fishing line.
Other methods:
- For a structure made of plastic pipe, pieces of pipe of larger diameter will be required.
- For reinforcement structures, use binders.
- If the arches are made of wood, the film can be secured with nails or screws. To prevent damage to the polyethylene sheet, secure it with wooden pads.
Thermoplastic problems
Polycarbonate sheets must be replaced if:
- the material has become cloudy or darkened;
- moisture forms in the honeycombs;
- deformation of the panels occurs in hot weather.
If there is a possibility and special means, then you can try to eliminate these defects, but most often you have to completely change the defective sheets.
What can damage the base?
Conventional arched greenhouses are distinguished by a shape that is very convenient for snow sliding off. But why does it still accumulate on their roofs?
The point here is the properties of cellular polycarbonate. In winter weather, even if the temperature drops to -15°C, inside the building it is up to +5°. The surface heats up, snow melts on it, which freezes when the sun rises. The roof becomes rough, which forms the basis for the accumulation of a solid snow cover, the weight of which sometimes reaches up to 80 kg.
Now let's compare. The “skeleton” of a greenhouse is usually made of metal profiles, which is the most common material. And the load it can withstand is no more than 50 kg/m2 . It is absolutely obvious that the structure needs to be strengthened.
The safest covering material is glass, under which a strong base is usually made in a greenhouse.
In the case of such a roof, you don’t have to worry about piles of snow. If you choose polycarbonate, it is best to buy its sheets with a thickness of 6 millimeters or more. They will not bend under the weight of the snow cap. Interesting.
A durable winter greenhouse can be built
with your own hands
!
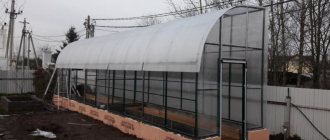
Reinforced greenhouses
For a long time, most summer residents prefer to install reinforced greenhouses. Such structures have a special design that adequately withstands harsh natural phenomena, which allows greenhouses to serve for years.
Design Features
The main differences of the reinforced structure:
- metal used for the frame is at least 1.2 mm thick;
- double arcs;
- the frame is equipped with transverse and longitudinal jumpers;
- arched structures have a horizontal guide under the roof ridge;
- the gap between the arches is from 40 to 60cm;
- polycarbonate is more than 4 mm thick and has a high density;
- the presence of cross connectors between the elements of the structure;
- arch cross-section of at least 20mm.
The most durable structures are those made from non-removable arches made of thick metal. In addition, the assembly of a reinforced greenhouse of this type is simpler and occurs much faster.
Whether to purchase a reinforced greenhouse or carry out work to strengthen the structure with your own hands depends on personal preferences, capabilities and certain factors.
How to strengthen a polycarbonate greenhouse for the winter with your own hands. With your own hands
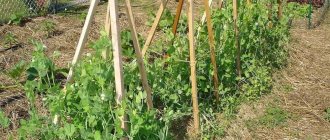
What to do if you don’t have a welding machine, the financial ability to call specialists and buy materials, and winter is already approaching? We strengthen the greenhouse with our own hands using improvised means:
- Let's prepare poles (you can use a block or small trees), the main thing is that the material is strong, with a cross-section of at least five centimeters;
- We attach the reinforcement to the main frame using wire or cord; in addition, it is better to use self-tapping screws;
- Let's duplicate the horizontal longitudinal parts of the greenhouse skeleton and the ridge with wood;
- We fasten the crossbars along the width of the building in increments of no more than a meter, here it is better to use long poles without connections, they should rest against the walls of the greenhouse at the transition from the walls to the roof, fixing the structure;
- To prevent the frame from being pushed inward, we install support pillars;
Pay attention to the joints of the reinforcing elements, provide recesses for a tighter fit!
- To protect from the wind, we use long pieces of reinforcement, deepening them into the ground outside the greenhouse.
This method does not require financial investment, but hard work and attention. In winter, it is advisable to check the structure after heavy snowfalls and regularly remove the “snow cap”.
Each summer resident determines for himself how to strengthen the frame of his greenhouse with a polycarbonate coating. In the process of use, it improves and complements the design using more modern materials. The main thing is not to forget that any structure requires attention, especially in winter.