Basic rules for cutting gooseberries
Cuttings are considered a fairly simple and effective way of propagating plants; it allows you to grow forms identical to the mother’s body, preserving all their varietal characteristics. However, to do this, it is necessary to choose the right bush suitable for taking cuttings, and also be able to maintain their viability until planting in a permanent place.
Selecting a bush for collecting material
In order to propagate gooseberries correctly, when choosing a mother plant, you must adhere to several mandatory rules. Only adult specimens, at least 5–6 years old, are suitable for cuttings. Taking cuttings from younger plants is not advisable, as this will provoke the death of the mother bush.
The next feature that the gardener should pay attention to is the external condition of the gooseberry. For propagation, you need to choose the largest and most developed bush, characterized by high productivity and active growth of above-ground mass. A specimen good for sampling must be healthy, without any traces of pests or infections. Otherwise, the selected cuttings will be exposed to parasitic organisms.
Important! About six months before cuttings, the selected bush needs to be rejuvenated; for this, all old shoots should be cut to the ground. This will help to obtain the most viable planting material.
Choosing a place and method for cuttings
There are many ways to propagate gooseberries; this fruit species is capable of producing new specimens under minimal conditions, so today many methods are used for this. Traditionally, they are divided into autumn, spring and summer cuttings. Autumn is considered the best time to take cuttings. Selection of seedlings at this time makes it possible to obtain a rooted sprout with maximum viable potential already at the beginning of summer.
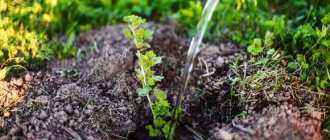
Gooseberries are sprouted in water or in moist soil.
Spring is an alternative season to autumn for carrying out the procedure; the method is not inferior in effectiveness to the previous one, while it makes it possible to root heat-loving and exotic varieties that are not able to winter safely before rooting. If it was not possible to germinate gooseberries in the spring, you can perform the procedure in the summer.
We suggest that you familiarize yourself with the information on the distance from each other to plant gooseberries.
However, this is done no later than the second half of June, otherwise the young bush will not be able to form an effective root system. These two methods are both effective, but it is best to root the cuttings in stages, first immersing them in liquid and then planting them in moist soil. Thanks to this, it is possible to cultivate even whimsical varieties that can reproduce only in ideal conditions.
Video: How to root cuttings in water
Reproduction by division
Propagation of black currant by cuttings in spring
Gooseberry is a plant with pronounced individual qualities of its individual parts. It is not uncommon for small shoots to appear on still young branches of a bush, which is the reason for propagation of gooseberries by division.
Note! This procedure can be started only after the end of the growing season, and sometimes in cases when the bush begins to “wake up”.
For gooseberries not older than 5 years, such propagation can be organized both in the spring and with the arrival of the autumn season. It is carried out according to the following simple scheme:
- First, the bush with young shoots is dug out of the ground;
- Then it is divided into separate small bushes, each of which should have a young shoot and sufficiently developed roots;
- The resulting bushes are planted in designated areas, after which their branches are slightly pruned.
Trimming excess branches will ensure accelerated growth of the bush during the arrival of spring warmth.
In conclusion, we note that caring for gooseberries comes down to regular watering and applying fertilizers to the soil according to an already proven and well-proven scheme. If the bush was divided in the fall, it is advisable to cover it with something warm for the winter to prevent frostbite of the branches.
0 0 votes
Article rating
Types of gooseberry cuttings
There are several ways to cut gooseberries; both young and mature shoots are suitable for this. Moreover, each of these methods has its own subtleties of implementation, as well as expediency in a given situation. When growing a plant, you should carefully study not only the technology itself, but also the features of its implementation.
You may be interested to know when gooseberries begin to bear fruit after planting the seedlings.
Green cuttings
Propagation by green seedlings can be called the most effective and simple way to obtain daughter plants. Germination of young parts of the bush allows you to instantly plant gooseberries, since in young shoots cell division always occurs more actively than in mature ones. According to the method, the shoots formed in the same year serve as planting material, i.e. cuttings are formed from shoots of the bush that formed during the spring. This procedure is often carried out at the beginning of summer, until the end of June.
Lignified
Due to the fact that lignified gooseberry cuttings take root with difficulty, this method of planting the crop is carried out in exceptional cases. Planting material is formed from any parts of the bush, but rooting works best if the cuttings are taken from the tops of the shoots. In addition, in order to ensure maximum quality rooting, gooseberries are propagated with such planting material only in the spring, and it is recommended to carry out the procedure before the buds swell, immediately after the soil thaws.
Combined
The combined cutting is part of a two-year-old woody shoot, with a small green shoot. In this case, the length of the lignified part should not exceed 4 cm. Gooseberries are propagated in this way throughout the entire growing season.
There are several types of combined cuttings:
- with a heel - obtained as a result of arbitrary formation of a cutting or simple breaking of a branch;
- with a crutch - when the cut follows last year's growth;
- with a stand - the green part is perpendicular to the lignified one.
About
Rules and timing of gooseberry propagation in spring, summer and autumn
When to take material for vegetative propagation of gooseberries depends on which method was chosen:
- woody cuttings are cut in spring, green cuttings in summer;
- Layers are added in the spring, dug up in the fall;
- You can divide the bush and replant the divisions throughout the growing season, but preferably also in the spring (in the northern regions) or autumn (in the southern regions and in the Middle Zone).
As for when it is more advisable to propagate gooseberries - in spring or autumn, it is better to do it in the fall: at this time the seedlings take root better than in the spring. But, if for some reason it didn’t work out in the fall, then you can do it early in the spring, as soon as it gets warmer, and you can start working in the garden.
To propagate gooseberries by cuttings in the spring, you need to choose a time before the sap begins to flow, when the buds have not yet had time to open. Accordingly, to propagate gooseberries by cuttings in the fall, you need to cut them after all the leaves have fallen from it, but even before the cold weather sets in.
Cuttings in autumn
Cuttings in the fall are used everywhere; this method is known to most gardeners. The technique for performing it is quite simple, but not everyone is able to create ideal conditions so that the cut branch not only grows, but also overwinters well.
Which cuttings are suitable
The choice of shoots for autumn cuttings is approached as painstakingly as possible. In addition to the optimal age, appearance, and activity, only bushes with young branches that managed to become woody before the end of the season are suitable for this. As a rule, such shoots have a rich green-brown tint, but the young branch retains its elasticity. You should select only those parts of the bushes that have entered autumn suspended animation (such plants completely lose their foliage).
Seedlings are formed using one of the methods described above (woody, green or combined cuttings), while correctly prepared material should have a total length of 15–25 cm. The lower cut of the shoot should be made at an angle, approximately 2–3 cm below the last bud, and the upper one is in the horizontal direction, approximately 1–2 cm above the apical bud. In this case, the total number of healthy buds on each part of the shoot should be at least 4–6 pieces.
Did you know? The first written mention of gooseberries is found in artifacts of Ancient Rus' and dates back to the 11th century.
Preparing for winter
Planting cuttings in open ground in the fall is impossible, so the harvested material for future planting is prepared for wintering. The shoots are treated with any universal protective agent and then slightly dried. After this, they are placed in a plastic bag or wrapped in cling film.
Traditionally, the best place to preserve shoots until the next season is considered to be a basement or cellar, where the average air temperature does not fall below +5°C. An alternative is to use temporary storage directly on site.
To do this, you need to dig a hole about 1 m deep in the garden bed, where you should place fragments of shoots, additionally wrapping them in straw or hay, and then cover them with soil.
Rooting methods
The cuttings are rooted in early March. Plants are removed from temporary storage and then carefully inspected. Only those fragments of shoots that have retained the buds without any changes are allowed to germinate. Next, you need to renew all the cuts on the cuttings, and then soak them in clean water, at room temperature, for 5–6 hours.
Important! During rooting, the water in the container must be changed periodically, otherwise the root system will rot, which will lead to the death of the planting material.
After this, they begin rooting: to do this, fill a glass jar halfway with clean water, and then immerse the cuttings in the liquid with an oblique cut down. The top of the container should be hermetically sealed with a transparent plastic bag, and then placed in a well-lit and warm place.
Over time, the cuttings will produce numerous white roots, as well as small leaves. As soon as the roots reach a length of 2 cm and darken, each fragment of the shoot is transplanted into a small individual container and rooted in a warm and well-lit place. Around the beginning of May, young plants become ready to dive into open soil.
Reproduction methods and step-by-step instructions with photos
There is nothing complicated about any of the gooseberry propagation methods, even for a novice gardener. However, each of them has its own nuances that you need to familiarize yourself with in advance.
Cuttings
Gooseberry cuttings can be green or woody. The former, as practice shows, take root faster, especially when it comes to varieties that are characterized by “capriciousness” atypical for the culture (Polonaise, Consul, Cooperator). But seedlings obtained from lignified cuttings can be transplanted to a permanent place in the fall, and those from green ones may have to be “grown” next summer.
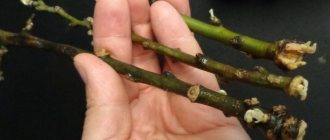
The time for harvesting gooseberry cuttings depends on their type - green or woody
The best time to harvest planting material is early morning or late evening in June or early July. The optimal length of a green cutting is 8–14 cm; the presence of 6–8 growth buds is required. The tip of a shoot or a completely cut annual branch takes root best. The “donor” bush should be no older than 4–5 years. The lower cut is made at a slight angle, the upper one is straight, 7–10 mm above the last bud.
Green gooseberry cuttings are cut early in the morning or after sunset - at this time the maximum concentration of nutrients and moisture is observed in the tissues
Green cuttings are rooted as follows:
- All leaf plates are cut from the cuttings, with the exception of the top two or three, without touching the petioles. Using a razor blade or scalpel, longitudinal cuts are made on the existing buds, and another 2-3 of the same are made at the base of the cutting.
- The lower part of the cut shoots is immersed for 8–10 hours in a root formation stimulator solution prepared according to the instructions (Heteroauxin, Kornevin, Zircon).
- Small containers are filled with a mixture of peat chips and coarse river sand (in approximately equal proportions), and the substrate is well moistened. If there is free space in the greenhouse or greenhouse, you can dig a shallow trench, filling it with the same soil. In this case, leave 5 cm between cuttings and 7–8 cm between rows.
- The cuttings are planted, buried 2–2.5 cm at an angle of approximately 45º to the soil surface. Those in containers are covered with plastic bags to ensure high humidity (85–90%). The air temperature is maintained at 25–27ºС, the substrate temperature at 20–22ºС. The soil is periodically sprayed with a spray bottle; it should be moderately moist at all times.
A prerequisite for rooting green gooseberry cuttings is high air humidity and frequent watering.
- The cuttings are protected from direct sunlight with branches or white covering material stretched over them. You can also spray the glass of the greenhouse in this place with a solution of slaked lime in water.
If there is no space in the greenhouse, an appropriate microclimate for green gooseberry cuttings can be created at homeRecent Entries
Lilac perennials that are beautiful, compact and do not crowd out other plants Why when buying seedlings you should not take the sellers’ word for it and how to determine the age of the plant using 3 signs Tomato seedlings have turned purple or whitish: why the color has changed and how to save the plants
- Under optimal conditions, cuttings should produce roots in 10–12 days. After this, they need to be fed by spraying with a solution of complex fertilizer containing nitrogen (Nitrophoska, Diammofoska, Azofoska) - 15–20 g per 10 liters of water. Feeding continues throughout the season; in the fall, the seedlings are transferred to a permanent place. If the roots seem underdeveloped, you can postpone this procedure until next spring.
Most of the planted green cuttings manage to get strong enough over the summer to survive planting in the ground.
Most domestically bred gooseberry varieties do not readily propagate from lignified cuttings. But this method is very suitable for foreign, primarily North American, hybrids.
Planting lignified gooseberry cuttings at an angle stimulates the development of the root system and new side shoots
Planting material is cut from the root shoots at the end of September or at the beginning of October, when the bush loses its leaves. The top of the branch takes root best. They don’t have to be long—15–17 cm is enough.
- During the winter, cut cuttings are buried in the snow or, if possible, stored on a glacier. If you have a cellar or basement, you can do it differently. After cutting, planting material is placed for 1.5–2 months in boxes with wet sand, completely buried. When a characteristic “influx” (called callus by botanists) appears at the cut site, they are put away for storage, covered with wet sawdust or shavings.
- The next year in May, they are planted at an angle in a trench filled with loose fertile soil so that one or two buds remain above the soil surface. The distance between adjacent cuttings is 10–12 cm.
- The soil is well moistened, when the water is absorbed - mulch with sawdust, peat chips, humus (a layer so thick that the cuttings are not visible) or cover the bed with black plastic film.
- When the cuttings take root, the cover is removed. Caring for them during the summer consists of watering, loosening the soil, and weeding the beds. Once every 15–20 days they are watered with an infusion of fresh cow manure or nettle greens and dandelions diluted with water in a ratio of 1:10. In the fall, the resulting seedlings are transferred to a permanent place.
You can judge whether woody gooseberry cuttings have taken root by the appearance of new leaves
In regions with a warm climate, cuttings can be immediately “planted” into the ground. They are tied in a bunch, turned upside down and buried about 40–50 cm into the dug hole. Due to this planting, the development of growth buds is inhibited, and new roots, on the contrary, are stimulated, because the soil above warms up faster. The hole with the cuttings is covered with peat or humus (a layer 10–15 cm thick) and covered with a thick film. In the spring they are planted in the garden in the same way as woody cuttings.
In addition to the “traditional” method of planting woody gooseberry cuttings (photo below), there is another option (photo above), but it is only suitable for regions with relatively warm winters
There are also so-called combined cuttings. This is a part of a branch cut at the place where the green shoot (at least 5 cm long) passes into the wood, with the obligatory preservation of a piece of woody shoot, usually called the “heel”. This planting material is suitable for propagating most varieties of gooseberries; these cuttings do not need to be kept in a greenhouse. Its length, as well as the quality of the substrate and air humidity, are not particularly important. They grow roots quite quickly in ordinary water, and even faster in a weak (2-3 ml per liter of water) solution of a biostimulator.
Combined cuttings are suitable for propagating any varieties and hybrids of gooseberries, regardless of their origin
Video: propagation by cuttings
Reproduction by layering
Propagation of gooseberries by layering is the most popular method among amateur gardeners. In this case, the plant is not subjected to severe stress, as when cutting or dividing a bush. Already formed seedlings with their own developed root system are separated from the bush. Layers can be horizontal, vertical and arcuate.
In autumn, seedlings obtained from gooseberry cuttings are carefully removed from the ground and assessed to see if their root system is somewhat developed.
Propagation by horizontal layering is best suited for young bushes, aged 3–4 years. From each of them you can get 4–7 viable seedlings per season. The mother bush continues to bear fruit.
- Select 3–5 healthy annual shoots. In the spring, when the soil has warmed up sufficiently, dig trenches 5–7 cm deep, fill them with a mixture of humus and peat chips and lay branches in them so that along the entire length, including the base, they are in contact with the substrate. To do this, the shoots are fixed in several places with pieces of bent wire or ordinary pins. The tops are pinched, cutting off 3–4 cm.
- The shoots are not covered with soil from above; the substrate in the trench is constantly kept moist. They are covered with fertile soil only when vertical shoots 4–5 cm high appear.
- When the seedlings grow to 12–15 cm, they are hilled up, completely covered with earth. Further care consists of regular watering, applying fertilizers containing nitrogen, potassium, phosphorus and weeding. If they stretch too much, in mid-summer the top of the shoot is pinched into 1-2 leaves to stimulate branching. In extreme heat, it is advisable to protect young plants from direct sunlight by covering them with branches or covering them with hay or straw.
- At the beginning of autumn, the resulting seedlings are removed from the ground and the root system is examined. Those in which it is sufficiently developed can be immediately transferred to a permanent place. The rest are grown next summer, buried for the winter.
When propagated by horizontal layering, the bush from which planting material is obtained continues to bear fruit.
Reproduction by arcuate layering is carried out according to the same scheme. The only difference is that the branch is fixed to the ground at one point, approximately in the middle, and this place is immediately sprinkled with earth and watered well. The top and base of the shoot remain on the surface; the first is pinched at a distance of 10–15 cm from the place where the branch is fixed.
The methods of propagating gooseberries by arcuate and horizontal layering differ little from each other; the choice depends on how many and what kind of seedlings you want to get
In the fall, the arcuate layer is guaranteed to produce a viable seedling. The branch connecting it to the mother plant is cut off, the young bush is dug up and transferred to a permanent place. Compared to propagation by horizontal layering, fewer seedlings are obtained, but they are more viable, quickly adapt to new living conditions and begin to bear fruit. As a rule, the first harvest is harvested two years after transplantation.
Vertical layering is used to propagate old gooseberry bushes over 6–8 years old, whose productive period is already coming to an end. You can’t expect a harvest from them this year or next.
- In early spring, before the leaf buds “wake up,” all shoots older than 2–3 years are pruned to the growth point. The remaining ones are shortened by two thirds. This procedure stimulates the intensive formation of new branches.
- When the young shoots reach a length of 12–15 cm, the bush is hilled around the perimeter, covering the new shoots with soil about halfway. All voids between them must be filled.
- During the summer, as the earthen hill crumbles, it is renewed 3–4 more times, gradually increasing its height to 18–20 cm. Before each hilling, abundant watering is required. In the second ten days of July, the tops of annual shoots are pinched so that they branch more intensively.
- During the season, future cuttings are fed 2-3 times, watered with a solution of complex mineral fertilizer for berry bushes. Regular watering is also required.
- In the fall, the soil is raked away from the bush. Rooted cuttings are separated from the mother plant and transplanted to a permanent place.
Compared to other methods, propagating gooseberries by vertical layering is a rather labor-intensive method.
There is another method of propagation by layering, most suitable for those who grow gooseberry seedlings for sale. From one bush you can get up to 30 new plants.
- In the spring, all shoots of the bush that will be the “donor” are cut off, leaving “stumps” 10–12 cm high. Since this stimulates intensive branching, many annual shoots appear during the season. A few of the weakest ones can be cut off to the point of growth, the rest are left until next spring.
- In mid-April, all shoots, except three or four located closest to the center of the bush, are bent and laid out in pre-dug grooves 8–10 cm deep, filled with fertile soil or humus. The resulting “design” resembles the sun with rays, as children draw it.
- The bent branches are fixed in a horizontal position, sprinkled with soil, and as it dries, watered with warm water.
- By the beginning of summer, almost every growth bud on the buried shoots should produce an “offspring.” When they grow to 12–15 cm, they are half covered with light fertile soil to stimulate the development of the root system.
- In September, all shoots on which layering has formed are separated from the mother bush. All plants that have at least small roots are preserved.
- The cuttings are transplanted into pots of suitable size. They overwinter in the basement or cellar, at a slightly positive temperature and air humidity of 65–75%.
- In the spring they are transplanted into a greenhouse. The distance between the bushes is about 30 cm, between the rows - 0.5 m. The root collar must be buried 3-4 cm more than it was before. By autumn, the grown layerings are ready for planting in a permanent place.
The latter method allows you to get up to 30 new seedlings from one gooseberry bush
Video: growing new gooseberry bushes from cuttings
Dividing the bush
Dividing the bush is the most suitable method when you need to propagate a rare or scarce gooseberry variety. As a rule, in places where shoots grow, its bushes form additional roots. A year before the proposed procedure, all branches older than five years are cut to the point of growth.
It is not advisable to divide a gooseberry bush into too many parts; usually 3–4 new ones are obtained from one plant
- Gooseberry bushes are dug out of the ground and the roots are unraveled, separating the young shoots from the old “stumps”. The roots are cut with a sharp, disinfected knife, trying to reduce the number of damage to a minimum.
- To prevent the development of rot and other diseases, the sections made are dusted with crushed chalk, sifted wood ash, colloidal sulfur, and cinnamon. Each part must have a developed root system and at least three shoots.
- The roots are lubricated with a mixture of powdered clay and a solution of any biostimulant. The correct consistency resembles thick sour cream.
- The seedlings obtained in this way are planted in pre-prepared planting holes and watered abundantly (15–20 liters of water). The soil is mulched, existing shoots are shortened by a third of their length. If division is carried out in the fall, preparations for winter should be especially thorough.
Video on the topic
Other ways
In addition to those described, there are other methods of propagating gooseberries, but for one reason or another they are not very popular among amateur gardeners.
Growing from seeds
The method is mainly used by professional breeders when breeding new varieties, but no one forbids an amateur gardener to try this. The result is completely unpredictable - bushes obtained in this way rarely inherit the varietal characteristics of the “parent” plant.
Gooseberry seeds are propagated mainly by professional breeders; this is a rather complicated and time-consuming procedure.
- To obtain seeds, several large ripe berries are selected. The pulp is separated from the skin and dried for several days in direct sunlight.
- Planting material is placed in small flat containers filled with wet sand, buried 2–3 cm. For the winter, they are stored in a cellar or basement, or buried in an area to a depth of 40–50 cm, sprinkled with peat chips on top (layer 15–20 cm thick). cm).
- At the beginning of April, the seeds are sown in a greenhouse or greenhouse, covered with humus or peat. Layer thickness - 2–3 cm.
- Seedlings with two or three true leaves are transferred to outdoor beds. During the summer, the plantings are regularly watered, weeded, and the soil is very carefully loosened.
- At the beginning of autumn, the seedlings (they should reach a height of 15–20 cm) are transplanted to a permanent place in pre-prepared holes.
Reproduction by perennial branches
Planting material is obtained during anti-aging pruning, ridding the bush of all shoots older than 5–6 years.
There will definitely not be a shortage of planting material when propagating gooseberries with perennial branches - it is formed in abundance after the next pruning
- The cut branches are laid horizontally in shallow (5–6 cm) grooves, leaving the top (last season's growth) on the surface, and covered with light fertile soil.
- The top is pinched, removing the top 2-3 buds. The soil is constantly kept moist. During the season, the emerging shoots are watered 2-3 times with a solution of Nitrofoski or Azofoski (5-7 g/l) to stimulate the growth of green mass.
- In autumn, seedlings that have reached a height of 15–18 cm are transplanted to a permanent location. Less developed ones are grown next summer in a greenhouse or in a garden bed.
Cuttings in spring
Planting shrubs in the spring is great for those who do not want to spend extra effort on planting and do not have the opportunity to save cuttings throughout the winter. If the optimal timing for collecting planting material is observed, the spring propagation method is no worse than others, making it possible to obtain a highly productive berry garden. This procedure is usually carried out in early March, before the buds on the bush swell .
We invite you to familiarize yourself with alternative methods of propagating gooseberries.
Material collection: choosing the right branches
To select high-quality planting material, you need to look at several features at once. The first thing to do is to exclude for selection bushes with traces of damage by various pests and diseases. Such plants most often produce infected material characterized by reduced immunity.
Next, you need to look at the structure of the bush: green or semi-lignified branches, no more than one year old, are best suited for spring cuttings. Such shoots are distinguished by their short length, brown-green hue, as well as elastic and juicy tissues.
Cuttings for planting are selected from the top of such branches, their length should be about 25 cm, and the surface of the cutting should contain at least 4–6 viable buds.
Rooting methods
After selecting the planting material, it should be placed in the refrigerator for a day. After this, an oblique cut should be made at the bottom of each shoot at an angle of 45°, and then the sections should be soaked in clean water at room temperature for 4–6 hours.
Next, the cuttings are rooted; this procedure is carried out according to the same scheme that is used for germinating shoots selected in the fall. After the successful formation of the young root system, future seedlings dive into individual garden pots. You can replace them with plastic glasses or any other small container.
Did you know? The first botanical description and systematization of gooseberries was given by the famous French botanist and physician Jean Ruel in 1538. Although before this time the plant had been known to mankind for at least 2 thousand years.
Care
Before planting in a permanent place, germinated cuttings are provided with special care. Gooseberries are surrounded by moderate humidity. Water the soil regularly, but in small portions, this will make it possible to avoid sharp fluctuations in moisture in the substrate, which has the best effect on the growth of the root mass. If possible, approximately 2 weeks after planting in the soil, the seedlings can be fed; any complex mineral fertilizer for fruit and ornamental shrubs is suitable for this.
Containers with plants are kept on the most illuminated windowsill, providing them with moderate and diffused light.
Sowing seeds
When using this method, you need to take into account that the grown bushes may not have signs of the parent plant. Main stages of the process:
- Overripe gooseberries are collected, from which the seeds are removed, washed and dried.
- Prepare a container for seeding material: a drainage layer is placed on the bottom. Fertile soil is poured over the drainage (humus, sand and soil are mixed in equal parts).
- The seed material is laid out on the surface of the soil in increments of 4-5 cm and sprinkled with soil.
See also: Ripening time and rules for collecting gooseberries from a thorny bush
The containers are covered with film and placed in a room with a temperature of 3-5°C. Periodically, the shelter is removed and the soil is moistened. In spring, seedlings that have grown more than two leaves can be planted in open ground.
Landing at a permanent place
Regardless of the time of harvesting cuttings, around the beginning of May, the optimal period for rooting seedlings begins. By this time, not only a dense root network should appear on the shoots, but also several young leaves. Rooted cuttings are planted in the early morning or late evening, in dry and cloudy weather. A well-lit part of the site, protected from drafts, with moderately moisture-absorbing sandy loam soil is best suited for this.
Also find out what you can plant next to gooseberries.
Gooseberries should be planted in rows or holes, to a depth of 10–15 cm. For compact varieties, the distance between neighboring plants should be about 1 m; for spreading varieties, it is increased to 2–2.5 m. Before
planting the cuttings, check the soil on the site should be well fertilized. To do this, 10 kg of humus, 100 g of wood ash, 50 g of superphosphate and 40 g of potassium sulfate should be added to 1 m² of beds, and then everything should be thoroughly mixed with the top layer of soil.
Growing gooseberries by cuttings is an effective, simple and low-cost way to create a highly productive garden on your site. Just one adult bush makes it possible to plant up to 10 young plants, while maintaining all the original varietal and production characteristics of the mother form. However, not many people succeed in using cuttings effectively, so often inexperienced gardeners have to be content with purchased planting material.
Propagation of crops by dividing an adult bush
This method is used mainly in the case of transplanting gooseberries to a new place of growth. You can plant the bush in the spring (before the buds swell) or in the fall, a few weeks before the onset of frost. The procedure for dividing the plant is simple: in dry weather, carefully dig up the bush, shake off the soil and divide the root into several parts using pruning shears.
It is important to ensure that each new bush has part of a well-developed root system and at least two shoots. Before planting the plants, the old roots are cut off and the rest carefully trimmed.
Arc-shaped layering
In some varieties of gooseberries, thin arched shoots, touching the ground, quickly take root. In this case, rooting can take place without our help, but if we help the plant a little, this process will go faster.
Where the branch touches the ground, dig a hole, place the branch in it, pin it and cover it with humus soil, forming a small mound.
In the fall, we separate the rooted cuttings from the mother bush and dig it up. We carefully inspect the resulting seedlings and, depending on their condition, send them either for growing or immediately plant them in a permanent place.
This method is very simple and effective. Its only drawback is that only one seedling is produced per branch. But if you are not growing gooseberry seedlings for sale or are not planting large plantations of this plant, then this is quite enough to update your plantings.
Further care
After rooting the cuttings in the summer, it is important to properly care for them. For moisture-loving gooseberries, it is advisable to install an aeration system, especially during a dry period.
Watering is carried out as the upper layers of the soil dry out. Each young bush requires 3 to 5 liters of water.
In order for the root system to successfully form, on the 3rd day after transfer to open ground, the cuttings are watered with succinic acid (for 1 plant - 0.2 g of dry matter and 1 liter of water). After 2 weeks, complex fertilizers are applied.
Best time
The main condition for successful gooseberry cultivation is warmth and humidity. Therefore, it is so important to choose the right planting date. Depending on the method of reproduction, this may be spring, early autumn or summer. In early spring, layerings take root best; in April, you can replant the plant by dividing the bush.
If you were unable to do so before buds formed, you can plant gooseberries in the summer. In June-July, green cuttings take root well. At the end of August, layering is also successfully added.
Autumn is suitable for any method: layering, lignified cuttings, dividing the bush. It is best to do this in September so that the young plant takes root before frost. In the southern regions, planting dates are pushed back to the end of October.
Note! The choice of method and time of propagation also depends on the gooseberry variety. Some are more frost-resistant and unpretentious, others are poorly cultivated by cuttings.
With the right choice of method and time of propagation, gooseberries take root well
How to root
There are 2 ways to root gooseberries: in water and soil.
In water
This method is suitable for rooting woody gooseberry cuttings. For the procedure, use soft melt or rain water, purified from impurities and salts. Sequencing:
- Sprouts up to 25 cm long taken from the mother plant are cut in the upper and lower parts at a distance of 2 cm from the lower bud.
- The material is disinfected with a bactericidal solution and placed in water so that the ends of the cuttings are immersed above the lower bud.
- The shoots are covered with a bag.
- When the first roots and green mass appear, the material is transferred to previously prepared soil, while ensuring air access.
For faster growth, the sections are treated with a growth stimulator for a day, then washed and again immersed in clean water.
In the ground
Green cuttings are planted in the ground throughout July. There is no need to prepare material in advance. It is rational to cut off the shoots right on the day of planting. Roots are formed on cuttings in a trench without the use of boxes.
The cuts on the cuttings must be fresh. Before transferring to the ground, the material is kept in warm water for up to 5 hours. The lower part is deepened at an angle into moist soil, compacted around the trunk and watered.
other methods
There are several other ways to grow gooseberries. They are used less frequently because they are not as effective.
- You can take perennial branches for propagation. They are cut off in May, part of the young growth and side shoots are removed. The branches need to be buried with fertile soil so that the green part is above the surface of the earth. Caring for such plantings is usual: watering, loosening, weeding.
- In the fall, after harvesting, you can plant young shoots that grow around the bushes. It is carefully dug up and transferred to a new place.
- An alternative method of propagation is to graft gooseberries onto other plants. Most often, red or white currants are used as a rootstock. But this method is complex and ineffective; there is no guarantee that the berries will turn out tasty.
Gooseberries are an unpretentious plant that takes root easily. There are many ways to propagate it, which are accessible even to inexperienced gardeners. If you follow all the rules, you can constantly get good harvests of tasty, healthy berries.
Preparatory stage
This labor-intensive but interesting method is associated with mechanical damage to the above-ground part of the bush. Therefore, it is important to prepare high-quality tools and disinfectants.
Conditions for rooting
To ensure that gooseberry propagation efforts do not end in the death of the planting material, it is important to strictly observe all the conditions and sequence of the procedure.
For successful rooting of cuttings you need:
- air temperature not lower than +20…+25°C;
- high humidity and good air permeability of the soil;
- soil temperature is 5°C higher than ambient temperature;
- high-quality lighting;
- optimal concentration of cambium and nutrients in planting material;
- saturation of the soil with growth stimulants.
To increase the content of nutrients and cambium, the mother bush is fed with potassium and phosphorus fertilizers for 1.5 months. Do this once every 3 weeks. For 1 bush, use 10 liters of water, in which 15 g of potassium and 20 g of phosphate fertilizers are diluted. 14 days before separation, the shoot is pinched at the bottom with wire.
Soil preparation
The berry bush prefers loose and nutritious soil. Before planting, all perennial weeds are carefully removed from the site.
Advice! Experienced gardeners plant dahlias in this soil a year before gooseberries. They clean the soil and loosen it.
Clay, sandy, and peat soils are suitable for gooseberries.
After harvesting dahlias in the fall, reduce the acidity of the soil by adding dolomite flour. Gooseberries thrive at a low or neutral pH level.
Reproduction by perennial branches
Obsolete dug up gooseberries do not need to be thrown away. Its branches can be reanimated and a new harvest can be obtained. First you need to dig a small ditch, put a branch there and cover it with earth, leaving the upper part on the surface where young growths are visible. Pinch the green ends of the branches to activate the viability of the lateral buds.
Several shoots should take root on the branch. When the seedlings appear, they need to be fertilized. In the fall, dig up and divide into individual seedlings.
How gooseberries reproduce by stem shoots
Gooseberries reproduce themselves by stem shoots. One-year-old branches produce buds from which roots are formed. If you sprinkle them with soil, the root system develops quickly. The advantage of this propagation method is that the stems of the seedlings are thick and strong, the plant grows easily and quickly.
You can remove the growth as follows:
- In spring, the soil around is loosened and fertilized with 5-7 cm of rotted manure.
- All old 2-3 year old branches are cut off, the cuts are treated with potassium permanganate and garden varnish. Active growth of young shoots begins.
- When young branches grow 10-15 cm, they are heavily sprinkled with earth at the base.
- In order for the shoots to bush, the top is pinched.
- By autumn, roots appear, but future seedlings are left until spring.
- In spring they are separated from the mother bush. Be sure to prune by 2-3 buds so that the plant develops a root system.
- Before planting in a permanent place of growth, they are grown for another year in a greenhouse. Replant together with a lump of earth.
Reproduction by stem shoots is similar to reproduction by vertical layering.