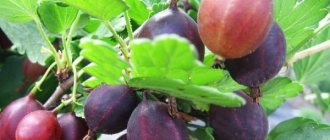
When can gooseberries be replanted?
Experienced experts say that berry crops can be replanted in autumn or spring, depending on the circumstances. The reasons why this is done are as follows:
- initially incorrectly chosen previous location for the bush;
- to rejuvenate an old plant;
- the bush grows greatly and does not receive enough light and nutrients.
Young gooseberry bushes take root best in a new place, which are also easier to replant.
in spring
Replanting gooseberries in the spring is not a good solution. But you have to carry out this procedure if you did not have time to do it in the fall. It is best to move the bushes from one place to another before the buds open, because if the buds are already swollen, the plant may not take root or may produce an insignificant harvest. In the southern regions, transplantation is recommended in March, in the northern regions - in April. For supporters of the lunar calendar, the optimal dates will be the days of the waxing moon, when energy accumulates, helping to quickly get used to new conditions.
You may be interested in information about what can be planted next to gooseberries.
in autumn
In autumn, it is most favorable to carry out activities to replant gooseberries. Basically, this process occurs at the end of September - beginning of October, when the bush completely sheds its leaves, before the first night frosts appear. During this period, the plant stops bearing fruit, remains dormant and adapts more easily to a new location.
Further care
A special feature of any spring transplants is regular subsequent watering. Their frequency and volume depend on weather conditions - air temperature and the presence of precipitation. But approximately once every two weeks throughout the season, you should pour at least 12-15 liters of water under each bush. Timely and generous watering helps preserve the fruits that have set and promotes their full ripening even on transplanted bushes.
Additional fertilizing during the first two years of the plant is not required, since for this period what you added to the soil when you transplanted the gooseberries will be sufficient. And if you want to maintain the nutritional value of the soil, you can add a little fermented mullein infusion or bird droppings to the water when watering.
You should also not forget about pest control, disease prevention and weed removal, and then your renewed, replanted bush will delight you with new harvests.
Preparing a new place for planting, taking into account humidity and lighting
Although gooseberries are considered an unpretentious crop, the correctly chosen place for planting them directly affects the growth, development and fruiting of the berry bush. For this it is recommended:
- give preference to sunny, windless areas on a hill;
- adhere to crop rotation (do not plant after currants or raspberries);
- choose places with deep groundwater (from 1.5 m);
- plant on loamy soils with neutral acidity.
Did you know? Gooseberries contain pectins, which remove toxins and waste from the body, so it is useful for residents of radioactive zones to consume.
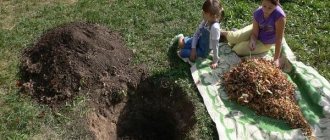
Pit
It is advisable to prepare the pit 10–14 days before the transplantation procedure by performing the following steps:
- dig up to a depth of 0.5 m, width depending on the size of the roots of the bush;
- add a mixture of chernozem and 1/2 bucket of humus or compost;
- pour about 3-4 buckets of warm, settled water into the hole.
Top dressing
In order for the gooseberries to quickly take root in a new place, it is recommended to add such preparations as “Heteroauxin”, “Kornevin”, “Rizopon”, “Agrecol” (according to the attached instructions) into the hole during planting, which contribute to better rooting of the plant.
Step-by-step instructions for transplantation
Gooseberry transplantation consists of several stages that cannot be ignored. Compliance with all aspects will allow you to save time in the future when caring for the transplanted plant.
Selecting a location
A sunny area, protected from drafts and northern winds, is the best place to transplant gooseberries. It is normal for the plant to be exposed to sunlight for at least 5-6 hours a day.
Usually they choose a place near a fence or outbuildings. Gooseberries do not respond well to waterlogging. If there is a high level of groundwater on a personal plot, you need to look for a hill.
The soil should be light and fertile. Excess acidity can be easily removed with lime, chalk, and dolomite flour. Clay soil is improved by adding sand or peat. It’s good if potatoes, legumes or beets grew on the site before.
On a note. To avoid the transfer of diseases, it is not recommended to plant gooseberries in an area where currant berries were planted or where old gooseberry bushes grew.
Preparing the holes
The area is cleared of weeds, roots, and debris. It will most likely not be possible to dig a planting hole in advance. In the spring, after the earth is broken through with a shovel bayonet, there are roads every day. Ideally, the planting holes are dug in the fall.
Required sizes:
- you should maintain a distance of 1 meter to the fence and 3 meters to the building;
- the optimal distance between bushes is 1.5 m, between rows - 2 m;
- The size of the hole depends on the bush, while the depth is not less than 50-60 cm, the diameter of the hole should exceed the size of the root system by 1.5 times.
To prevent water from stagnating in problem areas around the roots, drainage made of pebbles, crushed stone, shell rock, and screenings is placed at the bottom of the planting hole.
The fertile top layer is mixed with rotted manure and wood ash. At least 10 kg must be added to each hole. organic matter and 2-3 glasses of ash.
On a note. It would not be superfluous to apply mineral fertilizer (100 grams of superphosphate) between the drainage and fertile layers.
Preparing gooseberries
The bush is dug up and inspected. Diseased roots and branches are cut out with pruning shears. The tips of the roots are carefully trimmed to 3-5 mm using sharp pruning shears.
Next, you need to bring the above-ground part into line with the underground in terms of dimensions. To do this, the shoots are shortened, usually by a third, leaving 7-8 buds. This is the optimal size for the plant to tolerate replanting normally.
If the transplant site is far away, the roots are packaged in polyethylene for transportation.
On a note. The following procedure, carried out before planting, improves adaptation: dip the root part of the gooseberry for several minutes in a clay mash, to which a packet of Kornevin and 6 grams of Aktara are added.
How to replant
The transplant algorithm is as follows:
- pour a hill of prepared fertile soil into the planting hole (on top of the drainage);
- install the bush, supporting it vertically (you can bend it down, deepening the root collar by 8-10 cm);
- fall asleep with prepared fertile soil, shaking the bush to fill the voids, pressing down each layer;
- pour out a bucket of warm water;
- cover with mulch on top.
On a note. You can add Humate to the water for irrigation (100 ml per 10 liters of water). This will improve the survival rate of the plant during a long cold spring.
Selection, preparation and digging of bushes
Gooseberry bushes are dug up in several ways: with a clod of earth and in the form of seedlings. In the spring, the hole must be prepared after the snow has melted. Thanks to this, it will be possible to determine where water stagnates in the area, avoiding such places or installing drainage. If replanting is carried out in the fall, then the tree trunk area should be sprinkled with dry soil and covered with mulch to prevent the roots from freezing.
Read the information on what the distance should be between gooseberry bushes.
Mature large bush
You can replant an adult large gooseberry bush in spring or autumn, but autumn is still considered the most suitable time - from mid-September to the end of October. To do this you need:
- Trim the thickest roots around the perimeter to 1 m from the center of the bush.
- Using a crowbar, loosen the soil under the plant and cut off the powerful vertical roots with a lopper or saw.
- Sprinkle the cuts on the roots with wood ash for better adaptation to the new place.
- Place a shovel under the root, a crowbar under it, and pull out the bush.
- There is no need to shake off the soil. Just move the gooseberries along with a lump of earth to a new place.
Old bush
Preparing and digging up an old bush is similar to the previous method, with the only difference being that here it is recommended to additionally trim dry, damaged and diseased branches, leaving 6–8 of the youngest and most powerful shoots.
Young gooseberry bush
The process of digging up a young gooseberry bush follows the same technology as an adult large one. You just need to trim off weak and extra shoots, and shorten the strongest ones by 10 cm from the top.
You may find useful information on how to properly care for gooseberries in the spring.
Rooted cuttings
As for rooted cuttings, the situation here is a little different and has its own characteristics:
- In the spring you need to dig deep grooves near the bush.
- Select several young shoots (1-2 years old), pinning them in recesses to the ground using wooden staples.
- Sprinkle the top with soil, peat, sawdust, or cover with film.
- Regularly water and feed these places for quick rooting.
- In early September, cut off the rooted branch from the main bush.
- After 2-3 weeks, carefully dig up the seedling and move it to a new location.
Thanks to cuttings, gooseberries can be propagated and new bushes grown. It is very important to transplant gooseberry bushes to a new place along with a lump of earth, thanks to which the plant will take root more effectively and will not get sick.
Caring for a transplanted plant
Caring for gooseberry bushes after they are transplanted to a new place plays an extremely important role for their further growth, development and intensity of fruiting. It consists of regularly carried out watering, fertilizing and mulching the tree trunk area.
Read how to fertilize gooseberries in autumn and spring.
Watering
In the absence of rain, watering is carried out twice a week during cloudy times of the day (early morning or evening). It is recommended to water with warm, settled water, because cold water will cause the roots to rot and the entire plant may die.
Top dressing
Approximately 2 weeks after replanting, you can apply the first fertilizers. To do this, it is best to use nitrogen-containing substances that promote the growth of shoots and foliage. They must be applied after watering, along the perimeter of the tree trunk. These include, for example, an infusion of their bird droppings. In autumn, it is advisable to feed the soil around the plant with compost, humus or other organic fertilizers. To combat pests in the ground, gardeners advise treating the bushes with boiled water in early spring.
Mulching
Immediately after the gooseberry is transplanted, the area around the trunk must be covered with mulch (a layer of 10–15 cm), thanks to which the introduced moisture will not quickly evaporate and weeds will not grow intensively. It is recommended to use rotted manure, sawdust from deciduous trees, bark, and wood chips as mulch.
A little about care after gooseberry transplantation
Gooseberry bushes are not whimsical. Care is limited to removing weeds, which is preferably done by hand, since roots that are located close to the surface of the earth can be damaged by tools designed for weeding.
Of course, gooseberries require watering and fertilizing. In order to satisfy the need of the gooseberry bush for nutrients, you only need to create a new protective layer once a year in the fall, which consists of soil mixed with compost and organic fertilizers. If desired, the mulch layer can be increased; it will promote good fruiting and faster growth of the shrub.
Preparing the transplanted bush for wintering
Transplanted gooseberries in any season need careful preparation for wintering in order to produce a good harvest the following year. To do this, you must adhere to the following conditions:
- in the fall, after harvesting, treat the bushes with a 1% solution of Bordeaux mixture to prevent diseases;
- collect all fallen leaves and weeds from under the bushes;
- dig up the soil around the plants;
- pour several buckets of water under each gooseberry;
- spray the dug up soil with a weak solution of potassium permanganate;
- carry out sanitary pruning of the crown, cutting out dry and damaged shoots;
- Cover the tree trunk area with a 10 cm layer of mulch (humus or peat).
Errors during transplantation
The most common mistakes during transplantation are:
- when an adult bush is planted in a new place without an earthen clod, which is why it does not take root well;
- do not use special substances that promote rapid rooting of the plant;
- water the bushes with cold water.
Did you know? The Italians who came to Russia during the reign of Peter I called gooseberries the northern grape.
Thanks to the above recommendations for proper transplantation of gooseberry bushes, you can prevent plant disease, as well as ensure rapid fruiting and a high yield of berries.
Organic fertilizers
In this case we will also talk about additives containing nitrogen. Most of it is in bird droppings. However, using it in its pure form is strictly prohibited, otherwise the gooseberry may receive serious burns or even die. To play it safe, you need to thoroughly dissolve the droppings in water and let it sit for at least 7 days. The resulting infusion should be poured under the base of the bush in the amount of one bucket per plant. Before applying fertilizer, the mulch must be removed.
Also, according to reviews from experienced gardeners, it is better to choose liquid fertilizer. It makes no difference what fertilizers are used (mineral or organic). Before performing the procedure, the gooseberries must be thoroughly watered.
Soil microflora is activated only at positive temperatures. Therefore, it is recommended to fertilize in April, when the air warms up to +12 degrees. In addition, it is worth considering that microflora should not be used together with mineral fertilizers.