- October 29, 2018
- Country house
- Marina Olenyuk
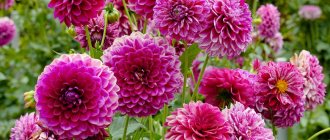
Which flower can rightfully be called the student’s flower? That's right - dahlia. Today there are many varieties of this plant, and it is again gaining popularity among gardeners. Closer to autumn, when most of the flower garden is already going to rest, dahlias appear in all their splendor. But in order to admire the gorgeous bushes of such flowers, it is important not only to plant the plant tuber correctly and on time, but also to preserve it so that next year you can again admire the spherical flowers with lush dark green foliage. Therefore, in the autumn, novice gardeners often face the question of how to properly remove dahlias for the winter.
Don't dig early
Everyone knows that these flowers do not like frost. After the first slight drop in temperature, lush bushes already have frozen tops and frost-damaged flowers. A compassionate gardener, having no idea when to dig up dahlias for the winter, may make an unforgivable mistake and send the tubers for storage too early. What is his mistake? But the fact is that early removal of tubers from the soil is fraught with their death during storage. Tubers need to ripen in order to gain strength and safely survive the dormant period.
Plants will tell you
When to dig up dahlias for the winter, their appearance will tell you. Of course, the first frost turns cheerful, chic bushes into sad, drooping ones. And here you need to be patient. Do not touch the plants so as not to freeze the tuber and neck of the flower stems; the plants are covered with earth. Concerned with the question of how to properly remove dahlias for the winter in order to keep them at their best, you need to remember one piece of wisdom: the longer the bushes sit in this state, the stronger the root (tuber) will be. Even the most careful storage will not replace being in the soil. You are unlikely to miss the moment of digging. It would be correct to remove dahlias for the winter as soon as all the foliage and flowers have completely withered and drooped under the influence of frost.
Consequences of late digging
Delayed harvesting of flowers can cause irreparable damage to your flower garden. It often happens that after fairly severe frosts (up to -5; -12 degrees), the weather improves again and the sun warms the dead leaves and flowers. The tops begin the process of thawing and rotting. How to remove dahlias in the fall so that they do not begin to deteriorate, because rot can spread to the neck of the stem and then envelop the tuber. The best thing is to dig up the tubers at least 2-3 days after a fairly serious frost.
Tuber division
In the spring, you can divide the tubers, but storing and disinfecting large bunches of roots is much more difficult than small divisions. Therefore, most gardeners prefer to divide dahlias in the fall immediately after digging.
The remaining stems of the cuttings are cut off as close to the tuber as possible. All roots are also removed. Remains of the stem and roots can cause rotting. Be sure to make sure that each division has a neck with buds from which new flowers will grow.
Each group of roots is divided with a sterile instrument. Otherwise, you can introduce the virus into all the tubers if there is a sick one among the dug up roots. To sterilize, the knife blade is heated over a fire.
Attention! Make sure that the sterilized blade is cool before use. Having several knives can save time.
Preparing identification marks for varieties
It is very important to understand how to properly remove dahlias from the ground for the winter. How to dig them up without damaging the plant. Before starting work, prepare tags with the names of the varieties. If the flower garden is impressive and the tuber harvest is also large, you can stock up on boxes and write the name (or color) of the plant on them. Don’t think that in the spring you will understand on your own what and where you spend the winter.
Necessity of the procedure
Dahlias are bright representatives of the asteraceae. Their homeland is the foothills of Latin America. Plants were brought to Europe only 400 years ago. Dahlias are heat-loving, so they need to be dug up for the winter. The root system consists of fleshy, voluminous tubers, inside which nutritional components accumulate. Freezing them can lead to rotting and further death. Growth buds are located close to the root collar or directly on it. It, in turn, is located at the very surface of the soil. Even with the best insulation, it is impossible to protect plants in cold winter. Frost damages the buds and freezes the juicy tubers. Affected dahlias do not revive.
Attention!
Damage to the buds of dahlias occurs already at zero temperatures.
Today you can often find information about cold-resistant varieties that do not need to be dug up. This is especially often said about low-growing species. However, this is not true. Any dahlias will not be able to survive in the ground in most regions of Russia. In the southernmost regions with warm and snowy winters, flowers can theoretically be left in the flowerbed. They can be protected from light frosts with a thick layer of sawdust. In reality, local summer residents often lost flowers in winter due to the dampening of the roots in damp and cold soil. Therefore, it is better not to take risks.
Let's start digging up tubers
- First of all, we trim the thick stems of the bushes. Don't cut it too low! This part of the plant is cut at a height of 30 centimeters. All foliage from this section of the stem must be removed.
- We arm ourselves with a shovel or a pitchfork: whichever is more convenient for you. The bush is dug in on all sides, and an area to be removed is outlined. Remember that the tubers extend quite widely underground. Be careful not to puncture or otherwise damage them.
- Now the movement of the pitchfork goes deep into the tubers. We turn the roots out of the soil. Do not pull the bush or try to somehow swing it by holding the root collar. This part of the flower is very important for the plant and at the same time quite fragile. Do not touch the bush with your hands at all during the digging process.
Correct preparation is the key to safety
And now about how to prepare dahlias for storage for the winter:
- Gently clear the bushes of large lumps of earth and place them in a shaded place until all the tubers have been dug up.
- Rinse the roots with water. It is better to do this under pressure using a hose.
- Cut off the thin roots coming from the tubers by about half. Many gardeners are sure that the plant does not need these small threads, but cutting them too short can lead to rotting, so we act wisely.
- Cut out small tubers and anything that fell off during the process of removing the plant from the soil.
- Remove diseased tubers.
- Now, cut the stems to 15-20 centimeters.
- Some gardeners disinfect tubers before harvesting for winter storage. To do this, they are placed in a fungicide solution or in diluted potassium permanganate for half an hour. Important! Water must not get inside the stem! Such carelessness can result in rotting of the root collar and death of the plant.
- Now the tubers must be dried. It is better to do this in the fresh air, but not in the sun. Use the space under the awnings. During drying, the roots are placed with the tubers facing up. The optimal time for such drying is up to seven days. During this time, the wounds from the pruning shears have time to heal and the tubers can be sent to a permanent storage location.
When to dig up dahlias in 2022 for storage according to the lunar calendar, favorable days
Most gardeners, when planning work in the garden, take the advice of the lunar calendar as a basis. It contains information on when it is best to plant, transplant, dig and other agricultural activities.
There are good and bad days for digging up dahlias after flowering. Favorable:
- 10, 11, 14 after lunch, 15, 16, 22, 23 before lunch, 26, 27, 28 September;
- October 8, 9, 12, 13, 18, 19, 20, 23, 24, 25;
- November 4, 8, 9, 15, 16, 20, 21.
On other days of these months, it is not recommended to dig up dahlias for subsequent storage. This may have an adverse effect on their growth and development in the future.
When is it not worth digging dahlias for winter storage in 2022 according to the lunar calendar?
There are also neutral and unfavorable days for digging. If you can dig up on neutral days, then on unfavorable days you should completely refuse to dig up dahlias.
Unfavorable days:
- September 6, 21, 25;
- October 3, 7, 10, 16,27-28;
- November 1-2, 10, 26-27.
If you rely on the lunar calendar, the rhizomes will be well preserved and will delight you with a new harvest next year.
Where to store dahlias in an apartment in winter
Many people have to use their apartment to preserve the tubers. How to position the roots so that the planting material survives safely until spring?
- The storage option in a box is suitable for those who have a cool, shaded place in their apartment. It’s great if you have an insulated loggia. Add peat moss to the box and place the roots. We also sprinkle some peat on top.
- You can use sawdust or sand instead. We lay the roots in the same way, on a layer of one of these materials and fill them on top in the same way.
- Another storage option is in a clay mash. We spread a thick layer of newspaper into the box and dilute the clay with water. The consistency of the solution is slightly thinner than pancake batter. Dip each root (and root collar) into the “chatter”, dry it, and place it in a box. This method maintains optimal elasticity of tubers almost all winter.
The most reliable way
Experienced gardeners have adapted to storing tubers by first dipping them in melted paraffin. This is perhaps one of the most painstaking methods. However, it is good because the safety of planting material increases several times. It is convenient to store small tubers and elongated roots of dwarf varieties in this form. The paraffin film penetrates into the most inconspicuous places of root tubers and prevents the development of rot. Paraffin does not release moisture, and the dahlia roots do not dry out, retaining their full potential until the time of planting. In addition, the temperature of the substance during melting is quite high and contributes to the destruction of pathogens of various tuber diseases. Step-by-step instructions on how to properly remove dahlias for the winter using paraffin:
- Paraffin is melted only in a water bath. Temperatures above 200 degrees can cause the substance to ignite. But a water bath can only give 80 degrees.
- We place two parts of paraffin and one part of garden varnish in a bowl - this way the mass will have a more plastic consistency.
- The layer in which we will dip the tubers should be decent enough to cover the entire tuber. It is more convenient, of course, to divide the roots into smaller segments (don’t forget about the buds, from which the nodule will give rise to stems in the future). If you don’t have enough paraffin available, then pour water along with it. The liquid will be under the paraffin film. Do not be afraid that water will wet the planting material. When the root is immersed in a dish, the paraffin instantly covers it completely. Water will not have time to wet the root.
- Now we tie each root with a thread.
- We hold it in our hand and immerse and remove the nodules as quickly as possible. Place until the paraffin cools completely (15 minutes).
- The finished planting material is placed in a cardboard box (in a bag or wrapped in paper) and put away in a dark, not hot place.
Dahlias: cleaning and storing tubers
Well-ripened tubers from healthy plants are usually stored normally in winter, and any of the reliable methods for storing dahlias ensures 90-95% success.
However, there are varieties of dahlias whose tubers do not have sufficient storage capacity, and some cultivars produce tubers that are too small. For such specimens, it is necessary to provide special storage conditions or grow and store them directly in pots.
Caring for the future harvest of dahlia tubers should be carried out throughout the entire growing season. It is especially important to remember that it is inadmissible to over-fertilize plants in the last third or quarter of the growing season before digging for better storage in winter.
Despite the fact that many dahlia varieties begin to form tubers in the spring, many of them finally ripen only towards the end of the season. If possible, keeping tubers in the ground for a longer period of time has a beneficial effect on final development, and, consequently, on more successful storage. The owner of a solid collection of dahlias of a thousand plants or more is forced to begin harvesting the tubers before frost or the onset of prolonged rains. For those hobbyists who have a small number of specimens growing in their garden, it is better to allow the plants to remain rooted for as long as possible.
In most areas, light frosts occur first, which damage the open dahlia inflorescences and only partially damage their foliage, and more severe frosts usually occur after another few weeks. After light frosts, dahlias continue to grow and tubers continue to ripen. It happens that dahlia roots can withstand more severe cold spells, but this depends on the moisture capacity of the soil and its mechanical composition.
Before you start harvesting dahlia tubers, you need to carry out a thorough and ruthless cleaning of the garden: dig up and throw away all weak plants, as well as those that bloomed poorly or are not of the right variety. If you come across plants with suspected viral diseases, they must be dug up along with a lump of earth and burned (or buried deep in the ground).
Digging up dahlias
Some gardeners prefer to trim the stems of dahlias a few days before the start of harvesting the tubers, guided by the fact that during this time the apical buds will have time to sprout, and it will be easier to cut the divisions. However, there is a possibility that the base of the plant stem will rot if water gets on the cut part.
Another possible danger: some gardeners believe that if you cut all the stems with one cutting tool, you can spread viral infections to a significant part of the collection. (According to the latest research data from virologists, it is unlikely that infection is transmitted through cutting instruments. However, it is better to exercise caution until further evidence of this theory appears).
It is believed that if you dig up and divide dahlia tubers immediately after cutting the stem, viruses are less likely to reach the tuber neck.
Hobbyist gardeners who prefer to trim plant stems a few days before harvesting tubers should cover the cut with aluminum foil to minimize water exposure. (After the first frost, dahlia stems always contain excess water, so it is impossible to completely avoid it).
Leave a piece of the dahlia stem about 8 cm long uncut to make it easier to work with this group of tubers later.
After cutting off the upper part of the plant stem, the ability to accurately determine the dahlia variety will sharply decrease. Therefore, be careful not to lose the label indicating the variety of each group of tubers - until you have individually labeled each section. Dahlia tubers of an unspecified variety have much less value than named varieties. When labeling tubers, in addition to the name of the variety, additionally add information about the best plants in order to continue propagating the variety from the best line.
Dig up dahlia tubers and carry out further processing with extreme care. The neck of the tuber is fragile, especially immediately after digging. If you start digging up dahlia tubers in the morning and then leave them to dry for a couple of hours, they will become significantly less fragile. Then in the future, as you continue to remove soil and dirt from the tubers, the chances of breaking off individual fragments will be minimal.
In order to dig a plant out of the ground, you first need to dig it up on all four sides (at a distance of about 30 cm from the base of the stem). This technique cuts off the long conducting roots of dahlias, but the tubers themselves remain intact. Place a shovel or fork under the earthen ball of tubers and, using the shovel as a lever, push it out of the ground.
Carefully remove large clods of soil from a group of tubers; Turn the tubers upside down to let them dry a little. Then you need to thoroughly wash the groups of dahlia tubers with a garden hose, since the remaining soil on them contains many microorganisms that cause diseases. Now the tubers are ready for division.
Dividing a group of dahlia tubers
So, the next step is to divide a large group of tubers into separate sections. On the one hand, this is much easier to do in the fall, since the tubers of some varieties of dahlias become very coarse during storage, and then they are extremely difficult to cut in the spring. But, on the other hand, in the spring the sprouted buds are already clearly visible, and when dividing the tubers in the fall, it is not always possible to predict their placement. Most experts are in favor of dividing dahlia tubers when digging. In the fall, gardeners still have more time: they can slowly clean the tubers from dirt, divide them and treat them with fungicides (whatever you say, small divisions of dahlias are much easier to process).
Amateur flower growers who doubt that they will be able to correctly determine the placement of the eyes can cut the dahlia stems a few days before harvesting - then the buds will be more clearly visible. And freshly cut and harvested tubers often have clearly visible eyes.
If some tubers are too hard, or have thin and small necks, as well as the smallest dahlia tubers, you can not divide them, but leave them for storage in groups of several uncut sections. If you leave a piece of stem at least 2 cm long, you can stick a marking tape on it indicating the variety for the entire group.
When dividing a group of dahlia tubers, it is very important to leave a piece of the plant neck with buds for each division (otherwise the dahlias will not germinate in the spring).
Trim the remaining stems of the division as low as possible, so as not to further provoke rotting of the neck and decomposition of the tuber. Always sterilize tools after dividing each group of tubers.
Some experts believe that when dividing a diseased group of dahlias, cutting tools can be used to spread viruses throughout the collection. The most reliable way to sterilize is to hold the cutting part of the instrument over the fire (don’t forget to cool it later before using it again). To save time, it is better to have several replaceable cutting blades: while you are working with one, the other is cooling down at that moment.
Almost all gardeners prefer to throw out the “mother tuber” of the dahlia. It produces sprouts, but it produces fewer suction roots and produces tubers of lower quality than younger divisions. However, experienced gardeners do not throw away the mother tubers of dahlias, but use them for subsequent spring cuttings, and only then throw them away.
Many gardeners believe that the larger the dahlia tuber, the easier it will withstand the winter and the less it will wrinkle from drying out. But for specialists, medium-sized tubers are preferable: they form a larger number of absorbing roots. Although large tubers are also suitable: they can be cut and then thrown away. Large dahlia tubers can be “improved”: they need to be heavily trimmed before planting and the cuts should be dried.
It is believed that smaller tubers produce hardier plants with better quality flowers. But you should always remember: this method is justified only if the small dahlia tubers are well ripened. Otherwise, the likelihood of them rotting is too high. The lateral upper tubers of the plant ripen later than others, so a good compromise may be to remove them before storing them. Store enough replacement tubers to avoid losing valuable dahlia varieties.
Remove all sucking roots and stem remnants - they provoke rotting of dahlia tubers.
When cutting groups, carefully check all resulting cuttings for signs of tuber diseases. If the inside of the dahlia neck has brown or rusty colored spots, cut them out completely. Discoloration of the neck may indicate incipient deterioration; such a tuber is unlikely to survive until spring.
Sometimes there may be holes on the tubers - marks from insect bites. These traces do not pose a danger if they do not serve as a gateway to infection: when the bottom at the hole is without color changes, such a tuber can be stored. It happens that the holes left by insects even help diagnose the condition of the tubers for the presence of brown and rusty areas.
Rinse the divided plants again with a hose to completely remove any dirt missed when washing groups of tubers.
After washing the cuttings again, trim off the ends of the dahlia tubers. At the same time, carefully inspect the place of the cut: any brown, rusty or colored area indicates that the process of deterioration of the tuber has begun. Then cut the tuber above the first cut to see how far the unwanted process has developed. When a completely light cut is achieved, if at least a third of the tuber has been preserved, you can put such a section for storage. If there is less left, mercilessly throw away the defective part.
Preventive treatment of dahlia tubers against diseases and pests
After all the operations have been completed, it is time to treat the tubers with fungicides (any systemic fungicide or sulfur is suitable). You can powder the tips of dahlia tubers with the preparation, or you can dilute it in water and completely dip all the roots into the solution. No one expressed concern that the spread of viruses could occur during the operation of sequentially completely immersing dahlia tubers in the same container.
If choosing a liquid form of fungicide, keep the tubers in the solution for approximately 15 minutes. After this procedure, you need to dry them by placing them on a wooden base, cardboard or several layers of newspapers. (Carry out this procedure sequentially, according to varietal groups of tubers, so that there is less chance of confusing varieties).
Do not dry dahlia tubers on concrete surfaces, as... they contribute to the extraction of moisture and premature wrinkling of tubers. Always have a label with the name of the variety of this group of tubers on hand. If you have prepared several containers with the solution, place tubers of the same variety in each and leave for 15 minutes.
Some gardeners also add a systemic insecticide to the prepared fungicide solution.
Important advice: throw away all the dahlia tubers that do not sink when immersed, but float on the surface of the solution - they still won’t last until the next season.
Remember that all procedures with wet tubers at this stage of working with chemicals must be carried out with rubber gloves!
Various authors recommend from 15 to 30 minutes for processing dahlia tubers. And many experts do not see the advisability of using fungicides at all. Perhaps the climate plays a decisive role here: in a more humid climate for growing dahlias, the likelihood of fungal diseases in them increases than in a dry climate.
Labeling dahlia tubers
Now it's time to label the dahlia tubers. When labeling, write enough information so as not to get confused about the varieties later. It is safest to write the name of the variety in full. If the names are too long, you can use codes or numbers, but it is important not to lose them!
If there are many dahlia tubers of the same variety, if possible, note which of them came from stronger plants. Use additional signs (such as “*”) to select tubers from the highest quality plants and use them for cuttings in the spring.
It is very convenient to use a chemical pencil for marking dahlias, which can be used to mark tubers that are not completely dry - it writes well on a damp surface. If the tubers are already dry, use a small container of water to wet the pencil lead. Never put a pencil in your mouth - it contains toxic elements.
When it is not possible to mark dahlia planting material with an indelible pencil, you can use a thin marker. However, markers do not always write well on the surface of the tuber - keep a few fresh spare ones on hand and rotate the markers often when writing. Many gardeners prefer to use markers for children or office ones to mark dahlia tubers. It happens that pharmacies are also used; they are less expensive (but often less reliable).
With indelible pens, you can only write on dried tubers - otherwise the ink will smudge and the inscription will be unreadable.
Some gardeners prefer to use labels to identify the variety of each tuber. To do this, prepare strips of plastic (for example, from some unnecessary container or plastic utensils), put the names of the varieties on them with markers, and then attach the labels to the strips using thin wire.
Storing dahlia tubers
After marking, you need to dry the dahlia tubers prepared for storage: small ones for 24 hours, medium and large ones for about a day and a half. The drying time for tubers can shift in any direction depending on weather conditions.
Do not dry dahlia tubers on cemented surfaces - cement tends to absorb moisture, so the tubers may wrinkle.
There are many ways to store dahlia tubers in winter. All of them work quite well if you maintain the ratio of temperature (temperature range - from 0 to +10 degrees) and humidity at the desired level - otherwise the tubers will simply shrivel and die. Containers adapted for this will help prevent dahlia tubers from drying out.
Many gardeners prefer to store dahlia tubers, dried for one or two days, in plastic bags with vermiculite. Moreover, here it is preferable to use large-fraction vermiculite than fine garden vermiculite (besides, vermiculite dust has an adverse effect on the lungs, and therefore small fractions should be avoided). But this method has a drawback: vermiculite retains moisture well, and if the storage temperature increases, the moisture can cause untimely germination of tubers.
Some experienced dahlia collectors use the technology of storing tubers in sand, using containers with a volume of about 20 liters. At the same time, the tubers are stored perfectly, but sprouts and suction roots appear earlier in the cuttings than if they were stored in coarse vermiculite. In addition, sand is much heavier than vermiculite.
When talking about ways to store dahlia tubers in winter, we can mention perlite. But the use of perlite in this case cannot be said to be a “golden mean” - perlite does not absorb excess moisture from tubers, and its dust also makes breathing difficult.
Experienced gardeners advise against trying to use moss to store dahlia tubers. Dry moss absorbs a lot of moisture, and this causes the tubers to shrink greatly. And wet moss provokes rotting of the planting material.
A reliable method for storing dahlias is waxing the tubers, i.e. immersing them in molten paraffin. Dahlia divisions treated in this way wake up later. However, for varieties that awaken slowly and late, this storage method is clearly not rational. It is better to wax dahlia varieties that tend to germinate in December. But still, storing dahlia tubers in paraffin has not become widespread enough. The reason for this is probably that this method requires too much additional effort and cost
Many gardeners use sawdust to store dahlia tubers, and quite successfully. The main thing is that the sawdust is not too fine, otherwise it will unnecessarily draw and absorb moisture from the tubers.
All kinds of containers or bags are suitable for storing dahlia tubers. Now there are discussions on the advisability of using vermiculite, but I believe that it is quite possible to abandon the use of sawdust when storing dahlias and begin to master the method of storing planting material in containers with vermiculite. First add vermiculite to the bottom of the container or bag, then place the tubers and cover them with vermiculite. Continue the sequence of such operations.
Some gardeners use a separate bag (or several bags if there is too much planting material) to store each variety of dahlia. It is important to take into account one detail: the volume of vermiculite should be approximately the same as that of plant tubers.
After filling the containers, place them in food-grade plastic bags. It is better to store containers at a temperature of +3..+6 degrees Celsius (in the basement, insulated garage, etc.).
There are different opinions about the tightness of bags with dahlia divisions prepared for storage. Some gardeners pack them tightly, others only twist the bags slightly at the top to allow gas exchange to flow. There are specialists who pierce additional holes in the bags (this is important in areas with wet winters). In fact, the specific features of storing dahlias are determined by the level of humidity - this is what you need to focus on.
An interesting experience is the experience of one gardener who adapted an old refrigerator for storing dahlia tubers. He maintains the desired temperature and humidity using a plastic container with ice, which he changes every few weeks.
You can also pack dahlia tubers (mixed with vermiculite) in cardboard or wooden boxes. But to prevent this container from drawing moisture out of the tubers, the inside should be lined with newspapers (at least 8 layers). Such packaged containers are stored closed.
It is necessary to ensure that dahlia tubers are stored at an even, cold temperature, without sudden fluctuations. Based on the experience of gardeners, the best indicators are values from 3 to 6 degrees Celsius. At lower temperatures, the tubers may freeze. If the storage temperature is higher, putrefactive microorganisms are activated, and early germination of buds and roots is possible in dahlia tubers.
Dahlia planting material stored for storage should be inspected and checked monthly, immediately removing all tubers with any signs of rot. Frequent checks make it possible to detect rotting of individual sections, and their timely removal will protect healthy tubers from damage. Some gardeners claim that if you pack dahlia tubers so that they do not touch each other, then rotting will not spread. This is an erroneous misconception, since decay produces a gas that stimulates the awakening of the buds and roots, and then this phenomenon affects not only the damaged tuber, but also healthy ones. This is why it is so important to frequently check the condition of stored tubers.
In early spring, transfer the preserved dahlia planting material to a room at room temperature (at this stage, light is not necessary for the tubers). You can add a couple of tablespoons of water to the bag - increasing the temperature and humidity will help the tubers awaken more quickly.
How to grow dahlias and store their tubers in pots
This method is suitable for dahlia varieties whose tubers are difficult to store. Try growing these plants in pots and storing the tubers in them. To do this, take pots with a diameter of 10-11 cm, plant a dahlia tuber in the nutrient mixture, and dig the entire pot into the garden soil (1 cm below the edge of the pot). Now you can care for such a plant in the same way as ordinary dahlias planted in the soil of the garden.
Due to the fact that the pot with the plant is dug into the ground below its edge, additional suction roots appear on the dahlia stem above the level of the pot. Of course, the tubers of such a dahlia will grow better and will be better stored.
Often, the roots of dahlias grown in pots are smaller in size than those of the same varieties grown traditionally in the ground (the exception is varieties bred specifically for cultivation in pots and containers).
When harvesting dahlia tubers in pots, first cut off the stem of the plant, leaving a stump of 3-5 cm, then dig up the pot. Remove any string-like roots extending beyond the pot (you can also partially cut off the tubers if they stick out).
Next, do not forget to attach a label with the name of the variety and wrap the pot with tubers in newspapers (5-7 layers). Place each pot in an opaque produce bag; store such pots along with the rest of the dahlia tubers. In the spring, take out the pots, unwrap them and start watering the soil. When the plants have buds, you can remove the tubers from the pot, divide them and plant them in new containers. Or you can grow shoots over several weeks, and then take them from cuttings.
Based on materials from gardenia.ru