Time to plant winter garlic
The best time to plant garlic before winter is considered to be approximately 3 weeks before the expected cold weather arrives. For different areas it will vary from the 20th of September to mid-October.
According to generally accepted standards, the clove is deepened by 3-5 cm. However, some gardeners prefer deep planting of garlic by 10-15 cm, which has a beneficial effect on its frost resistance. Thanks to this method, it is possible to increase the planting period from late August to October, which is especially important for regions with harsh climates. Planting will be successful if the garlic produces 15-20 roots up to 10 cm long, but it does not have time to produce greenery that weakens the root system.
The larger the root system of a plant, the more likely it is that it will not freeze.
Advantages of planting before winter
As practice shows, spring garlic does not bear fruit well when whole heads are planted. And winter crops can produce a rich harvest. The advantages of such a landing include:
- Planted heads take up several times less space than when planted with cloves. The method can be used in small areas.
- The possibility of using the method when planting crops scattered across the site. Garlic protects other crops from pests, and itself produces a high yield. This results in a double benefit.
- By planting garlic before winter, you can wait for the winter garlic harvest at the end of summer. And in the spring, time is freed up for other work.
What plants are best to plant after?
Garlic should be planted no more than 2 times in a row in the same place, otherwise the harvest will inexorably decrease from year to year. This plant can be planted in one place with a break of 3-4 years.
There is no need to plant garlic after onions and other root vegetables (carrots, celery, parsley), since these plants lead to a significant depletion of soil potassium reserves. In turn, soil for garlic is contraindicated after potatoes, tomatoes and peppers, since there is a high risk of infection with fusarium and nematodes.
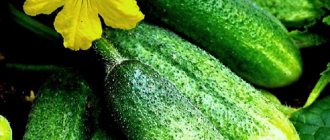
But such annual vegetables as zucchini, pumpkins, eggplants, cucumbers, legumes and early cabbage will be good predecessors for winter garlic, which left behind soil enriched with organic matter as much as possible.
The proximity of strawberries has a positive effect on garlic. The area where manure was applied this year is unsuitable for growing this crop. On such soil, garlic is susceptible to fungal diseases and produces rich tops and flimsy heads.
The previous crop must be removed from the area intended for winter garlic no later than the end of July so that the soil has time to recover.
But after garlic, in order to regenerate the natural balance of the soil, annual plants such as mustard, rye and peas should be planted.
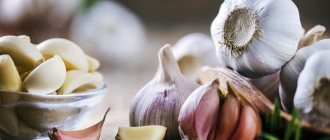
Preparation and selection of planting material
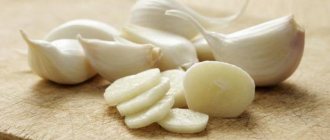
Before planting, be sure to sort out the garlic, first disassembling the garlic heads into cloves. Sick, damaged cloves with gray-green spots on the skin of the bulbs are discarded. And then, the remaining large, high-quality seed is dried and disinfected.
The following disinfection options are possible:
- soaking the cloves in a weak solution of potassium permanganate for 12-24 hours;
- disinfection with a solution of copper sulfate (1 teaspoon per 2 liters of water) or table salt (1 tablespoon per liter of water) for 3 minutes;
- using a boiled and cooled solution of ash (400 g) in 2 liters of water – 2 hours.
If you don’t have your own garlic for planting, the best purchase will be local. After carrying out the above operations, the garlic is completely ready for autumn planting.
Preparation of planting soil
The land for planting garlic in the fall must also be prepared. First, we select an area for planting, based on the fact that this crop is very light-loving and prefers clayey, non-acidic soil. Garlic will do best in an elevated place without drafts.
The soil should be of medium density, and if dry, it should be watered before planting. It is necessary to avoid using areas of land with close groundwater or prone to spring flooding.
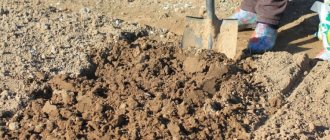
A few weeks before planting, the soil should be fertilized with humus or peat (5 kg of fertilizer, as well as 20 g of potassium salt and 30 g of superphosphate per square meter). Having uniformly placed all the components, you need to dig the soil 30 cm deep using a fork, choosing weeds.
After digging, the soil is allowed time to settle. If garlic is planted in unstable soil, the cloves may end up deep in the ground, which will adversely affect the yield.
To prevent garlic disease, the ground should be treated with a one percent mixture of copper sulfate (1 tablespoon of the product per 10 liters of water). After this, the ground is covered with film.
What fertilizers should I apply for garlic in the fall?
The following are used as organic fertilizers for garlic before winter:
- rotted pig or cattle manure;
- humus;
- bird droppings;
- humus;
- green manure embedded in the soil.
For one meter square of beds, take a bucket or 10-11 kg of homemade, matured compost or humus. If there is no organic fertilizer in the garden plot, ready-made complex mineral fertilizer from the store is suitable for these purposes.
Possible combination of minerals and organic matter for one square meter of bed:
- 20 grams of superphosphate mixed with 5 kg of humus;
- 5 kg of compost or rotted manure mixed with 25 grams of potassium salt and 35 grams of granulated double superphosphate.
Learn how to prepare a bed for garlic.
In addition to the listed compositions, fertilizers are effective in the following ratios:
- One gram of potassium salt and 30 grams of granulated superphosphate mixed with 0.5 buckets of humus. If clay predominates in the soil of the bed, you need to add 10 kg (one bucket) of peat chips to this composition.
- A ten-liter bucket of humus is mixed with a half-liter jar of wood ash, two tablespoons of potassium sulfate and 1 tablespoon of double superphosphate.
- Three kilograms of rotted leaves or grass are mixed with wood ash, superphosphate and nitrophoska. You will need 1 tablespoon of all minerals.
Organic
If the soil in the beds is sandy or clayey, it is necessary to add compost, humus, manure or other organic matter. Organic matter is laid out on the surface of the bed and carefully dug up with a shovel, turning over the layer. It is undesirable to leave organic fertilizers on the soil surface for a long time, since this will wash out and evaporate substances useful to plants, such as nitrogen.
You can use hay or dried herbs as fertilizer (before starting work, you must make sure that they have not been treated with herbicides). Juicy, green weeds are also embedded in the soil. During the decomposition process, they will perfectly fertilize the soil.
Important! Incorporation of weeds into the soil is carried out until the weed plants have ripened seeds. Sprinkled with soil, weed seeds will give a bountiful harvest next year and
“
choke out
”
all the cultivated plants planted in this bed.
Properties of humus:
- helps maintain soil structure;
- improves absorption and retention of nutrients;
- feeds bacteria;
- fixes nitrogen in the soil;
- increases soil aeration;
- retains moisture;
- helps prevent erosion.
Organic fertilizers improve every type of soil:
- Organic matter breaks down clay soils and promotes better moisture penetration. This increases the stability of moisture in the soil, maintaining its structure.
- In sandy soils, organic matter helps retain moisture and retain nutrients. Soil mineralization also increases, which is the amount of nitrogen, potassium, sulfur, phosphorus and other nutrients released by soil bacteria. Organic matter helps loosen compacted soils and add nutrients to poor soils.
- Garlic grows well in well-fertilized soil that has enough nitrogen, phosphorus and potassium. Adding organic fertilizer produces large garlic heads with the best pungent flavor. Organic fertilizers supply most of the nutrients needed to grow large garlic.
Important! When growing garlic, you need to loosen the soil. Garlic is a root vegetable, so the soil in which it grows must be soft and well aerated to a depth of 25
—
30 cm, otherwise the garlic will begin to rot during the growing season.
Mineral
If necessary, nitrogen is added to the soil under the garlic in the fall. This is only done if hay, straw, wood chips or similar materials were used as organic matter, as organic matter can temporarily fix nitrogen as it decomposes. As organic matter decomposes, nitrogen returns to the soil. When organic matter breaks down, it becomes humus.
It must be remembered that when planting garlic cloves in the autumn, you cannot use large amounts of fertilizers with nitrogen. This will cause rapid growth of the green part, which will negatively affect the preservation of garlic in the soil during the winter.
Nitrogen contains substances such as: urea, ammonium nitrate, calcium nitrate, sodium nitrate. To fertilize garlic, you need half as much nitrogenous substances as phosphorus and potassium substances. If there is no organic matter on the site, ready-made mineral fertilizer complexes are used.
For autumn planting of garlic, acidic soil must be moderately treated with lime, which will reduce the acidity level. This is done like this: dry, finely ground quicklime is scattered over the surface of the bed so that the soil is lightly dusted with white powder. Wood ash can also serve as a fighter against excessive soil acidity, as well as a supplier of potassium. For 1 sq. m of beds, scatter approximately 1/3 of a ten-liter bucket of wood ash.
One of the important minerals for growing garlic is potassium. It helps to grow large garlic bulbs. If it is necessary to grow commercial products, potassium is added to the soil and large garlic heads are obtained.
Did you know? The fear of garlic is called alliumphobia, people experience fear or anxiety when they smell garlic. Symptoms of alliumphobia include sweating, feelings of doom or fear, dizziness, anxiety, fast and irregular heartbeat, and feelings of irrational anger.
Using green manure
You can also use green manure, which gardeners also call “green manure.” The beds are sown with green manure immediately after harvesting the early crop preceding garlic, such as radishes, early white or Chinese cabbage, onions, and dill.
Typically, sowing of green manure occurs in early or mid-August. Before sowing the green manure crop, the bed is dug up and the soil is leveled with a rake. After that, green manure seeds are sown scattered across the soil surface. In order to plant small seeds in the soil, the bed is once again “combed” with a rake in different directions. After sowing, green manure is watered. You can water the crops using a garden watering can or hose, the main thing is that the nozzle has a spray nozzle with small holes. This will prevent the powerful water jet from driving small seeds into the soil to a depth from which it will be difficult for the plant to germinate.
In warm weather (+20...+25 °C), the seeds will hatch within 7-10 days. The soil under young plants should always be slightly moist, so in the absence of rain, it is necessary to water the seedlings every 3-4 days. Green manures are plants that quickly gain leaf mass, so in 30-45 days they will grow and be ready to be planted in the soil.
Did you know? Garlic contains a high concentration of volatile sulfur compounds, which, although beneficial to human health, have the side effect of bad breath.
Green manure crops:
- peas;
- oats;
- buckwheat;
- sorghum;
- clover and many others.
It is better to choose a crop suitable for the climate zone in which it will be grown. Green manure is sown in spring, summer and autumn. If green manure will be used over large areas, then before sowing it, it is necessary to clear the soil of weeds. On large farms, they do without chemical destruction of weeds, but periodically mow down weeds, preventing the formation of seeds.
Planting garlic
We form beds on a previously developed area. To do this, use a stick to make shallow holes (10 - 15 cm) at a distance of 20 cm from each other. The base of the recesses is covered with coarse sand (2-3 cm) to protect the cloves from rotting.
Planting garlic cloves
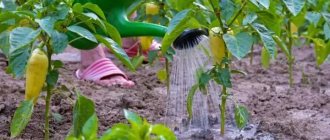
Place the garlic cloves ready for planting perpendicularly into the holes, bottom down. Teeth placed incorrectly may not emerge; it is also not recommended to press them in, so as not to disrupt the formation of roots. Then the holes are filled with compost, the soil is leveled and mulched. In dry autumn, garlic should be watered every 4-6 days.
Planting garlic bulbs
Constantly planting garlic with cloves causes it to age and increase various diseases. Therefore, from time to time the plant needs to be rejuvenated. This can be done using bulbs. For this purpose, several mature inflorescences are left, which are cut off along with the stem and stored in a dark place.
The bulbs are planted to a depth of 2 cm and a distance between them of 2-4 cm, and the gap between the rows is 10 - 20 cm. In the first year, the bulb will grow into a single-toothed bulb, which, after drying, is planted again in the ground in the fall. The head with teeth will appear in the second year.
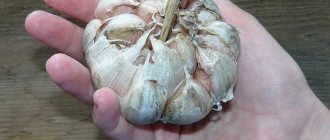
Planting garlic heads
There is another method of planting winter garlic - with heads.
This method is useful when you need to save sown area and simplify crop care. From such a garlic “bush” you can get up to 7 heads of this vegetable.
For planting, use the largest heads, which, just before sowing, should be soaked for 15 minutes in a salt solution (3 tablespoons of salt per bucket), and then rinsed with water. It is advisable to add a little humus to each hole. The bulbs are planted to a depth of 15 cm, at a distance of 20-30 cm from one another. After planting, garlic needs abundant watering (once every 5 days).
Features of planting in autumn step by step instructions
The basic steps for planting garlic are relatively simple. Most gardeners prefer to first properly prepare the site:
- Choose a place where there will be enough light. Preferably not in lowlands and not after harvesting onions, garlic, and potatoes.
- 1-1.5 months before planting (August, early September) add fertilizer.
- The area is dug up to a depth of 20-30 cm. Garbage and debris are removed from the ground.
- The soil is leveled and watered periodically (if it rains, there is no need to water).
Next, the garlic itself is prepared and planted:
- Before planting, the bulbs are disassembled, collected and sorted according to the size of suitable cloves for planting.
- You can soak the cloves for 10-30 minutes in solutions: potassium permanganate, copper sulfate, salt or purchased fungicidal agents.
- Holes or grooves are prepared on the site. Between the rows you need to maintain about 30 cm. Between the cloves on the beds - up to 10 cm.
- The cloves are carefully manually planted with the bottom down. It is important to maintain approximately a planting depth of 10-12 cm under the top layer of soil.
- The beds are filled and watered.
- From above, the area is mulched with straw, tops or leaves until spring.
Planting garlic cloves
Caring for winter plantings
Winter garlic is an unpretentious frost-resistant plant, but still, for its good growth, several conditions must be met. The main requirements for this plant are loose soil and moisture retention in the soil.
Mulching is a mandatory activity that must be carried out after planting garlic sown in the fall. It serves as a good remedy against soil cracking, perfectly retains moisture, prevents freezing, and also retards the growth of weeds. Cover the bed with various organic materials to a depth of 5-10 cm. As soon as the snow melts and the first warming arrives, you need to remove most of it, leaving a 2 cm layer of mulch.
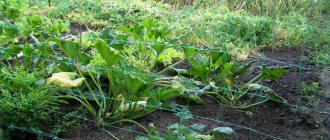
After the first garlic shoots appear, you need to start loosening the soil. In small areas, a rake is used for this. The depth of loosening should not exceed 5 cm, so as not to damage the root system of the plant, which is located very close to the surface of the earth. Such actions will help optimize the air regime and preserve ground moisture.
When the first greenery appears and in early July, you need to fertilize the soil with nitrogen fertilizers. When the garlic begins to throw out arrows, they will need to be broken off so that they do not take away the strength from the bulb. Watering in the first half of the growing season should be rich, and in subsequent periods – moderate. After irrigation, the soil must be loosened and all weeds removed.
Shortly before harvesting the garlic, during weeding you need to move the soil away from the plant so that it does not interfere with the sun's rays. This will help the vegetable ripen quickly and efficiently.
How to choose planting depth
An important issue lies in choosing the optimal planting depth for garlic cloves. There are several simple rules.
- Planting material should be planted strictly with the bottom down.
- Before planting, you should prepare the beds or holes. Their depth should be 10-12 cm. Between rows it is necessary to maintain approximately 30 cm, and between each clove - about 10 cm.
- It is advisable to shed the beds with water before planting garlic, or even better, with a one percent solution of copper sulfate or phytospirin.
- The cloves are carefully sunk into the ground, after which they are sprinkled with earth, and the area is leveled with a rake or harrow.
ADVICE . The optimal depth for planting garlic is also usually calculated based on the size of most cloves. For example, experienced gardeners have noticed that you can calculate the depth of the bed by adding 5 cm to the size of the clove. Or multiply the length of the clove by 3.
It is important to plant by hand so as not to damage the protective layer of the garlic cloves. In no case should you plant bare cloves without husks, as they will not be able to effectively withstand cold weather and the development of diseases.
In fact, a lot really depends on the correctly chosen planting depth. Garlic buried too deeply may not germinate and rot in the ground, not yielding any harvest. Also, you should not press the cloves, as in dense soil it will be difficult for them to take root (and for this the crop does not have much time before frost). On the other hand, garlic planted close to the surface can easily beat frost.
Sheltering garlic for the winter
How to cover garlic for the winter
After planting garlic in the fall, you definitely need to worry about covering it. There are many materials suitable for insulating beds:
- Sawdust. This is one of the optimal protective agents that provides high thermal insulation and moisture retention. But when wet, they impede the passage of air and increase the acidity of the soil.
- Plant stems without seeds or inflorescences. They serve as a good snow retention agent and maintain the level of moisture in the soil. But mold may form, which can lead to illness.
- Peat. Excellent protection from severe frosts, moisture resistant, retains heat well. The disadvantages of peat are the ability to increase the acidity of the soil and the formation of a crust during frequent thaws.
- Snow is a good helper in growing a good harvest, so if the beds are not heavily covered, it needs to be heated up. During snowless winters, garlic should be covered with polyethylene or roofing felt.
In spring, all types of shelters must be removed from the garden bed so as not to interfere with the growth and development of seedlings.
Growing winter garlic is an interesting and uncomplicated process. Timely planting, a suitable place, proper care, regardless of the chosen technology, will help any gardener create optimal conditions for a given crop and get a high-quality and rich harvest.
What kind of soil is needed?
Ideal soil for garlic:
- loose (well permeable to air and moisture);
- with neutral acidity;
- quite fertile.
Based on this, it can be argued that garlic feels good in black soil or loamy soils. If the soil is heavy, then it is better to add river sand and peat to the holes. Garlic will also grow in sandy soil, but you will have to water and feed it more often.
But it is better not to use soils that are too acidic or alkaline for planting garlic.
Garlic needs loose, fertile soil.