Planting fruit and berry bushes always depends on the goals, climatic conditions in the region and the age of the plant. For currants, planting is carried out in autumn or spring.
The autumn method is considered the golden mean among gardeners. This allows the bush to adapt to the soil and prepare for wintering. In autumn, the risk of pest infection is significantly reduced, and the plant takes root more quickly. Planting currants before wintering is suitable for both southern and northern regions, while spring planting may result in frozen roots in cold areas. From the article you will learn how to properly plant a currant bush in the fall, the basic technologies of this process.
Autumn timing for planting a currant bush to give a good harvest
There are no exact dates for planting currant seedlings in the autumn. First of all, you need to focus on the climate in the region and the specifics of a particular season. In the northern regions of Russia with early frosts (Ural, Siberia and Murmansk region), currants should be planted from the second half of August. In the south of the country, planting can be postponed until the first ten days of October.
For the middle zone, the second half of September is considered the optimal planting time.
Currant rooting occurs within 15-25 days, depending on the type and variety. It is recommended to plan planting approximately 3 weeks before the first frost.
Disembarkation dates
Planting crops in pots or containers (with ZKS) can begin almost from the very first days of autumn, regardless of the region of the country. This is especially true for areas with harsh winters - the sooner a summer resident plants seedlings, the faster they will take root well and withstand low temperatures without problems.
The situation is similar with planting in the southern regions, especially in the context of global warming and a changing climate. Now in these areas of the country it is still quite hot throughout September and planting bare-root currants is quite risky. But when choosing seedlings with ZKS, you can safely plant it from the first days of September. An important condition for the successful establishment of a crop is regular, abundant watering for the first two weeks as the soil dries out.
The situation is slightly different with dug seedlings or with OKS. Work with them begins only after moderate daytime temperatures have established. In hot weather, there is simply no point in planting currants - there will be a large loss of seedlings. For example, in the Moscow region and in the central zone it is planted at the end of September - beginning of October, in Siberia, the Urals and other cold regions - from the beginning of September. But in the conditions of the South - only from the beginning of October.
Planting currant bushes in the fall should be done no later than three weeks before the onset of stable sub-zero temperatures. The survival period of black currants in a new place is 15-20 days, and white and red currants are slightly longer - up to 25. Correct planting times will help the young plant to withstand the stress of replanting, adapt well to the soil and be fully prepared for wintering.
When is it better to plant currants in spring or autumn?
For northern regions, with the early onset of severe frosts, it is advisable to plant in the spring, after the soil has thawed and the threat of severe frosts has passed.
But for the southern regions the opposite is true. In spring there are often temperature swings; cold weather can suddenly give way to heat, which can have a detrimental effect on the survival rate of planted plants with an open root system. Gardeners should remember that in most cases, autumn planting of currants (red, white, black, golden) will be much more correct than spring planting.
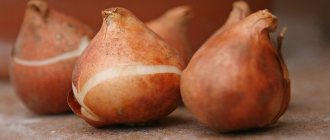
Seedling
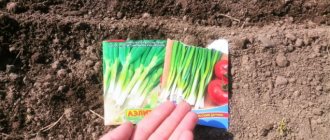
Not only the future productivity of the currant bush, but also its health, speed and development depend on the quality of planting material. Seedlings can be purchased at a nursery or prepared yourself; both methods have their advantages and disadvantages. Signs of good currant planting material:
- It is advisable to choose only two-year-old seedlings, so that the harvest can be obtained the next season;
- the root must have at least three branches;
- there are from 3 trunk buds of growth or shoot;
- The fibrous system is developed, there are no deformations or damage, small roots are formed in the form of a bundle.
When choosing, you should pay attention to the condition of the bark. It should be uniform in color, without visible cracks or signs of rotting.
How to choose a purchased one
You need to purchase black and red currant seedlings only in specialized stores or nurseries. This will protect you from purchasing low-quality planting material of an unknown variety and type. You should buy two-year-old cuttings of Gross currant and other varieties that acclimatize faster and produce new shoots. The root system must be developed by at least 15 cm; if this part is covered with film or cardboard, it must be removed. The roots should be slightly damp and treated.
Pay attention to the branches. It is advisable to choose a seedling with smooth and flexible shoots up to 40 cm long. They should have 3 or more buds without pronounced swelling. The bark along the entire length of a healthy plant is brown without any dents or deformations.
If you slightly cut the top layer of bark, you will notice a smooth lower layer of green color. It should smell pleasantly like fresh currants.
How to prepare yourself
If you decide to prepare cuttings yourself, then you need to start harvesting them 1-2 weeks after harvesting.
The main (basal) shoots or annual branches coming from the main bush are suitable for this purpose. The length of the cutting should be from 15 to 20 cm, width - from 7 mm. You only need to cut the shoots with a sharp knife or pruning shears, 1.5-2 cm above the bud, since it is in the internodes that roots form. Cuttings prepared independently should be immersed in water with a growth stimulator for 1 week. Its temperature should be 18-20°C, and the water should be changed at least twice during the entire rooting period. However, some gardeners prefer to use moistened sawdust or moss; when choosing this technology, a growth stimulator is not used. This material will tell you about the characteristics of the Malbec grape variety.
Soil preparation
Before planting, you need to plan and clean the area. They rake up all the debris, fill up all the holes and level out any uneven areas.
To increase soil fertility, rotted manure is scattered over its surface in a layer of up to 5 cm. It is advisable to use cow manure, but you can use sheep or chicken manure; they will be more concentrated and have a high nitrogen content.
This factor must be taken into account, otherwise you can burn the roots. After the humus is scattered over the area, the soil is dug up using a shovel or plowed using a walk-behind tractor or mini-tractor. Afterwards, planting holes are prepared, approximately 50x50 cm in size, up to 40 cm deep. Approximately a bucket of fertile soil, peat, compost or the same humus is poured into each of them. Granulated mineral fertilizers are also added:
- Superphosphate (150-200 g);
- Nitroamaphoska (20-30 g, about a tablespoon);
- Potassium chloride – (20-25 g).
When planting in early autumn, when the soil is still quite warm, it is important to treat the seedlings with preparations to protect them from soil pests. To do this, plants in pots are shed with a solution of insecticides Aktara, Nurell D, Antikhrushch, Konfidor. For dug seedlings, soak the root system in the same solution overnight.
I thoroughly mix all the ingredients (peat, humus, fertilizers) with garden soil. Before planting seedlings with ACS, they are inspected, cutting off all dried, broken or rotten roots to healthy tissue. Many experienced gardeners soak the root system overnight in a solution of a fungicide and growth stimulator, for example, they take the drugs Fundazol and Radifarm.
This allows you to avoid the development of various diseases, speeds up the establishment of bushes in a new place and contributes to a better wintering. After planting, the remaining solution is watered at the roots of the bushes. When choosing plants with ZKS, pour a similar solution onto the soil in containers or pots and let them stand for a while. Then a small earthen mound is poured at the bottom of the planting hole, on which the roots of the seedling are straightened, and then it is covered with soil, compacting it lightly.
It is important to plant currants at an angle, the angle should be about 45 degrees. It is also necessary to deepen the plant 8-10 cm into the soil. Such agricultural practices contribute to the active growth of new shoots and the development of a powerful root system. Then all branches are cut off, leaving only 2-3 buds above the ground. Pruning will stimulate the regrowth of numerous young shoots in the spring.
After planting, it is advisable to mulch the root zone with mown grass, straw, green manure (green manure), or just weeds without seeds. The layer should be at least 10 cm. Mulch will help the root system to better survive winter frosts. Mulch, gradually rotting, improves the structure of the soil. Humus or peat can be used as mulching material.
Then the planted bushes are shed generously with water (about a bucket per plant). If the weather is dry and not rainy, you need to ensure that the soil is regularly moistened as it dries out. After 10 days, you can fertilize the roots with complex mineral fertilizer.
Immediately before frost, the bushes are hilled, raising the soil to a height of 15 cm. It is important in the spring, with the onset of stable warm days, to rake away all the mulch from the root zone of the plant, allowing the sun's rays to begin to warm the soil. If this is not done, then the currant may lag behind in development.
How to choose the right landing site
Currants prefer well-lit areas located on a gentle slope or small hill. Some varieties tolerate darkening well, so the shrub can be placed under the crown of a large tree. Currants can be planted next to a fence or other structure, but the distance from it should be at least 1 m. When planting next to other large plants, it is advisable to maintain an interval of 2 m in order to create optimal conditions for the development of roots, as well as for the convenience of subsequent construction of supports for the bush.
It is undesirable to plant currants in close proximity to any type of body of water, which leads to constant wetting of the roots and their rotting.
Good soil
All types of currants are recommended to be planted in areas where the soil has a slightly acidic or neutral acidity level.
If the substrate is acidic, then during planting 100-150 grams should be added to the planting hole. ground limestone or chalk. Fertile black soil is best suited for this crop, but loamy areas can also be chosen. The soil must retain moisture and have good aeration to avoid root diseases. Read about the Pinot Noir grape variety here.
What can't you sit next to?
It is not recommended to plant currants in the place where gooseberries or other types of currants previously grew. They release a toxin that is dangerous to the crop into the soil, reducing yield and growth rates. It is undesirable to plant shrubs in an area where moss or horsetail grows, which are a signal of increased soil acidity.
If you are planning to create a fruit and berry zone on your plot, then you need to carefully select crops. It should be remembered that black and red currants do not get along well with each other, and also react poorly to proximity with sea buckthorn, cherries, raspberries and blackberries.
You should not plant currant bushes next to Jerusalem artichoke or horseradish, which tend to grow very quickly, occupying the entire free area of the site.
What can you plant with?
There are a large number of cultivated plants that have a positive effect on the growth and yield of currants. Honeysuckle and homemade hops are considered the best neighbors in the area. You can also place a plum in close proximity to currants. And onions and garlic, planted nearby, can reduce the likelihood of infection by certain harmful insects, such as bud mites or spider mites. Read about the Chinese Snake cucumber variety here.
Selecting a location
This culture loves to grow in moist, nutritious soils. But the landing location also directly depends on the region. In the context of global warming, the climate has begun to change dramatically, which brings its own characteristics to agriculture.
For example, not so long ago in the southern regions, gardeners calmly grew currants in the open sun, but now, in such conditions, the crop simply burns, yielding virtually no harvest. Therefore, when choosing a place for planting in regions where it is very hot in summer, you need to take into account the weather factor.
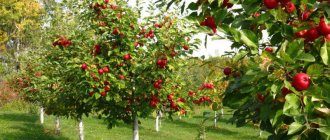
Many gardeners in these areas place a shade net over the bushes after planting, which effectively protects the plants from the scorching sun. It is advisable to plant currants in the shade of trees, taking into account the compatibility of these plants. For example, black currant feels great under an apple tree. Often gardeners plant it along the fence, providing the plant with shade for half a day.
The situation is different in more northern regions. Here, on the contrary, it is advisable to provide the plant with more sun, since in strong shade and cool weather the berries may not absorb enough sugar. The site must be protected from strong winds; it can be either flat or gently sloping. The place where planting is planned should not be swampy, and groundwater should not come close to the surface.
Red currants can be planted in sunny areas; they tolerate intense solar radiation and drought better than black ones. In addition, before planting, you need to check the composition of the soil. Saline, waterlogged, too acidic or gravelly soils are not suitable.
Landing
If you are planning to grow currants in your garden, it is important not only to know in which month to carry out the work, but how to plant this crop correctly. All the main points of autumn planting of seedlings are described below.
Pit preparation
Before planting currants, you need to first prepare the area. It is advisable to start work 2-3 weeks before planting the bushes, but if vegetables or flowers were previously grown in this place, less additional preparation is required. Site preparation algorithm:
- The selected location must be cleared of stones and weeds and dug to the depth of a spade bayonet.
- It is advisable to break up all hard clods of earth, remove weeds and remnants of plant roots.
- For planting, dig a hole or trench if you plan to plant several bushes. The recommended depth is 40 cm and the width is 50 cm. For convenience, the soil can be sorted during digging to separate the fertile layer from the turf.
- Fertilizers are placed at the bottom of the planting hole. It is advisable to combine organic and mineral compounds. For example, a mixture of 200 gr. mullein, 200 gr. nitrogen and potassium fertilizers, 200 gr. superphosphate. Additionally, it is recommended to add 100-150 g. wood ash.
- Top dressing should be covered with a 10 cm thick layer of soil, which is necessary to protect the roots from the effects of chemicals.
- 2-3 days before planting, the area should be watered generously with rain or settled water.
If you grew vegetables or ornamental crops on the site, then less fertilizer is required. As a rule, fertilizing is carried out throughout the season, so the soil is already saturated with all useful minerals. But it is still recommended to use organic matter regardless of crop rotation.
If any species of the legume family grew on the site before currants, then the amount of nitrogen fertilizers should be halved, since the nodules of these plants already saturate the soil with nitrogen compounds.
At what distance to plant
When choosing how to plant currants, you need to take into account the type of planting and plant variety. When standard planting, shrubs can be planted at intervals of up to 1 meter, which allows you to increase the volume of harvest from one plot. When growing crops using bush or trellis technology, it is advisable to maintain a distance between plants of 1.5 m.
The optimal row spacing is from 1.5 to 2 m. This is convenient for caring for currants and allows direct access to each plant. Adam will tell you about the variety of cucumbers in this link.
Planting methods and step-by-step instructions
Several methods of planting red varieties, as well as black ones, by cuttings in open ground are widely practiced among gardeners. The most commonly used method is the traditional one, suitable for most berry bushes. Step-by-step algorithm:
- A currant seedling is deepened into a previously prepared and fertilized hole at an acute angle towards the south. The root collar should be 5-7 cm in the hole.
- The hole must be filled with soil gradually, moistening and compacting each layer. After all the soil has been laid, the plant needs to be watered abundantly over the entire diameter of the root area.
- The soil around the seedling is mulched with a layer of sawdust or compost up to 15 cm thick, leaving the area near the root collar open.
- After planting, you need to prune the seedling, leaving 3-4 growth buds.
The second method is suitable for growing currants in lowlands. To do this, you need to cut off the top layer of turf with a diameter of 50-60 cm. The soil inside the hole must be carefully dug up, adding all the necessary fertilizers and fertilizing. After this, water is poured into the hole and the seedling is planted in it. Then the seedling is covered with the removed turf and the area next to the plant is mulched.
Among gardeners, this technology is called “bush in a flowerbed”; it is suitable for small plantings in a limited area.
What to do with currants after planting: care rules in autumn
So, you have planted a berry seedling in a permanent place in the garden, but what to do with it next? The young shrub does not need any large-scale work during this period; caring for it at this stage is quite simple.
Basic rules for caring for young currants after planting in open ground in the fall:
- Watering. As mentioned above, it must be done as a finishing touch. Without life-giving moisture, the plant will not be able to take root, the soil will not compact properly, and the necessary contact between the roots and the soil will not occur. It is necessary to add 3-4 buckets of water (approximately 30-40 liters) under one bush.
- Mulching. This manipulation must be carried out after all the water has been completely absorbed. Peat, humus, and compost can be used as mulch. Mulching performs 2 important functions: it slows down the evaporation of moisture and protects the root system from frost in winter. The thickness of the mulch is about 7-10 centimeters.
- Trimming. This care procedure is very important after planting currants in the fall; it helps to balance the forces between the above-ground and underground parts of the bush. Currant shoots should be trimmed in such a way that only 2-4 buds remain on each shoot (that is, there should be 10-15 cm left somewhere from the surface of the ground). The pruning pattern after planting is shown in the photo above.
Knowing the secrets and tricks of planting garden currants, you can complete this procedure without any problems. Even a novice summer resident and gardener can cope with the task. After you plant a shrub, you need to take good care of it and wait for a tasty harvest. By the way, it begins to bear fruit 2-3 years after planting with proper care.
Seedling care
If the technology for planting the best varieties for the Urals, as well as for other regions, is followed, the plant requires virtually no care until the start of the next season. To ensure a comfortable wintering for the plant, you need to carry out several simple procedures:
- mulch the tree trunk circle, which serves as additional insulation of the roots and protection against the growth of weeds;
- cover the top of the hole with a thin layer of sand to avoid the appearance of a dry crust on the top layer of soil;
- if autumn is dry and sunny, you need to regularly water with warm water at the rate of 10 liters per plant;
- Before the onset of frost, the tree trunk circle should be properly hilled, mulch should be added, and the seedling should be covered with agrofibre or straw.
Most European varieties of currants have high winter hardiness, so only a little shelter for the winter is enough. When growing shrubs in cold areas, protecting the plant from frost is a must.
Additional information on disembarkation
Currant seedlings rarely exceed 50 cm in height and width. The correct interval between them will allow you to get maximum yield and avoid problems with planting density. The shrub actively branches and grows to the sides, so stick to this pattern:
- the step between the holes is at least 1.5 m (the norm is 2 m);
- distance between rows - 2 m or more;
- the distance from the wall or fence is at least 1 m.
If you plan to plant not only currants in the berry corner of the plot, take into account the requirements for the proximity of the bush to other crops. It is not advisable to place next to currants:
- Gooseberry. The reason is due to close family ties and the ensuing list of identical diseases. If the gooseberry is infected with aphids or covered with powdery mildew, expect the same ailments on the neighboring currants. But in other aspects the cultures do not interfere with each other.
- Raspberries and blackberries. These shrubs are invasive underground. They also shield the currants from light with tall shoots.
- Walnut, apricot - due to the wide spread of roots.
- Plum, cherry, cherry plum. They produce a lot of shoots and thicken the area with currants.
Common mistakes when landing
Currants are considered one of the most common berry crops in the garden. Despite this, novice gardeners make a number of mistakes, which directly affects the quality and volume of the harvest. The main ones:
- planting cuttings in a darkened area, which leads to the formation of small and sour berries;
- using a seedling that is too short or long. The optimal length is 20 cm, which is enough for rooting and the formation of new shoots;
- planting seedlings at high elevations, where exposure to wind and direct sunlight increases;
- choosing a variety that is not intended for a specific region. To purchase high-quality planting material, you need to carefully read the instructions on the packaging, read reviews from experienced gardeners and check the zoning.
In addition, it is important to remember that some currant varieties require pollination to set fruit. To avoid this troublesome procedure, you should select only self-fertile plant varieties. Read about growing cucumbers on a windowsill in winter in this article.
Recommendations for beginning gardeners
You can achieve high yields and large, aromatic currant berries by following the recommendations and tips below:
- To increase the yield on your personal plot, you should plant several types of black currants at once, with different flowering and fruiting periods.
- Give the shrubs a so-called “spacious living space”, that is, plant currant bushes no closer than 1 meter from each other.
- Feed the plant with a special mixture based on starch.
- Carry out regular watering.
- Take care of the health of the bushes - remove the affected plants and all its parts, and treat the plant, especially after wintering, with hot water from a watering can.
conclusions
- Planting currants in the fall allows you to speed up the rooting process and get a harvest in a shorter time.
- The choice of planting date depends on the climate in the region. In the south, seedlings are planted until October; in the north, it is better to plan planting for the second half of August.
- Planting material can be purchased at a nursery or prepared independently. It is recommended to use only two-year-old seedlings without diseases or mechanical damage.
- It is recommended to plant currants in a well-lit area away from a pond. Crop rotation should be observed and plants for the garden should be carefully selected.
- After planting, it is necessary to mulch the root area, treat the bush from pests and diseases with soda or other preparations, and provide shelter for the winter.
When is it better to plant currants - in autumn or spring?
There is a widespread belief that it doesn’t matter when to plant currants , even in the middle of summer. Like, she is tenacious, and she will still take root. Most likely, it will take root, but you shouldn’t expect a good harvest from something planted anyhow. There is also an opinion that currants are not at all demanding in terms of the composition and structure of soils and weather conditions. There is, of course, a variety called Golden. It really grows everywhere and takes root wonderfully, whether in spring or autumn. In Kazakhstan it is grown for its berries, and in Russia it is planted as an ornamental shrub.
And planting black, red or white currants on time, and choose the most suitable place for this. Then they will be pleased with the harvest earlier, and the berries will be larger and sweeter.
Acceptable times for planting are both autumn and spring. The choice, of course, is entirely up to you. But keep in mind that bushes planted in autumn take root more easily, and you can taste the first berries as early as next year.
Planting in spring
If your region has little snow and severe frosts, then, of course, it would be better to leave planting until spring. But keep in mind that the time period for spring planting is too short, and it is very important not to miss it. Currants are planted in April, immediately after the snow melts.
On a note! At this point, the soil should thaw at least 20 centimeters. At the same time, it is undesirable to wait until the buds begin to bloom... ✍
Autumn planting: Pros and benefits
In autumn the favorable period of time is much longer than in spring. Currants planted in the fall will not have to spend their time and energy in the spring getting used to new conditions and growing the root system. Also, plants planted in autumn are less susceptible to disease and pest damage.
- Blackcurrant tolerates frosts down to -40C.
- Red and white - even down to -42C.
But here we are talking about mature bushes. For the winter, new seedlings are covered or sprinkled with fifteen to twenty cm of soil, and dug up in the spring.
If you plant currant seedlings in the fall , they will delight you with an abundance of berries already in the second year. Already in the summer, the first brushes appear on it, and after another year you can reap a very decent harvest from such a bush. Well, with spring planting, more or less decent fruiting will begin only in the 3rd year.
Optimal conditions
If you are interested in planting currants in the fall , then most likely you have wondered when and how to plant them . Determining the most suitable time for planting is easy, based on a simple rule. It is necessary to calculate the time so that there are at least 3 weeks left before stable frosts. Too early is also not a good idea. In this case, shoots will begin to grow, which will negatively affect winter hardiness.
Interesting on the topic: Preparing apple trees for winter in the fall: care, pruning, feeding, processing
How to properly trim and shorten stems
In order for the bushes to grow healthy, this procedure must be performed regularly.
The bushes are pruned for the first time in the second year after planting, after which old, fruit-bearing shoots are removed once a year or once every two years.
Spring pruning
In spring, the stems are not only cut, they are tied to a support. Branches tied to trellises will be well illuminated by the sun and blown by the wind, which means the berries will be juicy, sweet and large.
At the same time, the gardener evaluates how his blackberries overwintered - whether there are many dry, broken or frozen vines, and a set of measures is planned to save diseased plants. Warmed by the first rays of the sun, healthy blackberries are elastic, have a characteristic shine, and their color is brown. Frozen wood is easy to distinguish by color - it is black, friable, rough and fragile, the buds on it have dried out. Even if there are 2-3 branches left in the bush, there is no reason to panic; with good care, the berries will be sweet and large.
Sometimes, especially in areas with cold winters, the buds freeze a meter above the ground. Therefore, a shoot length of 1.5-1.8 m is not considered optimal; the maximum impact in winter will occur precisely in the fruiting zone, and if it suffers, then there can be no talk of a harvest. That is why very often the stem above the first formed bud is cut off. If something threatens the bush, then the stems can be shortened to the maximum, the most important thing is that you can tie them up.
At the same time as pruning, last year's foliage is removed from the branches. The fact is that before the start of winter, the blackberry does not have time to shed all its leaves; some of them remain. If they are not removed in time, they will fall off on their own. Plantings must be thoroughly cleared of last year's leaves. Fallen overwintered foliage is an excellent environment for the life of pathogenic microorganisms, fungal spores, pests, etc.
The timing of pruning is different in each area. In the southern regions, pruning begins earlier. In temperate latitudes, full normalization of the shoots of this crop begins when the threat of severe frosts has passed, and is completed in May-June. Young shoots are shortened to 8-10 cm, which means that secondary shoots will dominate. They cannot be called strong and strong, but you need to understand that in this situation the main thing is that they are healthy, not affected by infection, and therefore have strong immunity.
By the end of the growing season, the length of secondary shoots reaches 2 m. Do not rush to shorten them; in the fall they will need to be bent to the ground and insulated by the beginning of cold weather. Next year you will point them to a support and tie them up. This care will ensure the berries quickly ripen and have good taste.
Autumn pruning
After the harvest is harvested, the first autumn pruning is carried out. Branches that bear fruit are cut to the ground; it is better not to leave stumps, they will cause a lot of trouble next year. In addition, the purulent processes that occur in them can threaten the health of the entire area.
If there are lashes that have not matured, you can also say goodbye to them; they will not survive the winter. We are talking about too thin, short, pale shoots. The same is done with branches that show signs of the presence of insect pests - aphids or spider mites. Healthy young vines are shortened by ¼; in the spring they will delight you with excellent flowering. For the winter, no more than 8-10 shoots can be left in one bush, even if some of the branches are damaged, the remaining ones will be quite enough.
Stems that you consider promising will need to be shortened in the fall. They can be trimmed to 1.5-1.8 m.
After the pruning is completed, the vines need to be rolled up, folded like a grapevine and prepared for wintering. But this does not apply to all varieties. It is generally accepted that the immunity of upright growing varieties allows them to overwinter well, but there is no point in experimenting; winter shelter will not hurt them.
There are quite a few supporters of autumn pruning. They believe that if you shorten the tops, lateral branching will increase, and if representatives of upright growing species grow on your site, then this will be a big plus for them. But there are also opponents of this agricultural technique; in their opinion, provoking the rapid growth of plants can lead to the opposite result. All energy will be spent on growth, while the culture should be preparing for sleep at this time. The result is freezing of the trunk, buds, or worse, the entire bush. This is why most farmers and amateur gardeners prefer to prune blackberries in the spring.