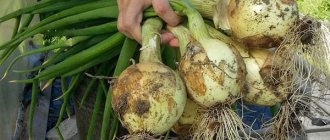
Pre-sowing seed preparation includes a number of activities that have one goal - to ensure a good harvest. Here are its main types: sorting, disinfection, hardening, soaking and germination, vernalization, bubbling, treatment with microelements and growth stimulants, panning (when growing onions, sets are prepared). Pre-sowing preparation is useful in that it gives vegetable seeds resistance in difficult environmental conditions, enhances their sowing qualities, increases germination and significantly increases productivity. In our article we will talk about hardening seeds before planting seedlings.
Methods for hardening seeds
Today, several methods of hardening seed material are known. Each summer resident chooses the one that is more convenient for him. Each method has its own advantages and disadvantages, but it is up to the gardener to make the choice.
Agrotechnical methods of hardening seed material:
- alternating high and low temperatures;
- freezing.
We recommend reading these articles:
Treating seeds with epin before sowing
Pruning raspberries in spring for beginners in pictures step by step
Pruning blackberries in spring for beginners in pictures step by step
List of events
All of the listed processing options cannot be considered strictly mandatory. Pre-sowing preparation of seeds is carried out in several stages, each of which is selected in accordance with the varietal characteristics of the crop. They can be combined, changed or skipped, leaving only those that are really necessary.
Preparation of seed material includes the following procedures:
- seed storage
- calibration (sorting);
- disinfection (disinfection);
- soaking in growth/root formation stimulants;
- bubbling (oxygen saturation);
- germination;
- hardening (vernalization);
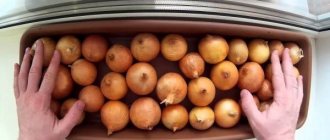
- panning (glazing);
- stratification;
- scarification.
When determining preparation methods, you should not carry out all the described options at once. They need to be combined or alternated, choosing only the most necessary for a particular crop.
Alternating temperatures when hardening seeds
To harden using this method, you should pour the grains into a gauze bag and place the contents in water. Tomatoes are soaked for about 10-12 hours, cucumbers - 5-6. After soaking, allow excess liquid to drain.
Well-swollen grains are placed in cold temperatures down to -1 degree. Seeds can be placed in the refrigerator for 15 hours. Next, the grains are kept at room temperature for 10 hours, but not higher than 19 degrees.
Hardening time alternating high and low temperatures is approximately 3 days. Seeds that have a low level of germination are hardened for a week.
If you plan to harden the tomato seed, for this crop it is possible to significantly reduce the temperature - down to -5 degrees. Watermelon, melon and pepper seeds are hardened to -3 degrees. The duration of this procedure is up to 2 weeks.
During the hardening period, it is necessary to monitor not only the temperature, but also the level of humidity in the room. Make sure that the grains are not affected by mold and mildew.
Which varieties require hardening
Hardening is carried out for tomatoes in both closed and open ground. It is especially important to harden seeds for owners of unheated greenhouses.
There is no clear list of tomato varieties that necessarily need hardening. But more than others, early-ripening varieties of tomatoes require hardening, which more often than others suffer from lower air temperatures.
- Aphrodite;
- Alpha;
- Explosion;
- Marisha;
- Parodist;
- Sanka;
- Valentina;
- Don Juan;
- Gina;
- Benito.
Cold-resistant varieties do not require pre-hardening. These include the Red Rooster, the Bullfinch, the First-Grade, the Lemon Giant, and Spiridonovsky.
There are also several cases in which it is highly desirable to prepare tomato seeds - low quality seed material, unknown origin or expired grains, rare or valuable growth.
Hardening of seed material is recommended if there are a small number of grains that must be germinated.
Hardening of pepper seeds
- There are gardeners who are confident that before sowing seeds into the soil, they must be hardened. To harden them, you need to place the swollen seeds in a place with an air temperature of minus 1 degree. There is a more complex option for hardening seeds. To do this, they are kept warm for 10 days, and at night they are removed to a place with a temperature of minus 2 degrees.
- Hardened seeds tolerate sowing better. Such seedlings appear relatively quickly and are not afraid of sudden changes in temperature. After the hardening procedure, the seeds will be ready for sowing, but before that they should be dried.
- It is not at all necessary to go through all 5 stages when preparing seeds for sowing. So, there are summer residents who only disinfect the seeds, others do not harden them, and some do not soak them in a nutrient solution. However, in order for your seedlings to be healthy and strong, it is still better to prepare the seeds completely.
Recommendations
In order for hardening of tomato seeds to bring the expected result and help strengthen the tomato seeds, it must be carried out taking into account all the rules. Many beginning vegetable growers make a lot of mistakes, including overcooling grains and hardening seeds that are too old and dry.
Basic rules for hardening tomato seeds:
- Tomato seeds should remain slightly moist throughout the hardening period. They should not be allowed to dry out; from time to time it is advisable to spray the grains with a spray bottle.
- Seeds that are too old are not used for hardening. In this case, under the influence of cold, more than half of the seed material will lose the ability to germinate. The best option is considered to be grains whose age does not exceed 1-2 years.
- Before hardening the grains, inspect them carefully. It is necessary to immediately discard all darkened, too small and deformed seeds. Even after treatment they will not produce high-quality shoots.
- Only seeds that have swelled after soaking can be placed in a refrigerator or snowdrift for hardening.
- The preparation of seed material must be comprehensive. Before hardening, the grains need to be sorted, disinfected and soaked.
- When using store-bought tomato seeds, read the label carefully. Encrusted and drained grains do not require hardening or other treatments, since they have already been fully prepared for sowing by the manufacturer.
- If the weather is windy outside, it is better not to harden in a snowdrift, otherwise the tomato seeds will freeze and die under the influence of frost and wind.
- To prevent freezing of the seed material, it is advisable to gradually increase the holding time at low temperatures. This will help the grains adapt to the cold, ensure complete hardening and reduce the risk of death.
Hardening of tomato seeds before sowing is an important agrotechnical technique, which is the key to the high resistance of tomatoes to adverse weather conditions. Properly carried out hardening helps strengthen the immunity of seed material, reduce the risk of diseases and fungal infections, increase yield and improve the taste of fruits.
Hardening of tomato seeds
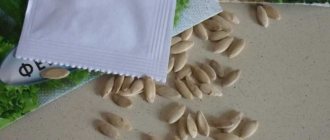
Preparation of tomato seeds for planting begins at the end of February or beginning of March, depending on what time the seedlings will be planted: plants can be planted in greenhouses and greenhouses earlier than in open ground. Preparing tomato seeds for planting involves first carefully sorting and sorting the seeds. Large, regularly shaped seeds are left for sowing, while small and crooked seeds can be safely thrown away, because it will still not be possible to get a good harvest from the plants grown from them. Some experts suggest sorting seeds in a saline solution, but when there are only 15-20 pieces in a package, this procedure becomes meaningless.
Next, the seeds need to be placed in small bags sewn from several layers of gauze (you can use old nylon tights) and attach a label with the name of the variety. This is done for a kind of selection and breeding of the highest quality and productive varieties. To disinfect the bags, place them in a saturated solution of potassium permanganate at the rate of 1 coffee spoon (without a slide) per 1 liter of water. After 15-20 minutes, the bags must be removed and rinsed under running water for 5 minutes.
The next step in preparing tomato seeds for planting is to germinate and harden them. To do this, a tray with sides or a baking sheet needs to be lined with 4-6 layers of fabric, possibly from old bed linen. Moisten the cloth with a solution of microfertilizers or another growth and root formation stimulator, for example sodium humate - 1 gram per 1 liter. Place the seeds on a cloth, marking where each variety is located, so as not to confuse them in the future, or better yet, write them down in a diary - it’s more reliable.
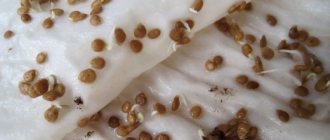
The fabric should be sufficiently damp, but so that the seeds do not flow along with the water when the tray is tilted and lie tightly on the fabric. The pallet is covered with a plastic bag and placed in a warm place with a temperature of plus 25-30 degrees. After a day, the tray should be placed on the bottom shelf of the refrigerator for 4 hours, and then again in a warm place for 20 hours. In order for the preparation of tomato seeds to be done according to all requirements, this procedure must be repeated three times. Then the seeds need to be kept in a warm place until they hatch, that is, for 3-5 days. At this stage, tomato seeds must be handled very carefully, since inept and rough handling can lead to damage to the root, and therefore destruction of the sprout.
As soon as the roots appear, the preparation of tomato seeds for planting ends and the sowing phase begins. If the seeds have already sprouted, but you can’t start planting, then place them in the refrigerator, where the sprouted seeds can last up to two weeks. But do not overdo it, as this procedure is extremely undesirable due to the negative impact of low temperature. Naturally, it is better to plant immediately after spitting the seeds. As you can see, the process is not that complicated, so each of you can easily get a couple of tens of kilograms of tomatoes on your plot!
We recommend reading these articles:
Germinating seeds on a sponge
Germinating pepper seeds on toilet paper
Treating seeds with boiling water before planting reviews
Sorting
The collected seeds from your garden must be sorted out before sowing. Only high-quality seeds are selected, the largest and healthiest, capable of producing good shoots, and spoiled and unsuitable ones are rejected.
Sorting can be done in two ways:
- manually, sorting and conducting a thorough inspection;
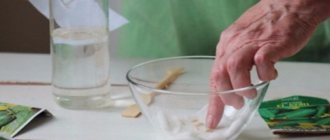
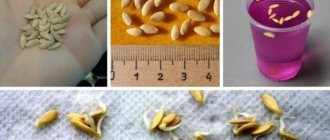
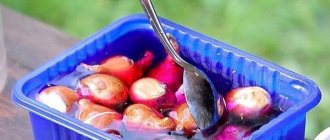
- to reject “empty” seeds, dip them in a solution of table salt (2-3 g per 100 ml of water) and mix. After 10 minutes, collect the seeds that float to the surface and discard. The remaining seeds must be washed in running water and dried.
To determine viable seeds, check the density of the seeds using a solution of table salt. By increasing the concentration of the solution, the densest seeds with good growth potential can be separated.
Saline solution for checking seed density
How to harden seedlings of various crops
We recommend reading these articles:
Germinating seeds on a sponge
Germinating pepper seeds on toilet paper
Treating seeds with boiling water before planting reviews
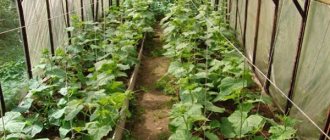
Crops such as tomatoes, cucumbers, eggplants and peppers are heat-loving plants and require increased attention. With a lack of lighting, they begin to quickly stretch upward. Therefore, as soon as the plants begin to grow after diving, the temperature should be immediately lowered to 14-15 C.
During the day, seedlings should be taken out onto the balcony or veranda, first for several hours, and in the evening brought into the room. The optimal temperature at this time is 18-20 C during the day, and 12-15 C at night. If the daytime temperature exceeds 20 degrees, then it’s time to open the windows and ventilate, avoiding drafts. If the night temperature does not drop below 8-12 C, then the windows do not need to be closed at all.
- Hardening of the root system is facilitated by reducing watering. 5-6 days before planting in open ground, the plants do not need to be watered at all. This contributes to better adaptation to lack of moisture in open ground;
- Cabbage and radishes (cruciferous), as well as annual flowers, are cold-resistant plants, and they need to be hardened at a temperature of 8-10 degrees;
- If the seedlings were purchased on the market, the seeds were purchased in bulk or collected independently, it is necessary to carry out the hardening procedure.
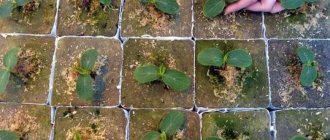
When the weather stabilizes, there is no threat of frost and the temperature at night stops dropping below 15 degrees Celsius, the seedlings can be taken to the dacha. It is better to place the plants under the canopy of trees so that the sunlight is more diffused, and cover them with agrofibre at night.
3-4 days before planting in a permanent place, they do not need to be covered. Hardened seedlings have a well-developed root system, the leaves are larger and dark green, and the stems are denser and more stable.
Draging
Dragging of seeds involves covering them with a nutrient mixture prepared from organic fertilizers and garden soil. All components are first dried, ground and sifted through a fine sieve.
It is recommended to add mineral fertilizers based on potassium and nitrogen to the mixture, as well as minerals that a particular crop needs. The following proportions are most often used (per 1 liter of coating mass):
- 2 g each of potassium sulfate, ammonium and potassium nitrate;
- 40 mg each of manganese sulfate and boric acid;
- 10 mg of copper sulfate;
- 300 mg ammonium molybdate;
- 200 mg of zinc sulfate.
To ensure that the mixture sticks to each seed, they are first placed in a jar and sprinkled with sugar syrup (0.5%) or starch paste (1%). To create an even coating, actively rotate the jar until the grains separate from each other. After this, they begin to pour in the nutrient mixture in small portions, without stopping rotation.
When the first layer is formed, spray it again with an adhesive substance and repeat the entire procedure until you get pellets with a diameter of 4 mm from small grains, 6 mm from medium ones and 10 mm from large ones. They are laid out in the shade to dry. You can sow immediately or leave until next season.
Sow pelleted seeds only in light soils, with optimal moisture (water the soil well before sowing), good air exchange and lighting. Under other conditions, the shell will either take too long to break down, or the sprouts will not have enough oxygen, which will lead to poor germination.
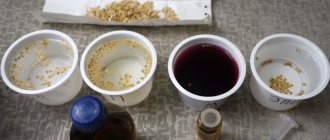
Express method of seed hardening
It is known that the best harvest comes from seeds several years after they are collected. But it is not always possible to accurately know their age. Seeds of unknown age or last year's are placed in fabric bags and placed on the battery. After three weeks, they will “age out,” meaning they will have the same characteristics as a two- or three-year-old. Fill them with hot water, the temperature of which is about 50 degrees, for two hours. Then they are placed in cold water for a couple of minutes and sent for germination.