Description of gladioli seeds
Gladiolus fruits have the appearance of a membranous box . Its upper part is slightly cracked. Inside the box there will always be winged type seeds. On average, their number reaches 250 pieces. The seed material of the gladiolus flower does not have physiological dormancy. Therefore, they can be planted immediately after collection. As a result, after a few weeks they will begin to germinate.
Important! It is necessary to store gladioli seeds in a room where there is a fairly high level of humidity. In a dry environment, seed material may lose the ability to germinate.
Most gardeners, even experienced ones, cannot answer the question of what gladioli seeds might look like. Every person knows the description of a flower bulb, but certain difficulties arise with the appearance of the seed material.
The main characteristics of seeds include:
- shape - flat;
- Brown color;
- size - about 2 mm.
How to remove an old bulb from a gladiolus
When it comes time to harvest gladioli, it is important to know how to remove the old bulb from a gladiolus and what to do with it. First of all, it is worth saying that the harvesting itself, together with the process of separating the corms, is carried out in dry weather
In gladiolus, the bulb is divided simply, but the process itself requires increased attention and caution. The chances that the root end has been cleared of soil without damage are good only in dry weather conditions
Otherwise, you need to shorten the roots and trim the stem. After which the bulb is washed and dried outside or in a well-ventilated room
The chances that the root end has been cleared of soil without damage are only good in dry weather conditions. Otherwise, you need to shorten the roots and trim the stem. After which the bulb is washed and dried outside or in a well-ventilated room.
After the children are separated, the old bulb is removed
When considering the question of how to separate the old bulb from gladioli, it is important to understand that you cannot rush into this. Many experienced gardeners who constantly deal with gladioli claim that earlier removal of the corm threatens the young one with an insufficient amount of important nutrients.
Vegetative propagation is important when the gardener's goal is to maximize crop persistence. Gladiolus will have a better chance of getting used to the conditions in your garden and developing quickly and unhindered if it was grown this way.
Growing from baby plants increases the chances of the plant growing efficiently and quickly in your climate.
Reproduction of gladioli by children (tuber buds)
The most reliable, but at the same time simplest way to propagate a flower you like is to collect tubers from it. Garden gladioli of any variety produce them in sufficient quantities after the end of the flowering period.
What it is?
Corms form the basis of bulbous plant species; it is from them that the growth and development of the future flower begins. Depending on the variety, a different number of children are formed on the mother bulb.
Sometimes you have to resort to stimulating this process by cutting off the peduncle just before the end of flowering.
Propagation of gladioli by tuber buds allows you to quickly propagate your favorite variety, as well as rejuvenate your own plantings.
Varieties of gladioli: photos, names and descriptions of flowers
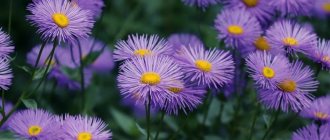
The most popular are tall hybrid varieties of gladioli with large flowers (11 cm or more in diameter). There are varieties of gladioli, which, depending on the shape of the flowers, are divided into butterfly and primrose. Butterfly-shaped gladioli look elegant. Their flowers are located close to each other, and their throat has an original color. The color range of gladioli is varied. They can be white, yellow, pink, black, all shades of red, as well as lilac-blue and many other transitional colors.
Primrose gladioli grow up to 60–80 cm. Their flowers are located on the stem at a distance from each other. The upper petal of flowers with a diameter of 8 cm hangs like a hood over the rest. Low hybrids (no more than 50 cm) with small flowers with a diameter of no more than 5 cm are similar to primrose gladioli.
Small-flowered forms include:
Cesan (this variety of gladiolus has light red flowers with a dark spot and a yellow pistil), Leviathan (cream flowers have a dark spot),
Focus (on bright yellow flowers there is a cherry spot), Bleriot (on light pink flowers there is a yellow spot with a dark red stroke),
Orchid Lailek (lilac-pink flowers have a cream spot and purple specks).
Medium-flowered gladioli are represented by the following varieties:
America (light pink flowers with a lilac spot), Arabian Knight (burgundy-crimson flowers),
Albit (white flowers with a greenish spot), Ilse (cream flowers with a yellow spot),
Polaris (white flowers), Rose van Lima (light pink flowers with white spots and strokes, as well as crimson specks),
Elegy (dark cherry flowers, velvety).
Among the large-flowered varieties of gladioli, the following are popular:
Amethyst (pink flowers with dark red spots and strokes), Velvet (dark burgundy flowers with cream strokes and strokes),
Berolina (red flowers with a creamy spot), Canada (flower includes purple and red-orange colors, with a red smear),
Don Quixote (dark cherry flowers, velvety), J. S. Bach (light red flowers, with a creamy spot),
Peacock's eye (lilac-crimson flowers, with a dark red spot and white strokes), Minerva (pink-orange flowers with a red stroke).
Here you can see photos of gladioli varieties, described above:
Plant care
After planting the bulbs, an equally important stage begins when growing varieties of gladioli in the photo and in reality. Proper care will ensure beautiful flowers in the flowerbed. The main technological methods for caring for gladioli bulbs are timely implementation:
- loosening and weeding;
- watering and fertilizing;
- culling of diseased plants;
- control of diseases and pests.
The land plot with gladioli should be free of weeds. This is explained by the fact that weeds:
- absorb the nutrients necessary for the normal growth of gladioli;
- prevent effective air access to the bulbs;
- lead to the emergence of diseases and pests.
Insufficient moisture causes poor root development and deformation of plant inflorescences. Flowers become especially sensitive to lack of moisture during the period when the second tier of the root system is formed and inflorescences appear.
Gladioli are watered with warm water to a depth of 25-30 cm. The watering rate is within 22-25 l/m². The watering process itself is carried out between the rows in pre-made furrows. Water should not get on the leaves.
After some time, the soil is loosened. This will prevent the formation of a crust, which is a barrier to air flow. Immediately you need to hill up the gladioli and re-create furrows for the next watering. It is recommended to loosen the soil not only after rain or watering. This procedure is carried out once every 10-12 days.
After the second leaf appears on the plants and until approximately the end of summer, mineral fertilizers are applied. And this is done:
- small doses;
- along with watering with a liquid solution.
Depending on the phases of the growing season, feeding gladioli is carried out as follows. When appearing:
- 2 sheets use ammonium nitrate or urea (up to 30 g/m²);
- 3-4 leaves – potassium sulfate (30 g/m²) and urea (25 g/m²);
- 5-6 leaves – potassium sulfate (30 g/m²) and urea (15 g/m²);
- flowers - superphosphate (40 g/m²), potassium sulfate (30 g/m²), urea (10 g/m²) and nitrophoska (30 g/m²).
The last feeding is carried out after the gladioli bloom. Superphosphate (40 g/m²) and potassium sulfate (30 g/m²) are used. The main purpose of the last feeding is the complete ripening of the bulbs with an increase in size. Which in turn leads to improved properties during winter storage.
In addition to mineral fertilizers, normal plant development is achieved through the addition of other microelements:
- boron;
- copper;
- molybdenum;
- zinc;
- cobalt;
- magnesium;
- gland.
During the growing season, it is necessary to periodically inspect gladioli and remove diseased plants. The following are subject to liquidation:
- yellowed leaves;
- leaves with spots;
- plants that are severely stunted;
- gladioli with rotten stems.
All such plants are dug up along with the soil that is on the root and burned.
To combat diseases of gladioli, potassium permanganate is used (2-3 times per season). Bulbs can be saved from pests using the preparations “Karate” (1.5-2 ml per 10 liters of water) or “Fitoverm” (3-4 ml per 0.5 liters of water).
Conditions for growing gladioli and how to prepare them for planting
Good flowering can be obtained only in open sunny areas with sufficiently moisture-absorbing fertile soil; the planting site should be protected from the winds to avoid bending of the flower stalks.
The site should be open so that the sun illuminates it all day, and there should be protection in the form of buildings from the north. It is not recommended to grow gladioli near trees, as these moisture-loving flowers will lack moisture and nutrition.
Before growing gladioli bulbs, you need to cultivate the soil. It is best to prepare it in the fall. First, the soil is dug up to at least 40-50 cm, then to 1 square meter. m add up to 4-5 kg of compost or humus, as well as 2 tbsp of mineral fertilizers. spoons of superphosphate and potassium sulfate. It’s a good idea to add wood ash at the rate of 3 tablespoons per 1 square meter. m. In the spring, the bed is dug up again to the depth of a bayonet shovel and holes are made. Before planting the bulbs, additionally add 1 tablespoon of organic fertilizer “Berry” and a deoxidizing agent to each hole. Fresh manure is not applied to gladioli, as this leads to the development of fungal diseases in the plant and the bulbs are poorly stored in winter. The landing site is changed annually. Gladioli should return to their original place no earlier than after 3 to 4 years. They are grown in crop rotation after cucumber, onion, and garlic.
Popular articles Features of the Mega Mindy hydrangea variety
Immediately before planting, the corms are first soaked in the “Zaslon” solution: 2 caps per 0.5 liters of water, or in a dark solution of potassium permanganate, or in a solution of the “Hom” preparation (40 g per 10 liters of water), the duration of each treatment is 10-20 min.
Watch the video “Growing gladioli outdoors” to better understand how to care for these plants:
How to obtain and collect gladioli seeds
The formation of gladioli seeds occurs in a capsule only after pollination . In the wild, independent pollination of these flowers is very difficult, since the maturation of pollen in the stamens (male flowers) and the opening of the pistil (female inflorescences) occurs at different times.
Insects are of great importance in the pollination of flowers, which transfer pollen between inflorescences . Strong winds also help. The disadvantage of the second method is that the purity of pollination is disrupted (pollen from other plants can be transferred). To obtain high-quality seeds and collect them, the gardener must pollinate the plants himself. To do this, pick a male flower and start shaking it over the female inflorescences.
It is necessary to collect gladioli seed from plants that are uniformly colored . This increases the chance of growing flowers of the same color. Planting material is collected when the flowering process is completed. That is, when the flowers turn into seed boxes.
The step-by-step procedure for collecting planting material is as follows:
- Carefully remove the box. To do this, it is better to use a knife or scissors.
- Dry the box at room temperature for 3 weeks.
- Take out the seed.
Diseases and pests
Like many other plants, swords are susceptible to serious diseases and pest attacks. These noble plants most often suffer from:
- Botrytis (Grey rot);
- Septoria;
- Fusarium;
- Flower rust.
All of these diseases of gladiolus are fungal in nature. The easiest way to protect a plant from death from the listed infections is timely treatment of the bulbs with foundationazole. If this does not help, then the following drugs are used for diseased flowers at different stages of development:
- “Falcon” and “Chorus” - used before the flowering period, but provided that the plant has three fully formed stem leaves;
- When fighting garden insect pests, such medicinal preparations as Aktara, Confidor-Maxim, Balazo, and Agrovertin are very effective.
The main problem with diseases is that they are very difficult to detect at an early stage. Therefore, if you want your gladioli to grow strong and luxurious, without stem bending and signs of disease in the inflorescence, regularly check the condition of the seedlings.
Many people, and even experienced gardeners, may be confused by the question of what gladioli seeds look like. Everyone knows that these flowers are propagated by bulbs, their children. But there is a method of propagation by seeds. It is worth collecting the seeds in case the bulbs suddenly cannot be saved. And even this happened; from the seeds, perhaps, it will be possible to grow a completely unique hybrid of this flower, which no one else has.
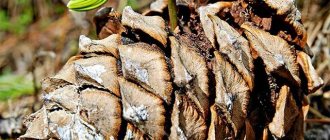
Gladioli seeds are formed in seed pods after the pollination process has taken place. Seeds in boxes ripen in about 35-40 days. Externally, a ripe box begins to change color (becomes yellow, brown) and even cracks slightly on the sides.
When sowing them in February, by autumn you can get strong and healthy baby onions, which will need to be planted in the ground next year.
The seeds look like small flat brown plates, no more than 2 mm in size. Upon careful examination of the plates, you can see the plant embryo inside, under the shell. The number of seeds in a seed capsule reaches 180-200 copies. After collection, they are preserved quite well in room conditions.
When growing gladioli from seeds, it is important to remember that in most cases the varietal characteristics of the parent plant cannot be preserved. At the same time, the dominant colors: purple, crimson - that is, more saturated colors - will cover up the more delicate ones. New inflorescences can have the most unexpected colors and shapes, which is why the seed method is used in breeding work
New inflorescences can have the most unexpected colors and shapes, which is why the seed method is used in breeding work.
Before planting, it is advisable to carefully clean the seeds from the impeller (shell), then soak in humate (you can also use heteroauxin, root) for several hours. After soaking, the seeds must be germinated until sprouts appear and sown in pots or boxes.
Sometimes gladioli can produce an ear in the first summer. Then it is better to break off the arrow to obtain a full-fledged bulb, so that all the plant’s forces are directed to the growth and nutrition of the tuber. But usually plants grown from seeds do not bloom in the first season. Small bulbs are dug out from gladioli planted with seeds in the fall, carefully separating them from the stem.
Summer gardeners are accustomed to propagating luxurious gladioli with bulbs, but there are other methods of propagation, for example, by seeds. At first it may seem labor-intensive, but those who have already received seeds and grown flowers from them say that there is nothing complicated.
When growing gladioli from seeds, it is important to remember that in most cases the varietal characteristics of the parent plant cannot be preserved. New inflorescences can have the most unexpected colors and shapes; it is no coincidence that the seed method is used in breeding work. But the florist has the opportunity to independently grow some special flower and get a gladiolus with an original color
But the florist has the opportunity to independently grow some special flower and get a gladiolus with an original color.
Subtleties of plant care
As already mentioned, gladioli are delicate plants that require some care.
Diseases
Gladioli have many different types of diseases:
- Fusarium. A common fungal disease that causes plant death. It can occur during storage of the bulbs if they are heavily infected. If the disease is poorly developed, it may not appear outwardly, but seedlings may not appear. When the disease appears late, yellow stripes appear on the leaves of gladioli and they quickly dry out.
- Heart rot. A common fungal disease. When it is infected, brown spots appear on the leaves and they quickly disappear. Wet stains form on the flowers. Heart rot spreads during harvesting in wet weather. It can also be provoked by storage in very humid areas.
- Less common are diseases such as sclerotinia, hard rot, bacterial scab, and yellow scab.
Pests
Gladioli are an attractive treat for some pests. These include spider mites and thrips.
In order to get rid of spider mites, plants are sprayed with compounds containing sulfur and phosphorus. Measures to prevent thrips infection include treating the bulbs with karbofos. They are placed in a solution of karbofos (0.4%) for half an hour, dried and stored in the refrigerator. The same is done before disembarkation.
Watering
Soil moisture is also very important, as for most plants, including nemesia flowers, described in the article https://2gazon.ru/ozelenenie/cvety/nemeziya-iz-semyan.html. Watering must be done regularly
This promotes good development of the root system and proper formation of inflorescences.
Diseases and pests
Among the variety of varieties, there are gladioli that are more resistant to diseases and attacks by pests and less resistant, but absolutely immune, unfortunately, breeders have not yet bred.
Fusarium is one of the most insidious fungal infections. Symptoms appear in the form of yellowed tips of leaf blades in the formation phase of 5-6 leaves, and then their complete drying.
On corms during storage it appears as depressed reddish-brown spots.
Botrytis is clearly visible during budding and flowering - brown round spots appear on the foliage and petals, the middle part of the bulb rots and the stem breaks, and soon the entire corm turns into a rotting brown mass.
Sclerotinia is also a fungal disease that spreads in cool, damp weather.
The first signs are yellowing of the leaf blades and softening, and then breaking off of the stem.
Yellow spots with burnt-like edges appear on the bulbs; they gradually grow, the corm hardens and dries out from the inside.
The causative agents of septoria are also fungi. During the growing season, angular red-brown spots form on the leaves; on the bulbs it manifests itself in the form of deepening round spots, small in size.
The affected tissues become hard and mummify.
Treatment of fungal diseases is difficult; it is easier to prevent them than to treat them, and often diseased plants are simply discarded and destroyed.
Among bacterial diseases, the most common is scab, which is very difficult to recognize at the initial stage.
Only with severe infection, dark red spots of irregular shape are barely noticeable on the lower part of the stem and leaves.
On the corms, the spots are light and located closer to the bottom, but over time they darken and form an easily detachable cork layer.
Viral lesions are difficult to identify: yellow-greenish stripes sometimes appear on the leaves, the main signs are visible after the buds open - uncolored areas on the petals, deformation, variegation.
Of the pests, gladioli are bothered by mole crickets and slugs, gnawing stems and corms, wireworms - click beetle larvae that look like a piece of solid wire and make passages in the bulbs, aphids and the most formidable and annoying gladiolus thrips, which destroys the buds.
To combat insect pests, they carry out repeated spraying of insecticides on the leaves - actara, fitoverm, karbofos and others, as well as pre-winter treatment of corms.
GROW THE MOST BEAUTIFUL GLADIOLUS!
If you want to grow gladioli in your garden, choose the most beautiful varieties! We want to offer you the best from our collection! Mystical Amber, Indian Summer, Boniface, Burgundy, Evergreen, Vine, Gaidan, Deep Red, Terrible, Jester, Ding-Don, Zizani, Zorro, Kirov, Color, Contrast, Corazon, Cote D, Azur, Kum Laude, Moscow, Princess Margarita, Purple, Murmansk, Omsk, Provence, Ram Bam, Robert, Pink lace, Rus', Saratov, Sugar Plum, Ufa, Flora, Tsepky.
We also have wonderful mixes of different varieties of gladioli, skillfully selected by our designers according to color scheme. These are the sets: Butterflies, Marshmallows, Lemon in chocolate, Terry.
Even a novice gardener can grow gladioli. But how much joy and aesthetic pleasure they will give you and your loved ones with their long, lush flowering. And I will also save you from any trouble!
Is it possible to grow gladioli on a windowsill in a quartet?
RU
How to grow gladioli at home - Garden on the windowsill sadnapodokonnike.info/topics/kak-vyrastit-gladiolusy-doma/ 13 Feb. 2015 - When growing gladioli from seeds, which are formed when ... they are quite suitable for growing in an apartment or on a balcony. Gladioli in the photo: growing at home megaogorod.com › Growing April 24 2013 - Gladioli are a species that is excellent for keeping at home. In this case, it will be best on the windowsill..
Hedgehog
It’s definitely possible on the balcony.. in an apartment I don’t know.
;
on the balcony)
always elegant
Our neighbors planted sprouted gladioli in a bucket in February and took them out into the cool entrance, so in April there were such a decent 3 leaves! And then someone stole the bucket!
Mityai Bukhankin
it is forbidden. The law allows you to have flowers on the windowsill no higher than 20 cm. For violation, a 3-year suspended sentence.
How to get gladioli seeds
Not everyone knows how to grow gladioli from seeds at home from China. But first of all, we need to say a few words about the Chinese gladiolus itself. This plant is also called Montbrecia. It is also found in the wild throughout South Africa. Chinese gladiolus has a characteristic smell that may somehow remind many of the aroma of saffron.
Chinese gladioli from seeds will germinate well if propagation was carried out at the end of winter. The procedure can be carried out in early spring. If you are wondering what the seeds of Chinese gladioli look like, then it should be noted that they are not much different from ordinary ones.
You need to collect seeds from uniformly colored plants growing nearby. This will give you a better chance that the flowers you grow from seed will be the same color. The seeds are collected when the flowering period ends. In place of the flowers, boxes with seeds are formed. The capsule is removed from the plant as carefully as possible, after which you need to dry it and remove the seeds themselves.
What to do with gladioli babies when digging
At the end of the growing season, the mother corm performs the last important function - it forms children (tuber buds).
If you conduct an experiment and tear off the mother bulb from a growing gladiolus, the plant will not die, but children will not form. Tubers are small bulbs that look similar to garlic cloves. They are located at the junction of the mother and replacement corms. They can be located either next to the mother’s bulb or at a distance and are attached to it with the help of stolons.
Each plant produces a different number of babies. This depends on the variety, planting depth, age of the mother corm, care during the growing season, and also on harvesting time. If it drags on, more babies will be formed. On average, each gladioli produces 20–50 children, but there are gladioli with single tubers, and the most “prolific” varieties produce up to 200–600 children.
Ripe children are easily separated from the dug out bulb. In some varieties, even immature children are easily separated from it. Therefore, in order to reduce losses and not lose them in wet soil, it is recommended to remove gladioli planting material in dry weather in late autumn.
All tubers, including the smallest ones, must be selected from the soil, even if they are not planned to be used for further planting. Remaining in the ground, they will germinate next year, clog the area and lead to misgrading. When harvesting, the tubers are placed on newspaper, burlap or cotton cloth separately from the bulbs, separated by variety.
WHAT ELSE YOU NEED TO KNOW ABOUT CARE OF GLADIOLUS
Gladioli grow very quickly. If you do not provide them with additional support, they can easily break or begin to grow obliquely. Therefore, plants must be tied up.
The easiest way is to drive pegs up to 1.5 m high near each one, and tie the gladioli to them with a soft rope or ribbon when they grow enough. If the flowers are planted along the border, you can make a small trellis 1.2 meters high and tie the plants to it.
You can start cutting flowers from mid-August. It is best to do this in the early morning or evening. Choose gladioli on which the lower five flowers have fully opened. In this case, be sure to leave the lower part of the stem with several leaves, then the corm will still receive nutrition from the above-ground part of the plant for some time and will have time to fully ripen.
How to propagate gladioli by dividing the bulb
Not everyone knows how to divide gladioli bulbs. Not everyone even knows that one corm can have a pair of lateral buds. They do not germinate if the bud located in the center begins to grow actively. But if it has been damaged, then the buds on the side can develop to form a replacement shoot. This feature should be taken into account by anyone who wants to know how to divide a gladiolus bulb.
This method is especially suitable for people who grow certain varieties of gladioli. It is strongly recommended to divide gladioli bulbs when it produces one replacement corm, but at the same time develops an insignificant amount of corm for reproduction.
People interested in how to propagate gladioli by dividing the bulb should know the most reliable method
Experienced gardeners pay attention to the effectiveness of cutting the bulb in half. Gladioli can be propagated by dividing the bulb and cutting it into more pieces.
But in this case, you need to make sure that each of them had at least one bud and the end of the root system. Small particles will not develop as quickly as large ones. This must be taken into account when planning the care and propagation of gladioli.
How to grow gladioli from seeds
Growing gladioli from collected seeds
Gladioli seeds from autumn must be saved until February or March. Usually during this time they are planted in boxes or special containers.
IMPORTANT! For flower seedlings, it is necessary to provide good lighting (additional illumination with fluorescent lamps). If this is not possible, then it is better to sow gladioli later, in the middle or end of March.
It is advisable to carefully peel the seeds from the impeller (shell), then soak in humate (you can also use heteroauxin, root) for several hours. Heteroauxin is a “magic” drug that stimulates the growth of a healthy and strong root system of gladioli. Proportions:
- heteroauxin: 0.6 grams of the drug is diluted in a liter of water, the seeds are soaked for 6 hours;
- Kornevin: 1 gram diluted in a liter of water.
Prepare containers for seedlings and soil in advance. The best soil mixture will be mixed turf soil, humus and river sand. Some gardeners use ready-made soils, such as Violet, Torfolin, but it is also necessary to add washed and calcined river sand to them (2/3 soil and 1/3 sand).
After soaking, the seeds must be germinated until a sprout appears, after which they are sown in pots or boxes.
Further care is simple:
- soil moisture;
- careful loosening of the soil in the boxes.
In May or early June, when stable warm temperatures set in, the boxes with plants are taken out into the air. At first, the time the gladioli spend on the street is short, then the duration is increased. At first, they can be slightly covered from bright sunlight. It is also advisable to cover the plants at night, especially if it is cool at the beginning of summer.
Then they act based on the situation. Some gardeners leave gladioli in boxes or pots all summer, providing normal care. Others prefer to transplant plants into the ground, especially if there are free ridges on the site for this. Some gladioli can produce an ear in the first summer, but usually plants grown from seeds do not bloom in the first season. Gladiolus directs all its forces to the formation of bulbs. When sowing in February, by autumn you can get strong and healthy baby onions, which will need to be planted in the ground next year.
Gladioli seeds planting and care
Small bulbs are dug out from gladioli planted with seeds in the fall, carefully separating them from the stem. The timing of harvesting baby bulbs depends on the climate and weather conditions; this is usually done in September.
The collected children are treated in a solution of potassium permanganate, then dried and placed for the winter. You can store the babies in boxes or drawers, ensuring a temperature of about +4…+8ºC.
ON A NOTE! Seed material should be regularly inspected, removing damaged bulbs. If the babies are wet, they need to be dried.
In the spring, in April, the baby is taken out of storage, the scales are sorted out and removed from them. They are then soaked in any growth stimulant and then planted in prepared beds.
Gladioli are planted in May (in the northern regions - in early June), when the threat of recurrent cold snaps has passed. The children are small in size, so it is most convenient to plant them in furrows sprinkled with river sand. In such soil they get sick less and produce strong and high-quality plants.
The grooves are made up to 5 cm deep, they are spilled with a solution of potassium permanganate, sprinkled with sand and then gladioli bulbs are planted.
IMPORTANT! The distance between children is 15 cm.
The top of the onion is again sprinkled with sand and gently irrigated with water.
Subsequent care boils down to regular watering and loosening. After about a month, you can water the plants with a solution of boric acid. This drug helps strengthen gladioli and form high-quality bulbs.
If everything is done correctly, then in the second year the baby produces a peduncle. To obtain a full-fledged bulb in the fall, you should break off the arrow so that all the plant’s forces are directed to the growth and nutrition of the tuber. You can fully enjoy the flowering of gladioli grown from seeds in the second or third year. And who knows, you might be able to grow a completely unique hybrid of this royal flower that will delight you and those around you.
How to work with seeds?
Over time, gladioli bulbs lose their properties:
- become flat;
- give fewer children for reproduction;
- They throw out weak peduncles in small quantities.
In this case, some gardeners resort to propagating gladioli by seeds. This technique is considered risky, costly and unjustified, but still takes place. When growing bulbs from seeds, all varietal properties of the mother plant are often lost, and cross-pollination that occurs during the flowering period has a strong effect. The result of such processes is unpredictable.
In gladioli, after pollination, seed pods are formed, in which the seeds then ripen. In terms of external characteristics, they resemble small flat plates, the size of which is 2 mm. After ripening, the seeds become brown in color. Under the shell, a barely noticeable embryo of the future gladiolus can be seen. Up to 200 seeds are formed in each seed capsule. After ripening and harvesting, they are successfully stored indoors, but the storage area should not be allowed to be too dry. In this case, germination greatly deteriorates.
In March-February, the collected seed material is planted in containers or boxes. During this period, flowers need to be provided with a sufficient level of lighting using fluorescent lamps. If this is not possible, sowing dates should be postponed to the end of March.
Before sowing, the seeds are soaked in a growth stimulator for several hours. Containers and soil mixture are prepared in advance. The ideal option would be to mix in equal proportions:
- turf soil;
- humus;
- river sand.
Flower growers also use a ready-made purchased mixture, but in this case calcined sand should be added to it. Gladioli seeds are germinated and then sown in boxes or pots. Subsequently, they will only need regular moistening and careful loosening of the soil.
With the onset of warm weather, boxes with young shoots of gladioli gradually begin to be taken outside and hardened. Initially, they are left in the fresh air for a couple of hours, and then this time is gradually increased. To prevent the sprouts from getting sunburned, they are covered from direct rays.
After the threat of night frosts has passed, you can plant gladioli in open ground. Although some florists leave them in boxes all summer, while implementing standard care procedures. As a rule, in the first year of life, a flower grown from a seed does not bloom. All his strength goes into the formation and development of a strong and healthy bulb.
In the fall, gladioli planted from seeds are dug up, small bulbs are separated from the stem and prepared for storage. The timing of harvesting flowers depends on climatic conditions, but most often this is done in September. The next year, the collected bulbs are planted in furrows on the plot. They may well already bloom, although professionals recommend cutting off the peduncle so that the plant has enough strength to further form the bulb. Caring for gladioli grown from seeds is no different from that carried out when growing them from bulbs or children.
Professionals usually prefer to grow gladioli from seeds. For amateur gardeners, this planting process may be too time-consuming and labor-intensive. If you understand how to properly propagate gladioli by seeds, you can not only grow plants every year, but also develop new hybrid varieties of these beautiful, majestic flowers.
Before growing gladioli from children or seeds, you should study as much available information on this issue as possible. Not only books will help, but also the lived experience of professional gardeners. The information collected will be especially useful if you want to create a new variety yourself. After collecting seeds for gladioli, planting should be successful. When selecting planting material, it is necessary to take into account that hybrid varieties in most cases do not acquire seeds.
When the desire to get your own personal variety is great, growing gladioli from seeds can become extremely interesting, despite the labor intensity and scrupulousness. The first step is independent artificial pollination of gladiolus flowers. This is a complex process for which you need to allocate enough time. It is not worth producing it hastily, without understanding it, as you can ruin the mother plants. Typically, pollination is carried out with the aim of producing a new early flowering plant or flowers of unusual shapes and colors.
How to grow gladioli from seeds at home
If you like to grow gladioli, then you need to know the basic rules of planting and care so that no problems arise with the plant during the growing season. First, decide on high-quality containers into which nutritious and light soil is poured.
Flower pots should be placed on well-lit windowsills. The future growth and development of plants depends on the quantity and quality of lighting.
Important! If you want to grow home flowers from seeds, you must be prepared for the fact that the varietal characteristics will not be preserved.
Therefore, the chances of you getting the same gladiolus as the mother plant are very low.
Landing dates
Gladiolus seeds should be planted in March or April. They must be planted in special boxes or containers. Monitor how the soil warms up after frost. The optimal temperature, at a depth of 10 cm, should be about +9°C.
Planting rules
First of all, it is necessary to clean the seeds from the shell . After this, the planting material is soaked in a growth stimulator. Most often, gardeners use “Kornevin” or “Heteroauxin”. You need to soak for 2–5 hours, depending on the drug used. The best effect on seed material is “Heteroauxin”, which has a positive effect on the development of the root system.
Proportions for using such substances:
- “Heteroauxin”: dilute 60 mg of the drug in 1 liter of water and soak the seed for 5 hours;
- "Kornevin": 100 mg per 1 liter of water. Soak for about 2-3 hours.
Did you know? In the Middle Ages, gladiolus bulbs were used in folk medicine. Decoctions were prepared from them, which are considered effective for toothache and improve lactation.
Prepare containers and soil for planting . A high-quality substrate can be prepared at home by mixing turf soil, humus and river sand. The ratio of components should be 1:1:1. If necessary, you can use ready-made soil, which is sold in specialized stores. It is best to use “Violet” or “Peat”. Be sure to add river sand to the prepared soil to ensure high-quality air exchange for the root system.
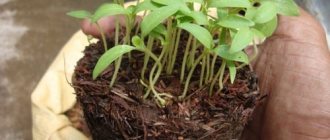
Before planting, germinate the seeds until shoots appear 5 cm high . To do this, soak them in clean warm water for 3-5 days. After this, transplant into containers with soil. The planting depth should be 1 cm, and the distance between seeds should be 2 cm.
Video: germinating gladioli from seeds
Watering and fertilizers
In May, take containers with seeds outdoors. They should be ventilated for 2–3 hours every day. Gradually, the stay time should be increased. At the last stage of hardening, containers should be kept in the open air for about 8 hours.
Further care for gladioli consists of watering and fertilizing. The first time you need to water the seeds is 2-3 weeks after planting . At first, it is better to use a sprayer to prevent the soil from becoming waterlogged. From May you can water the soil with a special garden watering can. For 1 container, which contains about 10–20 seeds, you need to use 2 liters of water.
Fertilizers are applied 2 times during the growing period. A month after planting, use potassium nitrate (50 mg per 4 liters of water) and pour the prepared solution into containers with seed material. In mid-May, feed the gladioli with superphosphate (20 mg per 3 liters of water) in the same way.
Reproduction
There are several types of reproduction of gladioli:
- seeds;
- dividing the bulbs.
All varieties prefer to reproduce differently. The features of growing flowers with seeds were discussed above.
Dividing the bulbs consists of several stages:
- Cut the planting material into 2 parts.
- Plant upside down or sideways.
Did you know? Gladiators of Ancient Rome wore a gladiolus bulb on their chest as an amulet. They believed that this plant brought them victory.
When and how to plant gladioli?
Planting begins when the soil at a depth of 10 cm warms up to 8-10 ºС. In the middle zone this usually happens at the end of April. It is necessary to clearly grasp this point, since a delay in planting leads to loss of soil moisture, which will adversely affect the development of corms and delay flowering.
It is more advisable to first plant corms and children of new, especially valuable varieties, which it is advisable to quickly propagate. Planting is done in sand, which at the first stage of plant development will protect the corms, the baby and their tender young roots from contact with the soil. To do this, pour sand in a layer of 1-2 cm into a dug ditch or hole, plant corms or baby plants and sprinkle sand on top again, and then soil.
To make it easier to care for plants, corms and children are planted in rows along or across the ridge. The location of individual specimens of planting material in a row and the distance between rows may vary depending on the size of the corms, the power of the variety and the tasks set by the grower during cultivation.
When placing plants, you should also take into account that the greater the distance between plants, the better the nutritional conditions and the lower the likelihood of contracting diseases from a neighboring plant. The smallest distances between large corms in a row are 15 cm, between rows - 20, for children - 5 and 15 cm, respectively.
Planting depth depends on the composition of the soil and the size of the corms. Planting material with a diameter of 4-5 cm (the one that produces flower stalks of the best quality) is planted to a depth of 10-12 cm. On sandy and chernozem soils, the planting depth can be increased to 15 cm, on clayey and swampy soils - reduced to 7-9 cm. This must be remembered that small-planted corms are more likely to get sick. Therefore, you should not plant smaller than 7 cm.
The florist will not be mistaken if he plants the corm at a depth equal to three of its diameters: it is obvious that small ones will have to be planted shallower, large ones deeper. Small corms may not germinate when planted deeply due to lack of air access. The baby is planted at a depth of 3-5 cm.
Planting can be along the ridge or across it. In any case, the previously dug soil is leveled with a rake. After which, marking the direction of the row, a groove of the required depth or hole is made across or along the ridge at a distance designed for planting corms or children.
Before planting, it is good to apply nitrophoska 3-4 cm below the bottom of the corm at the rate of 1-2 g per each or other planting fertilizer. During planting, the grooves and holes are watered with water so that the soil is moist and does not take moisture away from the planting material.
Planting gladioli corms in two rows. Lucinda
HOW TO CORRECTLY REMOVE GLADIOLUS BULBS
Gladiolus bulbs are not winter-hardy enough, so they are dug up every year and stored until next summer. This is done in early October (not earlier, since the corms must fully ripen!). The weather should be warm and clear.
The upper part of the gladioli is cut off, and the corms are carefully removed from the ground, cleaned of it, disinfected in a pink solution of potassium permanganate, wiped with napkins and laid out on sheets of paper in some dry, warm room to dry.
Over the summer, more than a dozen small baby bulbs can form on old bulbs. They need to be very carefully plucked from the mother plant with your hands and laid out to dry on a separate sheet of paper.
The bulbs are kept indoors for about two weeks. After this, they are placed in paper bags, several at a time, and put away in the basement or on the bottom shelf of the refrigerator. There they will be stored until next season.
Secrets of proper landing
Selection of quality planting material. For planting, only healthy and high-quality bulbs are selected, without signs of disease or damage. If the corm is soft and bends when pressed with a finger, then it is better to throw it away. Spots on the surface of planting material are also dangerous. These are signs of fusarium. If the stains are small, then they can be cleaned, and the cut area can be greased with brilliant green or sprinkled with Fundazol. It is better to plant such plants in a separate flowerbed. They require special care because they can infect healthy corms if treatment does not give a positive result.
Popular articles How to make a fireplace on the veranda with your own hands
Gladiolus bulb in shell
Proper preparation of gladioli bulbs. 2-3 days before the start of planting, the bulbs are cleaned of their upper scales, heated in the sun and treated with drugs against diseases and pests. For these purposes, you can use Fundazol, Fitospirin or Oksikhom, spraying the planting material or soaking it in the solution for 30 minutes. After processing, the bulbs are dried in a well-ventilated place.
Proper preparation of the flower bed. The appearance of the first tubercles-roots means that it is time to prepare the bed for planting. The best time to plant gladioli in open ground is from April 20 to May 1. If you have experience in planting potatoes, then there will be no problems with planting gladioli. Corms are planted in long trenches about 10 cm in height. The ideal distance between trenches is 0.7 cm, and between bulbs - 20 cm. Some gardeners recommend sprinkling the bottom of the trench with sand. If there is no drainage system on the site, then this should not be done. Sand will draw up moisture, and its excess is detrimental to the plant. After the shoots appear, the gladioli are covered with earth several times in order to strengthen the roots of the plant.
If it is necessary to quickly propagate a rare variety, then the bulb is divided into two parts with a sharp, disinfected blade, and the sections are lubricated with brilliant green. This is done only if the corm has more than 2 growth points.
Preparing bulbs for planting
Gladioli bulbs are stored in a ventilated, dry place. The temperature in it should be within 5-8ºС. Before planting, gladioli must be prepared, which involves germinating the planting material.
This procedure is carried out in early April and consists of:
- placing the bulbs in a warm room;
- cleaning them from scales;
- culling diseased seeds;
- laying out healthy bulbs in cardboard boxes.
The process of germination of seed material occurs in diffused light.
Cleaning and storing gladioli
Gladioli corms are harvested a month after they finish flowering. It is carried out in accordance with the variety, starting with early varieties and ending with late ones.
Dark varieties of gladioli are harvested first. They are very susceptible to fungal diseases.
Dig the bulbs only in dry weather, so as not to provoke the development of diseases during further storage by excessive moisture. After harvesting the bulbs, trim the stem and trim the roots. The bulbs are thoroughly washed and disinfected in a solution of potassium permanganate for about twenty minutes, then dried thoroughly.
Storing gladioli bulbs
Rejected bulbs with obvious signs of disease, and all garbage remaining after harvesting, must be burned.
After preparation for storage, the bulbs are sorted into varieties and placed in cardboard or wooden boxes. The container is left in the open air for several hours. Then they are dried in warm rooms for a month. After this, they are taken to a permanent storage place, where a constant temperature is maintained no higher than eight degrees.
During storage, you need to regularly check the bulbs and remove spoiled specimens in order to preserve the main planting material.
If you carefully study all the recommendations given and strictly follow all the rules for planting, growing and caring for gladioli, then they will not keep you waiting long for their abundant and lush flowering and will delight you no less than white hybrid tea roses.
2gazon.ru
How to grow gladioli from seeds
If you love gladioli, then you should know that planting seeds and caring for a growing plant will go smoothly if you follow the basic rules. First of all, you need to know that the seeds of the gladioli plant must be sown in containers with high-quality soil. These containers should be placed on the windowsill, where good lighting is guaranteed. Propagation of gladioli by seeds will be successful only in this case.
Do you have gladioli seeds and want to know how to grow this plant this way? You need to understand that the seed propagation method will not preserve varietal characteristics. The chances of you getting a plant that is the same color, size and growth habit as the main mother flower are very low.
How to propagate?
The seed propagation method is quite risky, labor-intensive and expensive, but some brave gardeners who are ready to experiment still prefer this method. The main problem when growing is that the varietal characteristics of the mother plant are often lost, and the result is unpredictable. This method is usually carried out by breeders when writing scientific papers or to develop new varieties. Sowing in open ground is possible if the following conditions are met.
The seed is planted in February in a greenhouse. Here, young seedlings will be able to gain strength for transplanting into open ground.
Before sowing, the seeds should be kept in a weak solution of sodium humate or heteroauxin for 2.5-3 hours.
A favorable substrate for seeds is a mixture of humus and sand in proportions 2:1.
Sowing is done shallowly; the planting site is sprinkled with light soil on top.
Moisturizing the sowing site is carried out simultaneously with fertilizer, and solutions based on mineral preparations are used.
Planting can be done not only in a greenhouse, but also in boxes or indoors, however, high-quality lighting should be provided. If it is not possible to install lighting fixtures, then the seeds should be planted later than February. Further care is not particularly different from growing other crops.
With the arrival of warmth, the boxes with seedlings are placed in a greenhouse, where they are left open for the whole day, creating shade at first in bright sunlight. If frost is likely, it is recommended to cover the plants at night. So, seedlings are grown in boxes or in a greenhouse until autumn, after which they are transplanted to a summer cottage.
Before the cold weather arrives, miniature bulbs should be dug up and stored.
They are usually stored in gauze bags in a cool room. For good ventilation, it is recommended to hang the bags or put them in a box, folding them in a layer of maximum 4-5 cm. If the gardener followed all the rules for propagating by seeds, then the resulting hybrid plants can bloom the very next year.
Pollination of gladioli when propagated by seeds
Gladioli cannot pollinate on their own, because the timing of the ripening of pollen, which is located in the stamens, does not coincide with the timing of the opening of the stigma. In nature, pollination occurs either with the help of insects or wind. But in this case, it is not known which plant pollen falls on the mother specimen.
Therefore, if you decide to get your own gladioli, where propagation by seeds involves obtaining offspring with certain characteristics, artificial pollination is necessary.
First, you should stock up on pollen from those plants that are chosen as fathers. You need to cut off the anthers from freshly blossomed flowers and place them on a clean sheet of paper for further ripening, in a dry room. When pollen spills out of ripe anthers, it must be carefully collected.
Now they begin the operation on the mother plant, that is, on the one where the seeds are planned to be obtained. The anthers are removed from these plants, after which the flower itself is covered with a gauze bag so that an accidental insect or wind does not carry foreign pollen. As a rule, after such a procedure on the mother plant, the stigma of the pistil opens within one to two days. Now you need to very carefully apply the collected pollen on the stigma with a small brush (you can use watercolor). After this, a gauze insulating bag is put on the pollinated plant.
If there are a lot of pollinated plants, then you need to hang a tag on each one, indicating who was the parent and who was the mother, and the date of the operation.
The bag can be removed when it is clear that a seed pod has formed. No more than two or three flowers on one peduncle are pollinated; the remaining flowers can be removed or the plant's spike can be pinched. Many people ask what gladioli seeds look like. Full-fledged seeds look like thin plates, about 2 mm in size, on which the embryo is visible in the center. There can be up to 200 pieces in one box. It is necessary to store the obtained seeds at normal air humidity so that they do not dry out, otherwise the seed material obtained with such difficulty will quickly lose its viability.
How to choose a breeding method
Gladioli are propagated by seeds, buds or bulbs. The seed method is considered the most difficult. Therefore, flower growers use it quite rarely. Transferring varietal characteristics using seeds is very problematic. This method is usually used by breeders to create new varieties.
Gladioli are usually propagated by bulbs or buds. Such a plant can bloom well for 5 years. After this period, it is replaced.
When propagating a crop using a bulb, it is divided into several parts. Each fragment must contain several buds. The cut areas are treated with carbon powder. It is recommended to dry the resulting material, and then proceed to planting work.
With this method of propagation, you can get 4 full-fledged plants from one bulb. This method is used for those varieties that form few buds.
Propagation of gladioli by buds is considered a simple and effective method. Thanks to this, it is possible to obtain a plant that completely replicates all the varietal characteristics of the parent. Approximately 30 buds appear on each bulb during the season. Of these, it is worth choosing the largest ones measuring 10-20 cm. They will be able to develop quickly and begin to bloom a year earlier than the smaller ones.
Selection of soil and location for gladioli
In shaded areas the culture does not develop well.
She has problems with flowering. Therefore, when choosing a place for planting, you should choose sunny places. This will ensure high-quality flowering and prevent the development of diseases. The causative agents of many pathologies develop well in wetlands. An illuminated place cannot be found in every area. Therefore, it is necessary to take into account that shading plants on the eastern side will delay flowering by 15-20 days. If the shadow is in the south, gladioli may not bloom at all.
With the constant presence of groundwater on the surface, plants experience oxygen deficiency. In such conditions, the beds are made higher. However, this method is not suitable for regions with hot weather.
To ensure that moisture from irrigation is consumed exclusively by gladioli, they are planted no closer than 3-5 meters to trees and other plantings. It is advisable that the flowerbed be protected from western and northern winds. Shrubs will help do this.
If an unsuccessful site for seedlings is chosen, gladioli will not bloom and form high-quality bulbs. As a result, next year it will not be possible to get full-fledged flowers, since there will be no high-quality planting material.
The choice and preparation of the soil is of no small importance. Gladioli love black soil. They can also be planted in loamy or sandy soil. Sandy, peaty and clay soils need improvement. It is recommended to add sand to peat, and peat to sandy soil. Clay soil is mixed with sand and peat.
Gladioli are suitable for soil that is characterized by a slightly acidic reaction. The pH level should be 5.5-6.5. Therefore, before planting bulbs, it is worth carrying out a soil study.
To do this, you need to take a glass of soil in 4-5 places on the site and submit it to the laboratory. It is recommended to do this analysis in the spring. Based on its results, it will be possible to determine the acidity of the soil and the amount of nutrients. If there is high acidity, chalk or quicklime should be added to the soil. Take 100-200 g of substance per 1 square meter.
The soil under the gladioli is dug up to the depth of the roots. This is done at 45-50 cm. All weeds are removed at the same time. If possible, legumes should be grown in this area the previous year before planting flowers. This helps improve the soil structure and protects against wireworms, which pose a great danger to gladioli.
In the fall, fertilizers with phosphorus and potassium are added to the soil. The amount of fertilizing is determined taking into account the results of soil testing and the selected crop nutrition system. Beginning flower growers can use nitrophoska. 30 g of the drug is used per 1 square meter. Chernozem does not require additional fertilization.