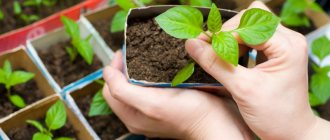
Mini-greenhouse conditions
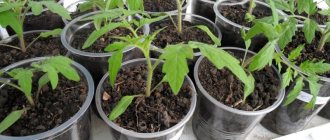
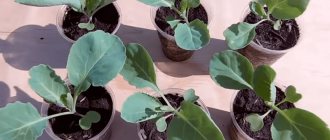
All our crops are in a mini-greenhouse. We move sprouted crops to the top shelf because it is cooler there, and on the bottom shelf there are crops that have not yet sprouted.
cheap tomato seeds from the best manufacturers
Now the temperature on the bottom shelf is 20 ⁰C, but only because the film, which maintains the microclimate in the greenhouse, is raised. When I lower it, the temperature rises to 22 ⁰C.
Selecting seeds and preparing them
Very often, disappointment in trying to grow tomatoes occurs when the gardener simply chose the wrong seeds. First, you need to decide what you need tomatoes for - for salads, for pickles or for other needs. The choice of variety will largely depend on this.
Tomato seeds
It is also important to pay attention to indicators such as ripening time, yield, keeping quality, and endurance. Usually all this information is written on the seed package, and it will not be difficult for you to choose the best variety for you.
Selection of tomato seeds
When purchasing, pay attention to how well the seeds are packaged and what their expiration date is. Do not take old ones - tomatoes remain viable for about 4-5 years, no more. Give preference to those varieties that are adapted to the climatic conditions of the region in which you are going to grow them.
Tomato varieties for a polycarbonate greenhouse
Growing tomatoes in greenhouse conditions allows you to get a good and (if necessary) early harvest. Not all varieties are suitable for greenhouses. Preference should be given to those that are resistant to diseases. More details in this article.
Before planting tomato seeds for seedlings, you should check them for germination. It happens that even the best producers make mistakes and there are “dummies” in the packaging with planting material. Pouring the seeds with salted water (10 g per glass) for 5-10 minutes will help to weed out the defects. All the bad ones will float to the surface, but the good ones will remain at the bottom.
Checking seeds for germination
This procedure is followed by seed disinfection. Don't be surprised - even the highest quality seeds can be contaminated with pathogens. Disinfection is carried out as follows: tomato seeds are placed for 10 minutes in a solution of water and hydrogen peroxide, which is easy to prepare - for this, 3 ml of a disinfectant is diluted in 100 g of water, then heated to 40 degrees.
Disinfection of seed material
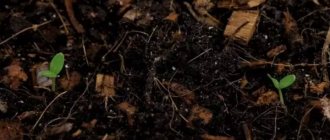
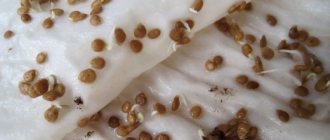
The next stage is seed germination. To do this, you will need a soft cotton cloth that is moistened with water. Seeds are laid out on one edge and covered with the other, the fabric is placed in a container, covered with polyethylene so that there is a gap for air access. Every day, the film is completely removed 3-4 times so that the planting material can breathe. You can plant seeds after 4-5 days.
Germination of seeds
Prices for tomato seeds
tomato seeds
Remove cover
On the bottom shelf there are two cassettes with tomato crops, and the first thing we must do after the shoots appear is to remove the covering from them.
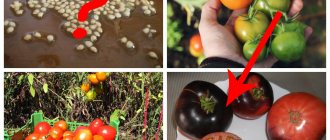
- Names and photos of black tomatoes
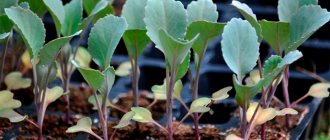
The tape with the Malduo variety has just started to show loops, so it’s too early to remove the film from it. And in the cassette with the early variety Baribin, not only did shoots appear, but roots began to hang from the drain holes of some cells. This means that tomatoes no longer need coating.
Most plants sprout at night, so I inspect the crops every morning to immediately remove the film from the crops. Unfortunately, some of the Baribin seedlings had already become twisted, since the film prevented them from straightening up to their full height. Several plants from one edge of the cassette have not yet sprouted: apparently, this area was not tightly covered with film.
Diseases and pests of seedlings
Many varieties of tomatoes are susceptible to classic diseases, and they can appear even at the stage of growing seedlings. Some diseases are transmitted genetically - through seeds. To protect seedlings, you need to know the problem directly.
Common Tomato Diseases
| Diseases | Signs |
| Late blight | The disease also has another name - brown rot. Spots of this shade appear under the skin of the fruits of adult plants. The same markings can be seen around the stalks. On seedlings, late blight affects the leaves |
| Septoria | Although the disease is called white spot, gray spots appear on the leaves. |
| Streak | It appears as oblong brown spots on the stems. Affected leaves dry out quickly |
| Brown spot | Markings appear on the bottom plates. Over time, the light brown spots become yellow. On the reverse side you can see a gray coating |
| Mosaic | Leaves begin to curl and change colors |
| Blackleg | It is impossible to detect the first signs - the roots are affected by rot |
To avoid such problems, the fight against diseases should begin at the stage of preparing seeds for sowing. When growing seedlings, all regimes are strictly observed. Otherwise, the seedlings weaken and lose their immunity. If the seedlings become sick, they are treated with fungicides. The neglected bushes will have to be destroyed.
Pests
Tomatoes in open beds are often attacked by insects. When growing seedlings at home, this problem can be avoided by using purchased soil. With soil taken from the garden, it is easy to bring wireworms, whitefly larvae and spider mites into the house.
Temperature and lighting
Having removed the film from Baribin, it would be possible to place the cassette on the top shelf of the greenhouse. In this compartment the temperature does not rise above 20 ⁰C, but it is usually maintained at 18 ⁰C. But today I intend to bring a shelving unit with many shelves into the room and place the Baribin tomato seedlings on the lowest one, where the temperature fluctuates between 16-18 ⁰C.
This will not prevent those seeds that have not yet sprouted from germinating, because the process has already started, and the bent seedlings will soon straighten out. At this temperature, the seedlings will not stretch.
- Why does the ovary fall off cucumbers, what can be done?
To summarize: before germination, tomato crops should be kept at a temperature of 22-25 ⁰C, and after germination, the temperature should be immediately lowered to 16-18, or at least to 20 ⁰C.
However, this is not enough to prevent seedlings from being pulled out. It is also necessary to provide seedlings with round-the-clock lighting for at least a week. This is something you should do immediately after your tomato plant sprouts.
Caring for tomato seedlings after germination
Then everything depends on the correct microclimate. It is selected taking into account the needs of tomatoes.
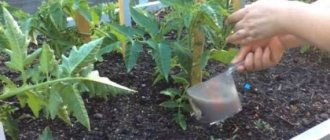
Proper watering
Soil moisture is the main need of vegetable crops, but everything must be done in moderation. The amount of water for irrigation directly depends on the phase in the development of tomato seedlings.
While the seeds are germinating, the humidity should be at its maximum. As soon as the seedlings appear, watering is reduced to moderate. Their frequency is determined based on the room temperature. The soil in the seedling container should be constantly moist (but not excessively wet).
Proper watering is carried out in 2 stages:
- First, pour a small portion of moisture under the seedlings to surface wet the soil.
- After a few minutes, the procedure is repeated, increasing the portion of water.
If the air in the room is dry, you should not be overzealous with watering - their frequency and quantity remain the same. In this case, the lack of moisture is compensated by spraying.
Lighting
The need for light for tomato seedlings is the same as for moisture. The above-ground parts of plants need lighting to produce green pigment (chlorophyll). As soon as the first leaves hatch on the surface, care is immediately taken to ensure that the seedlings receive as much natural light as possible (but it must be diffused).
Tomatoes are light-loving and need long days. Since sowing is carried out between the end of January and March, it is necessary to apply additional lighting to the seedlings:
- in the “loop” phase (when the stem has just poked out of the ground), it is better to keep the lighting on all night;
- when the first leaves appear, the duration of daylight hours is maintained for 12-14 hours;
- in subsequent seedlings, 8 hours of illumination will be sufficient.
To ensure that additional illumination is as close to natural as possible, it is better to connect phytolamps or fluorescent ones (at the rate of 400 W per 1 sq.m.). The total duration of additional lighting is 1.5 months.
Temperature
At each stage of seedling development, its own thermal indicators are maintained. As soon as the seedlings appear and the cover is removed from the box, by any possible means you need to lower the air temperature to +8-10°. For example, in a private house, take containers with tomatoes to the veranda, and in an apartment - to a closed loggia.
The seedlings are kept in this state for 3-5 days. Then return to the optimal mode:
- on cloudy days the temperature is maintained at about +15-17°;
- in sunny +18-22°;
- at night +10-12°.
If these conditions are strictly observed, the seedlings will not stretch out, but will develop into strong, thick bushes. In the future, this will contribute to the quality of the fruit and increase productivity.
How to dive correctly
The purpose of this procedure is to provide young plants with a larger area of nutrition and strengthen their root system.
Picking is not always carried out, but only if the seeds in the seedling box were sown densely.
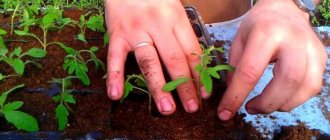
The procedure is carried out at the stage of 2-3 true leaves, choosing a separate cup with a diameter of 15 cm for each seedling.
Remove the sprouts from the box carefully, being careful not to damage the roots. It is best to use a special fork for this purpose (or remove excess teeth from a regular cutlery). The device is used to push the plant out of the ground, lightly holding the seedling by the cotyledon with the second hand.
The seedlings, along with a lump of earth, are immediately transferred to new containers, where depressions have already been made in the soil. When placing the seedling in a hole, try to ensure that the roots do not bend. The sprouts are buried in the soil to the level of the lower leaves. After this, the roots are pressed with earth, using a peg for convenience.
The picked plants are immediately watered (but moderately). The first days after transplantation reduce the hours of additional illumination. Or containers with seedlings are temporarily set aside from the window.
Proper feeding
The nutritional composition in seedling containers is limited, and seedlings need minerals for active growth. During cultivation, seedlings are fertilized twice - in the phase of formation of the first 4 leaves, then when the next 2 appear.
If picking is planned, then the first feeding is carried out 2 weeks after transplantation, and the second after 10 days. One more visit is allowed - 5 days before transplanting the sprouts to a permanent place.
Choose a standard mixture for garden crops at the rate of 50 g per bucket of water.
- In this case, superphosphates are diluted with hot liquid in order to achieve maximum extraction of the element from the dry preparation.
- Mineral solutions are filtered before use, getting rid of ballast particles.
Fertilizing rules
- You can alternate mineral water with organic matter - mullein or chicken droppings. Prepared solutions are used immediately so that the nitrogen does not have time to evaporate.
- Before filtering, the wood ash solution must be allowed to settle so that the ballast particles settle to the bottom.
- Before use, fertilizing solutions are heated to a temperature 1-2 degrees higher than the soil.
- Fertilizer application is tied to irrigation.
- The most favorable time for fertilizing is the morning or afternoon, when the plant actively absorbs useful elements from the soil.
If a soil mixture enriched with nutrients was used during picking, then there is no need to feed the seedlings.
Hardening
When grown at home, seedlings are in fairly comfortable conditions. Therefore, transfer to open ground can be stressful for plants.
To ensure that adaptation is painless, seedlings are prepared for moving gradually:
- to begin with, in warm, windless weather, open a window in the room for a while, providing access to fresh air;
- start hardening from 1 hour, gradually increasing the time to the whole day;
- on the 6th day the window can be left open overnight.
As an option, the seedlings are taken out onto the loggia (veranda), following the described scheme. Then you can move it to the garden bed under a film cover.
The hardening process also involves a gradual reduction in the volume of watering and a reduction in their frequency.
Watering, loosening and fertilizing
At this stage, seedlings should be watered as needed, alternating watering with drying the top layer and loosening the row spacing. But since we sowed the seeds in very high-quality soil from Klasmann, on which a crust will not form, the procedure for loosening the rows is not necessary: the breathing of the root system will not be disturbed.
In this volume of soil, seedlings can develop until the root system fills the entire cell, and we do not plan to add any fertilizers to the substrate. If there is a need for phosphorus-potassium fertilizer, we will add a solution of potassium phosphate to the substrate, but this is unlikely to be necessary.
We will discuss all further steps for caring for tomatoes as the seedlings develop.
Health to your seedlings, and all the best to you.
Growing tomatoes in open ground
- Preparing a place for tomatoes.
- Proper watering.
- When and how to feed seedlings.
- Formation of plants.
- Mandatory loosening.
- Preventative work.
- Planting scheme and timing.
- Temperature control.
Preparing a place for tomatoes
In our case, the soil must be nutritious and breathable, where an acidity of 6 - 7 pH will be the most optimal solution. A sunny, level area on loamy soils is considered the best option. Tomatoes do not tolerate heavy soils well and this must be taken into account.
Crop rotation plays a major role here. Where, we must remember that tomatoes grow well only after legumes. Carrots and beets are also good predecessors and neighbors. Areas after nightshade plants are absolutely not suitable, because they have the same diseases as tomatoes. And diseases are transmitted through fungal infections that are found in the soil on which nightshades grew.
In theory, the bed should be prepared in the fall by digging deep into the soil with manure. If you didn’t manage to dig in the fall, then it doesn’t matter, you can do it in the spring. But in this case, you need to fertilize exclusively with humus. And this is because the plant does not like fresh manure. Also, don’t forget about mineral fertilizers. Here, on 1 sq. m of plot, 30 g - 40 g of superphosphate, 20 g - 25 g of potassium fertilizers are applied. Important: fertilizers with nitrogen are not applied in the fall, because they are washed away in the spring by melt water.
Proper watering
First of all, you need to ensure regular watering. Here, you need to understand that high humidity or, on the contrary, insufficient humidity, negatively affects the plant. Excess moisture increases the likelihood of fungal diseases. But if there is insufficient watering, the leaves wither and the buds may fall off. Therefore, moderation and regularity are simply necessary.
Optimal watering will be considered once every 3 - 5 days, where water flows under the bush within 5 liters. Next, during fruiting, we reduce the amount of watering. And here, we water it once a week. In this case, we use warm water + 17 °C - 19 °C. Rainwater is the best option.
When and how to feed seedlings
Growing tomatoes is not complete without feeding. Feeding tomatoes promotes plant growth. A healthy plant, always blooms and bears fruit well, and is significantly less sick. And yet, it better withstands various adverse conditions. Next, let’s look at what and when to feed.
- Ammonium nitrate and urea . 1 time every 2 weeks. Fertilizers with nitrogen contribute to the growth of green mass.
- Diammophos and potassium monophosphate . Potassium-phosphorus fertilizer. Apply during flowering and fruiting approximately once every 3 weeks.
- Boron, zinc, magnesium . Preparations with such microelements promote better fruit set. "Boric acid" is one of these drugs.
You can also read about feeding in more detail in the article on the website “Feeding seedlings after planting in open ground.”
How to shape tomatoes
Everything is simple here:
- We drive the tall ones into one stalk. We remove all stepsons.
- We make medium-sized ones into two stems.
- Low growing with three stems.
Loosening the soil
Tomatoes cannot tolerate crusty soil, so after each watering we loosen the soil near each plant.
Air temperature
Here, it is worth remembering that already at 13 °C tomatoes stop growing. And, having covering material available is simply vital, and this especially applies to central Russia. And having a greenhouse is a must when growing tomatoes.
Planting dates and scheme
- Early tomatoes: 30 cm - 35 cm - between bushes, and 50 cm - 55 cm - between rows
- Mid-season: 45 cm - 50 cm - between bushes, and 60 cm - 65 cm - between rows.
- Late ripening: 50 cm - 55 cm - between bushes, and 70 cm - 75 cm - between rows.
Prevention from diseases
Tomatoes must be grown using correct agronomic practices. This is prevention against diseases and pests. This includes pre-sowing preparation of seeds and soil, proper watering, loosening, weeding and, of course, fertilizing. Note that it is easier to prevent a disease than to treat it later. Therefore, all these measures are very important.
- Scheduled treatment with fungicides. Read this article about fungicides.
Growing tomatoes without seedlings
Usually in the spring, experienced and not so experienced gardeners begin to sow tomato seedlings. And from this moment on, their summer season begins. You need to know how to properly care for seedlings. In addition, this requires special conditions that not everyone can create. Or just <<reluctance>>. This is where the seedless method, where tomatoes are grown without seedlings, can come in handy. We plant immediately, in a place in the garden or greenhouse.
On a note!
It is advisable to practice growing tomatoes without seedlings in the southern regions of Russia. But in other regions, seedlings will be the best option.
Growing tomatoes using the seedless method:
- Here you need to choose the right variety of tomatoes. And you need to choose early or super early varieties. Suitable for central Russia.
- The next point is the air temperature outside at the time of landing. It should be within 15 °C - 20 °C.
- Sowing of seeds is carried out under film or under cut five-liter bottles. Here, everything depends on the desires of the gardener.
- Sowing dates directly depend on the region.
- We dig up a bed for tomatoes. And don’t forget to fertilize with humus, where you can add a handful of ash.
- We disinfect the seeds. And we sow 2 - 3 seeds per hole.
Typically, plants grown this way have stronger immunity.
Good luck to you!!!
How to plant tomato seedlings correctly
Tomato seedlings require mandatory picking, which is carried out in two stages:
- The first picking requires seedlings aged 7-12 days with 3-4 original leaves. Before transplanting them into small (volume no more than 200 ml) individual pots or plastic cups, it is recommended to pinch their taproot one-third of the way. After this manipulation, the plant’s growth slows down for about a week, but the root system, on the contrary, strengthens and begins to develop intensively. A seedling with a pinched root is placed in a pot filled with the same soil that was used when sowing the seeds. After planting the plant, the soil is slightly compacted and moistened with a very weak (5 g per 10 liters of water) solution of potassium permanganate. During the first picking, it is necessary not only to plant the seedlings, but also to get rid of weak and diseased plants.
- After two to three weeks, the tomato seedlings need to be replanted one more time in order to provide nutrition from fresh soil, increase the size of the container and prevent the seedlings from overstretching. The capacity of individual pots must be at least 1000 ml. Stretched tomatoes should be planted deeper. Freshly picked seedlings are grown at a higher ambient temperature for three to four days. At this time, boxes with tomatoes can be placed a little closer to the heat source. After this time, they return to the previous temperature regime, regular loosening and watering.
In the absence of individual pots, seedlings can be planted into fairly wide and high (not lower than 15 cm) boxes. The distance between young plants planted in boxes should be from 5 to 7 cm, and between rows - from 7 to 9 cm.
If tomato seedlings are grown in peat tablets, picking the seedlings is not necessary. At the same time, gardeners have less worries, and injury to the root system is eliminated. Seedlings grown in a peat tablet are simply placed in a larger container half filled with nutrient soil. As the plants grow, you just need to add soil to the container.
So that the seedlings take root better
For better survival of seedlings, 2-3 lower true leaves are cut off 2-3 days before planting in a permanent place. This allows for better lighting and good ventilation, thereby eliminating the possibility of disease. The leaves are cut off, leaving stumps 1.5-2 cm long, which will then dry out and fall off on their own without damaging the stem.
To preserve the flower ovaries on the first cluster, 4-5 days before planting the seedlings in a permanent place, it is sprayed with a solution of boric acid (1 g per 1 liter of water). This procedure is carried out in the morning in cloudy weather, because... In sunny conditions, burns may appear on the leaves.
Fertilizers for tomato seedlings
The first feeding is done when the seedling has one or two true leaves. This usually happens 14 days after the seeds germinate. To enhance the growth of tomato seedlings, they are watered with a solution of Agricola Forward fertilizer prepared from 1 teaspoon of the drug and 1000 ml of water.
In the future, fertilizers must be applied once a week and at least 3 times a month. To apply the second fertilizing, after picking tomato seedlings, use a solution prepared from superphosphate (35 g), urea (4 g) and sulfate (12 g) dissolved in 10 liters of water.
The best fertilizer for tomato seedlings is a solution of chicken manure or fermented mullein. No less valuable organic fertilizer for feeding tomatoes is wood ash, an aqueous infusion of onion peels or crushed eggshells. You can replace organic fertilizers with humic fertilizers, which stimulate the growth of young plants.
Any fertilizers must be applied to the root zone of tomato seedlings only after watering (either in the morning or in the evening), making sure to dissolve them in water. At home, it is most convenient to apply fertilizing using a pipette or syringe, not forgetting to lightly loosen the soil afterwards.
What substances do tomato seedlings need?
In order to understand what microelements tomatoes need at the moment, it is enough to pay attention to the color of their leaves and stems. And depending on the diagnosis of microelement deficiency, you can choose the right feeding.
- The presence of a strong purple stem and elastic dark green leaves is evidence that the plants receive the full range of substances they need.
- The yellowing of all leaves is a consequence of an excess of nitrogen.
- Falling and yellowing of the lower leaves of tomato seedlings indicate the need for urgent use of nitrogen fertilizers.
- Tomato leaves acquire a rich purple color due to an acute lack of phosphorus.
- Tomato seedlings exposed to intense light require fertilizing rich in iron.
Basic mistakes when growing
- Evening watering. Cold is detrimental to young sprouts - when watering in the evening, the soil may freeze due to a nighttime drop in temperature.
- Keeping a large number of seedlings in one container. In this case, the shoots will interfere with each other, which will slow down their growth. Also, with such close proximity, the risk of spreading diseases increases.
- Ignoring the first signs of disease.
- Late pick. This leads to the fact that the plants stretch out, become fragile and frail.
- Neglect of hardening. Failure to prepare tomatoes for transplanting can destroy them at the first frost.
- Overgrown seedlings. You should not delay planting in open ground, otherwise it will be very difficult for the plants to adapt. If the time has come, but there is no opportunity, reduce watering and slightly lower the temperature.
Learn more about these and other errors in the following video:
Secrets of experienced gardeners - how to get healthy and strong planting material
- Use reminder tables with deadlines for all procedures.
- Turn the seedlings towards the light with different sides so that they are not one-sided.
- Increase the amount of light by attaching foil or other mirror surfaces to the window frame.
- Ventilate the room where the seedlings are grown, but protect them from drafts.
- Add a little potassium permanganate to the water every two waterings if the seedlings are on a cold windowsill.
- Use branches of overgrown seedlings as new plants.
- Do not use manure as fertilizer - ammonia burns the roots of tomatoes.
Now all you have to do is put these tips into practice and enjoy the results. As you can see, there is nothing complicated in caring for seedlings - the main thing is to follow the rules and follow the deadlines for the procedures.
Planting seeds
Typically, tomatoes are planted for seedlings around the end of February or mid-March, but depending on the variety chosen, the timing may vary. Therefore, it is best to check the planting schedule shown on the packaging of the planting material.
Sowing tomato seeds for seedlings
Step 1. Fill the washed and disinfected container for seedlings with treated and prepared soil.
The container is filled with soil
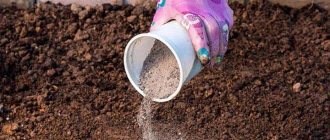
Step 2. Level, compact and moisten the soil with water at room temperature.
Watering the soil with water at room temperature
Step 3. Make neat furrows about 1 cm deep on the soil surface at a distance of at least 3-4 cm from each other. In individual pots, make recesses also 1 cm deep.
Depression in the soil for planting seeds
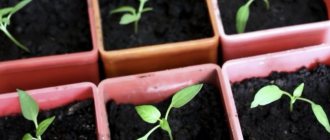
Step 4: Place the tomato seeds in the grooves at least 2cm apart. Place one seed in each pot.
Sowing sprouted tomato seeds
On a note! Remember that the less often the seeds are planted in boxes, the longer you will not have to resort to the picking procedure.
Step 5: Gently fill the holes or furrows with soil.
Seeds need to be sprinkled with soil
Step 6: Cover containers with plastic or a piece of glass to retain moisture and heat.
The container is covered with plastic film
Step 7. Place the containers in a warm place - for example, near a radiator.
The container should be placed in a warm place
On a note! For tomato seeds to sprout, the air temperature must be at least 25 degrees.
Step 8. Wait for shoots. The first sprouts will appear within about 3-5 days.
First shoots