Pros and cons of growing strawberries in pyramids
Growing strawberries in vertical structures is increasingly used by gardeners in large and small plots.
- This method has many advantages over conventional horizontal planting:
- allows you to save space in small areas - you can plant a large number of strawberry seedlings in a limited area;
- increases the yield of berries and accelerates their ripening - this arrangement of strawberries allows the sun's rays to better illuminate the plantings, which has a beneficial effect on the size and taste of the fruit;
- protects strawberries from the appearance of weeds - there is simply no room left for them in the garden, and it is much easier to remove emerging weeds;
- makes it easier to care for bushes - on a multi-tiered pyramid it is much more convenient to prune and treat plants from pests, as well as water the plantings and collect ripe berries;
- allows you to protect the fruits from contact with the ground - as a result, the strawberries do not rot and remain clean;
- is a decorative decoration of the site - a vertical structure consisting of several tiers of strawberry bushes with bright berries, when properly decorated, turns into a useful and beautiful element of landscape design.
- Despite the long list of advantages, this method of growing berries has the following disadvantages:
- the soil in a vertical structure dries out faster, so strawberries need to be watered frequently;
- the need for additional fertilizing - each tier of the pyramid contains a limited amount of soil, which is quickly depleted;
- the difficulty of covering for the winter - this design freezes more easily, so you need to cover the strawberries very carefully.
What a gardener should know
This method of growing is not without its drawbacks, and the gardener should familiarize himself with them first:
- the soil in vertically located boxes quickly dries out and is depleted, so there will be additional hassle associated with fertilizing and watering;
- Diseases appear less frequently, but when they develop, they spread rapidly. Plants will have to be removed from the soil, replaced or “etched” in case of infection;
- Certain difficulties arise when constructing a shelter for a berry garden for the winter. Since there is little soil, it freezes quickly.
Pyramid for strawberries made from available materials
To form a multi-tiered pyramid, you can use a variety of materials, and the construction of the structure is quite simple and does not require special skills. Read more about the materials from which you can construct a pyramid, as well as about the diagrams of finished structures, later in the article.
Did you know? There can be up to 200 seeds on the surface of one strawberry.
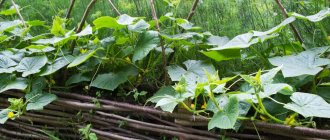
From tires
If the gardener has old car tires, you can make a pyramid from them. Tires are stacked on top of each other, placing the one with the maximum diameter at the bottom, and gradually reducing the size of each tier. A visual diagram of a vertical pyramid of car tires is shown in the picture below.
To make such a structure you will need the following materials and tools:
- old car tires;
- PVC pipe with a diameter of 100 mm;
- sharp knife;
- sand, peat and humus (ratio 1:1:2).
Important! The dimensions of such a vertical structure depend on the diameters of the tires, but the total height of the structure should not exceed 1.5 m: a pyramid that is too high can easily collapse.
Step-by-step instructions for making this structure are presented below:
- Dig a hole whose depth is equal to half the height of the widest car tire. The diameter of the hole must exactly match the diameter of the tire.
- If tires of different sizes are used to make the structure, then their upper parts must be cut off. When using car tires of the same diameter, holes are cut out in their side for strawberry seedlings.
- Place the largest tire in the hole. Place a 2 cm thick layer of expanded clay on the bottom for drainage. Fill the remaining part of the tire with a mixture of soil, sand and peat.
- Close the bottom of the PVC pipe tightly, and make holes on its side: at the top with a diameter of 10 mm, at the bottom - 5 mm. Install the pipe vertically in the center of the first tier, placing its clogged side into the ground.
- Water the soil inside the car tire with water and let it shrink for 30 minutes.
- Install the remaining tiers of the pyramid in the same way. You can place a flower pot on top of the structure for decoration.
Made of wood
The most common material used to make a strawberry pyramid is wood. Square boxes of various sizes are made from the boards and then stacked on top of each other.
To make such a structure you will need the following materials and tools:
- boards 25 cm wide and 40 mm thick;
- Rabitz;
- drying oil and varnish to protect wood;
- self-tapping screws;
- jigsaw;
- screwdriver;
- plane;
- building level;
- roulette;
- PVC pipe with a diameter of 100 mm;
- sand, peat and humus (ratio 1:1:2), compost, manure.
The standard dimensions of a wooden structure are:
- first tier - 220x220x25 cm;
- second tier - 170x170x25 cm;
- third tier - 120x120x25 cm;
- fourth tier - 70x70x25 cm;
- fifth tier - 20x20x25 cm.
Important! A wooden pyramid for growing strawberries can have any size, but the sides of adjacent tiers should differ from each other by 30–35 cm.
Step-by-step instructions for making a multi-tiered square pyramid made of wood:
- Cut parts from the boards to the required length (according to the drawing). Measure a piece of mesh measuring 240x240 cm.
- Make square boxes from the prepared pieces of boards, connecting the parts with self-tapping screws. Round the top edges of the boards so that they do not injure the thin mustache of the strawberry.
- Treat the resulting tiers of the pyramid with drying oil, and then sand them with sandpaper and varnish them - this is necessary to protect the wood from external factors.
- Close the bottom of the PVC pipe tightly, and make holes on its side: at the top with a diameter of 10 mm, at the bottom - 5 mm.
- Spread a chain-link mesh in the chosen place and install the largest box on it. Cover it with soil, leaving a distance of about 6 cm from the top edge of the boards. Water the soil and leave it to shrink for about half an hour. The first tier of the pyramid is ready.
- Place a PVC pipe vertically in the center of the lower tier with the closed end down. Cover it on the outside with a layer of a mixture of compost and manure, compacting it with your hands.
- Similarly, install the second and all subsequent tiers of the pyramid on top of each other so that the PVC pipe is in the center.
Video: Pyramid for strawberries
Made from alternative materials
To make a strawberry pyramid, you can use other available materials. The finished structure can have an original shape, being a real decorative decoration of the site.
Ways to build a pyramid from alternative materials:
- Plastic pots of various sizes. Small holes are made in the bottom of each of them, and in the selected area, a reinforcement rod of the required length is dug into the ground to a depth of 50 cm. The largest pot is placed on the reinforcement and filled with soil. All other containers are placed in a similar manner, arranging them in tiers and giving the finished structure the desired shape.
- Barrels and pipes of different diameters. The process of assembling such a pyramid is similar to installing a structure made from car tires. The barrels are cut into rings and placed vertically on top of each other, filling each tier with a mixture of sand, peat and humus.
- Plastic bottles. Their upper part is cut off at a distance of 20–25 cm from the neck, which is tightly screwed on with a lid. Make 2 small holes on opposite sides and thread a rope through them. The resulting containers are filled with soil and tied to any vertical surface (wall, wooden or metal frame, fence, etc.).
- Plastic bags. They need to be cut into vertical pockets of the desired size, leaving 1.5–3 cm for the seams. Then the cut polyethylene is sewn together using thread and a needle, and each pocket is filled with soil and strawberry seedlings are planted there.
- Slate sheets. The material is cut into fragments of the required size and connected into a square box, placing the parts perpendicular to the surface of the earth. In this way, the required number of tiers is formed, placing them on top of each other and alternately filling each slate box with soil to form a pyramid.
Plant perennials with different textures
When designing shady corners of the garden, the focus is not on color, but on texture. Ferns would look most appropriate here. You shouldn’t limit yourself to the “classic” ostrich. As an alternative or supplement, you can use other species of this plant, for example, various shield plants.
Everything you need to know about fern before planting it in your garden Do you need to plant a shady corner in your garden, but you don’t know which plant to choose? Of course, fern!
Selection and preparation of a site for a pyramid
Before making the described structure, you need to select the most suitable area for its installation. If you have free space, you can place the strawberry pyramid anywhere, but it must meet certain requirements.
Did you know? The daily requirement of vitamin C for an adult can be obtained from just 100 g of fresh strawberries.
Basic rules for selecting and preparing a site for construction:
- the place should be well illuminated by the sun - this will ensure normal development of the bushes and uniform ripening of the berries;
- the pyramid should be located near a water source - this will make frequent watering of the beds much easier;
- before installing the structure, you need to remove all stones, weeds and plant debris from the ground so that the soil is clean;
- It is recommended to level the ground at the selected location using a building level - this is necessary so that the installed pyramid does not skew to one side;
- It is not recommended to dig up the site beforehand - on hard ground the structure will stand more stable;
- the square pyramid must be placed so that its corners are directed to the north, south, west and east;
- Before installing the first tier, you need to cover the selected area with a chain-link mesh - it protects the strawberries well from moles and rodents.
How to do it yourself
The simplest answer is to buy a ready-made structure in a specialized store. And if this is not possible, then build using virtually any available material: boards, boxes, pieces of slate, barrels, old furniture. Assembling a multi-tiered or vertical bed with your own hands is not so difficult. To make such a unique pyramid, you do not need to have special training.
Before arranging multi-tiered beds, two questions need to be resolved: is there enough lighting for future plantings and how level is the terrain of the area? Taking into account the second condition, a building level will be needed for the arrangement. After marking the area for multi-tiered plantings, it is necessary to level it. Also, it is possible that the first tier will need a strong foundation made of bricks, which needs to be made on an already leveled area.
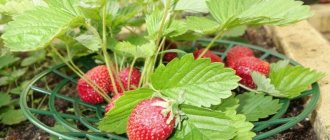
Selecting optimal varieties and planting strawberry seedlings
Planting strawberry seedlings in a pyramid can only be done after the soil in it has settled, and this requires 7–10 days. In order for the cultivation of berries in this structure to be most successful, it is recommended to choose remontant varieties of crops for planting, which bear fruit throughout the summer.
The best remontant varieties include:
- Queen Elizabeth 2. The plants produce very large and juicy berries weighing about 50 g. The taste is very high, and the pulp is of medium density. The bush begins to bear fruit from the first year, but needs annual renewal to maintain the large size of the fruit.
- Temptation. Strawberries of this variety have dense and juicy pulp with a characteristic nutmeg taste. The average weight of one fruit is 30 g. Long flower stalks are formed on the plants, which turn the pyramid into a real decorative flower bed. The variety is even suitable for growing in apartment conditions.
- Diamond. One of the best remontant strawberry varieties, which is characterized by high yield and excellent immunity to diseases and pests. The weight of one fruit is about 20 g, and its pulp is very juicy and tasty.
- Evie 2. The berries of this variety attract with their rich scarlet color, and their pulp has a sweet and fresh taste. Strawberries grow well even in drought conditions, and the weight of each fruit is about 20 g.
- Moscow delicacy. The variety is very productive and unpretentious to the length of daylight hours. The berries can weigh up to 35 g, and their pulp has a rich cherry flavor and is covered with a smooth red skin. Plants exhibit high resistance to frost, diseases and pests.
- Albion. Its fruits are very large, have dense pulp and dark red skin. The bushes can tolerate drought, and in the southern regions they can withstand winter well without shelter. The variety is characterized by high shelf life and excellent transportability.
Step-by-step instructions for planting strawberry seedlings in a pyramid:
- Prepare small holes on the surface of each tier, the depth of which is equal to the length of the root system of the seedlings. For a square pyramid of standard sizes of 5 steps, 7 seedlings are placed on each side on the first tier, 5 on the second, 3 on the third, 2 on the fourth, and only 2 strawberry sprouts are planted on the fifth tier.
- At the bottom of each depression, form a small mound of soil. Water the holes with water.
- Place the strawberry seedling in the hole so that its root collar is above the soil level. Spread the roots of the sprout on the surface of the mound.
- Sprinkle the hole with the seedling with soil and lightly compact it. Water the bed with a small amount of water.
- After complete absorption of moisture, mulch the ground around the bush with hay or sawdust.
Important! The assembly of the strawberry pyramid must be carried out directly on the selected site, since the finished structure is large in size and inconvenient for transportation.
Selecting flowers for a multi-tiered flower bed
Most multi-tiered flower beds are designed so that after watering, part of the water flows from the upper tiers to the lower ones. This is a very important feature that should be taken into account first when choosing plants and flowers for a flower bed.
Thus, for the lower layers of our flower arrangement, we choose plants that feel comfortable in high soil moisture.
Spring flowers:
- primrose;
- forget-me-nots;
- violets.
Summer flowers:
- irises;
- geraniums;
- astilbe.
In the upper levels of the composition we will place flowers that are less demanding of watering. These colors include:
- asters;
- marigold;
- nasturtium;
- cosmos.
These flowers do not need frequent watering and can tolerate a lack of moisture in the post without consequences.
Of course, special attention should be paid to the appearance of the entire flowerbed, which you want to get in the end.
- You should definitely take into account the size of the inflorescences of the flowers you choose. Ideally, the inflorescences should decrease in size from the bottom row to the top.
- It is preferable to use flowers of the same size in one tier.
- It is also worth considering the flowering period. To keep your flowerbed blooming for as long as possible, choose crops with a long flowering period.
- Will the entire flowerbed be decorated with shades of the same color scheme, or vice versa with contrasting colors:
you can use a bright combination: three primary colors - red, blue and yellow, and the remaining colors as additional ones.
Select flowers for your flower bed according to their flowering time
- A monotonous flowerbed always looks impressive.
- Flower beds with classic combinations of two contrasting colors, such as yellow and purple, look harmonious.
- Transitional shades from darker to lighter or from cold to warm look very impressive in flower beds. For example: red - orange - yellow or blue - purple - blue.
For everything else, rely on your taste and imagination! Armed with the necessary knowledge and a minimal set of available materials, you can easily transform your site into a blooming garden!
Agricultural technology
Growing strawberries in a vertical pyramid greatly simplifies the care of the beds, but to obtain a generous harvest of berries, you must follow the rules of agricultural technology. With this placement, the bushes require additional irrigation and are almost not affected by pests or diseases. An experienced gardener should always monitor the condition of the plants in order to maintain comfortable conditions for them and promptly notice the emergence of a problem. Below we will consider in more detail information about watering strawberries in a pyramid and dealing with possible difficulties.
Watering
Strawberries are very sensitive to soil moisture, so they need regular irrigation. When growing this crop in a vertical structure, water leaves the soil faster, which means you will have to water the plants more often than with conventional horizontal planting.
Read more about how and when to water strawberries correctly.
The basic rules for watering strawberries in a pyramid are listed below:
- it is recommended to equip a drip irrigation system for bushes - for this, a perforated hose is laid on each tier of the structure, one end of which is connected to a water source, and the other is hermetically sealed and discharged through holes in a pipe installed in the center of the structure;
- It is recommended to water strawberries in the morning or evening - at this time, less moisture evaporates from the soil;
- You need to moisten the beds as needed - about 3-5 times a week, without allowing the soil around the plants to completely dry out or the soil to get too wet;
- For irrigation, only warm water is used, standing in the sun for 24 hours;
- Irrigation of bushes is carried out strictly at the root - if drops of water get on the leaves of plants, burns may occur;
- during prolonged rains, the structure must be covered with film - this will protect the strawberries from excess moisture and prevent rotting of the stem;
- To keep the bed moist longer, it is recommended to cover it with a layer of dry straw or sawdust.
Disease and pest control
Planting strawberries in a vertical structure allows for improved air circulation around the bushes and prevents stagnation of moisture in the soil, so the plants are rarely affected by diseases and pests. But if there are errors in care, harmful insects or infection may appear in the beds.
Did you know? The largest amount of strawberries is grown in California (USA) - about 1 billion tons of these berries are harvested here every year.
List of the most common diseases and pests of the described crop:
- Gray rot. The disease affects the berries, covering their surface with spots with a fluffy gray coating. Over time, the lesions spread to the entire fruit, the strawberry begins to rot, and the bush dies. The affected plant is pulled out of the garden bed, and the plantings are treated with a 1% solution of Bordeaux mixture or Fitosporin.
- Brown spot. The disease can quickly destroy the entire bush, therefore it is one of the most dangerous. At the same time, small brown spots with dark edges appear on the strawberry leaves. Gradually, their area increases and covers the entire leaf, causing it to turn yellow and fall off. The affected areas of the plants are removed and destroyed, and the strawberries are treated with a solution of copper oxychloride (1 tbsp per 10 liters of water).
- Powdery mildew. The infection is a fungal infection, and its sign is a whitish coating on the leaves of plants. The bush begins to lag in growth, the green mass becomes deformed and turns yellow. The berries also become covered with a white coating, reminiscent of mold, and then dry out. You can get rid of the infection using a solution of 3 liters of water, 200 g of laundry soap and 5 g of copper sulfate, and in case of significant damage, use “Topaz”.
- Strawberry mite. The size of this pest does not exceed 0.2 mm, and it feeds on the juice and pulp of the green part of plants. Strawberry leaves wrinkle and their surface becomes oily. The bush stops growing, the berries become smaller, and the plant dies. You can get rid of strawberry mites using a 3% solution of copper sulfate (30 g of product per 10 liters of water) or Karbofos.
- Aphid. It lives on strawberry leaves and sucks the juice from them. The green mass of the affected bushes begins to wither, the leaves become covered with a sticky coating, dry out and can curl into tubes. Pests are well repelled by treating plants with an aqueous solution of Nitrofen.
All of these problems can be prevented if you follow the recommendations for caring for the crop and place the pyramid with bushes in a suitable place.
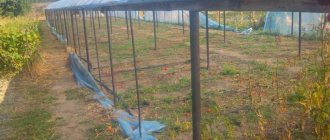
Finnish technology
Now it is difficult to understand why this particular berry has been grown in Finland on a large scale for 50 years. Which, at first glance, does not fit in with the northern, not very sunny country. But local farmers quickly realized the profitability of such a business, having tried all sorts of options. Now in this small country 3.5 thousand hectares are occupied by strawberries.
Suspicions arise that the Finns have secrets of agricultural technology that are inaccessible to the rest of the world. In reality, there are no secrets, and many Russian gardeners have long adopted some of the tricks of cultivating such crops. As for varieties, their range in Finland is not large. Species that do not get sick and have high commercial qualities are valued: aesthetics, keeping quality, transportability.
Features of growing strawberries using Finnish technology
The uniqueness of Finnish technology is as follows:
- the rows are located on the ridges;
- cover with dark material is used;
- Comfortable, wide enough.
Most often, on farms that produce this berry, one, or maximum two, rows of bushes grow on one ridge. This is how it is more convenient to care for and harvest. The rows are located quite high, above ground level. They are formed by adding earth from the boundary. The material used to cover the soil is any non-woven dense dark fabric that will cover the soil as much as possible. If the plantation is not very large, and it is possible to purchase mulching material inexpensively, then sawdust, shavings or hay are placed between the rows.
Pros and cons of Finnish technology
Like any methods of growing plants, Finnish technology has its advantages and disadvantages. To begin with, you should dwell on the advantages. Firstly, there are more of them. Secondly, they have been formed over a long time and have been tested many times by both farmers and ordinary gardeners:
- the ridges of high beds for strawberries are better warmed by the sun;
- dark material protects against weeds throughout the season;
- the soil underneath remains moist for a long time and does not need watering for a long time;
- a special microclimate contributes to the creation of beneficial microflora and the reproduction of earthworms, which improve the nutritional value of the soil;
- despite the fact that the soil is covered with Agrospan, it breathes and remains loose for a long time;
- with this arrangement it is more convenient to harvest, you need to bend over less, since the bushes are higher than the boundary;
- wide row spacing of high beds for strawberries makes it possible to easily move during processing and harvesting, which increases labor productivity;
- The berries do not lie on the ground, so they do not get dirty: in order for them to remain fresh for several days, they cannot be washed.
All of the above methods are designed to pay a minimum of attention to the growing process and to obtain good harvests that are convenient to harvest. Among the disadvantages of high beds for strawberries, one can note the labor intensity of preparing the soil for planting seedlings. The canvas will last a maximum of 3 years, after which you need to purchase a new one and make cuts for the bushes at the same distance from each other. Then it is pinned to the ground, maintaining intervals. Mulch is constantly added between the rows. It requires updating several times a season.
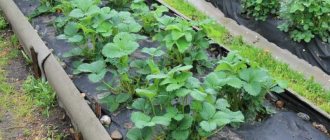
Rules for growing strawberries in high beds using Finnish technology
If you wish, you can adopt the experience of the Finns and arrange your berry garden in a similar way. You can correctly make a raised bed for strawberries using Finnish technology by observing the following nuances:
- Before planting the berries, the soil must be thoroughly cultivated so that the weeds do not retain their roots.
- Any organic fertilizer that will last 3-4 years should be applied to the center of the mound. This is manure, compost or humus.
- Dark non-woven material is pulled over the formed ridges and secured along the entire length. Bushes are planted in the holes.
- Watering should be done as needed. It depends on the quality of the soil and the weather. If the soil is dry, this is a signal for watering.
- On the ridges, the berries are planted in 1 row with a distance of about 40 cm.
If the above rules are followed, a large harvest is guaranteed.
Comment! This method of cultivation is advisable only if there are a large number of bushes or in the case when the summer resident is rarely on the site.
Structure care
In addition to proper watering and regular control of pests and diseases, it is also necessary to carry out other measures to care for the pyramid. Thanks to these actions, strawberries produce a generous harvest of sweet berries, and the plants develop normally.
Basic care recommendations:
- After each watering, the surface of the soil in the beds should be loosened to a shallow depth - this improves the air permeability of the soil and facilitates access of water to the roots of the plants.
- When weeds appear, they need to be pulled out - they take moisture and nutrients from the strawberries.
- During the entire growing season, the bushes are fed 3 times with fertilizers containing nitrogen, phosphorus and potassium. In the spring they are applied in a ratio of 3:1:4, during fruit set - in a ratio of 2:1:4, and after harvesting berries - in a ratio of 2:1:3.
- If necessary, trim the mustache and green vines of plants - this procedure is carried out to ensure that all the berries receive a sufficient amount of sunlight and ripen on time.
- To increase the service life of the pyramid, it is necessary to build a reliable shelter for it in the winter - bury the structure with earth, and then cover it with a layer of hay or spruce branches.
- Every 3–5 years, the soil in the pyramid is completely replaced - the old soil is significantly depleted during this time, which leads to a decrease in yield.
Advice from experienced gardeners
To get a good harvest of strawberries in a pyramidal bed, you need to listen to the advice of experienced gardeners:
- the pyramid is installed in a sunny place, optimally if you choose a bright area of the garden;
- It is advisable to plant seedlings not immediately after making the pyramid, but 8 days after filling with soil, so that it compacts a little;
- for planting in a pyramid, choose low-growing or hanging varieties of strawberries;
- seedlings are used only with a good root system;
- maintain a minimum distance of 25 cm between plants;
- strawberries are planted so that the root of the seedling remains in an upright position;
- The soil in the garden bed should not dry out.
The ease of care in a pyramidal bed sometimes gives way to difficulties. If weeds appear, you will have to pluck them out by hand. To prevent gray rot from affecting the berries, the bushes are sprayed with a weak solution of potassium permanganate before flowering. For prevention, the procedure is carried out twice a month.
It is important to monitor the color of the foliage. Yellowed leaves are torn off immediately. It is better to burn them, as yellowness can occur as a result of dangerous diseases. Parasites must be dealt with immediately after they are discovered. In a pyramidal bed, they spread quickly and can destroy all the strawberries in a day.
Pyramid for strawberries in the apartment
If you don’t have your own plot of land, you can install a strawberry pyramid even in a city apartment. It is best to make a compact structure from flower pots using the method described above in the article.
Important! If there is no balcony, you can install a compact pyramidal structure on a window sill facing south or southwest.
Basic rules for using a vertical structure for growing berries indoors:
- It is recommended to install the strawberry pyramid on a glazed balcony or loggia - this way the plants will receive a sufficient amount of sunlight and heat.
- For each strawberry seedling you need to prepare a separate flower pot with a volume of no more than 3 liters and a diameter of about 20 cm.
- If there is a lack of sunlight, artificial lighting is used - the total daylight hours for strawberries should be at least 12 hours.
- In winter, it is recommended to cover the strawberry pyramid installed on a glazed balcony with film to protect it from frost.
Growing strawberries in pyramids not only allows you to save space on your plot, but also greatly simplifies the care of the beds. Using the information presented in the article, you can get a stable and generous harvest of ripe berries, and also create a real decorative decoration for your plot from a vertical structure.
Features of landing
As soon as the soil settles, it is recommended to fertilize it with humus.
At each level of the structure, a specific planting method is used.
- They start from the lowest floor - seven seedlings on each side.
- The next level is five bushes on each side.
- The third and fourth rows are three bushes on each side, the top level is two seedlings at the base of the pipe.
Care
Caring for plantings consists of regularly watering the seedlings, but you cannot rely on any conventional scheme.
Watering is carried out as needed. Feeding is carried out using liquid nutrient mixtures. Among other things, it is worth taking care to protect the plantings from low temperatures and provide sufficient lighting .