Growing seedlings in a greenhouse has its advantages: it turns out to be hardened, strong and very viable. The seedlings are not at all like the stunted, elongated creatures that grew on your windowsill. But such a result requires certain conditions. The Butterfly greenhouse can provide them on your site. Today, the editors of HomeMyHome.ru decided to study in detail the design features of such a mini-greenhouse, as well as talk about its advantages and disadvantages. In addition, for our readers we have prepared a detailed master class on making a greenhouse.
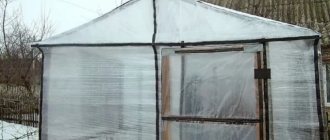
The Butterfly model greenhouse is deservedly popular among Russian summer residents
Greenhouse “Butterfly”: design features and photographic examples
The “Butterfly” design is considered universal. It can be accommodated on a spacious hacienda and a modest four hundred square meters. This greenhouse is especially convenient in that it can be moved to a new location if necessary.
In “Butterfly” you can grow seedlings of tomatoes, cucumbers, peppers and cabbage. Radishes, salad greens and cucumbers will do well here.
The name of the greenhouse comes from the peculiarity of its design: the lid opens on both sides, resembling the wings of a butterfly. Thanks to this, it is possible to regulate the temperature and microclimate in the greenhouse, providing the most comfortable conditions for the growth of seedlings. In addition, it is very convenient to approach the greenhouse from both sides and care for the plants.
For your information! A small greenhouse can be heated to preserve seedlings during late frosts. Heated models are available for sale.
Typically, such greenhouses are made of lightweight metal profiles and transparent polycarbonate. In homemade versions, summer residents use wood for the frame and plastic film.
Pros of the Butterfly greenhouse
A standard summer cottage plot is generally small in size, which is why owners of personal plots are often concerned about how to make the most functional use of the free space. That is why it is very important that a greenhouse installed on a summer cottage takes up little free space, but is as functional as possible. This is why many summer residents prefer the Butterfly greenhouse. However, it has its pros and cons.
The main advantages of such a greenhouse include:
- Good resistance to adverse conditions;
- Withstands a large layer of snow well;
- Doesn’t take up much space on a summer cottage;
- Convenient to care for plants;
- It is possible to provide very good air exchange for plants.
Such a greenhouse warms up very quickly in the sun, which is why various heat-loving plants can be grown in it. This greenhouse is distinguished by its strength and durability, and manufacturers guarantee that it will last for more than 10 years.
Since the structure of the greenhouse is very light, there is no need to make a foundation for it on a summer cottage, which allows you to save on building materials.
However, despite all the advantages of such a greenhouse, during its operation, summer residents also highlight certain disadvantages. One of the disadvantages of this design is that due to frequent opening and closing of the sashes, the hinges may be damaged, and thus repairs may be required. When using polycarbonate as a covering for a greenhouse, it is necessary to strengthen the lower arcs, since they can sag and bend under the influence of gravity. In addition, many note the terrible type of paint applied to the frame, which almost immediately cracks and peels, as a result of which the metal arches can be exposed to corrosion.
Dimensions, types and materials of the Butterfly greenhouse
The size of the greenhouse depends on two factors: its purpose and the available space for placement. If you plan to grow only seedlings in it, a size of 1x2 m is sufficient. If you need to place cucumbers or radishes in a greenhouse for growing in the cool season, you can increase the dimensions of the greenhouse to 8-20 m².
For large greenhouses, the lifting parts of the roof are divided into several sections
The second factor influencing the dimensions of the Butterfly is its location. It is clear that in a small area it is difficult to install a large greenhouse in such a way that it is convenient to approach and service it from all sides. There should be at least one meter of free space around the perimeter of the greenhouse so that you can turn around with a watering can and bend freely over the plants. As for the types of Butterfly greenhouse, three main configurations can be distinguished:
- a greenhouse with solid walls and straight “wings”. Closed walls protect plants well from the cold, but force them to actively stretch upward;
- greenhouse with transparent side walls. The sides can be made of glass or polycarbonate. This design provides the seedlings with more light;
- greenhouse with arched “wings”. The high transparent roof of the greenhouse makes it possible to plant medium-sized plants in it.
The greenhouse can be as small as you need.
The materials for making a greenhouse are the same as for other popular greenhouses. The frame is made of metal, steel or aluminum profiles, and the transparent parts are made of dense reinforced film or cellular polycarbonate. Experts recommend making the closed parts of the greenhouse from wood or OSB boards. The photo shows greenhouses of the “Butterfly” design in different designs.
Related article:
Do-it-yourself greenhouse made from a profile pipe. A separate review provides detailed instructions for the design and construction of a structure from a profile pipe with photo examples.
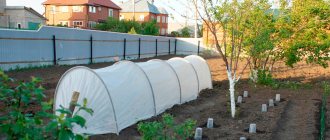
Examples and options
Below are examples of the greenhouses under consideration.
The design of a butterfly greenhouse can be made in such a way that the structure is located on the site as compactly as possible.
Many people prefer a wooden frame. It is easy to process and also looks aesthetically pleasing.
The profile pipe construction is highly durable.
Such a greenhouse may have a rather unusual design.
Drawings with dimensions
The drawing is an important stage in the formation of a greenhouse. For competent construction, preliminary calculations will be required.
It is important to calculate the size, prices and number of materials. First you need to lay out the foundation
It’s not so important whether you make a foundation or not, but the sides are important
First you need to lay out the foundation
It’s not so important whether you make a foundation or not, but the sides are important
The sides can be single or double, the layer is 2.5 cm, and the height depends on the specifics of the selected crops.
Melons - up to 20 cm, cucumbers require much more height.
There should be a main beam on top of the system; the main component, the “wings,” is attached to it.
Basic characteristics - length, latitude and height of the system - are calculated individually.
The height is no more than one and a half meters. When calculating the wood frame, log products are disinfected before painting.
In order for the wings of the system to be in the open state, it is necessary to provide special stops made of resistant material.
Complete set of 2 meter and 4 meter Butterfly greenhouse:
| № | the name of detail | Photo | Number of parts, pcs. |
| Butterfly 2 m | Butterfly 4 m | ||
| 1 | End arc (with holes for polycarbonate fastening) | 2 pcs | 2 pcs |
| 2 | Intermediate arc | — | 1 PC |
| 3 | Cross member 1260 mm | 2 pcs | 3 pcs |
| 4 | Side stringer 1978 mm | 4 things | 8 pcs |
| 5 | Upper stringer 1978 mm (with holes for hinges) | 2 pcs | 4 things |
| 6 | Upper lid stringer 1828 mm (with holes for hinges) | 2 pcs | 4 things |
| 7 | Bottom cover stringer 1828 mm | 2 pcs | 4 things |
| 8 | Cover arc | 6 pcs | 12 pcs |
| 9 | Grouser 450 mm | — | 2 pcs |
| 10 | End grouser 450 mm (with holes for polycarbonate) | 4 things | 4 things |
| 11 | Triangular headscarf | 24 pcs | 32 pcs |
| 12 | Square scarf | — | 8 pcs |
| 13 | Corner | 16 pcs | 32 pcs |
| 14 | Intermediate bracket | — | 2 pcs |
| 15 | Corner bracket | 4 things | 4 things |
| 16 | Emphasis | 4 things | 8 pcs |
| 17 | Pen | 4 things | 8 pcs |
| 18 | Pinwheel | 4 things | 8 pcs |
| 19 | Screw M5×30 | 86 pcs | 130 pcs |
| 20 | Nut M5 | 102 pcs | 146 pcs |
| 21 | A loop | 4 things | 8 pcs |
| 22 | Hinge cover | 8 pcs | 16 pcs |
| 23 | Screw M4×30 | 20 pcs | 40 pcs |
| 24 | Screw M5×16 | 8 pcs | 16 pcs |
| 25 | Nut M4 | 24 pcs | 48 pcs |
| 26 | Self-tapping screw 4×20 | 108 pcs | 162 pcs |
| 27 | Roofing washer | 108 pcs | 162 pcs |
| 28 | Cover stop | 4 things | 8 pcs |
| 29 | Passport | 1 PC | 1 PC |
| 30 | Insert with complete set | — | — |
Sources
- https://ogorod-bez-hlopot.ru/parnik-babochka-stoit-ono-togo.html
- https://homius.ru/parnik-babochka.html
- https://teplicaexpert.com/stroitelstvo-teplicy/babochka/
- https://MrDachnik.com/parnik-babochka-svoimi-rukami
- https://remoo.ru/postrojki/parnik-babochka
- https://b-online.ru/malye-formy/teplitsa-babochka-iz-polikarbonata-kompaktnaya-i-udobnaya-konstruktsiya-svoimi-rukami.html
- https://stroy-podskazka.ru/parnik/babochka/
- https://sdelairukami.ru/parnik-babochka-iz-polikarbonata-svoimi-rukami/
- https://BestForHome.ru/teplica/slava/parnik-babochka/sborka-svoimi-rukami-chertezhi-s-razmerami
Advantages and disadvantages of the Butterfly design
Whether a greenhouse design is convenient or not can only be determined in practice. Reviews from summer residents about the “Butterfly” shaped greenhouse give a complete picture of the advantages and disadvantages of this configuration. We have highlighted the main points that will help you make your choice.
Advantages:
- Saving free space. A greenhouse is not a greenhouse in which you need to allocate space for internal passages. This is important if you have little space and need to save every meter.
- Easy to care for plants. The plantings in Butterfly can be approached from two sides, so there are no problems with loosening, watering and planting.
- There are no problems with installing the structure. The Butterfly device is very primitive, so any summer resident can handle its installation.
- Affordable price. You can quite cheaply buy a ready-made “Butterfly” greenhouse made of polycarbonate or make it yourself from scrap materials left over after construction on the site.
- Reliability. The squat greenhouse will withstand wind gusts of up to 20-25 meters per second. If you have a film coating, it will cope with a ten-centimeter layer of snow, and a plastic structure can withstand even greater snowfall.
Flaws:
- Unreliable fastening of frames. According to user reviews, the main and, as they believe, terrible drawback of the Butterfly greenhouse is the unreliability of fastening the wings when open. It’s as if they are specifically trying to hit you on the back while working with seedlings. This deficiency can be corrected by installing reliable supports.
- Defects in factory designs. Finished models often suffer from factory defects: the edges of the greenhouse are poorly processed, the paint does not adhere well, and weak hinges. All these unpleasant moments are eliminated manually.
The popularity of the “Butterfly” design is evidenced by the fact that the demand for this product is steadily growing. You will find commercial offers on many trading platforms. If a product has been purchased for many years, it means it suits summer residents.
Related article:
Do-it-yourself greenhouse made of plastic pipes. A separate review provides a detailed overview of the use, design and installation of greenhouses made from PVC pipes.
How to make a mini greenhouse with your own hands: mobile design
In terms of its technical characteristics, the mobile mini greenhouse is in no way inferior to the in-depth version. It retains heat perfectly and creates all the necessary conditions for comfortable growth and development of plants. However, this model is more suitable for use in conditions of stable temperatures, which are more typical for the second half of spring.
Polycarbonate of thin thickness bends easily, so it can be used for a small greenhouse and even cut holes using a construction knife
Thanks to the presence of wheels in this design, the greenhouse can be easily moved from one place to another, choosing the most suitable place on the site.
To make it you will need:
- support frame;
- plywood sheet;
- two bars;
- four-wheel device;
- polycarbonate;
- self-tapping screws
The supporting frame is made of thin bars, fastened together with ordinary self-tapping screws. The wheels are attached to the rack legs, and the side bars are also used as a harness to which the rafter legs can be attached. At the top of the structure you need to make a roof using wooden frames to which polycarbonate sheets are attached.
Polycarbonate can be used both for covering large greenhouses and small greenhouses
This type of greenhouse must open, and therefore it is worth taking care of the presence of hinged doors on the end parts of the structure. The bottom, which is made of plywood, must be covered with film and covered with a layer of manure and soil, which will be an excellent nutrient medium for the root system of plants.
Such an unusual, at first glance, greenhouse is an excellent alternative to the usual, stationary structures, because thanks to the lightness of all materials and small size, moving it to another place will not be difficult.
Do-it-yourself drawings of a polycarbonate greenhouse of this type are not found too often, however, thanks to a fairly simple device, it is gradually gaining popularity and summer residents are increasingly using it for growing seedlings.
DIY arched polycarbonate greenhouse
In order to make a simple arched polycarbonate greenhouse, you will first need metal or plastic pipes, the length of which will correspond to the size of the arch. Each element is bent and attached to the base. The only difficulty is that it is quite difficult to make good opening doors on such a frame. It is for this reason that polyethylene film is often used as a covering material for arched greenhouses rather than polycarbonate.
Photo of the installation of an arched greenhouse using wooden beams and a polycarbonate coating
To cover a small arched greenhouse, one sheet of polycarbonate, which can be cut into 4 parts, will be sufficient. One of them should be larger, and the remaining three smaller. You can use a sharp construction knife for cutting.
When everything is ready, you can proceed to attaching the polycarbonate to the frame. To do this, the sheets are placed on the ground and attached to even frame elements laid on top. They need to be positioned so that the wide side of the polycarbonate sheet is along the beam. We overlap each sheet with self-tapping screws and seal the joints with tape.
Helpful advice! Be sure to pay attention to which side you place the polycarbonate
It is extremely important that the solar control film is placed on the outside and not on the inside
After this, you need to bend the entire resulting structure so that you get an arch. Using the chosen fastening method, we fix each frame element to the base so that the entire greenhouse is securely fastened.
Scheme of an arched greenhouse using plastic pipes
All that remains is to close the ends. To do this, take a sheet of polycarbonate and apply it to the hole. We mark the boundaries with a regular marker and cut off the piece we need. Then we attach it to the frame according to the standard scheme.
As already mentioned, this design does not have opening doors, so in order to care for the plants, you will need to completely lift and remove the frame. But in order to add comfort, you can add small windows for ventilation, taking them into account in the drawing of a polycarbonate greenhouse with your own hands. Photos of such greenhouses can be seen on the Internet or on specialized websites.
Of course, this design is far from perfect, but if you want to make a simple greenhouse without spending a lot of money and time on it, then this option is ideal. After all, anyone can figure out how to assemble a polycarbonate greenhouse of such a simple design with their own hands.
How to choose the right place for a greenhouse
What is important for choosing a location for a small greenhouse? First of all, pay attention to the quality of the soil in the selected location. In principle, it is possible to completely replace the soil under the greenhouse, but it is much easier to immediately install it on suitable soil.
If the ground is too soft, the greenhouse may sag, so immediately consider installing a small foundation
Advice! Avoid areas with clay soil and high groundwater levels when installing a greenhouse or greenhouse - clay retains water, and plant roots will rot from excess moisture.
Another significant point is the direction and strength of the wind on the site. With the top open and closed, the structure has a decent windage; if you place it in a heavily blown place, the greenhouse will periodically blow away. The third important factor is the level of illumination of the selected area. It is recommended to install greenhouses in the south and southeast. The sun here not only fully illuminates the plants, but also warms up the greenhouse.
Do not place the structure near a high fence, building or tree
It is not advisable to install “Butterfly” or “Novator” type greenhouses on a slope. If the situation is hopeless, you will have to make a foundation and level the ground.
Related article:
DIY polycarbonate greenhouse. Drawings, types of structures, step-by-step construction, advice and recommendations from experts and much more in a separate publication on our portal.
Instructions for assembling the factory model of the Butterfly greenhouse
A ready-made “Butterfly” greenhouse with a polycarbonate coating in sizes from 1 to 4 m² can be purchased in online stores or retail outlets for summer residents in your city. The products are supplied unassembled and include detailed installation instructions. You can find information on the procedure for assembling the Butterfly greenhouse in the video below.
There is nothing complicated in the assembly process. All parts of the frame are bolted together, and the frame itself is then covered with film or polycarbonate sheet.
Video: how to assemble a “Butterfly” greenhouse
Review: Greenhouse PTS “Butterfly” - Although beautiful, I didn’t like the assembly
So we looked on the Internet for a “Butterfly” type greenhouse, completely dismountable, dimensions: 1250 x 4000 x 1100 mm.
in a 2.2 m long trailer, I transported both the greenhouse frame and two polycarbonate sheets without any problems. This product was manufactured at LLC > Krasnoyarsk - Moscow. Internet - store in St. Petersburg. 1/4 of the total cost is the cost of delivery to our city. During assembly I encountered a problem: the profile pipe is made of sheet iron 0.5 mm thick. and these 20 x 20 mm square pipes are joined to 15 x 15 mm squares. There is no way to get a tight connection, the gaps are large and the whole structure turned out to be very shaky, flimsy, the square tubes are welded crookedly, the welds prevent larger pipes from being joined all the way.
To make the greenhouse structure more rigid and stable, each joint had to be secured with two self-tapping screws. After covering with polycarbonate, large gaps appeared in some places, so what kind of heat will such a greenhouse hold? Disappointed with this purchase.
After assembly and various adjustments, the result is this “butterfly”
I had to build additional supports and here it is “Butterfly”
The greenhouse is ready to receive tomato seedlings!
And these have already grown, but it’s better to plant low-growing ones
How to use the Butterfly greenhouse correctly
For shading, you can use a special fine-mesh mesh.
There are several simple recommendations for operating a greenhouse that are suitable for designs such as “Butterfly”, “Innovator” or “Breadbox”. They have been tested by many years of experience of summer residents:
- Don't forget to ventilate the greenhouse. If there is a lack of fresh air, bacteria multiply in the warm, damp air of a greenhouse, which can destroy your seedlings.
- Securely secure frames when open. The point is not only that a suddenly collapsed frame will break, it can cause serious injuries to the gardener.
- If you place plants in the greenhouse during hot summers, use gauze or other shading material on sunny days. The material is placed on top of the slightly open “wings” of the “Butterfly”.
- If the greenhouse is not used in the summer, remove its lid so that the ground is saturated with rainwater and can be naturally ventilated.
- During operation, do not forget to thoroughly clean the greenhouse windows so that they let in as much light as possible.
- Regulate the temperature for hardening the seedlings by opening the doors slightly for ventilation and closing them at night.
- Use a greenhouse in winter to store plants that do not tolerate soil freezing well. You can install it over strawberries or a bed of tulips and lilies.
Preparing the greenhouse for winter
If you do not plan to use the structure in the cold season, it is better to disassemble it. Remove the film or polycarbonate. The film can crumble in cold weather, and the honeycomb material will be better preserved in a barn or garage. If you don’t want to disassemble the metal structure, just check the integrity of the paint that protects the metal from rust, and renew the coating if necessary.
The ground under a stationary greenhouse needs to be cleared of weeds, disinfected and dug up so that the pest larvae freeze out
Making a “Butterfly” greenhouse with your own hands from cellular polycarbonate
You can make a simple “Butterfly” design yourself. The frame will require a steel or aluminum profile. You can also use wooden slats. In a simple design, you just need to hang the doors on the hinges and think about the supports.
Related article:
Do-it-yourself greenhouse made from scrap materials. Design features, the use of various materials to create a reliable load-bearing frame and high-quality cladding, step-by-step installation instructions with rules for choosing a suitable location on a plot of land are in our publication.
Drawing with the dimensions of the Butterfly model greenhouse, which you can make yourself
Any design begins with a drawing. It is impossible to do without accurate measurements of the site. Remember that for ease of maintenance of the greenhouse you will need a meter area around it. The more accurately you prepare the drawing, the less hassle there will be with fitting the parts.
For example, we offer you a drawing of a greenhouse model “Butterfly” at 4 m:
Materials and tools for work
To make a frame, you will need a profile pipe with a cross-section of 20x20 mm, hinges or hinges for a movable roof, handles, polycarbonate 3 meters wide and a length corresponding to the size of the greenhouse, metal screws, boards or OSB board.
The tools you will need are a hammer, a drill, a screwdriver, a welding machine, a primitive pipe bender and a grinder.
Step-by-step instructions for making a “Butterfly” greenhouse
For good plant growth in a greenhouse, it is necessary not only to choose the right place, but also to follow the installation technology.
| Illustration | Description of action |
| Cut the pipes into lengths according to the drawing. You will need pipes for the main arcs, a rectangular frame and “wings”. | |
| If you don’t have a pipe bender in your arsenal, you can contact any workshop where the arcs will be bent for you to the required dimensions. | |
| Weld cross members onto the finished arcs. One at a height of 30 centimeters, the second at the very bottom. | |
| Weld the parts of the rectangular frame so that you get a lower base of 8 pipes and an upper longitudinal strip on which the roof wings will be attached. | |
| The greenhouse arcs are welded from two straight pipes and two bent ones. If the greenhouse is long, an additional bent pipe in the center will be required. The finished wings are attached on two or three metal hinges to the upper central rail. | |
| The frame of the greenhouse is sheathed with polycarbonate. For this design, a thickness of 4 mm is sufficient. | |
| Thin polycarbonate can be easily cut with a construction knife. | |
| Attach the polycarbonate sheets and cut them exactly along the lines of the frame. | |
| The covering is attached to the frame using a screwdriver and roofing screws. | |
| The location of the screws on the top rail should be such that when open, the heads do not rest against each other. | |
| To fix the greenhouse in the open state, metal stops with a number of holes are used. |
Butterfly greenhouse: cheap, reliable and practical
Many practical summer residents are familiar with the “butterfly” greenhouse design, which is characterized by reliability and ease of operation. It is this kind of greenhouse that will be the subject of our conversation, during which we will try to cover in detail all aspects of using this model.
Benefits Overview
The design has several significant advantages, one of them is the efficient use of space and easy access to plantings, which greatly facilitates care and collection, and the risk of damaging the plant by accidentally stepping on it is very low.
Another attractive factor is that the butterfly has a significant service life. One of the reasons for the “longevity” of a greenhouse is its structural strength, which allows the structure to withstand winds of up to 20 m/sec. The greenhouse's safety margin allows it to cope with 10 cm of snow, which in many cases guarantees the integrity of the structure, especially if the prudent owner takes care to install supports in a timely manner.
The design features of the “butterfly” make it possible to approach plants from any side. Often, a greenhouse has vents, which can be opened to quickly ventilate the room.
The “butterfly” does not cast a dense shadow on the area. The construction of a greenhouse structure will be quite inexpensive and will not require great construction skills and experience. As a rule, the usual set of tools that almost everyone has on the farm is sufficient.
How to choose the right place
Choosing the right location will maximize the effectiveness of the greenhouse and ensure rich harvests. The selected location should be well lit all day. The best option for the location of the structure is along the north-south line. Low-lying places for installing the structure are completely unsuitable, since rain and melt water accumulate in them, and water in a low place can protrude from the ground. In the humid microclimate that is formed here, most crops will develop poorly, rot, and become damp.
Construction materials
The simplest solution is to choose wood as the material for the frame. Although, if you have the skills of a welder or involve an appropriate specialist, nothing prevents you from building a greenhouse from scraps of pipes, welding them in the form of the required structure.
For now, let’s look at how to make a “butterfly” greenhouse on a wooden frame. The frames will need to be covered with polyethylene, covered with polycarbonate or glazed. Glass and polycarbonate (especially the latter) are more preferable, as they are more durable and block ultraviolet radiation. By the way, if you have old wooden frames lying around on your farm, they can be used to glaze a greenhouse, which will significantly save your time, materials, and money.
Greenhouses for a summer cottage (video)
Definition of parameters and assembly
Naturally, the size of the structure is determined by the specific needs of the summer resident and the capabilities of the site. It is worth considering the fact that different crops may require different heights of sides. Melon plants do not need a significant elevation above ground level, but other pitchforks are usually suitable for higher sides. A compromise option is arched frames, under which different types of garden crops can coexist. But installing arched frames with your own hands is a more labor-intensive process than installing flat frames.
Let's start from the sides
When the size issue is resolved, you can begin preparing the frame parts. It is recommended to use boards with a thickness of at least 25 mm.
It is customary to begin the process of constructing a greenhouse with the sides, which can be single, double, or folding. For melon crops that need to be protected from the wind, and at the same time provide them with the maximum possible amount of heat and light, the sides must be glazed. The installation of the sides begins by first marking the place for the greenhouse on the site. There should be no gaps between the sides; they should be adjusted as closely as possible to each other. Then strong beams are installed along the sides.
We install the frames
Frames are attached to the sides on metal hinges, which, if necessary, are additionally reinforced with parts designed for this purpose. Glass frames are quite heavy and, most likely, the greenhouse will bend under their weight in the central part, so it would be good to install a support made of metal pipes or wooden poles. To ensure that the open frame can be fixed, wooden stops must be installed across the entire width of the greenhouse.
Which greenhouse is better for a summer residence: “Butterfly” or “Breadbox” - choose the option for yourself
The “Breadbox” differs from the “Butterfly” model in that only one half of it opens. If you don’t need a wide greenhouse, you can get by with just one flap. But for proper care of plantings, the “Butterfly” is still more convenient, because you can approach the garden bed from both sides.
In terms of construction cost, the Bread Box wins because it has fewer moving parts, which means it will cost you a little less
Another reason for comparison is the assessment of tightness. The “bread box” retains heat better due to its design. But in the warm season, “Butterfly” is better ventilated. Which of these models to choose is up to you to decide. It all depends on the tasks you set for this greenhouse.
Ready-made greenhouse “Butterfly”: asking price and best offers
Practice shows that it is cheaper to make such structures yourself or order them from local craftsmen. So, you will seriously save on delivery. But if you are satisfied with a small design, you can purchase it through the online store. We've found several inexpensive models that might interest you.
| Model | Image | Dimensions (Width×Height×Length), cm | Average cost (as of May 2022), rub. |
| Greenhouse-greenhouse “Butterfly”, 2m (Mr. Heat) | 125×115×200 | 3100 | |
| Greenhouse "Butterfly", 4m | 125×115×400 | 5400 | |
| “Butterfly”, polycarbonate frame | 125×115×200 | 3500 |
Reviews from summer residents about the practice of operating the Butterfly greenhouse
To be completely honest in this matter, we are ready to present to your attention real reviews from owners of suburban areas who have used a similar design in practice. They have not only a positive vector, so take into account all the claims and nuances before making your final choice.
Review of the Butterfly greenhouse:
More details on Tomat-Pomidor:
Another review about the Butterfly greenhouse:
More details on Ogorod:
The Butterfly greenhouse is a convenient and compact greenhouse in which you can grow seedlings and salad greens. It is not difficult to make it yourself, and you can use polyethylene film or polycarbonate as a covering material.
If you have experience using such greenhouses, share it in the comments. We will also be grateful for your useful tips on arranging a greenhouse.
Flaws
Like any product, the Butterfly greenhouse has its drawbacks.
- The paint coating on the frame is of insufficient quality. Paint may peel off when removing tape or tightening bolts.
- The presence of burrs in holes formed in production. You have to work with a file to remove them.
- Despite the instructions in the instructions that the film is suitable, in reality this is not the case. Another thing is polycarbonate, which, due to its strength, rests on the lower trim and large arches.
But in the end, even if there are shortcomings, many people like this approach. And summer residents are ready to eliminate any such disadvantages, believing that in all other respects the Butterfly greenhouse is an excellent solution.