Author: Elena N. https://floristics.info/ru/index.php?option=com_contact&view=contact&id=19 Category: Garden plants Published: April 26, 2016Last edits: January 06, 2021
- Sowing dill
- Planting dill in the ground
- Dill diseases
- Early varieties of dill include:
- Useful properties of dill
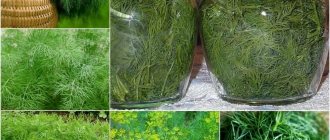
Dill (lat. Anethum) is a monotypic genus of herbaceous annuals of the Apiaceae family, which is represented by the species aromatic dill, or dill. In the wild, the species is found in central and southwestern Asia, the Himalayas and northern Africa, and is cultivated throughout the world. Just like its relative parsley, dill has been known to mankind since the times of Ancient Egypt, but dill began to be used as a spice in Europe only in the 16th century. Today, this unpretentious cold-resistant plant is in demand in cooking and medicine.
Planting and caring for dill
- Planting: sowing seeds in open ground in early spring, and then you can sow it every 2 weeks. When growing dill at home, seeds can be sown at any time. Sowing bush dill seeds for seedlings - in March, planting seedlings in the ground - a little over a month later.
- Lighting: bright sun or partial shade.
- Soil: loose and well-fertilized soil of neutral reaction.
- Watering: frequent: in hot weather - twice a day. Water consumption – 20-30 liters of water per m².
- Fertilizing: when grown in pre-fertilized soil, no fertilizing is needed; nitrogen fertilizers in the form of fermented nettle infusion are added to poor soil. If there is a need for potassium and phosphorus, add them at the rate of 10-15 g per m².
- Reproduction: seed.
- Pests: umbrella blinds, Italian bugs (striated stink bugs), carrot psyllids and flies, melon, willow-carrot and carrot aphids.
- Diseases: blackleg, powdery mildew, fusarium, phomosis, cercospora and rust.
Read more about growing dill below.
Soil requirements
Dill can grow on any type of soil, but it will be juicy and spreading only on fertile, loose soil rich in organic matter. Dill does not grow in acidic soils or when water stagnates.
Immediately before planting, it is not recommended to add ash or lime to the bed, as this can lead to reddening of the green mass.
Only on fertile soil will dill grow juicy, green, and aromatic
Dill plant - description
The dill plant has a strong spicy odor. Its stem is single, straight, reaching a height of 40 to 150 cm, the surface of the stem is dark green and finely grooved. The ovate leaves are dissected into three or four parts, the lobules of the last order are bristly or linear-filamentous. Flowers with yellow petals are collected in umbrellas with a diameter of 2 to 9 cm, which in turn are arranged in umbrella inflorescences with a diameter of 15 to 20 cm. The fruit is a lichen. Widely elliptical or ovoid dill seeds reach a length of 5 mm and a thickness of 3.5 mm. The dill herb blooms in June-July, and the fruits ripen in July-September.
In the article “Sowing vegetables for seedlings in February” we wrote how to grow dill and parsley on a windowsill in the form of seedlings, and in the article “Sowing vegetables in the ground in March” we described how and when to sow dill in the ground, as well as how to grow dill and parsley in open ground. Today we will tell you in more detail how to properly grow dill at home, when to sow dill in open ground, how to grow dill from seeds and how to care for dill growing in the garden.
What happens if you put him in a bad place?
If you choose the wrong soil for dill, you may encounter the following problems:
- Instead of bright greenery in the garden bed, you will see yellow leaves.
- The plants will stretch into a stem.
- The color of the dill leaves will change to pale bluish.
- Foliage may begin to fade for no apparent reason.
- Crops can be damaged by pests.
- Disease resistance decreases when planted in poor soil.
Planting dill
When to plant dill
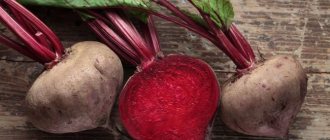
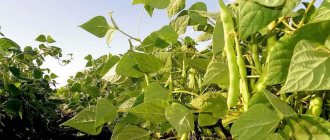
The first sowing of dill in open ground is carried out in early spring, but if you want to have green dill on the table in spring, summer and autumn, then it is best to use the conveyor method of growing the crop - sow the seeds every 10-12 days from early spring to the end of August. Planting dill in the spring involves preparing the site in the fall - digging up the soil to the depth of the fertile layer, but it is better to apply organic matter in the form of manure not under dill, but under its predecessors, the best of which are cabbage, beets, cucumbers and legumes.
- Growing sweet pepper seedlings WITHOUT picking - what is special, what to consider?
You cannot plant dill in areas where Umbelliferae - carrots, parsley, cumin, fennel and parsnips - grew before it.
The best neighbors of dill are cabbage and cucumbers, and Umbrella crops are considered the worst. Dill and carrots are an unfortunate combination, just like parsley and dill. It is much better to grow dill and garlic in the same area. Dill and potatoes get along well with each other.
In early spring, before sowing seeds, the soil is loosened with a rake and 15-20 g of urea, 15-20 g of potassium salt and 20-30 g of superphosphate are added per m² of plot.
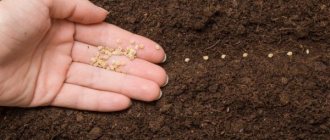
How to plant dill
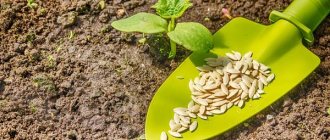
Before sowing, dill seeds are poured with water for 3-4 hours, changing it several times to wash out substances from the seeds that slow down their germination. After this, the seeds are dipped in a strong solution of potassium permanganate for two hours, then washed, dried and sown in grooves 2 cm deep, located 15-20 cm apart. The seeds are laid out in the furrow at a distance of 1-2 cm and, having planted the seeds, the crops are watered. Dill germinates at a temperature of 5 ºC, and to speed up the emergence of seedlings, the area is covered with agrospan. The first shoots may appear in one to two weeks.
Choosing a location to get a good harvest
When choosing a territory, it is worth considering that the rate of vegetation growth depends on the illumination. The greens should be exposed to sunlight for 10-12 hours. It is optimal to sow dill on the southern or eastern side of the garden, so that shading occurs in the late afternoon.
Its growth rate depends on the soil in which the crop is planted. The best soil for growing and caring in open ground is fertile black soil. Greens grow worse in swampy and clayey areas. To improve the soil, fertilizers, such as zeolites, are added to the ground in advance. You can grow a good harvest of dill in soil with neutral acidity, that is, a pH of no more than 6 units. Litmus paper or a special device (pH meter) will help determine acidity. If the soil is acidic, the leaf part will begin to turn brown. If the soil is alkaline, the leaves turn yellow. When leaching, dolomite and wood ash are used. It is permissible to add them immediately during planting or at the stage of digging the ground.
Important : young dill sprouts need shading during hot hours. As soon as the grass gains strength and stretches upward, the sun's rays will benefit the plant.
Growing dill on a windowsill
Sowing dill
When to sow dill at home? Yes, at any time - this crop can be grown on a windowsill all year round. However, if you want to have green dill at home in the middle of winter, you need to know which variety is suitable for this. At home, it is best to grow early-ripening bush varieties of dill such as Gribovsky, Grenadier and Richelieu.
The seeds are pre-treated as before sowing in open ground, after which they are sown to a depth of 1-2 cm in large containers with a drainage layer at the bottom and a moist substrate of one part vermicompost and two parts coconut fiber, after which the containers are covered with glass or film and placed to a dark place. Do not forget to ventilate the crops and remove condensation from the glass. Shoots appear after two weeks, after which the covering can be removed, and the containers must be moved to the light.
Caring for dill at home
Densely sprouted sprouts are thinned out, because dill does not tolerate crowding. The optimal distance between seedlings is 2-3 cm. The room temperature should not be too high, as the seedlings can stretch out. In the first week after germination, it is advisable to lower the temperature by a couple of degrees. To do this, you can take the crops to an insulated balcony. After a week, the temperature is raised to 15-18 ºC - this is the optimal indicator for the successful development of dill seedlings.
At a time when the days are shorter than the nights, dill at home will not be able to develop without additional lighting. A fluorescent lamp with a power of 40-80 W should be placed at a distance of 60 cm from the container with seedlings. The seedlings are illuminated from early morning for 5-6 hours.
Watering dill
Since dill does not tolerate chlorine, water the crops with water that has stood for 24 hours at room temperature or slightly warmer. If possible, it would be good to pass water for irrigation through a magnet or use melt water to moisten the soil. The soil should be loose and barely moist at all times; the substrate should not be over-moistened so that the seedlings do not get sick with blackleg.
Dill on the windowsill likes spraying from a spray bottle, especially if the box with seedlings is located near heating devices, for example, a central heating radiator.
Fertilizing dill
Twice a month, seedlings are fed with a solution of complex mineral fertilizer, for example, Ideal or Raduga in a weak concentration. Avoid overdose, it can destroy young plants. The seedlings must be watered first, and after fertilizing, it is advisable to spray the seedlings with clean water to prevent leaf burn. You can carry out foliar feeding, as they say, on the leaves, but the concentration of these solutions should be even weaker.
What conditions are needed for growing?
For dill, the type of soil does not really matter. It does equally well in sandy and loamy soils. However, the seeds are poorly fixed and difficult to germinate on infertile sandy soils. Light and medium loams are most suitable. Soil acidity also matters. Dill does not grow well at a pH below 6.3.
To obtain good quality greens, plants need regular watering and fertilizing with mineral fertilizers. Seeds and young plants tolerate frosts down to -3...-5o C. This feature of dill makes it possible to do winter sowings.
Important! To keep plants from getting sick, they need a lot of sunlight and warmth.
The optimal air temperature for green growth is at an average daily temperature of 16-20o C.
Growing dill in open ground
Planting dill in the ground
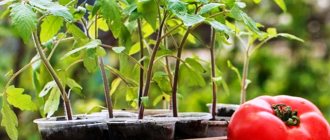
We have already told you how to sow dill seeds in open ground, now we will tell you how dill seedlings are planted in the ground. It is better to grow bush varieties of dill in seedlings, especially if you want to get an early harvest. Dill is sown for seedlings in March, dill is grown in a greenhouse or on a windowsill, and a little over a month later, when the seedlings have developed 3-5 leaves, dill is planted in the garden bed. This should be done on a cloudy day or in the evening, when the rays of the sun cannot harm the seedlings.
In order to avoid thinning in the future, seedlings are planted at a distance of 20-30 cm from each other, keeping row spacing within the same limits. After filling the holes, the soil is lightly compacted, the seedlings are watered, then the area is covered with dry soil. Plants need to be shaded from the bright sun for several days. When flowering shoots begin to form on the bushes, it is better to remove them in order to enhance the growth of lateral branches.
- When to plow green manure for maximum effect
Caring for dill in the ground
Dill in open ground does not require any special care, everything is as usual: thinning, watering, loosening the soil, weeding and fertilizing. The soil on the site is loosened to a depth of 5 cm as soon as the seedlings take root. The next two loosenings are carried out at an interval of two weeks after watering or rain to a depth of 10-12 cm.
Weeding is very important until the plants get stronger. As soon as they come into force, weeds are unlikely to be able to harm them, but while the seedlings are small and fragile, do not give the weeds a single chance to take root in the garden bed.
Watering dill
Dill needs to be watered often, otherwise it loses its taste, turns yellow and may even lose its medicinal properties. On hot days, you need to water the plant twice a day. If you have the opportunity, install an automatic watering system. The amount of water per 1 m² per watering is 20-30 liters.
Fertilizing dill
Dill needs nitrogen fertilizers, but one must take into account its ability to accumulate nitrates, so it is best to apply nettle infusion fermented for five days as a top dressing. This measure, in addition to feeding the dill with nitrogen, will rid the plant of aphids. Keep in mind that it is highly undesirable to use insecticides on dill, especially later than half a month before harvest. If the need arises, you can apply phosphorus-potassium fertilizers at the rate of 10-15 g per m².
How and when to collect dill seeds
When the seeds dry, take on the appearance of brown flat disks and become easily separated from the umbrella, you can begin to collect them. Dill seeds remain viable for 3-4 years. After collecting, it is advisable to dry them until completely dry.
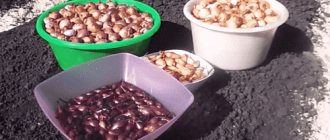
How to determine what kind of soil is on the site?
Humidity and temperature
The easiest way to measure soil temperature is. To do this you can:
- Use a professional agricultural thermometer. However, this device is quite expensive, and is usually used only by agronomists or farmers on large farms.
- Take a regular outdoor thermometer, dig a hole 5-10 cm deep, place the thermometer there with the lower end and leave for 7-8 minutes. After this, you need to quickly take out the thermometer and look at the scale so that the device does not have time to heat up or cool down from the air: usually there is a difference of several degrees between the soil and the atmosphere. For a more accurate measurement, you should shade the thermometer during the measurement so that it does not heat up under direct rays sun.
- Focus on folk signs: if the birch tree begins to produce sap, the soil temperature is above +2 degrees, if the birch leaves begin to open from the buds, the temperature is above +10 degrees.
As for humidity, in the absence of special instruments, it can be determined by taking a lump of soil from the garden bed and squeezing it in your fist:
- If water flows from the lump, the soil is waterlogged, you need to reduce watering or wait until it dries out after spring floods.
- If the lump crumbles, the soil is too dry.
- If the lump is moderately moist to the touch, retains its shape and does not crumble, the humidity is normal.
Important!
You can determine it more accurately if you squeeze a lump of soil with your fingers and throw it to the ground from about chest height. If it crumbles completely, the soil is overdried. If it remains intact and retains its shape, it is overmoistening. If it falls apart into several parts, everything is fine.
Acidity
Soil acidity can be determined in the following ways:
- Send samples (at least three) for analysis to the laboratory. Accurate, reliable - but not cheap.
- Buy an acid meter and test the soil with it. However, you need to remember that the cost of a high-quality device is comparable to the price of examination in a professional laboratory, and cheap and low-quality ones give an error of up to 0.8 - 1.0 pH, which in some cases can be decisive factors.
- Make an extract from the soil and use litmus paper. To do this, at least 3-4 soil samples are taken from a depth of 20 cm for every 100 square meters. m plot. After this, the soil is placed in a vessel, filled with water (ideally distilled, in extreme cases, boiled) and left for one and a half to two hours. Then a piece of paper is dipped into the vessel and the acidity is determined by the color change. You can purchase litmus indicators in stores for gardeners or chemists, and usually the kit is accompanied by a table indicating the correspondence between the colors of the indicator and the pH of the test medium. The measurement accuracy is less than 0.2 pH (especially if you use 3-4 indicator strips), but it requires time and access to chemicals.
- Test with vinegar and soda. To do this, just drop acetic acid onto the sample (preferably undiluted, sold in any supermarket): if the sample hisses and bubbles, the pH is too low, the soil is alkaline and not suitable for dill. If the extract (how to make it is described above) by adding a pinch soda began to foam - the acidity is too high, it is also not suitable for dill. The method is extremely inaccurate, but allows you to navigate, if not
Type
You can determine what type of soil is on the site in the following ways:
- Use a local soil type map compiled by soil scientists. Since the cadastral value of soils depends on the grading (assessment of their fertility and productivity), the maps are usually accurate and are in the public domain. The problem is that mapping does not yet affect all regions.
- Carry out a manual test. To do this, a lump of soil, moistened to a thick paste, needs to be rolled into a “sausage” 3-5 mm thick, and then try to roll a ring from this “sausage”.
- If the ring turned out great - it is heavy clay soil, before growing dill you should add about a bucket of calcined sand per 1 square meter. m beds.
- If the soil crumbles already at the rolling stage, it is sandy or sandy loam soil, ideal for dill.
If you get a “sausage”, but it cracks and crumbles when rolling, it’s something like loam, you don’t need to add anything.
This is an extremely inaccurate method - but for a summer resident-gardener who is not involved in professional agricultural production, it is enough.
As for the humus layer, you need to lay a test pit by digging a hole in the area a meter or more deep. The darker humus layer is clearly visible to the naked eye on a trench wall that has been cleaned vertically. At the same time, you can see at what depth the underlying rock (sand, clay or chalk) begins.
If in a pit a meter deep the color of the soil does not change, then either you are in a completely infertile area where clay and sand come out, or you are lucky and the area ends up in an area of rich chernozems (for example, in the Tambov or Voronezh region, where the power of humus layer sometimes reaches 2 m or more).
Pests and diseases of dill
Dill diseases
Dill is a fairly disease-resistant plant, but it can also have problems. Diseases that pose a danger to dill are blackleg, powdery mildew, fusarium, fomoz, cercospora and rust.
Blackleg affects the root collar of young plants, causing it to become black, soft, thin and rotting. Plants lie down and dry out. The disease usually occurs due to improper care, and is facilitated by excessive watering, sudden temperature changes, stagnant air, insufficient lighting or growing in the shade. At the very first signs of the disease, treat the plants with a solution of Fundazol.
Powdery mildew affects the above-ground parts of dill, covering them with a whitish coating. Stimulates the development of heat disease against a background of high humidity. Powdery mildew is combated by treating dill with colloidal sulfur.
Downy mildew, or downy mildew, also develops on the ground part of the plant and looks like chlorotic, gradually turning brown spots, on the underside of which a dirty purple coating forms. Downy mildew at the first signs of the disease is destroyed by treating plants with one percent Bordeaux mixture or copper oxychloride - 40 g per 10 liters of water.
Phoma appears as brown spots on the leaves, stems and umbels; it also affects the root of dill, painting it with dark stripes arranged in rows. To avoid infection of the area with Phoma, you should warm the seeds for half an hour in hot water before sowing, then immediately immerse them in cold water, and then dry them until they become free-flowing. Diseased plants are sprayed with one percent Bordeaux mixture. Treatment can be carried out several times with an interval of 10-12 days, but the last spraying is carried out no later than two weeks before harvest. Before processing or eating, dill greens should be washed thoroughly.
Cercospora blight looks like dirty, yellowish-brown spots up to 6 mm in diameter on the stems and umbels of dill, which fade in the center over time, while the edges remain dark brown. Cercospora blight needs to be fought in the same ways as Phoma.
Fusarium wilt develops in plants in the 3-4 leaf development phase: chlorotic spots appear on them and they droop. Waterlogging of the soil, overheating of the soil, or damage to the roots during loosening contribute to the development of the disease. Fusarium can be cured only at an early stage of development - dill is treated with fungicides to combat it. If the disease takes effect, diseased specimens will have to be removed and burned. The best way to protect dill from fusarium blight is to maintain crop rotation and grow disease-resistant dill varieties.
At the very beginning of summer, rust forms yellow-brown cushions on the underside of petioles, leaves and stems. As a preventive measure, you need to warm the seeds before sowing in hot (50 ºC) water, then immediately immerse them in cold water and then dry them. Plants affected by the fungus are treated several times with an interval of 10-12 days with one percent Bordeaux mixture. The last treatment is carried out no later than 15 days before harvesting the dill. Be sure to rinse greens thoroughly before eating or processing.
- Don’t rush to sow seeds right away - how to check the seeds for “suitability” and save seed material?
Dill pests
The most common pests of dill are umbrella blinds, Italian bugs, or striped stink bugs, carrot psyllids, carrot flies, melon, willow-carrot and carrot aphids.
The carrot fly damages the above-ground part of the dill, after which the plants begin to lag in growth, their leaves first become red-violet, then turn yellow and dry. A fly may appear on dill due to the proximity of the area to a carrot bed, since it is the smell of carrot tops that a fly flies to, like a bee to honey. To prevent pests from appearing in a dill area, mix tobacco dust in half with sand and sprinkle the soil along the rows with this mixture. This will need to be done 2-3 times during the season. Instead of a tobacco-sand mixture, you can use a mixture of sand with hot ground pepper, mustard powder, wood ash or dry peat. If you were unable to prevent the invasion of carrot flies, you will have to treat the dill with Vantex, Arrivo or Karate Zeon no later than two weeks before harvest.
Umbrella blinds are small bugs that infect all plants of the Celery family - both cultivated and wild. They suck the juice from the inflorescences, leaves, and shoots of plants, dooming the green part of the dill to death. In areas invaded by blind people, yields drop by 30-40%. To destroy these bugs, treat the dill with Actellik or Fitoverm.
Italian bedbugs lead the same lifestyle as umbrella blinds, and the harm they cause is approximately the same. In one season in warm areas, these insects can produce two generations, but the bug can only pose a danger when there are too many of them. In such cases, it is suggested to treat the area with Fitoverm or Aktellik.
All three types of aphids - carrot, willow-carrot and melon - suck juices from the ground parts of dill, causing them to lag in growth, become deformed, wrinkle, turn yellow and dry out. But this is not the worst thing that can happen to a plant that is parasitized by aphids. The worst part is that it carries bacterial and viral infections for which there is no cure. First, the aphids are washed off the dill with a strong stream of water, after which the leaves are fertilized with potassium-phosphorus fertilizers. Then pour one tablespoon of liquid soap into a daily infusion of 3 kg of wood ash in 10 liters of water, stir thoroughly, filter and treat the dill with this solution. After a week, the dill solution is washed off with water.
Dill varieties
Experts distinguish dill varieties by the shape of the rosette, width, length and shape of leaf segments, color and degree of leaf dissection. It is more convenient for amateurs to focus on such a sign as the beginning of stem formation. Based on this characteristic, early, middle and late varieties of dill are distinguished.
Early varieties of dill include:
- Gribovsky is a low-maintenance, productive variety that can be grown both on a windowsill and in open ground. This is a fragrant dill that is almost not susceptible to disease. The plant reaches a height of 25 cm;
- Dalniy - this high-yielding and lodging-resistant variety is grown for eating, freezing, drying, preparing marinades and brines. The rosette in plants of this variety is formed 38-40 days after emergence. Their leaves are green, with a faint waxy coating;
- Aurora is a new variety that is productive and resistant to diseases and pests, ripening in 25 days. It has a dense rosette, a powerful bush with close internodes, juicy and fragrant leaves of bright green color;
- Grenadier - this bush variety ripens in 35-40 days from the moment the seeds germinate. The plant is most fragrant in the development phase of 3-4 leaves;
- Umbrella is also a new variety whose ripening period coincides with Gribovsky. This variety is best grown in a greenhouse.
Popular varieties of mid-ripening dill
- Umbrella is a variety with long leaves and dense branches, suitable for fresh eating and as a spice;
- Borei is a productive and aromatic bush variety with large green leaves with a bluish tint in semi-raised rosettes up to 36 cm high. From the moment of sowing to ripening, it takes from 40 to 60 days, and the seeds ripen in 65-105 days;
- Richelieu is an ornamental and disease-resistant variety characterized by a large rosette and fragrant, beautiful bluish-green lacy foliage with long lobes. The greatest number of leaves on a stem occurs in the flowering phase;
- Kibray is a high-yielding variety resistant to powdery mildew. It can be grown both in open ground and in a greenhouse. From the moment the seedlings appear until the greenery ripens, no more than 45 days pass, and until the seeds ripen - about 70 days. The leaves of plants of this variety are tender, light green, fragrant and juicy;
- Alligator is a bush variety with leaves raised above the soil, which is very convenient for harvesting. The harvest can be harvested 42-45 days after emergence, although greens for food can be cut earlier;
- Lesnogorodsky - the peculiarity of this high-yielding and disease-resistant variety is that even in the fall, when its seeds ripen, the leaves remain green, large and fragrant, with a high content of vitamin C and provitamin A.
The best varieties of late ripening dill
- Salute is a productive bush variety up to 150 cm high with a ripening period of 35-45 days. Its leaves have a thick aroma, dark green with a bluish tint, large but delicate, the stem is strong, densely leafy. This variety is especially valued for the rapid growth of leaves after cutting and the late formation of an umbrella;
- Buyan is a disease-resistant variety grown in open ground using seedlings. This is a succulent plant, the stems of which do not become coarse for a long time, and the fragrant green leaves are covered with a strong waxy coating;
- Frost is a productive variety grown for fresh consumption, as well as for freezing and canning. The rosette of long, strongly dissected bluish-green leaves with a waxy coating is raised, the bush is heavily leafy, the umbrella is large;
- Ozornik is a productive, aromatic variety with bluish-green leaves covered with a waxy coating. It is grown primarily for fresh consumption, but it can be used to prepare spicy additions to dishes;
- Kutuzovsky - ripeness of this variety occurs 41-44 days after emergence. The leaves of plants of this variety are fragrant, tender, large, up to 20 cm long, light green, dissected into thread-like segments. The bushes are heavily leafy. The variety is grown for freezing, drying, preparing seasonings, marinades and brines.
And some more useful tips
The dill harvest will please you if:
- To extend the harvest of dill over time, you need to plant several varieties at once with different ripening periods;
- Seeds can be sown in early spring and even late autumn, before winter;
- Before sowing dill, there is no need to add ash to the soil. The taste of dill will suffer.
Dill of the Alligator variety is especially popular among summer residents.
Personally, I don’t have any problems with dill: it grows by self-sowing throughout the garden. And the variety can no longer be determined. And in order to get young greens longer, you have to sow in mid-June. I tried different varieties, but settled on the Alligator variety, beloved by many.
Properties of dill
Useful properties of dill
Dill is one of those plants that we eat all year round. A significant role in this recognition among humanity is played by the substances contained in its leaves that are necessary for the body, such as nicotinic and ascorbic acids, carotene, thiamine, riboflavin, pectins, flavonoids, vitamins A, B2, B6, C, PP, as well as potassium, iron , phosphorus and calcium. Dill fruits contain a high concentration of fatty oil, consisting of palmetic, oleic and linoleic acid. All parts of dill contain essential oil with a characteristic aroma of the plant.
The iron and magnesium salts contained in the leaves in an easily digestible form have the property of enhancing hematopoiesis, and dill essential oil stimulates the formation of bile and digestive enzymes, and also disinfects the human genitourinary and digestive system.
In the medical industry, a drug called Anetin is obtained from dill - it stimulates the heart, promotes the dilation of blood vessels in the heart muscles and brain, which greatly enhances their nutrition.
The benefits of dill for nursing mothers are obvious - it enhances lactation. It is also useful for respiratory problems, hypertension, and blurred vision. Preparations made from it act as a sedative, diuretic, analgesic for ulcers of the duodenum or stomach, and an antispasmodic.
An infusion is prepared from dill seeds that improves digestion and stimulates appetite, relieves kidney inflammation and helps cope with insomnia. Two teaspoons of dill seeds are poured into two glasses of boiling water, covered and left for 10 minutes, then filtered and drunk a glass a day. This infusion is effective as an antihemorrhoidal and antiallergenic agent, as well as an external wound healing agent.
Dill seed powder, used to enhance lactation, is also popular. It is consumed in the amount of 1 g three times a day, half an hour before meals.
An infusion of dill leaves is successfully used to eliminate bags under the eyes; you just need to soak cotton pads in it and apply it to your eyes for 10 minutes.
Dill oil is effective for pneumonia and bronchitis - it promotes the rapid separation of mucus from the walls of the bronchi.
Dill water eliminates gas formation in babies. To prepare dill water, you need to dissolve one part of dill oil in 1000 parts of water. In addition, dill water lowers blood pressure, slows down intestinal motility, increases diuresis and dilates blood vessels.
Dill - contraindications
Is there any harm from dill? Eating dill won't hurt anyone - how much dill can you eat in a salad or in soup? But drugs made from it that lower blood pressure can cause weakness, loss of strength, decreased vision and even fainting in hypotensive patients. Dill preparations should not be used by persons suffering from intolerance to the product. It is advisable for women to limit their consumption of dill during menstruation and pregnancy, but this healthy and tasty spice should not be completely excluded from the diet.