Features of growing hot peppers in an apartment on the windowsill
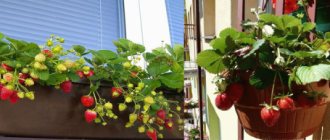
Growing peppers on a windowsill is quite a fun activity. As for the purpose of such an unusual planting, it can be a big plus for decorating the interior of a room, since a plant densely strewn with bright, ripe fruits looks very decorative.
And, of course, it will not be superfluous when eaten.
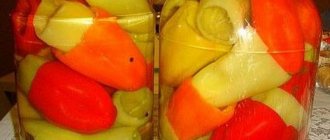
Advice! You can use hot pepper for salting, pickling and canning, as well as as a spicy addition to first (soups) and second courses (especially meat).
To successfully grow pepper on a windowsill, it is necessary to create optimal conditions for its growth and development, because this crop is quite capricious. Therefore, it is necessary to familiarize yourself in advance with the characteristics and preferences of the plant, as well as the rules for planting and further care.
By the way! With proper care and regular feeding, indoor peppers can grow fully and produce a stable harvest for 5-10 years, because it is a perennial plant.
To grow hot peppers at home, you need to consider the following factors:
- seeds of a suitable variety from a trusted manufacturer or freshly cut cuttings;
- choosing the optimal place for plant growth, its lighting, the need for additional lighting;
- selection of planting containers and suitable substrate;
- features of watering and fertilizing;
- knowledge of pepper diseases and pests.
Important! By following all the rules of care, you can get 10-20 or more fruits from one plant at the same time.
Choosing a bitter variety for planting in an apartment
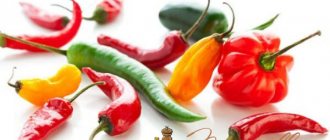
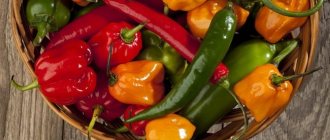
Before planting pepper, it is recommended to decide on its variety. By selecting several different types of plants, you can create a multi-colored vegetable garden on the windowsill that will delight you with its bright fruits.
The following varieties of decorative peppers are ideal for growing on a windowsill in an apartment:
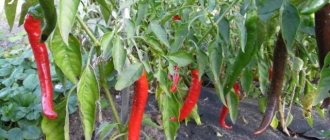
- Ogonyok. This variety has long been popular due to its compact bush, which reaches a height of 40 cm. It was developed by crossing chili and cayenne pepper. Forms fruits up to 5 cm, which at the base have a diameter of 1-1.2 cm. As they grow, they change their color: green, yellow, red. The fruits ripen within 120 days.
- Aladdin. An ultra-early compact variety, the height of the bush reaches 35-40 cm. It forms cone-shaped multi-colored fruits, the length of which does not exceed 3 cm. During growth, the shade of the fruit changes: green, purple, red. Fruit ripening occurs within 105 days.
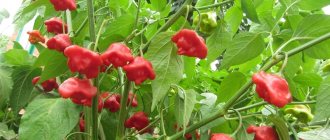
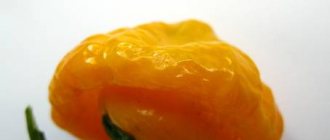
- Garda Firewall. One of the new indoor varieties. Forms compact bushes 30 cm high. The length of the pods is 5 cm. A peculiarity of pepper is that the fruits stick out with their tips up. As they ripen, they change color, so the plant can simultaneously have green, lilac, orange and red fruits. The pods ripen within 115 days.
- Explosion Amber. The unusualness of the variety is that the foliage of the plant has a dark purple color. Forms cone-shaped small fruits 2.5 cm long. As they grow, the shade of the fruit changes: purple, pink, scarlet. The bush forms compact, 30 cm high. The variety is considered early ripening, fruit ripening occurs after 115 days.
Also suitable for growing at home are such varieties of hot pepper as Black Prince, Five-Colored, Medusa, Ornament, Orange Round, Phoenix, Fakir, Falcon's Beak, Queen of Spades, Salute.
Depending on individual preferences, you can select one or several varieties at the same time.
As a rule, the most popular varieties for growing on a windowsill are Ogonyok and Chili peppers.
Important! You cannot use seeds from a pod purchased in a store to grow pepper on a windowsill, since it is an industrial variety and requires completely different conditions.
Preparing seeds for planting
Sowing seeds for growing pepper on a windowsill is carried out at the same time as for growing in open ground, and this is the second half of February.
Read more about the features of growing peppers on a windowsill.
Seeds take longer to germinate than other vegetable crops, so to speed up this process it is advisable to prepare them:
- You can fill the seed placed in a thermos with warm (about +40°C) water and leave for 2–3 hours.
- For disinfection, the seeds are kept for 15–20 minutes in a 1% manganese solution. After the procedure, they need to be rinsed well.
- It is practiced to soak for 1–1.5 days in growth stimulants (“Epin” (4 drops per 200 ml of water), “Energen” (10 g per 200 ml of water), “Bud” (1 g per 1 liter of water)) or in aloe juice (5 ml per 200 ml of water).
- After all the manipulations, the seeds are placed on a damp cloth (cotton wool or bandage) and kept at a temperature of +20...+25°C until hatching. The fabric must be constantly kept moist so that it does not dry out. Instead of water, you can use a solution of ash (1 tbsp per 1 liter of water).
After this preparation, the seeds will germinate within a week. After pipping, they can be carefully planted in prepared containers.
Features of planting hot pepper at home - step-by-step instructions
To grow Ogonyok pepper on a windowsill, you need to prepare for the procedure by studying the preferences and features of growing this crop indoors. Only by following all stages of planting can you ultimately achieve the desired result.
Sowing dates: when to sow seeds
It is worth understanding that hot peppers grow for a very long time, like any pepper, for example, sweet peppers are sown among the very first seedlings, back in late February-early March.
In the case of growing indoor hot peppers, you can start sowing them at any time, that is, all year round. Let’s say if you sow in winter, in December-January, you can get the harvest in summer – in June-July.
Choosing a suitable location and creating optimal growing conditions
Hot peppers are very demanding of light and heat, so for its full growth and development it is necessary to choose a southern or southeastern (or western) window sill. During the period of active sun in spring, the plant needs light shading. In summer, the plant should be placed on a balcony or loggia, but it is recommended to avoid drafts.
Important! Pepper does not tolerate cold drafts, so when ventilating the room it is best to keep it away from an open window. You should also seal (seal) any holes if you have old window frames.
For full growth and development, the plant needs 12-16 hours of daylight. During the period of short days from early October to March, bitter pepper especially needs additional lighting with phytolamps or full-spectrum LED lamps in the morning and evening, as well as on cloudy days.
Important! A lack of light is manifested by a light shade of foliage, which can ultimately lead to leaf fall. In this case, the duration of artificial additional illumination must be increased.
For normal plant growth in winter, the air temperature should not fall below +18 degrees, and starting in spring, the optimal temperature is +20-24 degrees.
Do not forget! In summer, pots of indoor peppers can, and even should, be taken outside.
Planting container
Hot pepper forms a relatively compact root system, which is located closer to the soil surface. To grow indoor peppers, it is recommended to select pots with a volume of at least 3 liters, and preferably 4-5 liters .
Important! Peppers are grown, as a rule, with a pick, so for the initial sowing, very shallow, wide (rectangular) containers (4-5 centimeters in height) are first prepared. From these, the grown plants are subsequently transplanted into larger individual containers, and then to a permanent place (in large pots).
A prerequisite is the presence of drainage holes in the bottom of the pot , which helps remove excess moisture. Before planting, it is necessary to pour a 2-3 cm layer of drainage onto the bottom, which will prevent water from stagnating in the pot.
Suitable substrate
To sow hot pepper seeds, you can purchase seedling substrate at a specialty store. But you can prepare a nutrient mixture for planting yourself. To do this you will need the following components:
- 2 parts peat;
- 1 part river sand, perlite or vermiculite.
Immediately before planting hot pepper seeds, it is necessary to disinfect the soil by sprinkling it with the bio-fungicide Fitosporin or potassium permanganate, which will prevent the development of fungal diseases. You can also disinfect the soil in advance by heating it in the oven.
Pre-sowing seed preparation
It is recommended to germinate pepper seeds in a moist environment before planting. To do this, you need to spread the seeds in damp gauze (or use cotton pads) and carefully wrap the fabric. And then put them in some container and close the lid so that the moisture is retained longer.
For germination, place in a dark and warm place (+25-27 degrees) for several days (1-2 days will be enough), periodically opening, moistening and examining for the presence of sprouts. As soon as most of the seeds hatch, they will need to be planted in the prepared soil.
Important! Seeds should not be allowed to dry out during germination, otherwise they will die.
Although, in principle, you can sow dry seeds.
Growing hot peppers from cuttings indoors
In some cases, to preserve all species properties, it is recommended to carry out pepper cuttings. Cuttings must be cut from green young shoots without fruits, 7-8 cm long. Each of them should preferably have at least a leaf, but not necessarily.
Before planting in the ground, they must be pre-soaked in a zircon solution (3 drops per 100 ml of water) for 12-24 hours or the lower cut must be powdered with root powder.
For more information on growing indoor hot peppers from cuttings , see the video below.
Video: growing hot peppers on a windowsill from cuttings - pruning and propagation
Step-by-step instructions for sowing seeds
- Prepare the seeds.
- Fill the containers (pots) with the required substrate and level the surface.
- Moisten the soil generously with water and allow it to be completely absorbed.
- Make small grooves (rows) up to 1 centimeter deep.
- Place the seeds at a distance of 0.5-1 cm from each other.
- Sprinkle with soil.
- Moisten the top layer with a spray bottle.
- Cover the containers with glass or film to maintain high air humidity inside the planting container (to create greenhouse conditions).
- Place the containers in a dark and warm place (22-25 degrees) until shoots appear.
Video: how to grow indoor hot peppers - proper sowing and further care
Features of further care for hot peppers in the apartment
After the pepper sprouts appear, it is recommended to move the container with the seeds to the windowsill and lower the temperature to +20-22 degrees. The glass or film should be removed completely and be sure to begin illuminating it up to 12-16 hours of daylight with the help of lamps.
To exclude warm air from heating devices, cover the pepper sprouts with a layer of polystyrene foam or a blanket.
Pepper cuttings take root within 2-3 weeks.
Picking
When 2-3 true leaves appear, it is necessary to plant (pick) the peppers in separate containers.
During transplantation, it is not recommended to pinch the main root, as the plant is painful for this procedure and significantly slows down its growth.
The first planting should be done in pots (it’s best to take cups) with a diameter of no more than 5 cm and a height of up to 10 cm.
Adviсe!
- Before diving, water the container with the seedlings so that you can transfer the seedlings with a clod of earth.
- The new soil should be even more airy and fertile, so prepare a substrate based on peat, humus and river sand (perlite), taking the components in approximately equal parts.
- After picking, water the transplanted seedlings with water (preferably with the addition of root for better rooting).
In the future, it is necessary to replant young seedlings as they grow. As soon as the roots begin to crowd into the pot, it is recommended to replant the plant, increasing the diameter of the pot. A container for an adult plant should be about 10-15 cm high and about 20-30 cm in diameter.
By the way! The website has a separate detailed article on picking pepper seedlings.
Watering
Hot peppers are very demanding when it comes to soil moisture and cannot tolerate watering with cold water. It is necessary to water the plant moderately, with water at room temperature, as the top layer in the pot dries, but allowing it to absorb moisture from the pan. If there is still water in the pan 30 minutes after watering, it should be completely poured out.
Important! The higher the air temperature, the more often the soil should be moistened.
In conditions of low air humidity, it is worthwhile to additionally spray the foliage using a spray bottle.
Top dressing
For full growth of hot peppers on the windowsill, regular feeding is required. During the period of active growing season (gain of green mass), preference should be given to mineral fertilizers with a high nitrogen content or organic fertilizers. And when forming buds and fruits, it is worth using fertilizers with a large amount of potassium. It’s even better if you use complex mineral supplements, which also contain phosphorus. The plant needs to be fed once every 7-14 days.
Forming (stepping) and pinching
As a rule, indoor hot peppers grown on a windowsill are not planted.
To make the bush branch better, you can pinch its top.
Main diseases and pests
Peppers, including indoor ones, are susceptible to fungal diseases and various pests. Therefore, you should know in advance what problems may arise and how to deal with them.
- Aphid. This pest loves to feast on young shoots of pepper, so it is on them that a large accumulation of pests forms. To combat them, it is necessary to treat the plant with the biological preparation Fitoverm or bitoxybacillin.
By the way! A folk remedy for combating aphids is ammonia. You need to prepare a solution (dissolve 5-10 ml of ammonia in 1 liter of water) and simply pour it under the root.
- Spider mite. It is characterized by stunting of plant growth and curling of young leaves, on which a small cobweb later appears. To combat the pest, it is necessary to spray with Actellik, although at home it is still better to use biological products (Fitoverm, bitoxibacillin).
Advice! Another popular method of pest control is tobacco. You just need to sprinkle the tobacco from the cigarette on top of the soil in the pot.
- Blackleg. It affects pepper seedlings during the initial period of germination. The stem at the base of the seedlings becomes thin and turns black. Appears as a result of overwatering a plant, which leads to its death. It will no longer be possible to save the plant. To prevent the disease, it is recommended to spill the soil with the biological product Fitosporin .
Growing fruits for winter
There are certain rules for growing hot peppers at home.
It is better to sow seeds in February. To do this, you need about a two-liter clean container, which should be treated with boiling water. Place drainage in the form of expanded clay at the bottom of the pot, but crushed stone or charcoal will also work. On top of the drainage we fill the soil consisting of humus, leaf soil and sand in a ratio of 5:3:2. Before planting seeds, the soil should be poured with boiling water and after it has cooled, sow 2-3 pepper seeds, pre-soaked and already swollen, into small holes 1-1.5 cm in diameter.
Cover the pot with planted grains with polyethylene or glass and place in a warm place. When sprouts appear after 5-7 days, move the pot to a sunny place in the window. When the first true leaves appear, the peppers can be picked into separate pots, or it is better to remove the excess ones so as not to disturb the roots.
When the plant grows to 20 cm, pinch the crown. This is necessary for better branching of the bush, in which fruits will form.
Don’t forget to water the plant regularly and periodically feed your pet with fertilizers, then you will definitely see a harvest on your windowsill.
Method for obtaining fruits by May
Observing the development of homemade pepper, lovers from the Ivanovo region came to the interesting conclusion that in our northern conditions it is possible to change the timing of the ripening of pepper on the windowsill. They use spring days filled with bright sunlight to flower and ripen fruits.
Sow peppers in autumn in bowls on the windowsill. They create not very comfortable conditions for the pepper, so that it does not have time to pick flowers before the New Year, so that it does not exhaust its strength for growth in the darkest “dead” days. This saves the plant from pulling out its shoots. At the moment when the days begin to arrive, the pepper is transferred to a bright window (east or south). The plant soon blooms and bears an average of 10 beautiful pods. Yes, the fruits are such heroes that have never happened in the fall.
And immediately after the harvest is harvested, the plant throws out a couple more vigorous shoots and blooms a second time. By the second half of September, another harvest ripens, and out of 20 pods, only three were small. Thus, about 30 pods are harvested from one bush per season, almost 5 times higher than the average yield!
The main secret of a high yield is that by the time of the very first flowering (in early February), peppers from the autumn sowing period have time to develop good, powerful roots. Starting from March and ending at the beginning of October, that is, during a period of abundant sunshine, pepper actively sets fruit and uses its strength to fill them.
You don’t have to throw away a plant that bears fruit in the fall, but let it go before winter. In winter, at the beginning of January, it must be transplanted into a new substrate, cut off the old shoots by half, then move the pot to a bright window (east or south). Such care can bring up to three harvests per season.
When planting peppers, it is still better not to pick them, as they react painfully to transplantation. And they treat transshipment well. When the shoots disperse, simply pinch off the extra weak shoots. Another important point - do not miss the time when the roots begin to crowd in the pot and grow out.
For seedlings, of course, peat pots are best suited. For normal growth, peppers are transferred to spacious containers and pots 30-50 cm high. Be sure to place drainage (a layer of expanded clay, broken brick) at the bottom of the planting containers.
Sometimes props are placed to support ripening fruits, and the bushes are sprayed with warm, settled water to remove spider mites.
To get a good harvest, it is recommended to grow peppers in two trunks, constantly shaping them by pinching them. A strong shoot is left on each stem, and the weak ones are pinched off above the first leaf. Although peppers are self-pollinating, like tomatoes, it is better to shake the plants periodically so that pollination is more effective.
Pepper is the same perennial as cherry tomatoes; the bush can delight you with a harvest for five whole years. You can also grow sweet bell peppers on your windowsill using the same methods.
Can you imagine what a pleasure it is to watch a ripe pod fill before your eyes when the weather outside the window is “non-flying”.
If your plant is more than 5 years old, you can make it into a wonderful home decoration - BONSAI.
You can use almost any small pots you like, but most traditional bonsai in special pots look really, really cool!
Basically, you can use whatever you use to grow your chillies, but I prefer soft, peat-based soil. A bonsai plant should have very limited root space, you should use very fertile soil.
Timing of emergence and first harvest of homemade hot pepper
Hot pepper seeds take a long time to germinate, which is why this feature must be taken into account when planting. Shoots appear within 14-21 days if all recommendations for sowing are followed.
The first harvest of pepper on the windowsill ripens 105-150 days from the moment the first sprouts appear, depending on the selected variety.
As soon as the pepper turns red (ripe), you should promptly remove the fruit from the bush along with the stalk. Then, after some time, a flower will appear in the same place, in other words, the plant will continue to bear fruit - set new fruits.
Characteristics of hot pepper varieties
- Hot peppers are rich in various valuable substances, which explains their many beneficial properties:
- green pods contain 3 times more vitamin C than citrus fruits, and in red pods this figure is 4–5 times higher;
- the alkaloid capsaicin (found only in spicy varieties) gives the vegetable its burning properties; it is used in medicine as an irritant, for filling gas canisters, and as an insecticidal substance to combat various pests;
- the enzymes contained in the fruits have a positive effect on the digestive tract;
- when eating spicy vegetables, the amount of cholesterol decreases, blood circulation improves, and inflammatory processes go away;
- fruits relieve excess weight;
- beneficial properties are used in cosmetology (for example, for hair growth);
- The main application of the vegetable is cooking: it is part of adjika, spicy marinades, hot Tabasco and chili sauces, as well as popular Indian curry.
Did you know? Some types of canaries are specially fed with cayenne pepper, due to which the wings of the birds acquire a more intense color.
What to do with indoor hot peppers after harvesting in the fall, when the leaves begin to fall
Since indoor hot pepper is a perennial plant, when its leaves begin to turn yellow and fall off, and as a rule, this happens in late autumn and early winter (November-December), you will need to trim the pepper, leaving only 8-10 centimeters .
Interesting! New shoots will begin to develop from dormant axillary buds and branches that are in the dormant stage. The cycle will repeat, by March the plant will bloom, and in May you will receive the first fruits.
If you follow all the recommendations, growing hot peppers on a windowsill will not be particularly difficult. But it is necessary to understand that further care of the plant must meet all its needs, since the pepper will grow and bear fruit only taking into account all the required conditions.
Video: detailed instructions (master class) for growing extra hot peppers on a windowsill in 2 parts
Site selection and preparation
Chili peppers are picky about soil composition. It will not grow on heavy and dense soil or clay soils. If loam predominates in your garden, when digging the plot in the fall, add a bucket of humus and sawdust, two buckets of peat and a little wood ash into the ground. Adding sand will make the soil lighter.
Beds for growing hot peppers are made in a sunny but protected from the wind place. Good predecessors for it are legumes, onions, carrots, and pumpkin. You should not plant it in a place where other representatives of the nightshade family have previously grown. The most unsuitable neighbor for chili peppers will be bell peppers: they will cross-pollinate, which is why the bitter peppers will become less hot, and the sweet ones will acquire overly piquant notes.