Home / Vegetable garden / Bulbous
Back
Published: 10/04/2020
2
Rate this post
Year after year, the gardener, harvesting garlic, calibrates the heads: the best cloves - for planting, the smaller ones - for processing or storage. Unquestioningly follows agricultural practices: planting, fertilizing, and watering dates. Breaks out the arrows in time to get larger planting material. But year after year the garlic gets smaller. A favorite variety, when resistant to infections and pests, for some reason loses its immunity, although crop rotation is held in high esteem in the garden.
Disappointed, the summer resident goes to the store, looking for new - larger and healthier - planting material. In line, he complains to like-minded people: “How can this be! The garlic was excellent." And, if you’re lucky, there will be someone more experienced among the sympathizers who will tell you about the aerial bulbs - garlic bulbs.
- 1 Garlic bulbs - what are they?
- 2 When to collect garlic bulbs for seeds
- 3 When to plant bulbs 3.1 Planting in autumn
- 3.2 Is it possible to plant garlic bulbs in spring?
What are bulbs
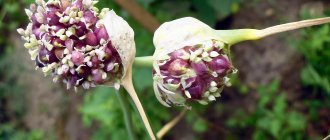
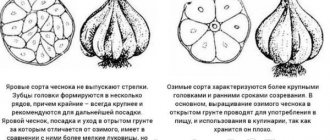
There is spring garlic, planted in the spring and bearing fruit in the year of planting, and there is winter garlic - it is planted in the fall and a harvest is expected the next year. The difference between the winter type is that the cloves are located around the base of the arrow. Air bulbs called bulbs are formed on this rod.
Aerial bulbs are excellent propagation material. In addition, they have several other useful properties:
- preserve the varietal qualities of the crop;
- provide the future plant with disease resistance;
- allow you to save on the purchase of planting material.
Over time, after about 3–5 years, garlic begins to degenerate, that is, its heads become smaller. With the help of bulbs, you can rejuvenate a crop without depriving it of its varietal characteristics. And if you consider that more than 100 bulbs are formed around the arrow rod, then the costs of planting are simply unnoticeable.
Did you know? French microbiologist Louis Pasteur proved in the 19th century that garlic contains antibiotics that are active against many infections, bacteria, in particular salmonella and staphylococcus a .
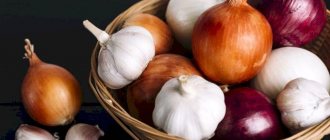
Garlic varieties for growing at home
For planting at home, it is customary to choose winter varieties of garlic. For comparison, winter garlic is also planted in open ground in the fall. Its varietal characteristics allow the plant to comfortably survive the winter and form a high-quality harvest. In addition to dividing into winter and spring varieties, there are non-shooting and shooting varieties of garlic.
All information concerns table varieties; technical varieties are not used for window planting.
To grow garlic for greens on a windowsill, shoot varieties are chosen. They differ in that they produce an arrow, which is called a feather and is eaten. In addition, winter varieties are considered the best varieties of garlic for winter cultivation. They are more productive during this period of the year and contain more essential oils than spring ones.
If you are late in trimming the feather, so-called “bulbs” - garlic seeds - will grow on it. They are also used for propagation of crops in order to save cloves. But, for balcony growing this is unacceptable. When planting seed bulbs, you will have to wait a long time for results.
For indoor cultivation, you can take any varieties that have performed well in open ground. For example, “Lyubasha”, “Alekseevsky giant”, “Polessky”.
Let's summarize. To plant garlic on a windowsill with good results, choose a winter table variety. It is best to choose garlic that is adapted to the region, but at home this is not a requirement.
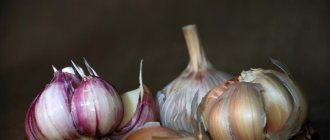
Selection and preparation of bulbs
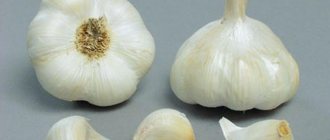
The size of the onion cloves depends on the quality of the planting material. Therefore, you need to carefully select suitable specimens.
Selection criteria:
- size more than 3 mm in diameter;
- no double tips;
- absence of any damage or stains;
- dry bottom.
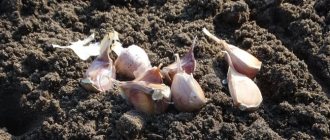
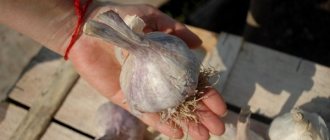
A month and a half before the intended planting, the aerial bulbs are moved to the refrigerator, preferably at a temperature of no more than +4 °C. Before sowing, the material is disinfected, which prevents fungal infections.
The procedure consists of the following steps:
- 50 g of wood ash is poured with water (3 l).
- The solution is infused for 30 minutes.
- Then mix thoroughly and bring to a boil. Let it sit.
- The top layer of the solution is removed and filtered, half diluted with boiled water.
- The planting material is soaked in the resulting mixture for 1–2 hours.
Important! If the planting bulbs are less than 3 mm, the resulting harvest will be frail and small.
Soil preparation
The culture prefers to grow in nutritious and loose soils with neutral acidity. The area needs to be dug up with a shovel and the clods broken up. To deoxidize the soil, add 300 g of lime per square meter.
To fertilize the soil, humus and mineral additives are added (per sq. m):
- humus - 5 kg;
- superphosphate - 30 g;
- calcium chloride - 20 g.
Important! The plant should not be planted after nightshade crops - they leave fungal spores in the soil.
Types of garlic propagation by bulbs
The crop variety from which the planting material is taken is of great importance for the yield. Varieties brought from distant regions or countries do not adapt well to local climatic conditions. Therefore, local, zoned varieties would be an ideal option.
There are two methods of propagation by bulblets:
- first , the seeds are planted in the spring at a great distance from each other; the sprouted seedlings are left to overwinter in place;
- the second is a set sown thickly in the spring, dug up at the end of summer and replanted after about a month, according to the planting scheme before winter.
When to plant garlic seeds
This plant also differs from other crops in that it can be planted both in autumn and spring. In the first version it is called winter, and in the second - spring. In cold countries, vegetables are mostly planted in autumn, and in hot countries - in spring. In the first case, the cloves are deepened into the soil, already slightly germinated. Spring planting must be done as soon as possible. Ideally, the soil should not yet dry out after the snow melts. Only in this case can you get fairly large heads.
Features of planting and growing
There is little difference between how to plant and grow spring and fall crops. Autumn plantings do not require care until spring, wintering under a layer of mulch and snow. For plants planted in spring, care begins almost immediately after sowing.
We recommend reading how to fertilize garlic when planting before winter.
in autumn
The optimal time for autumn planting is September-October. Planting must be completed before mid-October, otherwise the bulbs will not have time to take root.
How to plant seeds, diagram:
- distance between rows - 15 cm;
- the distance between the bulbs is 10 cm;
- depth - 5 cm.
After planting, the top of the bed is not watered, but covered with straw mulch. When snow falls, a layer of snow is shoveled onto the area.
in spring
Spring sowing is carried out from late April to early May. The soil fertilized in the fall is leveled with a rake; if there are clods, they need to be broken up.
Sow using the belt method, approximately 6–8 rows, the scheme is as follows:
- distance between rows - up to 40 cm;
- distance between sets - 15 cm;
- depth - 3 cm.
You need to fill it with moist, but not wet soil and compact it slightly.
Afterwards the bed is covered with peat mulch. Find out also how to prepare a bed for garlic before winter.
When to plant?
The optimal time for planting bulbs is a month before the first frost. In the northwestern region it is the beginning of September, in the middle zone it is mid-September-early October, and in the south it is the end of October-early November. In a month, the bulbs will have time to take root, but not grow. If you were unable to plant winter garlic in the fall, it’s not a problem. You can plant in the spring, as soon as the snow melts.
About two weeks before planting, you need to properly weed the ridge for planting, fertilize the soil with ash and humus, and dig it well again.
Garden bed care
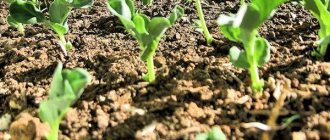
After germination, active care begins. The crop needs watering every 7–10 days. The frequency depends on the amount of natural precipitation. You need to water the soil until the top layer is moistened by 10 cm. After watering, you need to remove weeds and loosen the area to a depth of 4 cm. For normal growth and development, the bulbs need oxygen.
Plants begin to be fertilized after the appearance of two strong leaves. Feeding scheme:
- first - mullein solution 1:10, 2 l/sq.m. m;
- the second (after 14 days) - ammonium nitrate and superphosphate, 5 g/10 l of water, 2 l/sq. m;
- third (at the end of June) - sprinkle with wood ash at the rate of 300 g per square meter. m.
After fertilizing with aqueous solutions, the leaves should be washed with a watering can or hose so that the greens do not get burned.
How to plant garlic using arrow seeds
Before sowing, the aerial bulbs must be removed from the inflorescence, choosing the largest ones. Sowing should be done from September 7 to October 15. In July next year, from all the bulbs, a large-volume one-tooth will form, which will be an excellent seedling for planting a crop before winter, so that large bulbs can be grown.
First, you should create beds for growing vegetables from bulbs approximately 12-15 cm in height and up to 90 cm in width. The soil is prepared in this order:
- per 1 sq. m add 3-4 kg of humus or compost and 1 tbsp. l. superphosphate;
- dig up everything and level the ground on the ridges;
- then make paths opposite the beds to a depth of 3-4 cm;
- the intervals between the recesses should be 10 cm;
- the bulbs must be placed in the groove at a distance of 1-2 cm from one another;
- then you need to cover the paths with soil and leave them all winter.
If there is a harsh winter ahead, you can mulch the beds with sawdust in a layer of 2-3 cm. With the arrival of spring, when the ground thaws, the sawdust should be removed. Now many people have probably already understood when to plant garlic seeds.
Harvest and storage
The ripening of the crop is signaled by yellowed tops. It is advisable to choose a cloudy day for harvesting so that exposure to aggressive ultraviolet radiation does not reduce the shelf life of the seeds. The heads with bulbs are carefully dug up and pulled out of the ground by the tips of the tops.
Did you know? In the old days in the south of Russia there was a belief: to prevent damage to the bride, garlic leaves were woven into her braid.
The harvested crop is cleaned of adhering soil and dried until it rustles under a canopy. After drying, cut off the foliage, remove the roots and cracked husks. Store in linen bags or boxes, wrapped in paper. The storage place should be dry and dark, storage temperature - 20–25 °C.
Planting winter garlic bulbs in early spring: the experience of gardeners
Most home garden owners do not dare to propagate garlic using aerial bulbs for fear of failure (planting material freezing, producing small bulbs, seeds drying out, etc.). Bolting varieties of garlic have given gardeners an amazing opportunity to save planting material and renew the variety by vegetating the crop with the help of bulbs. To insure against the loss of seeds in a severe, snowless winter, many summer residents resort to a trick - they plant winter garlic bulbs in early spring, having previously vernalized them in the refrigerator. But first things first.Planting material
First you need to get high-quality bulbs. In the garlic bed, mark several of the largest plants (preferably they were grown from large cloves) and leave arrows on them. The remaining seedlings have their shoots removed (broken out) in order to obtain larger garlic heads. At the very beginning, the arrows are curled into a tight spiral, which straightens towards the end of the growing season. A sign that garlic needs to be harvested is cracking of the outer covers on the bulbs.
The dug up plants are removed from the garden bed entirely (without cutting off any inflorescences or bulbs), tied into bunches and hung to dry in a place with good ventilation, for example, in an attic, veranda, or under a canopy. The period of complete outflow of plastic substances from the stem and tops into the head and aerial bulbs, after which they increase in size, ranges from 3 to 4 weeks. After the leaves have completely dried, the heads with bulbs are carefully separated from the stem, trying not to damage their covers.
Until the end of winter, the seed is stored at room temperature. The bulbs are laid out on newspaper, wrapped in several layers, and stored in an open plastic bag. 4-6 weeks before planting, which is usually carried out in March-April (depending on weather conditions), the bulbs are sorted, removing dried and defective ones, wrapped again in paper, put in a bag and placed in the refrigerator. This is called the vernalization process, when the aerial bulbs are kept for several weeks at a temperature of about +5°C.
This stage is very important, since with the help of such a simple manipulation the biological mechanism of crop vegetation is launched. If the seed is not kept in the cold, then plants planted in the spring will not stop growing until the onset of cold weather at the end of autumn, sometimes they may even shoot arrows. The result is small, immature bulbs or sets that are of no value either for culinary purposes or as planting material.
Plants grown from bulbs that have gone through the vernalization stage stop growing at the end of summer (approximately mid-August), completing the growing season. This produces a large, juicy onion, up to 3 cm in diameter, called a single clove, from which a large multi-pronged head of garlic will grow next year.
Preparing beds for spring sowing of bulblets
It is necessary to prepare the bed in the fall, since sowing is carried out in early spring, when the soil is still wet, and high-quality digging with the addition of the necessary organic matter is simply impossible. Garlic prefers soil that is fertile, with neutral acidity or slightly alkalizing. The place for the crop is chosen in a sunny area of the garden, without shading during the day. Lowlands and places where melt water accumulates are unsuitable for garlic, since in such conditions the roots of the plants rot.
During autumn digging, the site is filled with compost or well-rotted manure, at the rate of a bucket for each square meter. meter. Fresh farm animal manure is never applied to garlic; only its incorporation into the soil under previous crops, for example, plants of the pumpkin family, is allowed. Be sure to enrich the soil with mineral fertilizers, which include superphosphate - the main source of phosphorus (matchbox / square meter) and plant ash - a natural source of potassium and microelements (liter jar / square meter).
Spring sowing of bulblets
A day before planting, the aerial bulbs are soaked in an ash solution (1 tablespoon of ash per 0.25 liters of clean water), changing the solution four times for a new portion. Pop-up bulbs must be removed.
Sowing is done to a depth of 2.5-3 cm, keeping a distance between plants of about 4 cm. The rows of garlic are spaced 15-20 cm apart. Carefully sealed beds are mulched with hay (a mulch layer of about 5 cm).
This agricultural technique allows you not only to protect garlic from sudden frosts on the ground, but also to preserve valuable moisture in the top layer of soil, where the garlic root system is located. Mulching leads to a reduction in the frequency of watering, and also reduces the work of the summer resident in weeding and loosening the beds.
Harvesting one-tooth
When the leaves of the plant begin to turn yellow and dry out en masse, it is necessary to dig up the crop. If you are late in harvesting, you may not find garlic cloves in the ground, since the above-ground part will die off. Single-toothed mushrooms are dried under a canopy, without cutting the tops, spread out in one layer on canvas or polyethylene for three days. Then the plants are tied into bunches and continue to hang dry in the attic until planting before winter. Grown one-toothed plants are high-quality planting material for sowing in autumn. Next year they will form large (from 100 to 150 grams, depending on the variety) garlic bulbs.
Easy work for you on your plot!
Useful tips for growing
Despite the apparent ease of growing garlic from bulbs, the process has its own subtleties.
Recommendations from experienced gardeners:
- It is best to plant the crop after cabbage, pumpkin, and legumes - they feed the soil well with organic matter.
- Before planting, it is undesirable to add fresh manure or bird droppings to the soil - due to the abundance of nitrogen in them, the bulb will become loose, and all the strength of the plant will go into the tops.
- To prevent weeds from growing on the site for a long time, the grooves for planting seeds are lined with paper . The seeds are first mulched with sand and sawdust, and then sprinkled with a layer of soil. It should be noted that newspapers cannot be used, because they contain a lot of toxic lead.
- If the set is not dug up in the summer for autumn replanting, it will grow into a larger fruit.
- If the tops of the plant have already fallen, then you need to hurry with harvesting, otherwise the foliage will die off and the heads will be difficult to find.
Planting with bulbs is the most reliable way to grow a large harvest, preserving all the varietal qualities of the crop. Caring for seedlings is not difficult, the main thing is to carry out all procedures in a timely manner.