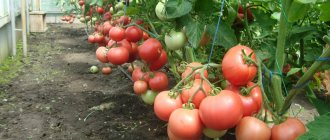
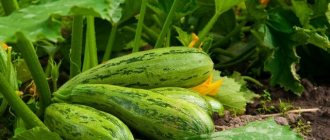
There are three known methods of growing onions. The choice depends on the gardener’s experience, skills, and habits. But not only: before making a choice in favor of one of them, it is worth thinking about the variety - both the method of cultivation and the timing of planting depend on this. In the wide variety, two significant groups can be distinguished. Of the existing more than 60 varieties of onions grown in Russia, there are representatives of northern and southern origin. Each of these groups has preferred cultivation methods.
How to grow onions from seeds?
Methods
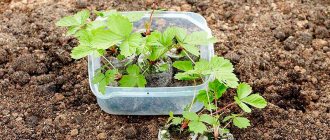
The method, which is carried out in stages, is to grow onion sets, and the next season from them into onions.
You can get a harvest at once during the season if you plant seeds or ready-made seedlings in the ground in the spring.
The third option involves winter sowing. The material (onion sets) is planted in the fall; the specific timing depends on the climate. As a rule, this is October, perhaps early November. By the way, in this case the issue of variety is very important. Small onion sets do not help the shooter, but large ones may not respond to weather surprises in a timely manner.
There are three ways to grow onions
Next, let's look at the advantages and disadvantages of growing onions from seeds. We'll tell you what methods and varieties are used, and how to adapt a small space for growing onions. We will touch upon the issues of seed preparation, soil, and crop storage conditions.
Pros and cons of growing onions in one season
A quick way to grow onions in one season has its advantages and disadvantages
| Pros of growing in one season | Disadvantages of growing in one season |
| Opportunity to save. Onion seeds, popularly called nigella, are cheaper than onion sets. | Requires more effort and attention. |
| Storing and preparing seed material is much easier. | You will have to carry out more actions, unlike growing in two seasons. |
| Possibility of harvesting in one season. | Not all varieties are suitable for growing in one season. |
| With the seedling method, the yield is much higher. | — |
| The absence of arrows during cultivation, which has a good effect on keeping quality. | — |
| For some varieties this is the only way to obtain a harvest. | — |
Growing from seeds: features
There are quite a lot of opinions about which method is better. Each gardener chooses one of them in accordance with his experience, recommendations from friends, neighbors, and magazines. Preference is given to one method or another for one reason. Some people are concerned about the size of the crop, while others are worried about the lack of storage space.
Important! Some are ready to slowly carry out all the necessary steps, no matter how long it takes. And there are others - without much hassle, you can get a harvest in one season and use it without long-term storage.
Let's consider who is suitable for growing from seeds.
Advantages:
- speed of obtaining onions;
- the harvest is well preserved;
- profitability (planting material is more affordable);
- seed preparation provides better protection against diseases;
- you can add seeds directly into the soil, or you can use ready-made seedlings;
- When sowing, a scheme is strictly followed, which gives the correct distribution of nutrients and moisture.
There are quite a few advantages to growing onions from seeds, and this method is perfect for beginners.
If you use onion sets for planting, there is no complete guarantee that it will not contain pathogens of various diseases. The planting material has been stored, and its quality depends on many conditions. It is difficult to determine germination by the type of bulbs - usually impossible. Proper seed preparation is the key to a good harvest within one season.
It is worth mentioning the shortcomings. The most significant is that when planted in the spring, the bulbs ripen fully under the condition of a warm, dry autumn. Under “favorable” weather conditions, plant growth will continue. The problem is that unripe onions have a very short shelf life. Having received the harvest in the fall, it will need to be sold before the beginning of winter. If this option is not suitable, it is better to turn to sowing in the fall or plant seedlings.
Important! When planting seeds directly into the ground, you will have to take care to create favorable conditions. At first the seedlings are very tender and fragile and require protection from bad weather and weeds.
If you place seeds directly in open ground, you need to make sure that the seedlings are protected from bad weather. Seedlings
begin to form in winter, traditionally in February. At home, create small greenhouses in containers.
Thus, to grow onions from seeds, you can start sowing in early spring. You can plant the seeds directly in the ground or prepare seedlings. In the fall, seeds are added before winter (pre-winter). The name indicates that sowing is done in frozen soil.
Spring planting is carried out early, as soon as the soil is free of snow. Thanks to this, root crops have time to ripen in one season.
Spring planting should be done immediately after the snow melts - this way you can get fruits by the end of the season
Why such difficulties or why summer residents grow onions with seedlings
Growing onion seedlings at first glance seems like extra work.
Boxes, soil, additional lighting... why all these difficulties if you can stick seedlings into the garden bed - and there will be order? And yet, the number of gardeners who prefer the seedling method is growing year by year. First of all, this is due to the low quality of the sets in our stores. In one of the articles we wrote about how important it is to properly store onion sets. Failure to comply with storage temperature conditions always leads to a sad result - bolting. We can only guess where, how and for how long the store-bought onions were stored. You have to warm up and soak the sets before planting. This is troublesome and the result is not guaranteed.
Onions grown from seeds through seedlings will never produce an arrow. And this is his most important trump card.
Second point. The seedling method allows us to grow delicious sweet varieties of onions in the central zone and other areas of the country not spoiled by heat. There is no other way. Due to the short shelf life, seed bulbs of such varieties simply will not last until spring - they will germinate and rot. So if you want to try salad varieties, get ready to sow seeds for seedlings.
And finally, for many it is easier and more convenient to tinker with seedlings at the beginning of spring than to allocate a separate bed for sowing, selecting mother bulbs, planting them for seeds, etc.
And onion seedlings are less likely to get sick. It’s also easier to plant many varieties at once with seeds than with sets. And since we’re talking about varieties, let’s continue about them.
Creation of seed material
To collect the seeds, cut off the so-called boxes on which they are formed, along with the arrow, calculating so that the shoot is 30 centimeters.
The quality of seeds in one box may vary. The ripening process occurs unevenly: first the upper ones, later the lower ones. The appearance of black seeds is a signal to start collecting.
The seeds are small, and a special technique is used to collect them: the boxes are tied into bouquets and hung in a shady and well-ventilated place. A cloth or paper is laid out underneath them, where the seeds are collected as they dry. Thus, nature itself selects the most mature seeds. They are then checked by filling them with water. High-quality seeds are dried, ventilated and stored in paper bags, and it is important that the room is dry. Don't forget to note the collection date.
Important! The shelf life of the seed is 3 years.
You can get the seeds yourself from the boxes formed on the onion arrow
Germination of seeds
Onion seeds take quite a long time to germinate, and if you use a non-seedling method of growing, a significant part of the sprouted seeds can become clogged with weeds, as a result of which the plant is at risk of death. To avoid this situation, nigella should be soaked for 1 day in water with the addition of potassium permanganate. You can also add vegetable growth stimulating drugs to this liquid.
To get quick germination, the seeds can be placed on a damp cloth and covered with wet gauze. After 10 days they will begin to hatch, and only then can they be sown in moist soil.
It is necessary to water until the first shoots appear. If the grains fall into dry soil, the crop will not sprout.
Sometimes the seeds are glued to toilet paper with starch paste. After they stick, the paper must be rolled into a roll. When the time comes for sowing, the workpiece is placed with the seeds facing down. Using this method, you can achieve uniform seedlings, which do not need to be thinned out.
Preparing seeds before sowing
Many people ask: why prepare seeds? Especially if you grew them on your own plot.
Agrotechnical methods for processing planting material are aimed at increasing the yield of root crops in general. How can this be achieved? Thanks to preparation, the seeds acquire better germination, and this, in turn, ensures an increase in yield. Seed treatment provides an optimal combination of green and head growth, because the abundant formation of shoots reduces the root crop.
Gardeners know that enormous efforts to grow any crop can be wasted when pests and parasites appear and multiply. Seed treatment is specialized disease prevention.
To get a bountiful harvest and protect it from diseases, you should prepare the seeds in advance by soaking them in solutions of salt and potassium permanganate.
Any seeds - purchased in a special store, collected on your own site - must be sorted out. To sort out low-quality ones, they are placed in a container and filled with a strong saline solution, then left for 5 minutes and shaken.
Important! Those seeds that float to the surface are drained, the salt solution is washed off and the remaining material is dried.
There is another way to check germination. 10-15 seeds from a batch are wrapped in a damp cloth for two weeks, maintaining humidity regularly. The procedure must be done no earlier than a week before sowing.
The next stage is heat treatment. Its role is to disinfect the material and activate it before planting. Several methods are described.
Immerse in water at a temperature of plus 70 degrees Celsius for 3 minutes, then in cold water for several minutes. The temperature difference is what causes the expected result.
Heat treatment is also important - it can be carried out using hot and cold water
There is a recommendation to immerse the seeds, wrapped in cloth, in water at a temperature of +45-50 degrees Celsius for 15 minutes, then in cold water for a minute. The methods differ only in details.
Hardening. Cover the saucer with gauze, place the seeds on it and fill it with warm water. Wait 24 hours, drain, moisten the gauze with cold water and put the saucer in the refrigerator for two to three days.
Important! The hardening procedure involves keeping it in warm water (plus 25 degrees Celsius) for a day, then another 48-72 hours in cold water (in the refrigerator, according to some sources).
There are several heat treatment methods
How and what to feed onion seedlings
The first fertilizing is applied immediately after emergence. Subsequent events will take place no earlier than two weeks later. The interval between further feedings should also be 15-18 days.
As a top dressing, special complex fertilizers are most often used, which can always be purchased in specialized stores.
You can also prepare fertilizer yourself from 10 grams of urea, 5 grams of potassium chloride and 20 grams of superphosphate. All ingredients are mixed and dissolved in 10 liters of water. You can also use a solution of chicken manure, which is mixed 1:10 with water.
The infusions are distributed over the entire surface of the soil using a watering can with a thin spout.
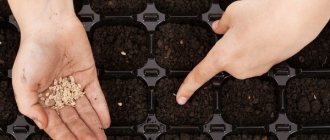
How to sow onion seeds?
For a bed width of 80-100 cm, follow the following scheme.
10 cm are retreated from the edge of the bed on the left and right; the remaining space is marked with future beds of three with a distance of 5 cm between them. Between the next three, the distance should be 15 cm. The seeds are distributed at a distance of 1.5 cm from each other. The ground is leveled and watered at the rate of at least 2-3 liters of water per meter of bed.
The depth of seed placement should be no more than 2 cm. If loops appear, possibly with fragments of seeds, you need to carefully examine and remove those sprouts that have emerged with their roots up.
Seeds in the beds must be sown according to a certain pattern, maintaining the distance between the beds
Important! To create optimal conditions, the sprouts after mass germination are thinned out, leaving a distance of 1.5-2 centimeters.
How to grow onion sets from seeds
Good onion seeds are the key to quality results, so you need to choose them very carefully. Seeds of any variety you like will do, provided they are ripe, collected correctly and stored in a dry place. If the seeds are the same size, dry, black, shiny, free of impurities and mold, feel free to use them for sowing.
Preparing the soil for sowing onions
Before sowing onion seeds in the ground, you need to choose the optimal place for this. Seedlings work best where zucchini, cucumbers, tomatoes or cabbage grew last year. But pathogenic bacteria and onion flies could remain on the onion bed and next to it.
Choose a bright, well-ventilated place, dig up the soil and start fertilizing about a week before sowing. Add half a bucket of rotted manure or compost and 1 tbsp to loose, breathing soil. nitrophoska, Kemiry Universal, Mortar or other complex mineral fertilizer per 1 sq.m.
On heavy clay soils, add 1 bucket of sand and rotted sawdust to this complex, and mix acidic ones ahead of time with half a glass of ash or dolomite flour per 1 sq.m.
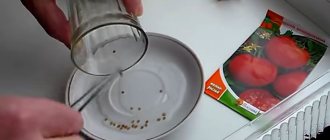
Preparing onion seeds for sowing
Nigella onion seeds are covered with a hard shell, so they need to be soaked in advance. Place the entire volume in a damp cloth and regularly spray with warm water, not allowing it to dry out. When the first seeds hatch (after 1-3 days), you can start sowing.
If you doubt the quality of the seeds, for example, they have been stored for several years, check them in advance for germination. Soak the nigella in water and place it in a warm place - in a few days more than half should hatch. If this does not happen, the seeds should be replaced or simply sown thicker.
Sowing onions with seeds
The sowing itself is simple and will not take much of your time. You can start it in the middle zone in the penultimate or last week of April. But residents of other regions will have to decide when to plant onion seeds, depending on the weather. In any case, you need to focus not on return frosts (onions can handle them), but on the average daily temperature - it should be above 15-18°C.
Many summer residents wonder whether it is possible to plant onion seeds before winter. It is possible, but this method has its own nuances. Firstly, the beds need to be prepared in the same way as in the spring, but not earlier than October. And secondly, the actual planting of onion seeds before winter begins only on frozen ground or even on the first snow, when no thaw is expected. The seeds are sown a little thicker than in the spring, always dry, immediately covered with previously prepared soil or peat, and the bed itself is covered with a thick layer of spruce branches.
- Planting onions before winter - optimal timing and suitable varieties
Dreaming of spring greenery straight from the snow? Then start planting onions in the fall and ensure yourself an early harvest.
On the selected day, the prepared ridges are spilled with warm water, and then grooves are laid on them. Their depth should be no more than 3 cm, the distance from each other should be about 15 cm. The bottom of the grooves should be dusted with ash and the seeds should be laid out. Yes, they are exactly laid out at a distance of 1.5-2 cm from each other, and not sown in the generally accepted way. Although the seeding rate for onions is 4 g per 1 linear meter, you should not sow them like dill - the shoots will be uneven and the onions will interfere with each other.
The sown seeds are sprinkled with a thin layer of earth, peat or sand, and the bed is mulched. If the seeds have been germinated, no additional watering is needed - they will already appear on the surface in a week. But dry seeds need to be carefully watered, and they will sprout no earlier than in 10 days.
Although onions are not very heat-loving, a strong frost can kill tender shoots, so cover the bed with spunbond or film at night.
Caring for onion seedlings from seeds
Onion seeds germinate slowly, but young leaves grow for a very, very long time. If you see seedlings a couple of weeks after sowing, then a pair of real leaves - only after a month. Despite its pale appearance, you cannot forget about the onion, otherwise it will be swallowed up by much more active weeds, and it will be unrealistic to find it in the wilds of dandelions and woodlice.
As the soil dries out (every 3-4 days), water the onion shoots with warm water and regularly loosen the row spacing shallowly, breaking up the crust. When each plant has 3-4 true leaves, thin out the crops, leaving 3-4 cm between them. Then apply two feedings with an interval of 10 days. For the first one you will need 1 tbsp. urea per bucket of water, for the second - the same and half a tsp. superphosphate and potassium sulfate.
When fertilizing, pour fertilizer into the furrows and not onto the leaves to prevent burns.
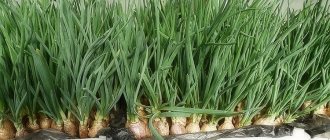
Harvesting and storing onion sets
In the second half of July, the leaves of the set begin to turn yellow and lie down. Don’t be afraid and try to “water” fading plants. In fact, these signs indicate that the seedlings are ripe and ready for harvest.
Pull out the bulbs, place them directly on the ground (if the weather is dry) and leave for 3 days. Then take it to the hottest possible place (attic or veranda) and dry for another 5-7 days. Before storing onion sets, sort them. The best bulbs are obtained from sets with a diameter of 1.5-2 cm, the larger ones bolt, and the smaller ones dry out.
It is not necessary to throw away the culling - you can easily plant it before winter in order to get an early harvest in the spring.
Store the sets in fabric or mesh bags in a cool and dry place. A barn, a glassed-in balcony or a storage room in an apartment will do.
- 4 dangerous diseases of onions during storage
Diseases that can destroy the entire onion crop you have grown in a month or two.
How to get greens (arrows)?
Even at home, you can grow both the bulbs themselves and the arrows. Most often, a mini-garden is set up on the windowsill in order to diversify dishes with fresh herbs. The preparation of seeds intended for this purpose begins with soaking in warm water. It is enough to leave the seed in this form overnight. The next stage is soaking in potassium permanganate. Two hours are enough to achieve the effect.
You can grow onions at home, on a windowsill, and also get arrows, which are often used in chopped form to add to food.
Traditional pots or special baths are used as containers.
Important! There are people who like to use egg containers. This option is more suitable when growing greens from bulbs.
You need to prepare the substrate in advance. The drainage layer is necessary for aeration and optimal hydration. The soil should be fertile, loose - it contains humus and coconut fiber. It should not contain clay or foreign components. Often, a suitable substrate composition is achieved by mixing compost, humus, and peat in a 1:1:1 ratio.
It is worth preparing the soil mixture for growing onions in advance.
Treated seeds are planted in the prepared soil to a depth of 1.5-2 centimeters, covered with film and left until the first shoots appear. One of the secrets to growing thick greens is maintaining the optimal temperature. To do this, after the first shoots appear, it is illuminated for 2-3 hours, usually in the evening. Experienced gardeners believe that the thermometer should not be lower than 18-22 degrees Celsius.
After 7-14 days, the film is removed and the container is moved to the shade. The place should be away from windows or heating devices. During this period it is worth being patient. For further growth, strengthening of the root system is required. The process will take a month. Subsequently, the greens will delight you with regular harvests for almost a year.
You need to wait until the root system becomes more powerful - soon after this you will be able to see greenery
Important! For faster results, seedlings are grown first.
When it comes to harvesting greens from bulbs, there are many more ways to choose from. This includes hydroponics using special equipment, aeroponics, and sawdust. Plastic bottles work great as containers at home. The method that is called “cheap and cheerful!”
There are methods that don't even require adding soil. Take the bulbs and tightly fill a tray with shallow walls with them. Care consists of regularly adding water up to a quarter of the height of the bulbs. By maintaining the humidity in the container in this way, you can soon get arrows.
You can germinate bulbs even without soil: for this you use egg containers or simply fill a container with bulbs with water
There are more than enough ways, and the requirements differ, but if you put all the most important ones into one list, this is what you get:
- lighting changes as seeds grow;
- Watering should only be done with settled water at room temperature or slightly warm;
- The watering regime should maintain the loose state of the soil;
- stagnation of water leads to rotting of the bulbs;
- dry air is harmful to the growth of greenery, and it is not worthwhile to increase the temperature by placing a container on the battery;
- When growing greens from bulbs, they must be changed after 2 months.
To obtain greenery, water the bulbs with warm, settled water.
Important! Growing greenery on the windowsill has become not only a necessity, but also an element of room decoration. The number of methods and devices for this is constantly increasing.
Caring for onion seedlings
Quite a lot of time passes from the moment the seeds are planted until the first shoots appear. Proper care from the first days will help speed up this process.
How to care for onion seedlings before germination
After you have planted nigella, you need to create a greenhouse effect.
To do this, the containers are placed in a transparent plastic bag or covered with glass on top.
The containers are ventilated daily to prevent fungi from growing in the soil and damaging the seeds.
Watering is done using a spray bottle or a special watering can with a sieve. This is a very important point that must be observed. Water as the soil dries, but so that a crust does not form on the surface.
Caring for onion seedlings after entry
After the sprouts appear, the container is removed from the shelter and placed in a bright room with an air temperature in the range of +13°C - +16°C, after a week the temperature is increased to +18°C.
At this time, it is recommended to thin out the seedlings, if necessary, so that there is about 3 cm of free space between them.
Watering is also done as the soil dries with a spray bottle or watering can.
During the entire growing season, onions are fed 2-3 times with an interval of 2 weeks.
If there is a lack of sunlight, they resort to additional artificial lighting so that the seedlings form correctly and do not stretch upward.
IMPORTANT! Watering is carried out with settled water at room temperature.
The soil
Proper soil preparation is important for harvesting. If the seeds fall into the soil at a greater depth than required, they may germinate with their roots upward. The composition of the soil is also important. The best option is loamy soils subject to the application of mineral and organic fertilizers.
The place should be well lit and warm. An effective agronomic method is to place onions in beds where cabbage, tomatoes, and cucumbers were previously grown. The above-mentioned crops enrich the soil with nitrogen and contribute to abundant onion harvests.
The soil for the beds is prepared in the fall: they dig it up, add compost and mineral supplements. The prepared substrate is watered with a solution of copper sulfate.
When planting in the spring, it is better to prepare the soil in the fall - add all the necessary fertilizers, disinfect
In the spring, it is additionally recommended to add ash. Too much fertilizer will cause abundant green growth, and this may affect the size of the roots. Experienced gardeners experiment with several options until they find one that suits the soil perfectly. A few days before planting the seeds, the ground is covered with transparent polyethylene or dark film.
Important! The reception has a double effect: it warms the soil and prevents the growth of weeds.
A method for treating a finished bed with the preparation “Baikal EM-1” is described. The product contains strains of beneficial microorganisms. When used, the culture receives protection from fungi and pathogenic bacteria. The process of humus formation is stimulated.
To treat finished beds, you can use the preparation “Baikal EM-1”
Important! The bed should be about a meter wide and no more than 10 cm high, otherwise the soil will dry out quickly.
Planting sprouts in beds
Planting of seedlings is carried out 52–60 days after sowing the seeds, when three true leaves have formed. Plants are planted in open ground no earlier than April. To do this, choose a well-lit area. It should be noted that this plant crop grows well on sandy loam soil.
The land for planting seedlings is prepared in the fall. When digging, compost or humus is added to the soil, based on the ratio of 2 buckets per 1 m². You should also add 2 liters of ash and 50 g of complex fertilizers. In spring, the area is loosened and leveled with a rake. Then furrows are made in rows, 5 cm deep with a gap of 0.3 m between them. Afterwards, watering and planting of seedlings is carried out.
Only strong seedlings are selected for planting. The leaves of the plants are first cut off by 1/3 (this will reduce moisture evaporation), and the root system is trimmed and lowered into a clay mash. The planting process itself is carried out in dry weather, in the evening, after 17-00 or in cloudy weather.
Other seed materials
You can also plant onion sets. The material for its production is “chernushka”. These are the seeds that are formed after the flowering of the onion. You can easily get them yourself. Bulbs with this ability to reproduce are formed only in the second year, but it is quite suitable as seed material for onion sets.
You can plant seeds at the end of April, and this is an advantage over seasonal onions. If frost occurs in late spring or the temperature drops, the nigella will withstand this test, while the bulbs will stop growing.
It is necessary to choose a place for future planting and prepare it in advance, so work on forming the beds begins in the fall. Finding the right place for gardening is a whole science. What is known about onions?
When growing onion sets yourself from nigella, full-fledged bulbs can be obtained only after a year
Important! You should not sow nigella in an area where garlic has previously ripened. Also, legumes should not be planted nearby. Useful predecessors are cabbage and nightshades.
Not everyone agrees with the opinion that a bed with carrots would be a good neighborhood for onions. For example, watering of onions is stopped at the beginning of August, but carrots require active moistening further. Actively growing carrot tops shade the onion bed, and this is fraught with the development of diseases.
The place should be accessible to sunlight and well ventilated. Loose soil promotes necessary aeration. Stagnation of liquid in the garden bed leads to rotting of the bulbs.
It is important to choose the right “neighbors” for onions - it’s great if they are cruciferous or nightshade
Preparing the soil itself involves digging it up, loosening it, and clearing it of weeds. Traditionally, mineral fertilizers are applied. In this case, the choice is made in favor of potassium-phosphorus compounds, but there is disagreement regarding organics. Some experts believe that manure should not be applied - it stimulates the growth of the green arrow, depriving the turnip of nutrients and slowing down growth. In spring, nitrogen fertilizers are added to the complex.
Important! It is recommended to change the planting site every 3-4 years.
Growing shallots
Shallots are similar in properties to onions, but differ in small bulbs and strong branching. It is cultivated mainly for greens.
To obtain products in one season, the seedling method is used . At the end of winter, the seeds are planted in boxes with coarse soil.
Important! Be sure to fertilize the seedlings with organic-mineral fertilizer.
When 3-4 leaves are formed, the onions are planted in beds . A gap of 12–15 cm is maintained between plants, rows are spaced at intervals of 20 cm.
The harvest begins in the second half of July, when the leaves begin to dry out . The nests are divided into heads, the roots and stem are cut off, and dried. In a cellar or apartment, shallots are stored in mesh bags in a cool, dark place. A convenient way to use bulbs and herbs for a long time is freezing.
Summer season
After planting, the crop requires care according to the rules of the summer season. What to pay attention to:
- watering is done as the soil dries out;
- Fertilizers are applied before the beginning of July - no later;
- a special moment for feeding is before the formation of bulbs;
You don’t need to water the onions according to a specific schedule - you just have to watch the soil dry out and periodically moisten it - Pest control can be carried out with herbal mixtures containing wormwood, dandelion leaves, tomato, and hot pepper;
- The harvest of seed onions begins in the first half of August;
- you can dry the bulbs in the garden, then transfer them to a hot and dry place until the tops dry out;
- storage conditions largely depend on the variety, but before putting the bulbs, for example, in the basement, it is necessary to sort them out and remove low-quality ones;
- The best storage method is canvas bags or boxes located in a cool and dark place.
It is better to store the bulbs in canvas bags or specially prepared boxes
Important! Different varieties may have features of care, watering, and fertilization. As a rule, a successful variety has many fans who are a source of valuable, time-tested advice.
Care
With proper agricultural technology, seedlings quickly take root and begin to grow. Care comes down to regular watering, fertilizing, removing weeds and loosening the soil.
Top dressing
- the first time 14 days after planting the seedlings. Use bird droppings or mullein solution (1:10). Add 25 g of urea to a bucket of infusion. Each seedling requires 1 liter of solution.
- The second time is fertilized in mid-June with phosphorus-potassium fertilizers. Superphosphate together with slurry (add 2 tablespoons of superphosphate per 10 liters of water) or “Humisol” is also combined with superphosphate or other phosphorus fertilizer.
- in July, nitrogen fertilizers are stopped.
Watering
It is necessary to maintain high soil moisture while the seedlings take root. When the bulb has formed, reduce watering. In regions with arid climates, onions are watered 8-9 times per season.
If it rains, there is no need to water the onions. If the weather is sunny, then water the onions once a week at the rate of 10 liters per 1 square meter. m.
More details about proper watering of onions in the article: Features of watering onions in open ground
Stop watering 3 weeks before harvest, otherwise the onions will be watery and quickly deteriorate.
Loosening and removing weeds
Each time after watering, weeds are removed and the soil is loosened.
Disease and pest control
Onions can be subject to bacterial or fungal infections such as fusarium bottom rot, rust, onion mosaic, neck rot, downy mildew, black mold, etc.
A universal means of spraying is a solution:
- 10 liters of water;
- 1 teaspoon of copper sulfate;
- 1 tbsp. a spoonful of grated laundry soap.
This product is used from the moment the feathers reach 15 cm in length.
The most common pest for the vegetable in question is the onion fly; cabbage cutworm, onion moth, nematode, harmful centipede.
Watch the video! Super remedy - ammonia - against onion fly
Using the seedling method of growing onions, you can grow a good harvest in one season.
Pre-winter sowing
This method has a significant number of supporters.
The beds begin to be prepared immediately after harvesting and digging up the soil. Sowing is done later, almost during the coldest months. The seeds are carefully selected: they must be large and dry. After embedding, mulch is applied on top to a depth of 1.5 centimeters.
Autumn soil, well saturated with moisture, allows the shifts to be saturated, but not to germinate. This helps them spend the winter under the snow without any damage to germination and begin to grow with the first warmth. As a rule, a soil temperature of +3-4 degrees Celsius is sufficient.
Many people prefer winter sowing - this allows them to get bulbs in the spring and spend less time caring for the beds
Harvest and storage
A signal of maturation is mass lodging and yellowing of feathers . As a rule, this time falls at the end of July-beginning of August.
On a dry, warm day, the onion is pulled out by hand or dug out with a pitchfork . The harvest is laid out in one layer under a canopy for several days to dry. Unripe specimens are kept in the sun for 2-3 weeks.
After this, the feathers are trimmed so that a tail of 3–5 cm remains. The heads are carefully sorted, sick and damaged ones are sorted out. Small ones are suitable for winter sowing.
The harvest is stored in boxes, fabric bags or braided . At home, the optimal temperature for onions is +18°C in a dark place. In the basement, spicy varieties are stored at 0...3°C, sweet and semi-sharp ones - at 0-...+1°C.
Growing in a greenhouse
If you want to grow onions in a greenhouse, you need to take into account the basic requirements that relate to the features of the greenhouse design:
- the place should be well lit;
- an effective ventilation system is required;
- drip irrigation device;
- heating to raise the temperature to plus 15 degrees Celsius.
It is worth planting onions in greenhouses either in late autumn or early spring, when the air temperature begins to gradually rise
Important! The best time for planting is late autumn or early spring.
Picking a bow
Picking is another important process that must be carried out before planting onions in open ground. Picking is very simple - half the root system and a third of the length of the leaves are shortened. The procedure is carried out with a sharp knife or scissors.
After parts of the seedlings are shortened, they are moved to a larger container.
RECOMMENDATION! Before the start of the event, instruments are thoroughly treated with disinfectants.
Different varieties: what to choose?
Before listing the most suitable varieties for seed propagation, let us outline the main selection criteria.
| Criterion | Description |
| Growing season | Varieties are divided into early, mid-season and late growing season. When growing from seeds, it is better to choose early ones. |
| Number of primordia | In low-germinating varieties, one bulb ripens, sometimes two. Nutrients are concentrated in the fruits. In polybuds, more of the bulbs themselves mature, but the growth mainly goes to the greens. Therefore, preference is given to the low-germinating variety. |
| Bulb size | The indicator is related to the purpose of the variety, taste characteristics, and shelf life. |
Onion varieties are divided depending on the size of the bulbs, the number of rudiments, and the growing season.
The combination of qualities may look very attractive, but inexperienced gardeners should consult with specialists. It often happens that after going through several varieties, they find the ideal one for certain conditions.
Important! To avoid making your own mistakes, you can use the experience of others.
Let's consider the varieties that are best chosen for seed propagation.
Early ripening varieties have good keeping quality. According to nesting they are distinguished:
- with ripening of 2-3 bulbs - Timiryazevsky;
- 3-5 bulbs - Bessonovsky;
- up to 4 pieces - Rostov;
- small-growing, 1-2 bulbs - Odinovets.
Mid-season varieties: Danilovsky 301, Arzamassky, Svirsky, Carmen, Centaur.
Mid-season varieties include Arzamassky, Svirsky, Carmen
Let's look at the most popular domestic varieties.
- Centaur. Refers to low-primordial ones. The bulbs ripen well by the end of the season, weigh up to 150 g when sown in the ground, when using seedlings - up to 300 g. The root crops are dense and have a high shelf life. Gardeners value the variety for its pungent taste, undemanding cultivation, and disease resistance.
- Agro winter. The name of the variety indicates the method of sowing. The seedlings germinate early. Root vegetables have an average weight of 90-100 g. The taste is semi-sharp. During the harvest season it is stored until the end of the year.
- Farmer. Suitable for direct planting in the ground and for growing seedlings. Large round root vegetables with juicy white pulp weighing up to 300 g. Due to its unpretentiousness, resistance to adverse climatic conditions and diseases, it is considered universal.
The Farmer variety is considered unpretentious and resistant to different weather conditions. - Zolotnik. An early-ripening, small-growing variety, suitable for producing onion sets and turnips.
Criteria for choosing planting material
For growing as an annual crop, summer residents and farmers often choose domestically selected varieties recommended for cultivation throughout the country. The most popular are single- or low-germ, sweet or semi-sharp varieties of early or medium ripening - with a vegetative period not exceeding 110-130 days from sowing to harvesting. Multi-primordial varieties in annual crops turn out to be deformed.
Here are brief descriptions, characteristics and photos of some varieties and hybrids that are most suitable for growing from seeds in one season through seedlings:
“Annual Siberian” Obtained at the West Siberian Vegetable Experimental Station by selection from the “Tsituassky” variety. Zoned in 1950. The bulb is dense, rounded-flat, weighing 38-60 g. Dry scales are yellow, sometimes golden, juicy - white, with a semi-sharp taste. Maturation before harvesting is from 20 to 100%, keeping quality is good.
Early ripening variety, small-growing; has proven itself well when cultivated both in annual (from seeds) and biennial (from sets) crops
"Yukont" Early ripening single-germ variety. The period from complete germination from seeds to mass lodging of leaves is 83-93 days. The bulbs are round-flat, weighing 100-150 g, with a neck of medium thickness. Dry scales are purple, fleshy scales are slightly purple, with a pungent taste.
The variety is characterized by stable yield, good ripening and keeping quality of the bulbs
"Candy F1" (Candy F1) With direct sowing, it forms a bulb in one season. Mid-day hybrid. It is especially recommended for obtaining a super early harvest when growing seedlings. The bulb is round, very large, weighing up to 800 g. The scales are golden-yellow in color. The harvest is stored for up to 6 months.
“Candy F1” is a very early (85-90 days of growing season) semi-sweet hybrid bred by Seminis
“Red Airship F1” (“Red Zeppelin”, Red Zeppelin F1) Mid-early long-day hybrid. Forms large bulbs, weighing 150-250 g (up to 600 g). The color of the bulbs is dark red, rich, the shape is very even: from round to highly rounded. Recommended for growing in seedlings.
The harvest is used for fresh consumption, processing and long-term storage
“Strigunovsky”, “Early Pink”, “Amphora”, “Lyubchik” are also popular among domestic gardeners. Excellent yields are produced by semi-sharp semi-sharp varieties of onions, for example, “Kaba”, “Karatalsky”, “Krasnodarsky 35” and others.
Exhibition onions grown from seeds
The Exhibition variety is the result of the work of Dutch breeders. It is distinguished by its productivity; bulbs weighing up to 500 g ripen in one season. It is used as a salad, has a mild sweet taste. It is recommended to grow by direct sowing into the ground, although it is noted that the root crops obtained by growing seedlings will be larger.
Let's consider the features of agricultural techniques.
The first stage is seed preparation. It starts at the end of February - beginning of March.
The substrate for seed germination is an unusual mixture of liquid paste and fertilizer. A good base for applying and preparing seeds is regular toilet paper. It is enough to cut it into strips about 3-3.5 cm wide. The mixture is drawn into a syringe and carefully applied at a distance of 4-5 cm from each other. Onion seeds are placed in the resulting “nests”. After giving the paste time to dry, the ribbons are rolled up. Seeds packed in paper will be used in the spring, usually in April. But they prepare the beds in advance, in the fall.
Seeds can be germinated using homemade paste and toilet paper
For paper ribbons with seeds, prepare grooves with a flat cutter so that the seeds are at a depth of 1.5 centimeters. To protect against hypothermia and to retain heat, low arcs are placed above the beds. They are covered with woven material on top. In such conditions, a favorable microclimate is created for onions, especially since watering is done directly through the fabric. Experienced gardeners claim that this will protect the planting from the onion fly. Another completely environmentally friendly way to repel parasites is to place a bed of carrots nearby.
Important! Essential oils effectively repel pests.
The process of root crop formation must be regulated. Greenery should not be allowed to grow. Regular removal of weeds is required so that nutrients and moisture are used for onion growth. The growing season takes 120-130 days. It is recommended to store the bulbs in a dark, dry place.
If you want to get large bulbs, you need to prevent the appearance of arrows
What varieties of onions can be grown from seeds in 1 season?
Not all varieties are suitable for growing onions from seeds in one season. This is mainly how varieties with a sweeter taste are grown, which are more often used for making salads. It is best to plant the following varieties:
- Chalcedony – disease resistant, great as a herb, medium sized bulb;
- Farmer - well stored, bulb weight reaches 350 g;
- Olina - has high taste and long shelf life, adapts well to growing conditions;
- Karatalsky is an early ripening variety with a semi-sharp taste;
- Delight - has high resistance to diseases and climatic conditions, bulb weight from 250 to 320 g;
- Centaur is a sweet variety with high resistance to weather conditions and diseases;
- Shaman is an oblong onion that is great for growing in small areas;
- Siberian annual - an early variety with a semi-sharp taste and a bulb weight of about 100 g;
- Exhibition - the bulbs are very large, can gain weight up to 500 grams, and are resistant to climate change.
RECOMMENDATION! When choosing a variety, you need to pay attention to the timing of ripening, taste and the number of buds.
Questions
I want spring onions to grow early in the garden bed. When to plant and how?
In order to get green arrows in early spring, plan planting in the fall (August-September).
You can buy seeds or use those you get yourself. They should first be soaked in water or any growth stimulant for 10-12 hours. Plant the seeds to a depth of 2 cm in moist soil, and apply a layer of mulch on top.
You can grow different varieties of onions on your plot, but you should listen to the opinions of local experienced gardeners and choose the most successful ones so as not to waste time on your own experiments
I planted onion sets from the purchased material, and he gave it to the shooter. Is there something wrong with the seeds?
Here the reason is rather different. Planting is usually done in early June. Climate change has caused seasonal temperature variations to change. therefore, an arrow could form. It must be carefully trimmed, and for better growth of the bulb, you can add fertilizer. Make sure that irrigation water does not accumulate in the soil and weed weeds in a timely manner. The bulb grows systematically when the plant has enough nutrients, moisture, and oxygen.
Answers to frequently asked questions
Why should onion seeds (nigella) be processed before planting?
Such actions are carried out in order to destroy fungal and infectious diseases that may have already settled in the seeds.
Why is planting onions deep a bad idea?
Onions are a very delicate vegetable that needs good air circulation to grow. If there is a lack of air, the bulbs can rot and ruin the entire harvest.
Seedling method or direct sowing in the ground?
When sowing directly into a garden bed in spring, there is a risk (especially in unfavorable weather) that the bulbs, although formed, will not have time to ripen. This onion does not last long; it must be sold before the beginning of winter. If this is not a suitable option, it is better to use growing vegetables through seedlings, which will allow you to get a larger harvest of full-fledged bulbs in the middle zone, and in the southern regions will provide high-quality early products. It is the seedling method that is discussed further.
Sowing time
After the seeds have been in water for a day, they must be dried to a crumbly state, and only then planted in the soil. In this way, it will be possible to achieve rapid germination and reduce the likelihood of weeds that can interfere with the proper growth of the vegetable crop.
In order for the bulbs to form, there must be nutritious soil and good sunlight. The best predecessors of this vegetable crop are cucumbers, potatoes, cabbage and legumes. The planting site should be prepared in the fall. The soil needs to be dug up, fertilized with compost and mineral fertilizers added.
When the soil is very dense, the onion harvest is small, often most of the fruits do not even have time to ripen and rot completely.
Before harvesting, stop watering for at least a week.
Soil for planting
Onions are grown on different soils. On sandy loam and sandy soils, which are characterized by lightness, the vegetable is sown earlier. Then the bulb turns out clean, with brightly colored scales. The disadvantage of such soils is the need for frequent watering, rapid leaching of minerals introduced with fertilizing.
Cleaner harvests are obtained on sandy loam soils
Heavy clay soils prevent early sowing. A crust forms on the surface, so it is not possible to obtain the desired standing density. At the same time, it is easier to maintain the required level of moisture and mineral components. The harvest obtained under such conditions is stored longer.
The vegetable is sensitive to such indicators as acidity. It is better to choose soils that are neutral or slightly acidic. Any deviations are harmful to the vegetable. The degree of acidity is determined, for example, by the plants living on them. So, sorrel, horsetail, and buttercup prefer acidic soils.
Soil acidity is checked with litmus paper
Tests are carried out using chalk. A little soil is poured into the bottle, water is poured in and chalk is added. A fingertip is placed on top of the neck. If, after shaking, the fingertip inflates, this indicates a reaction with the release of carbon dioxide. Therefore, the soil is acidic. When mixing chalk with neutral soil, the accessory will not straighten.
Rules for planting seedlings in open ground
At the age of about 2 months, seedlings are usually ready to move to a permanent place. Usually it is planted by choosing a warm, dry day in the first ten days of May. Before transplanting, the plants are watered well, each of them is removed from the ground, inspected and sorted, removing weak and damaged specimens. Then the roots and green part are shortened by a third and dipped in a mash of clay and mullein with the addition of trichodermine.
Furrows are made in the bed, leaving 20–30 cm between them. The seedlings are placed in furrows at intervals of 8–10 cm, the bulbs are buried 2 cm, the row spacing is watered and mulched. The soil under the plantings is kept moist during the first week with periodic watering. Further care is no different from the usual care of onions grown from sets.
Experiment with growing onions from seeds.
Don’t neglect the opportunity to get full-fledged bulbs of the exact variety you like in one summer. But we can also recommend you planting onions before winter - this is an excellent original solution! Author of the article: Oksana Artemenko
Preparing the soil for sowing onions for seedlings
To obtain high-quality seedlings, loose, nutritious soil with a neutral reaction is required. You can use ready-made peat soil with microelements. If the purchased substrate does not contain the latter, it is worth enriching it with wood ash - ½ cup per 5 kg of soil. Some gardeners prepare the soil themselves. Its optimal composition is: turf soil, humus, lowland peat and agroperlite in equal parts.
Important! If you make the soil mixture yourself, do not add garden soil from onions or garlic to it.
To prevent seedling diseases, the soil must be disinfected using one of the methods acceptable to you: warm it up, pour boiling water on it, treat it with solutions of potassium permanganate, phytosporin or trichodermin (according to the instructions).
How to grow seedlings
It is better to plant seedlings in containers: special boxes or pots. Based on the rules of agricultural technology, it is necessary to take into account some points before sowing nigella:
- place seeds at a distance of 5 cm between rows;
- per square meter, grain consumption can vary from 15 to 20 g (it all depends on the type of onion);
- from the moment the grains are planted, the boxes are placed in a warm room with a temperature of +18…+26 °C;
- after the first shoots appear, the temperature is reduced to +14...+17 °C (this procedure is very important, otherwise the greens will grow, but not the turnips);
- While the seedlings are growing, it is necessary to fertilize regularly (you can fertilize the soil with chicken droppings, which should be diluted in water 1:10).
From the appearance of the first shoots to the time when the seedlings can be planted in a permanent habitat, approximately 2 months pass. This period will be quite enough for the first leaves to appear.