When to plant tomatoes?
About two months should pass between the processes of planting seeds and planting seedlings, during which sprouts will sprout from the seeds. You can start working with seeds in February for those who live in warm regions, and in March for residents of the northern part of the country.
To plant seeds in the ground, it is necessary to take into account information about the weather in the near future. They need to be sown two months before the end of spring frosts - then the tomato bushes will take root better in open ground and will be able to bear fruit well.
Another key point is the landing location. You only need to be guided by the weather when planting sprouts in a field or garden. If you have a greenhouse, this is not essential, and you can start seedlings in the middle of winter. The main thing is to provide the sprouts with good heat and light conditions.
Preparation of seed material
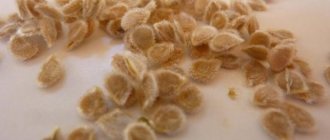
Sowing tomatoes for seedlings begins with preparing the seeds. Experienced gardeners often only disinfect them, warm them up and soak them until they swell.
Proponents of the full cycle of treatments at home carry out the following procedures before planting seeds (in stages):
- Culling. Make a saturated salt solution and soak the seeds there. Those that float are thrown away. Those remaining at the bottom are washed and subjected to further processing.
- Warming up. Pour tomato seeds with water at a temperature of 53° C and leave in a thermos for 20 minutes. Then they are washed to stop the thermal processes. The procedure kills some of the pathogens and acts as a stress factor that promotes the awakening of the embryo.
- Etching. There are many ways to disinfect tomato seeds - in garlic infusion, aloe juice, chlorhexidine, special chemicals, brilliant green. Potassium permanganate does not kill all microorganisms, and peroxide is generally useless for etching.
- Stimulation of the tomato embryo. Such natural preparations as Epin, Zircon, Energen showed excellent results. They stimulate the plants’ own defenses, and the treated seeds immediately sprout well. In the future, if no significant mistakes were made in caring for tomato seedlings, they will have a strong stem, better withstand temperature fluctuations, and tolerate isolated mistakes in watering. Aloe juice and ash infusion have worked well as a stimulant.
- Saturation of tomato seeds with useful elements. To do this, they are left for 2-3 hours in a solution of any complex fertilizer.
- Soak. Tomato seeds are wrapped in a damp cloth and placed in a warm place until they swell. This usually takes approximately 18 hours. If the seeds are fresh, of high quality, and the temperature is about 25° C, they can become saturated with moisture in a few hours. Old people sometimes need a day or a little more. Tomato seeds need to be monitored, since each of the previous procedures involves soaking them. They may swell much earlier than the specified time.
- Germination. The method is very similar to soaking, only the seeds are left in a damp cloth until the root pecks (it is the root that appears first, not the sprout). To prevent moisture evaporation, place the tomatoes in a plastic bag, ventilate them several times a day and check the humidity. As soon as the root is equal in length to the diameter of the seed, it is immediately planted.
- Hardening of seeds. After the grains have swelled, the seed material is placed in a damp cloth. For 5 days, the tomatoes are placed in the refrigerator at night and kept in the apartment at room temperature during the day. You can wrap the seeds in jute or burlap and stick them in a snowdrift several times for 3-4 hours. The method is not suitable for sprouted grains.
Only one of the last two procedures is performed. If you germinate seeds and then start hardening, they will die. After exposure to low temperatures, the seeds must be planted immediately, otherwise the procedure will lose its meaning.
It is impossible to swap the processing steps, but you can exclude any point starting from 4. No procedures are carried out at all with coated or encrusted tomato seeds. They are planted dry, otherwise the shell will be damaged.
Selection of seeds in the store
In order to choose the right and suitable seeds, you need to pay attention to the parameters of the future bush and the conditions for its best growth.
Tomato bushes can be tall, medium-sized or low-growing. They differ in care, so you should choose them according to your growth capabilities.
Tall tomato bushes can reach a height of two or more meters. They are grown both in open ground and in greenhouse conditions. A prerequisite is the presence of support. This is due to the fact that during the period of fruit ripening, the weight of tomatoes can reach 20 or 30 kilograms per bush. If the plant is not given proper support, it may break and then the harvest will be lost.
Tall bushes bear fruit longer and produce a harvest much earlier. The fruits can be collected from mid-summer until late autumn. This plant option is suitable for those who have a small area for planting plants, but require a large harvest.
Most varieties have an average size of bushes. They reach one and a half meters at the peak of growth and do not require as much care as tall bushes. However, their yield is significantly less.
Low-growing varieties are the most popular among the population. They do not grow above a meter, are quite compact and easy to care for. They can be grown at home, for example, in a box on the balcony. They do not need support, since their trunks are strong enough to support a weight of up to 8 kilograms, which is exactly how much harvest is obtained from one bush.
Another choice parameter is the characteristics of the fruit itself. You need to choose what exactly the tomatoes are for. Large and fleshy varieties are perfect for making salads, and small tomatoes, for example, cream tomatoes, are ideal for canning. We recommend reading the following article for lovers of sweet varieties of tomatoes.
The color of the tomatoes may also vary. There are red, orange and black varieties. They all have different tastes, so you need to choose based on personal preferences.
You can also choose by price category. There are cheaper and more expensive varieties of seeds. According to statistics, expensive seeds germinate better and produce greater yields. Among cheap products, empty seeds are often found that do not germinate in the ground.
If you rely on productivity, then choose the appropriate varieties, for example, tomato seeds of Siberian selection have proven themselves well.
In addition, in stores there are seeds that have been processed - they can be planted immediately, or you can use seeds that you have prepared yourself for sowing.
Preparing the land for seedlings
Good and stable growth of seedlings is possible with high-quality fertile soil, which can be found in the store. You can buy both universal soil and special soil designed for growing tomatoes.
Soil for seedlings of tomatoes, peppers and eggplants
Manufacturers of quality soils supply the market with an excellent product, balanced in terms of nutrients and acidity. But this does not always happen, so you can also find products whose declared composition does not fully or does not correspond at all to the contents of the packages. Therefore, experienced gardeners do not trust store-bought mixtures for seedlings, preferring to prepare it themselves. Thanks to this, you can save a lot of money, and the quality of the prepared mixture remains undeniable.
Soil for tomato seedlings
Prices for peat soil
peat soil
A simple recipe for preparing soil mixture
In order to prepare the soil mixture, you need to mix sand, compost or humus, garden soil and peat. Due to the increased acidity of peat, it is necessary to add another 40 g of dolomite flour per bucket of the prepared mixture. If flour is not available, you can use wood ash instead. Potassium fertilizer is also added to the soil mixture - 10 g, superphosphate - 30 g and urea - 10 g. Instead of these components, you can add a complex fertilizer, which contains large quantities of potassium and phosphorus. This fertilizer also contains less nitrogen.
Components for soil mixture
Features of the soil for planting
Depending on the period of plant development, it is necessary to make some adjustments to the composition of the soil mixture. When preparing the soil for sowing seeds, you need to add a little humus and sand. Moreover, the amount of sand should exceed the amount of humus. The prepared mixture must be disinfected and sifted. To achieve maximum effect, the soil mixture must be steamed in a double boiler, after which all fungal spores and harmful microorganisms will die. Also, after this procedure, the weed seeds will die.
Steaming soil in a water bath
It is recommended to perform steaming a week before sowing the seeds, so that the activity of beneficial bacteria in the soil has time to resume.
The prepared soil should be moisture-absorbing and loose, but at the same time it should be breathable. To increase the breathability of the soil, you need to add finely chopped sphagnum moss (dry sphagnum moss). It is advisable to perform this procedure after steaming. Sphagnum can also be replaced with store-bought leavening agents such as vermiculite and perlite - this will speed up the growth of the plant root system.
To increase breathability after steaming, you can add dry crushed sphagnum moss (sphagnum) to the ground.
Preparing soil at home
Of course, every gardener’s household should have sand and garden soil, but what if there are no other components for preparing the soil mixture? Luckily, there are several solutions for this. To replace peat, you can use a store-bought mixture made from it. In addition, there is vermicompost on sale, with which you can successfully replace compost or humus, as well as sapropel.
Approximate scheme for preparing soil mixture for seedlings
Sapropel is a unique and useful fertilizer. It consists of the remains of fauna and flora that accumulate at the bottom of reservoirs over many years. Sapropel plays the role of a filter, purifying water from various harmful impurities.
Sapropel
Sapropel as fertilizer
Some gardeners use a special mixture for growing tomato seedlings. It consists of sand and sawdust in a ratio of 1:2. In this case, you need to soak the sawdust in a special solution, which must include mineral fertilizers. The benefits of such a mixture are due to the content of all necessary microelements. Sawdust can also be used as a leavening agent, but it must be small, cleared of dry leaves and various additions in the form of small twigs. For cleaning, the shavings can be sifted. For maximum effect, it is advisable to use old sawdust rather than fresh. Otherwise, you first need to boil them, add a little urea and dry them. Prepared sawdust should be added to the mixture in an amount of 20%.
Soil mixture for tomato seedlings
Prices for sapropel
sapropel
Seed preparation
In order for the harvest to be rich and pleasing to the eye, it is necessary to carefully select the seeds before planting them. This process will discard all low-quality seeds, leaving only the strongest ones. Most people buy regular seeds and prepare them at home, as there is nothing complicated about it:
- The first step in this process is seed sizing . To do this you will need salted water. In half a liter of ordinary water you need to add a teaspoon of table salt and stir thoroughly until completely dissolved. Then tomato seeds are placed in the resulting solution and left for several minutes. Over time, all the good seeds will settle to the bottom, and the bad ones will float to the surface. The top layer must be removed with a slotted spoon or spoon, and the bottom layer must be carefully fished out of the jar. It is the settled seeds that will subsequently be planted in the ground.
- The next step is disinfection . This is necessary in order to destroy possible pathogenic microorganisms and fungi so that the harvest is healthy. For this purpose, a solution of potassium permanganate has long been used in the proportion of 1 gram of the substance per liter of water. To disinfect, you need to keep the seeds in this solution for no more than 20 minutes, since overexposure can reduce germination. In addition to potassium permanganate, ready-made solutions are currently also used, for example Fitosporin, which can be bought in the same store as the seeds.
- Stratification is a fairly specific method of seed preparation. The method is to place them in winter temperatures. To do this, the seeds must be thoroughly mixed with a peat mixture, which is purchased in the store, and then placed in the refrigerator for a month. After this, the seeds are washed and dried.
- Stimulating the growth of tomato seeds is one of the most important steps in preparation. Without this, the plant bushes will be sluggish and frail, and the harvest will be meager. To prepare the stimulant you will need ash and water. Take a glass of water for three teaspoons of ash. The stimulant must be infused for at least a day. Then the seeds wrapped in gauze are placed in the mixture for about 5 hours. After this, they need to be dried thoroughly.
calibration of tomato seeds
Disinfection of tomato seeds in potassium permanganate
Seed stratification
Stimulation of tomato seed growth
Rules for planting seeds
When growing seedlings, you need to maintain a distance between tomato seeds. They will need space as they grow.
If the seedlings are dense, the seedlings will begin to stretch and there may be a risk of fungal diseases.
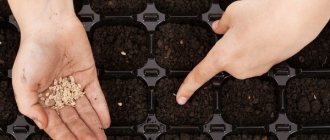
You need to sow tomato seeds in shallow grooves (about 1 cm) with a distance of 1 - 2 cm. And leave 3 - 4 cm between rows. You should not make too large distances, as you will still have to dive.
When planting seeds individually, you need to take one seed at a time; this method does not require picking.
Sowing tomato seeds in germination tray
Soil preparation
An equally important point is preparing the land for planting seeds. Ideally, this is soil on which no other crops have grown for the last few years; in extreme cases, it is allowed to use soil after cabbage or zucchini. Soil after nettles is good. You can use soil from the forest. However, you need to check that it does not contain residues and seeds of other crops, especially harmful weeds.
You should always carefully check the soil for pests. Otherwise, you can lose the entire harvest or a significant part of it, which means time and money.
To improve the quality of the soil, you can add ash to it - it is an excellent fertilizer, especially for tomatoes. Tomatoes also prefer to grow in soil that contains sand, as it retains the moisture they need well.
If it is not possible to obtain the necessary soil in natural conditions, you can use the services of a store. Most garden centers provide services for the delivery of the required substrate, which does not contain pests and other crops, and is also fertilized with useful substances.
Optimal conditions for growing tomato seedlings
Tomato seedlings prefer the following growing conditions:
- Abundance of light . Place the pots on the windowsill. In February, there is not enough daylight for plants, so use fluorescent lamps. For the first 2 days after the shoots appear, it is advisable to illuminate the boxes without turning off the lamp. Then they adhere to the usual lighting format - no more than 16 hours a day.
- High percentage of humidity . The seedlings should be irrigated a couple of times a day using a spray bottle. It also doesn't hurt to cover a common box or tray with a piece of glass. This way you can recreate the greenhouse conditions for seed growth at home. The glass is removed a couple of weeks after sowing the tomatoes. An alternative option is to use a humidifier. Soil moisture is checked in the morning. If spruce sprouts are drooping and look stale, water them immediately. If this is not done, at 12 noon the shoots will dry out completely and die.
- The daytime temperature in the room is 25 degrees, at night 15 degrees plus. Do not expose the seedlings to direct sunlight - the stems and leaves may burn.
- When the first tomato shoots are formed, fertilizing is applied to the soil . Repeat the procedure every week. The best composition is considered to be a natural fertilizer based on organic matter, for example, made from manure or grass. If you trust industrial fertilizers more, choose vermicompost or humic fertilizer.
Containers for seedlings
In order for the sprouts to sprout and be ready for subsequent planting in open ground, it is necessary to provide them with a suitable container. There are quite a lot of them and each has its own advantages and disadvantages:
- A wooden box is considered a classic container for planting seeds. Its advantages are large capacity and convenient transportation. In addition, such a box can be assembled independently, which is quite economical. One of the disadvantages of this method is the weight of the container with earth - wooden boxes are very heavy. In addition, it is difficult to plant sprouts from it in open ground - their roots are easily damaged.
- An alternative to a box can be considered plastic cassettes - they can reach the same size as boxes, but have much less weight. In addition, their length can be easily adjusted using a knife or scissors. The downside of cassettes is their fragility - they easily break when overloaded with soil, which can damage unformed sprouts. They are also not very convenient to transport from place to place.
- Peat containers are environmentally friendly. They can be in the form of pots or tablets. They can be planted directly into the ground along with seedlings. This is a big plus, since the root system is not damaged. However, due to their natural nature, they are susceptible to mold, which can damage the sprouts and reduce germination. In addition, it is very difficult to select an irrigation regime in peat, since it absorbs a lot of water. These containers are among the most expensive, so not everyone can afford them.
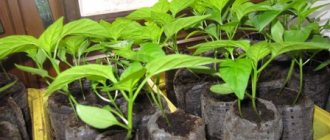
- A cheap analogue can be considered ordinary plastic cups, which can be selected according to volume. It is very convenient to extract sprouts from them, since the roots are not damaged - this is their plus. The negative side of using them is the need to make drainage holes; this takes quite a long time, especially if there are a lot of seedlings. In addition, they easily turn over during transportation and can tip over even from a small draft.
- Experienced gardeners use not only the above containers for seedlings. Milk tetra packs are used as a budget option. The top is trimmed, and the lower part is used as a container for seedlings. Sour cream cups and plastic buckets after sauerkraut also work well. The only condition is that you need to wash them well after use to prevent rotting of the roots.
- A little-known, but no less good way is to place seeds in newspaper. To do this, you need to roll up a bag of newspaper, as you would for sunflower seeds, and cover it with soil, forming a stable bottom. This is the most cost-effective type of container for seedlings, which also has good air permeability. The disadvantage of this method is that transportation is quite difficult, since newspaper bags are easily turned over.
How to choose a container for sowing tomato seeds for seedlings
The quality of future seedlings depends on the container where the tomatoes are grown. There are many containers into which you can sow tomato planting material, from plastic yogurt cups to peat pots. If you choose plastic boxes for seedlings, give preference to containers that fit on window sills with drainage holes.
The boxes are made from wood with your own hands. The height of the boxes is 10 cm. Before placing the grains in the container, a plastic film is placed on the bottom. Then water will not seep through the walls and bottom. Although it wouldn’t hurt to make a pallet either.
Caring for tomato seedlings in wooden boxes is simple. If necessary, containers are moved to the right place and turned with the right side towards daylight. When the sprouts hatch and grow, the seedlings are transplanted into separate cups. If the seedlings are not picked in time, they may grow into the wood or become too tangled.
Gardeners also grow seedlings in trays. Outwardly, they look like boxes, only there are partitions across and along them. The advantages of trays are:
- ease and practicality of use;
- low price of cassettes, durability of use (for 10 years);
- compactness;
- the cells have recesses for drainage of liquid to avoid waterlogging;
- guarantees the absence of the factor of outgrowing a limited space.
Experts advise avoiding cassettes made of polyvinyl chloride and polystyrene. They contain toxic substances that, when the material overheats, are harmful to human health.
The list of disadvantages of using trays for growing tomato seedlings includes the following:
- A small volume of containers causes the soil to dry out. The cassettes are fragile, their walls are unstable.
- If you want to remove the stem from the tray without damaging the earthen ball, you will have to make an effort.
Peat tablets are made from compressed material consisting of nutrients. For tomato seedlings, it is better to choose containers with a diameter of 9 cm. Gradually absorbing water, the containers increase 7 times. After abundant watering and absorption of water, the tablets are ready for use. The grains are sown by making a depression at the top of the tablet.
Now about containers that are inexpensive and have optimal parameters for growing tomato seedlings. These are plastic pots with holes in the bottom for drainage. For tomato sprouts, it is better to buy plastic containers 12-17 cm wide and 12-17 cm high.
How to plant tomatoes for seedlings: step-by-step instructions
It is necessary to start planting seeds to obtain sprouts by preparing the soil. To do this, you need to add hot water with potassium permanganate to it two days in advance, and the next day add a fungicide. This will help prevent rotting of the root system.
In order not to confuse the seedlings in the case of planting several varieties, markings can be applied to the pallets, for example, multi-colored stickers with the names of tomatoes.
Planting the seeds itself is not difficult. To do this, you need to place the soil in a pre-selected container, mix it with a wooden stick and then level it. This is convenient to do with a ruler. After this, you need to make depressions (grooves) in the ground using the same ruler at a distance of no more than three centimeters from each other. The depth of the groove should be at least half a centimeter.
The seeds are planted in these depressions at a distance of 5-10 millimeters from each other, after which they are sprinkled with water and covered with earth.
The last step is to cover the future seedlings with polyethylene.
How to care for seedlings
The optimal germination temperature for tomato seeds is considered to be +23–25°C . Also, after planting the seeds, maintain high humidity.
Until the moment of germination, that is, until the first shoots appear, the crops must be periodically ventilated and watered when the top layer dries out. After airing for 20 minutes, wipe off excess water from the glass or bag and only then cover it again.
How long does it take for seeds to germinate?
Properly prepared seeds germinate within 5-7 days .
If tomato seeds do not germinate for a long time, the following problems or mistakes by gardeners are possible:
- low-quality seed material: the expiration date of the seeds has expired (6-7 years) or their storage conditions have been violated (temperature no higher than 19 degrees);
- the preparatory work was carried out incorrectly (soaking and disinfection of seeds);
- the seeds were planted too deeply in the ground; The optimal planting depth for tomato seeds is 6-10 mm.
- unsuitable conditions for seed germination - too cold a temperature or inappropriate humidity (the soil is too dry or overwatered and the seeds rot).
After the first shoots, the covering material is not removed immediately, but gradually. At first it may be 2-3 hours during the day, and at night - shelter. Within 3–5 days the structure can be completely disassembled.
Subsequent care of seedlings
For proper development of tomato seedlings, it is necessary to create optimal conditions. One of the most important is lighting.
Seedlings need 12–15 hours of full light . The best place for seedlings are windows facing south or southwest. If there is a lack of light, you will have to add additional lighting, especially on cloudy days.
To prevent tomato seedlings from stretching out, in the first days, as soon as the first seeds hatch, the temperature is lowered to +14–16 °C. The duration of such a temperature of 7 days will be quite sufficient. After a week, the temperature can be raised again to +20–22 °C during the daytime and +16–18 °C at night. Then the seedlings will turn out thick, low and strong.
Young seedlings should be watered only with warm, settled water. It is better to spray from a spray bottle after drying the top layer of soil.
Planting seedlings in the ground
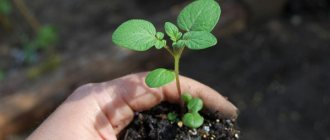
By the time of planting in a greenhouse or open ground, the seedlings should have a height of 25-35 cm and 8-12 developed leaves . There should not be more than 1 formed inflorescence on it.
Early varieties of tomatoes are planted in the ground when the seedlings are 40-50 days old. Mid-season - 50-60 days. And late and large-fruited varieties 60-70 days after the first shoots.
Sprout care
The air temperature in the room must be constant and maintained at a certain level. The optimal temperature for tomatoes is considered to be from 18 to 20 degrees. In such conditions, the first leaves will appear on the third day.
After this, the tomatoes need to be moved closer to the light source - this way the leaves will gain sunlight and grow better. Usually natural light is enough, but in the case of winter planting in January-February, the tomatoes need to be provided with artificial lighting.
Daylight should be about 16 hours. You should not leave the light on all day long, as this can weaken the sprouts.
It is important to maintain a certain level of humidity in the container. Watering too much will cause the roots to rot, and overdrying will simply kill the plant. To prevent this, you must adhere to certain rules:
- There is no need to water in the first week of cultivation; there is enough water in the soil from the period of preparation and sowing.
- For watering, it is better to use a spray bottle - it will carefully and accurately provide moisture and will not damage weak shoots.
- If it is not possible to use a sprayer, you can water it with a watering can, but only near the edge of the container, so as not to wash away the soil from the sprouts.
- The water should be at room temperature.
Fertilizing is carried out after the leaves appear. From this moment you need to wait at least a week. For feeding, solutions and mixtures from specialized stores are often used.
After this, watering should be carried out 4 or 5 hours before picking. This is done to facilitate the process of moving plants. Picking tomato seedlings is carried out after three weeks from the emergence of most sprouts, but you need to focus on the condition of the plants.
Picking is carried out in order to provide the young plant with a large amount of soil and to prevent intertwining of root systems. To carry out the procedure, you need to prepare the soil in the same way as before planting seeds.
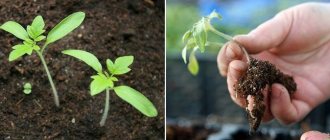
It is necessary to remove the plant from moist soil so that the roots are not damaged by lumps of dry soil. You need to place it in a separate container. It would be ideal to use individual cups. The sprout must be planted carefully, carefully immersing the roots and part of the stem into the soil. The soil around the plant is carefully pressed down with your fingers and watered to remove voids.
After the manipulations, the transplanted sprout is left alone for several days in a warm and dark place. This is necessary so that it takes root better in the new container.
After 3 or 4 days, the seedlings return to a bright place. During this period, you need to regularly water the plants, loosen the soil in containers, and feed the tomatoes with special solutions for rapid growth.
We also advise you to read the recommendations that will help you grow strong and healthy tomato seedlings - here.
Methods of planting seeds
The key to proper planting of seeds will lead to strong seedlings.
Stages of planting seeds for seedlings.
Stage 1.
Fill the prepared containers with disinfected soil to 2/3 of the volume.
Stage 2.
Water the soil thoroughly, allow the water to soak in and allow the soil to settle.
Stage 3.
Make grooves 1 cm deep, and the distance between them should be 3-4 cm.
Stage 4.
Spread the seeds, keeping a distance.
Stage 5.
Sprinkle with soil and use a sprayer to moisten.
Stage 6.
Create a greenhouse effect by covering the containers with film or glass.
Stage 7.
Place containers with future seedlings in a warm place, the optimal temperature for friendly shoots is + 22-28 degrees.
Then everything will depend on proper care. It is necessary to periodically check the soil moisture. Ventilate containers from time to time.
The emergence of seedlings will take from 4 to 10 days, depending on the seeds. Were they sprouted or dry? As soon as the shoots appear, the containers are moved to the windowsill and the temperature is lowered.
Temperature for seedlings
As soon as the first shoots appear, you need to remove the shelter and lower the temperature to + 14 - 18 degrees during the day, and + 10 -14 at night for 5 - 7 days. This will allow the seedlings not to stretch out and there will be an opportunity for roots to develop. For further growth of seedlings, it is necessary to create temperature changes. During the day + 22 - 26 degrees, at night + 14 - 18 degrees. Thus, the seedlings are hardened.
Lighting
Tomato seedlings require 11 - 12 hours of daylight. The best place for seedlings will be south windows. South-eastern and south-western ones are perfect. Every other day you need to turn the seedlings over so they don’t bend to one side.
If the windows face north, then you need to use phytolamps for illumination. If there is not enough light, the color of the leaves will be light green, and the seedlings themselves will begin to stretch.
What size should seedlings be before planting?
In order for planting to be successful, it is necessary to develop a powerful root system in the seedlings. With proper care, this occurs 60-90 days after planting the seeds in the soil. This is individual for each variety.
Before planting, the plant must be prepared so that it does not die from unusual conditions. To do this, the seedlings need to be taken out into the open air a week after picking. The time should be increased gradually, starting from half an hour and ending with a whole day.
Let's watch a video on how to sow tomato seeds to obtain seedlings. We will learn how to create the necessary conditions for the growth of tomato seedlings, and how to properly care for the planted seedlings:
In order for the result in the form of a good harvest to be pleasing to the eye, you need to adhere to the simple rules and instructions outlined above, and then everything will work out, the tomatoes will be tasty and juicy, and their quantity will pay off all the effort invested in them.
0
0
Copy link
How and when to pick seedlings
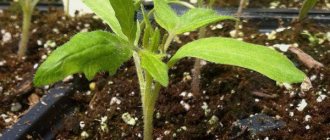
Tomato seedlings should be picked when the first pair of true leaves appear. This moment usually occurs approximately 2 weeks after the seedlings appear.
It is optimal to pick tomatoes according to the following scheme:
- First of all, it is necessary to prepare containers of larger volumes.
- Then water the plant generously.
- It is necessary to remove the plants from the old container; it is better to do this using an ordinary teaspoon.
- Then you need to shorten the central root by one third. This will promote the growth of lateral roots.
- And then you need to immerse the seedling in the soil until the first leaves, delicately sprinkle the hole and lightly compact it.
Video: how to properly plant tomato seedlings.
A little about capacity
Plastic or wooden boxes are usually used for growing seedlings . The first ones can be purchased at a specialized store; wooden ones can be made with your own hands from planks or plywood. Each of the listed types has pros and cons.
Of course, a wooden box is an environmentally friendly container, but the porosity of its structure has a beneficial effect on the development and accumulation of pathogenic microflora on the walls.
Important! Before using wooden boxes for sowing seeds, they must be thoroughly treated with fungicidal chemicals.
Another advantage of a box made of natural material is its low cost if made by hand, but plastic containers are not expensive either. In addition, plastic does not need careful treatment with fungicides; it is enough to wash it thoroughly. Plastic containers are easier to carry and last longer .
Sowing tomato seedlings
Tomatoes are supposed to be sown as seedlings, because they are southern heat-loving plants, and it is the seedling method of cultivation that allows you to get a harvest in a short summer. That’s why we plant tomatoes in the ground as seedlings, not seeds. Their further development and the harvest itself depend on how to plant tomato seedlings. An experienced vegetable grower who knows how to properly plant tomato seedlings first determines the sowing date, then skillfully selects and prepares planting material, as well as suitable dishes. The prepared soil is poured into containers and moistened using bottom watering. After the excess water has drained, small trenches less than 5 mm deep are made on the soil surface; it is convenient to do this with a ruler, so the rows are even. Seeds are placed in trenches in 2.5 cm increments and covered with earth. Leave 4 cm between trenches.
Picking tomato seedlings
Tomato picking is done when the seedling has two true leaf blades. To do this, soak the soil well and carefully remove one seedling at a time and transplant it into a separate container according to the root system. It is most convenient to do this at home or in an apartment.
When picking seedlings, you need to plant them quickly and carefully without interrupting the process, so as not to destroy the seedlings.
Landing Features
The depth of planting tomato seeds is not the only condition for obtaining healthy seedlings.
Selection of tomato seeds
Additional factors need to be taken into account:
- Damaged seeds are selected, the rest are filled with water. The floating seeds are empty and are removed.
- The seed material is disinfected with a weak solution of potassium permanganate. For hardening, hold alternately for 1-2 minutes in heated and cold water. You can place the seeds in a liquid preparation to stimulate growth.
- For sowing, take soil with turf and humus in a ratio of 1 to 1, a ready-made soil mixture, and a coconut peel substrate. The soil is treated against pests with potassium permanganate or special compounds.
- The density of placement in planting boxes is 1-2 pcs/sq. cm, in cups - 2 seeds with an interval of 10 mm. In a peat tablet with a diameter of 35 mm - 2-4 pcs.
- After planting, the containers are wrapped in film or covered with a piece of glass. Leave until the first shoots at 22-25 degrees Celsius.
- Water by spraying with a spray.
Density of placement in planting boxes
Before sowing, soil for seedlings is placed in a container, moistened, and lightly compacted. This is necessary to ensure that the depth of planting the tomato seeds is uniform. Then the shoots will be simultaneous, and the seedlings will be equally strong.
